NO.
Service Bulletin
302
MODEL
Various
DATE ISSUED
DATE REVISED
8/10
12/13
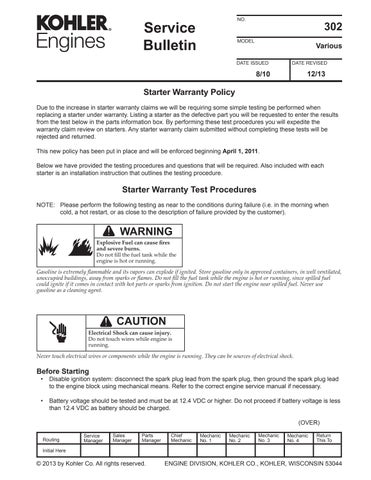
Starter Warranty Policy Due to the increase in starter warranty claims we will be requiring some simple testing be performed when replacing a starter under warranty. Listing a starter as the defective part you will be requested to enter the results from the test below in the parts information box. By performing these test procedures you will expedite the warranty claim review on starters. Any starter warranty claim submitted without completing these tests will be rejected and returned. This new policy has been put in place and will be enforced beginning April 1, 2011. Below we have provided the testing procedures and questions that will be required. Also included with each starter is an installation instruction that outlines the testing procedure.
Starter Warranty Test Procedures NOTE: Please perform the following testing as near to the conditions during failure (i.e. in the morning when cold, a hot restart, or as close to the description of failure provided by the customer).
WARNING
Explosive Fuel can cause fires and severe burns. Do not fill the fuel tank while the engine is hot or running.
Gasoline is extremely flammable and its vapors can explode if ignited. Store gasoline only in approved containers, in well ventilated, unoccupied buildings, away from sparks or flames. Do not fill the fuel tank while the engine is hot or running, since spilled fuel could ignite if it comes in contact with hot parts or sparks from ignition. Do not start the engine near spilled fuel. Never use gasoline as a cleaning agent.
CAUTION Electrical Shock can cause injury. Do not touch wires while engine is running.
Never touch electrical wires or components while the engine is running. They can be sources of electrical shock.
Before Starting •
Disable ignition system: disconnect the spark plug lead from the spark plug, then ground the spark plug lead to the engine block using mechanical means. Refer to the correct engine service manual if necessary.
•
Battery voltage should be tested and must be at 12.4 VDC or higher. Do not proceed if battery voltage is less than 12.4 VDC as battery should be charged.
(OVER) Routing
Service Manager
Sales Manager
Parts Manager
Chief Mechanic
Mechanic No. 1
Mechanic No. 2
Mechanic No. 3
Mechanic No. 4
Return This To
Initial Here
© 2013 by Kohler Co. All rights reserved.
ENGINE DIVISION, KOHLER CO., KOHLER, WISCONSIN 53044
• Test meter leads before use. (Set meter to Ohms and check for resistance reading of less than 0.5 Ohm.) • If available, use clamping meter leads to assist with testing. • Set meter to next highest voltage scale that includes 12 VDC. • When taking readings, allow the meter to stabilize before recording. The reading should stabilize after 3 to 5 seconds. If reading continues to drop while cranking, stop the test and perform a battery load test.
Solenoid Shift Starter Warranty Test Procedures Test #1 Battery Voltage Test (Static)
Test #2 Voltage Drop Across Battery (Cranking)
DVOM
DVOM
+
+
NOTE: Touch meter leads to actual battery terminals.
-
Battery
-
+
+
Test 1 Conclusions • If battery voltage is above 12.4 VDC continue to Test 2.
• If voltage is below 12.4 VDC, charge battery and retest.
• If battery will not hold a charge it should be replaced before continuing the test or replacing the starter.
DVOM
-
Battery
VDC
Test #3 Voltage Drop Across Starter (Cranking)
NOTE: Use starter end plate as test point.
-
+
+
- Starter
VDC
Test 2 Conclusions • If battery cranking voltage is above 9.0 VDC continue to Test 3.
• If battery cranking voltage is below 9.0 VDC you should check the battery by using a load tester. Also check for external engine load.
VDC
Test 3 Conclusions • If the difference between test 2 and test 3 is greater than 1 VDC, a voltage drop test on the system will need to be performed to determine where the loss is occurring. Testing of the battery + and battery – circuit will need to be done independently.
• If additional testing is
necessary, refer to proper service manual for complete troubleshooting information.
2
Inertia Drive Starter Warranty Test Procedures Test #1 Battery Voltage Test (Static)
DVOM
+
+
DVOM
NOTE: Touch meter leads to actual battery terminals.
-
Battery
Test #2 Voltage Drop Across Battery (Cranking)
-
+
+
VDC
Test 1 Conclusions • If battery voltage is above 12.4 VDC continue to Test 2.
• If voltage is below 12.4 VDC, charge battery and retest.
• If battery will not hold a charge it should be replaced before continuing the test or replacing the starter.
NOTE: Use starter + end plate as test point.
-
Battery
Test #3 Voltage Drop Across Starter (Cranking)
DVOM
-
+ - Starter
-
VDC
Test 2 Conclusions • If battery cranking voltage is above 9.0 VDC continue to Test 3.
• If battery cranking voltage is below 9.0 VDC you should check the battery by using a load tester. Also check for external engine load.
VDC
Test 3 Conclusions • If the difference between test 2 and test 3 is greater than 1 VDC, a voltage drop test on the system will need to be performed to determine where the loss is occurring. Testing of the battery + and battery – circuit will need to be done independently.
• If additional testing is
necessary, refer to proper service manual for complete troubleshooting information.
Warranty Claim Instructions
1. Create claim in warranty system as normal. 2. Once the starter part number is placed in the defective part box the questions listed below will display in the section shown as a Parts Message. Enter the results of the testing in the Parts Information box.
• Battery voltage measured? • Voltage across battery during cranking? • Voltage across starter during cranking? • Was the testing above performed under the conditions that failure was observed? (Yes/No) 3. Finish warranty claim as normal.
3