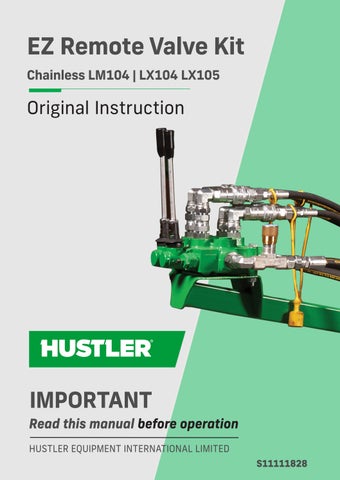
EZ Remote Valve Kit Chainless LM104 | LX104 LX105
Original Instruction
IMPORTANT Read this manual before operation HUSTLER EQUIPMENT INTERNATIONAL LIMITED S11111828
Dear Customer, Welcome to the Hustler family! We’re delighted to know that we can make a difference in your operation and would love to take this opportunity while you’re reading this instruction manual to say a special THANK YOU for purchasing a Hustler! We hope you enjoyed dealing with us and our business partner(s) and trust that we contributed to make your purchasing journey easy. Here at Hustler we are on a mission to help farmers and ranchers ‘Achieve More Everyday’ with the ‘World’s Best Livestock Feeding Solutions’. If at any stage you have any queries/questions or even a feel like a chat, our passionate team would value the opportunity to help. We hope you enjoy your Hustler as much as we do, for many years to come. Thanks again, hopefully we will meet someday. Kindest Regards
Brent Currie CEO
1
CONTENTS
Introduction................................................................................. 3 Important..................................................................................... 3 Warranty....................................................................................... 4 Operational Instructions....................................................... 5-6 Installation.............................................................................7-10 Headstock Drilling Template.................................................. 11
2
INTRODUCTION Thank you for purchasing your new EZ Remote valve kit!. The following instructions will help you install and operate this kit correctly on your Chainless LM104, LX104, LX105 bale feeder
IMPORTANT • Please ensure this booklet is read and understood by every operator of this machine. • Also ensure that this booklet goes with the kit if it is resold and is read and understood by owner.
3
WARRANTY
(CH20004 Bale Feeder)
The long-term cover you’ll probably never need. At Hustler, we believe in delivering products that exceed the highest standards of performance and durability. We test our products harder than anyone else to ensure it meets the Hustle Muscle standard before it hits the market. However, we’re all human! We understand that defects can happen, and that’s why we offer a seamless and hassle-free warranty experience. We call it Achieve More Everyday™.
No Fine Print. No Hassle. NO BULL. Our Warranty is 100% Backed by Hustler. All machinery manufactured by Hustler in 2023 or later is covered by a 5-year warranty against manufacturing defects for the original purchaser from an authorised Hustler dealership. In the rare event that a defect is discovered, we will repair or replace the product or part at our discretion. For model years 2022 and older, please refer to our previous country-specific warranty period, as outlined on our website. To enjoy the benefits of our warranty, simply register your Hustler equipment online at hustlerequipment.com/warranty and ensure that servicing or warranty claims are processed through an authorised Hustler Dealership (original proof of purchase is required). If you haven’t registered your Hustler yet, you can easily do so before making a warranty claim. Exclusions: •
Puckboard floors are covered for 10 years, except for fading and conditions caused by excessive ultraviolet light (UV) or outdoor exposure.
•
Components are covered against damage due to manufacturing defects for the original purchaser for a period of 2 years. While we carefully select the highest-quality components for our equipment, the manufacturing of these components is outside our control. These include for example:
4
•
Hydraulic components – hose, valve blocks, motors, gearboxes & rams
•
Chains & bars
•
Electronics – load cells, Feedlink units, joysticks, controllers, lights, looms, solenoids, GPS systems.
•
Bearings, shafts & sprockets
•
Jack stands
OPERATIONAL INSTRUCTIONS 1. Load a bale onto the balefeeder. 2. Connecting the tractor to the Remote Valve a. Diagram below shows oil supply hoses from the tractor into and out of the valve.
b. Locate the valve supply hose going to the needle valve. Plug the QRC end of this hose into the pressure send port of your tractor (normally marked with a + as shown.
c. Plug the other hose into the return port of your tractor. 5
OPERATIONAL INSTRUCTION CONT. 1. Operating the re-baler a. Warning! Ensure no-one is near the machine before commencing operation. b. Move the tractor hydraulics handle forward into the ‘detent’ position to provide continuous oil supply. c. Proceed to the Remote Valve. Observe the valve and levers as shown in the diagram.
A is the drum rotation level B is the platform ram lever C is the flow adjustment valve d. Begin lifting the platform by pushing lever B forward. e. Move the lever A forward into the detent position. This will start the rotation of the drums in the anti-clockwise direction (the feeding-out direction). You may have to start slowly, and speed up only as you become more comfortable. f. Lift the platform slowly bit by bit as the bale is fed out over the drums. g. Use the needle valve C or the tractor hydraulic flow adjustment to adjust the motor speed as necessary to facilitate a smooth and controllable feeding out process. 6
INSTALLATION 1. Fitting to Chainless LM104, LX104, LX105
a. Drill two 13mm (1/2”) holes in the headstock side plateunderneath the motor mount using the attached template on page 4.
b. Bolt the arm and pivot bracket onto the headstock as shown using 18mm and 19mm spanners.
c. Bolt the valve onto the arm using the supplied bolts.
7
INSTALLATION CONT. d. Find the hose coming out of the left -hand port of the motor as shown
e. Plug this hose into the lower motor port on the valve block as shown:
f. And the other motor hose into the upper motor on the valve block:
g. Find the hose coming from the port of the ram as shown: 8
h. Plug this hose into the lower port in the valve block as shown:
i. Run the other ram hose to the upper port in the valve.
2. Fitting to Chainless SX105
a. Remove the two bolts pointed out from the pivot bearing
b. Using the bolts removed from the bearing, install the arm and pivot bracket using 18mm and 19mm spanners.
e. Plug this hose into the lower motor port on the valve block as shown:
d. Find the left motor hose coming out of the motor cover as shown:
9
INSTALLATION CONT.
e. Plug this hose into the lower motor port on the valve block as shown:
f. And the other motor hose into the upper motor on the valve block:
g. Find the hose coming from the upper port of the ram under the platform as shown.
h. Plug this hose into the lower ram port in the valve block as shown
i. Run the other ram hose to the upper ram port in the valve.
10
HEADSTOCK DRILLING TEMPLATE
11
REGISTER YOUR WARRANTY Register your warranty online! Scan the QR Code to register your warranty. Or visit www.hustlerequipment.com/warranty
Follow our 3 easy steps: 1. Dealer or end user? Click which applies to you. 2. Follow the instructions and fill out the info required 3. Submit your form!
Note: The machine is NOT covered by warranty until the EUSA Product Registration form and your warranty form is completed!
12
MAINTENANCE LOG This record is to stay with the instruction manual and be used as proof of upkeep should a claim be lodged. Hustler requires you to keep track of approx 12 monthly maintenance by having your service provider routinely fill out the log, or by keeping receipts of work done. Routine checks will save ongoing repair costs. Pre-season is the best time for this. Excluded items are wear parts and electric components. Purchase Date _____________________ Machine serial number____________ SERVICE 1 (12-15 MONTHS FROM PURCHASE DATE) Date of service_____________________ Number of bales / hectares sprayed_____________________________________ Signature and Dealer Name _____________________________________________ SERVICE 2 (24-30 MONTHS) Date of service_____________________ Number of bales / hectares sprayed_____________________________________ Signature and Dealer Name _____________________________________________ SERVICE 3 (36-42 MONTHS) Date of service_____________________ Number of bales / hectares sprayed_____________________________________ Signature and Dealer Name _____________________________________________ SERVICE 4 (48-55 MONTHS) Date of service_____________________ Number of bales / hectares sprayed_____________________________________ Signature and Dealer Name _____________________________________________ CHECKLIST Grease all nipples All fastenings tight Wear parts replaced (bushes, cables etc. are not covered items) Secure all hoses and clamps 13 13
Drive components not wobbly Wash down + Throughly Inpect Machine Chassis/boom Hairline Cracks repaired General Inspection of construction
NOTES
14
EZ REMOTE VALVE KIT CHAINLESS LM104 | LX104 | LX105 NEW ZEALAND - GLOBAL HQ Free call: 0800 487 853 Email: sales@hustlerequipment.com After sales: 06 873 9520 PO Box 2127 Stortford Lodge Hastings, 4153 New Zealand
www.hustlerequipment.com
S11111828