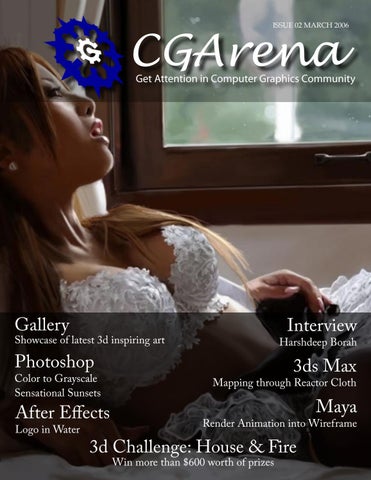
ISSUE 02 MARCH 2006
CGArena
Get Attention in Computer Graphics Community
Gallery
Interview
Showcase of latest 3d inspiring art
Photoshop
Color to Grayscale Sensational Sunsets
After Effects Logo in Water
Harshdeep Borah
3ds Max
Mapping through Reactor Cloth
Maya
Render Animation into Wireframe
3d Challenge: House & Fire Win more than $600 worth of prizes
contents
05 Interview
10 3d Challenge
14 Composition
16 Photoshop
19 Photoshop
20 After Effects
25 3ds Max
28 Maya
Harshdeep Borah
Depth of Field
Sensational Sunsets
Mapping through Reactor Cloth
House & Fire
Color to Grayscale
Logo in Water
Render Animation into Wireframe
32 Gallery
Showcase of latest 3d inspiring art
Magazine Designed & Edited: Ashish Rastogi, India Magazine Cover Image: Lukasz Szeflinski, Poland Challenge Sponsors: Corel, Duber Studio, iStockphoto, Daz3D
Page
Issue 02 March 2006
industry news Bollywood Embraces Autodesk Technology for Moviemaking
Disney hiring back the creators of Mermaid and Aladdin
As the Indian entertainment industry continues to flourish, many film studios and post-production facilities are turning to digital color grading technology from Autodesk, Inc. Five Indian studios and post-production facilities recently adopted Autodesk’s Discreet Lustre system, which is used to realize “look and feel” ideas in movies around the globe.
The future of Walt Disney Feature Animation under Disney CEO Robert Iger, Walt Disney Studios chairman Dick Cook and Pixar Animation Studios’ John Lasseter and Ed Catmull might lie in the future of CG, but the studio said as it moves forward, it also is returning to its past.
In Bollywood, the Discreet Lustre system has shaped groundbreaking films such as Kaal, Lakshya, Black, The Rising and Chocolate, and has been used by Prime Focus and Pixion for several years. In addition, the following Indian studios and post-production facilities recently adopted the Discreet Lustre system: 1) Avitel Post StudioZ Ltd. 2) EFX Labs 3) Raj Taru Studios 4) Spirit 5) United Studios Ltd. (USL)
Disney has signed composer Alan Menken, an eighttime Oscar winner and one of the driving forces behind “The Little Mermaid” -- which helped resuscitate Disney animation in the ‘80s -- to a nonexclusive, multipicture deal. Highly regarded feature animation directors John Musker and Ron Clements, the team behind such animated hits as “Mermaid” and “Aladdin,” also are returning to the Disney fold.
Source: www.autodesk.com
Source: www.hollywoodreporter.com
Buzzword of the Month Rotoscoping - Rotoscoping is a technique where animators trace live action movement, frame by frame, for use in
animated cartoons. Originally, pre-recorded live-film images were projected onto a matte windowpane and redrawn by an animator. Prior to computers, an animation stand called a Rotoscope was used to project a sequence of action frames against a surface so that a set of animation frames could be traced or created. The same work can now be done with digital images and special computer software. Rotoscoping is frequently used as a technique for combining (compositing) cartoon figures with realistic settings in television commercials and is also used for special effects in feature-length films. The technique was invented by Max Fleischer, who used it in his series “Out of the Inkwell” starting around 1914, with his brother Dave Fleischer dressed in a clown outfit as the live-film reference for the character Koko the Clown. Fleischer used rotoscope in a number of his later cartoons as well, most notably the Cab Calloway dance routines in three Betty Boop cartoons from the early 1930s, and the animation of Gulliver in Gulliver’s Travels.
Page
Issue 02 March 2006
interview
AN INTERVIEW WITH Harshdeep Borah Hi could you tell us a bit about yourself? My name is Harshdeep Borah, 25 years old and I’m originally from India, currently living in Melbourne, Australia. I’ve been in CG field for about 4 years. Since my early childhood, I’ve always been been drawing and painting, fantasized by comics, cartoon series, action figures and movies. I remember me being beaten up by my mom for messing up with the walls with crayons at home. My dad bought computer at my early age and since then I have been hooked to this digital world and took it seriously to pursue as my career. What first got you started in 3D? Right after my basic high schooling, I got into computer graphics studies. I finished 3 years Advance Diploma from Arena Multimedia back in 2000. I remember it was not a great help for me in 3d, but I learnt a lot in multimedia and graphics in general and discovered the passion for CG in me. Then after working as a generalist in CG for a while, I decided to specialise in a particular field in CG, that is 3D Modeling. So I decided to join a school in Vancouver Canada having specialised courses in 3D for Games and Movies. You have just graduated from the Vanarts, what do you think you will do now and how would you rate the school? I have been lucky as right after my graduation from Vanarts, I have been offered few great jobs. One to name is fulltime job offer by Electronic Arts Blackbox studios Vancouver, makers of famous titles like Need for Speed and more. Recently I have been offered another great job at Redtribe Games, one of the promising game studios here in Australia. I have joined their studio now and am happy to start here, as people here are amazing, place is great and we have some very exciting projects currently and ahead us. I would thank Vanarts for giving me the opportunity to explore my inner self as an artist, and to push myself harder to reach for the quality I always wished for. Their life drawing classes, expert teachers within school and from Electronic Arts, were very helpful. And not to forget, my game arts class
Page
Issue 02 March 2006
interview
AN INTERVIEW WITH Harshdeep Borah was fun and my fellow classmates have been a great inspiration and competition to me. We worked really hard and in the end produced worthy reels. Which area of 3d do your really enjoy doing? I have always been excited and fantasized by the detailed sketches and modeling of traditional sculptors like Michelangelo and Leonardo Da Vinci, and wondered how they created a physical form out of their imagination which could express feeling in their artworks. It is that passion to explore their epics, made me more interested in 3d modeling, as analog or digital form. I have tried to do some sculpting work, and really enjoyed doing it. And professionally work as a modeler and texture artist as its very much related to that, and gives me the same independence to explore my ideas into computer as digital form. Currently I’m working as a character artist for Games industry. I also have always been fantasized by Special effects in movies and their capabilities of bringing imaginary creatures and characters to life. Same thing with games, since I played games, I have been it that interactive world where everything is possible and there are no limitations. I love writing stories and making imaginary creatures/characters. A perfect place for me would be, either a game company where they are working harder to bring their story to life and let people be an interactive part of it, or an effects company working on another breath taking effects for a movie where people cannot differentiate cg from real. A hard working but fun to be with environment where I can evolve more of myself in a creative manner benefiting the company’s projects. What’s the most useful thing you have learnt in 3d? Passion, hard work and patience. You need these three things to succeed in 3d. To talk more practically, following subjects helped me a lot to unleash myself as an artist and would recommend
Page
Issue 02 March 2006
interview
AN INTERVIEW WITH Harshdeep Borah
anyone who wants to pursue 3D as a career. Life Drawing, Anatomical Sketching, Sculpting, Sketching and painting, eye for detail, inspecting every day objects how they react to environment, inspirations from real life, keep practising every day, getting inspired from great artist around the world, talking to peers and respecting them. Making myself feel there is so much to learn and achieve. This is just the beginning, and I am blessed to be a part of this beautiful CG field and pursue it as my career. What have been your major influences over the years? Works of traditional artists, great cg artists around the world creating stunning artwork everyday, awesome talents I have worked with or known of, has been some of influences for me to get better in what I’m doing now. CG works in movies and games are always fascinating and inspiring. Real life I see and interact around me has been also my biggest resource for inspirations as they have so much beauty and detail in them, makes me wonder how they have been created. Its just so intimidating. Today there are lot of new innovations that can help an artist to unleash his hidden talent. One of the software is Zbrush2. It helped me a lot to free my mind and do lot of experiments with 3d. Another digital sculpting hardware device is Haptic Device Claytools from (www.sensable.com). Its quite innovative and you can actually feel your models physically and sculpt them. I my opinion it’s a groundbreaking innovation, which I think should be included in every Digital Sculptor’s wishlist.
Page
Issue 02 March 2006
interview
AN INTERVIEW WITH Harshdeep Borah What advice would you give to future wanna be modelers out there? Today there are so many resources available for the beginners than it used to before. If they want they can utilize all those resources at its best and work hard and achieve things sooner. Commitment and patience are the biggest factors for anyone to live up his or her dreams. Working with true passion and creating your own identity or style is needed to put yourself ahead of the crowd. Also another important advice would be, never be dependant on hardware or software. Tools are there to just help you and will keep on changing, but what matters most is your artistic sense and abilities. Making your fundamentals of arts, colour theory, anatomy and composition strong. Specially for character and creature modellers, I would advice that know human body well. Do a lot of study in anatomy. Research as much you can, draw a lot and always be curious to get more details. Work it our from bones, to muscles and then to skin. Sculpting can be a big help to just like it was to me. If you can feel the form physically, expressing it digitally wont be hard. There are few good books by great artists. Those can be big help too. And at last, practise, practise and practise is the key to be a good modeller. So yeah keep click…click…clicking :) Where do you see yourself in a 5 years time? In the future I would still want to work on challenging projects. I would want to see myself working into one of the best gaming or movie projects at a great working environment as a senior artist. There is so much to learn and life is so short. I have always been interested in directing my own animated short. Maybe I will start it soon. (By the way Australia is very close to New Zealand i.e. home to WETA…hehe) What are your hobbies and daily routine? On weekdays, I’m busy in the projects at my office. And every evening after work I take some time to relax and chat with my friends. Sometimes walk/sit beside the beach and hear mesmerizing sound of water. Try to cook some food, though I’m a bad cook. Workout at gym mostly every evening. Also I find some time after office to work on my personal
Page
Issue 02 March 2006
interview
AN INTERVIEW WITH Harshdeep Borah models, and to name recently I’m modeling a famous historical sculpture (shh it’s a secret). Hope to show it soon. On weekends, as I’m new in this city, exploring the city and getting used to Australian beer (which is quite bitter :P). Also trying to learn guitar from my office friend who is a game designer and lives at same place with me. And in return of that favor from him, I will be teaching him sculpting that also interests him just like myself. Would you like to give any message to CGArena E-Zine readers? I am really impressed with the work CGARENA has done to inspire and expose all the artists through their portal and E-Zine. This would come as a big help to lot of people who have just started in CG, or to ones who have already been in it for some time. I wish all the best and hope to see it grow more in future. God bless CGArena. Thanks a lot for the interview. I hope I answered the questions appropriately and the readers will enjoy it. Harshdeep Borah www.harshcg.com
Page
Issue 02 March 2006
challenge CGArena is proud to present “Home & Fire” Challenge (3D Challenge), 15 March - 20 April 2006, sponsored by Corel, Duber Studio, iStockphoto and Daz3D. We want lots of different ideas and approaches in a more creative way.
Your Mission Create an image which shows both Home/Room & fire in a scene. This Challenge is a Work-In-Progress Challenge -- all contestants are required to post their work-in-progress images for community to critique/comment in order to qualify.
How the Challenge will be Run This challenge will be a WIP (Work in Progress) Challenge. Each challenger is required to submit Work In Progress (WIP) images, from the initial concept sketch to the final render. The purpose is that everyone can learn from each other, offer feedback and critiques. 1. Enter the Challenge by registering yourself on CGArena forum. 2. Submit your work in progress images in forum on a regular basis. 3. Participate in the community by critiquing other challengers works in the respective forums. 4. Submit your final entry till 20th April 2006. 5. All CGArena members may enter the CG Challenge. Membership is free of charge. 6. There will be 3 winners in this 3D Challenge and CGArena, Sponsers and Judges decision will be final. Note: You are required to submit work in progress images, obtain feedback and give feedback to other challengers in the WIP challenge.
Final Image Size - Your final image dimensions should be print resolution. Do not send in a low-resolution placeholder and ask us to get back to you, as we won’t.
First Prize Corel Painter IX.5 - $399USD
The world’s most powerful Natural-Media® software. For more than 13 years, Painter has been the world’s pre-eminent Natural-Media® painting and illustration software. Corel Painter IX.5 also unveils the brand-new Artists’ Oils Painting System, a revolutionary Natural-Media painting technology that enables you to sample multiple colors from the Mixer palette and apply them as wet oily paint to your canvas.
Duber Studio Training DVD (3DVD’s) - $88USD
Duber Training DVD’s by Loocas Duber, contains over 18 hours worth of tutorials covering topics such as organic modeling, pelt mapping, classic mapping, painting maps (color map, bump map, specular map, reflection map) in English and Czech language.
Second Prize Duber Studio Training DVD (2DVD’s) - $55USD
Duber Training DVD’s by Loocas Duber, covering topics such as organic modeling, pelt mapping, classic mapping, painting maps (color map, bump map, specular map, reflection map)
DAZ3D - $25 Gift Voucher
DAZ strives to bring 3D art directly to the masses by delivering the highest quality digital 3D content and software at the most affordable prices.
iStockphoto - $20 Gift Voucher
iStockphoto is the world’s fastest growing collection of royalty-free images, at the world’s best prices. Just the best Stock Photography, Vector illustrations, and Flash files online, at prices for everyone.
Third Prize Duber Studio Training DVD (1DVD) - $28USD
Duber Training DVD’s by Loocas Duber, covering topics such as organic modeling, pelt mapping, classic mapping, painting maps (color map, bump map, specular map, reflection map) This 3D Challenge is proudly sponsored by:
i n f o @ d u b e r. c z w w w. d u b e r. c z
I n t e r m e d i at e
t r a i n i n g
DV D s
fo r
3 d
a r t i s t s !
Testimonials: “A must buy for everyone.” - Ashish, CGArena
“Portrait of a girl is an excellent set for those who are interested in seeing how to create and texture a human head from scratch.” - Wes Burke, CG|Underground
“This is the best head modeling dvd out to date!” - Chris Maddos
“The DVDs should buy anyone who wants to create organic models!” - Leoš “Sniffer” Janek, Pixel magazine
Organic modeling DVD - $27.80 USD UV Mapping DVD - $27.80 USD Texture Painting DVD - $27.80 USD Postage & Handling included! Shipping worldwide within 7 days! 10% off when purchasing all three!
composition
Depth Of Field One complaint in many 3D animations is that they look “too clean”. So, what do you do? You can add more detailed textures, better lighting, softer shadows, and even radiosity. But watch any movie, and you’ll see something not often put into 3d animations: depth of field. When a lens focuses on a subject at a distance, all subjects at that distance are sharply focused. Subjects that are not at the same distance are out of focus and theoretically are not sharp. However, since human eyes cannot distinguish very small degree of unsharpness, some subjects that are in front of and behind the sharply focused subjects can still appear sharp. The zone of acceptable sharpness is referred to as the depth of field. Depth of field, often called DOF in animation software. You can use depth of field in a number of shots: 1) Over the shoulder shots 2) Close-up shots 3) Product Shots 4) Landscape Shots 5) Crowd Shots Depth of field can also be animated. For example, many shots in movies and television use rack-focus shots. These are shots that changes focus over time, perhaps from one person talking to another. The cinematographer needs to manually adjust the focus, aperture and other settings on the fly while shooting the scene. In the digital world, it’s much easier. You can assign a focus point to your 3d camera, set an appropriate f-stop, and then simply keyframe that focus point at any desired time. So, add more depth in your image or animations through Depth of Field.
Page 14
Issue 02 March 2006
composition
Page 15
Issue 02 March 2006
photoshop
Page 16
Issue 02 March 2006
photoshop
Color to Grayscale
Step One Open the color photo that you want to convert to grayscale using the Lightness method.
Through this technique (using lightness channel) you will get a perfect grayscale photo almost every time.
Original
Step Two
Default Photoshop Grayscale Preset
Under the Image menu, select Mode > Lab Color. You won’s see a visual difference between the RGB photo and the Lab color photo - the difference is in the channels that make up your color photo.
Final
Page 17
Issue 02 March 2006
photoshop Step Three Go to the Channels palette and you’ll see that your photo is no longer made up of a Red, Green, Blue channel. Instead the luminosity has been seperated from the color data, which now resides in two channels named “a” and “b” .
Step Six Press Ctrl + J to duplicate the background layer. Switch the Blend Mode of this duplicated layer to Multiply, and you’ll see the photo become much darker on the screen.
Step Four Click on the lighness channel in the channels palette to make it active.
Step Five
Final Step
Now, go under the Image menu, under Mode, and Just lower the Opacity for this layer in the layers palette until choose Grayscale. Photoshop will ask if you want to you have the tonal balance you’ve been looking for. discard the other channels. Click Ok.
Page 18
Issue 02 March 2006
photoshop
Three easy Steps to...
Bef
ore
Sensational sunsets !
1) To begin, add the first Solid Color Layer, and then go to Layer > New Fill Layer > Solid Color. From the Color Picker, choose a deep red/orange. Click Ok to set the layer and change the Layer blending mode to Overlay and reduce its opacity to 50%
Page 19
After 2) Add another solid color layer and fill with warm yellow color. Set the layer blending mode to Color Burn and reduce its opacity to 20%
3) Finally, choose the brush tool with softer edges. Paint with grey color on the statue and the stones. Increase the size of the brush, and paint over the some areas of water too.
Issue 02 March 2006
after effects
Logo in Water
First Step First prepare the logo material in your favourite software for this effect.
Step Two Create New Composition, size = 640 x 480, Frame Rate = 25fps or 30fps, Duration = 5 sec.
Page 20
Issue 02 March 2006
after effects
Step Three Drag the logo material in the timeline and apply a mask and scale animation. Animate the mask expansion and also apply the Mask feather to 50-100
Step Four Create New Composition, size = 640 x 480, Frame Rate = 25fps or 30fps, Duration = 5 sec. Create New Solid layer (Ctrl + Y) Layer > New > Solid. Choose any color and press button Make Comp Size.
Page 21
Issue 02 March 2006
after effects Step Five Apply Effect > Simulation > Wave world and change these settings. Set Amplitude: 0.5 (Frame 1) and 0.0 (Frame 3)
Step Six Create New Composition, size = 640 x 480, Frame Rate = 25fps or 30fps, Duration = 5 sec. And drag previous two compositions in this new composition. Step Seven Turn off the visibility of Wave World layer. And apply Effect > Simulation > Caustics on the logo layer.
Page 22
Issue 02 March 2006
after effects Step Eight Change the following settings in the Caustics effect.
Step Nine Apply Effect > Stylize > Glow to logo layer. And choose the settings according to your project requirements.
Hope you like the tutorial. Please post your problems/comments/suggestions in the forum.
Page 23
Issue 02 March 2006
3ds max
Mapping through Reactor Cloth
I will explain you how to use reactor cloth in mapping any object or model. All of you noticed that every model required lot of tweaking to remove the stretching. Step One Open you model and select your half model as shown below.
Page 25
Issue 02 March 2006
3ds max Step Two Detach the model and press OK
Step Six Step Three
Change the Friction, Rel Density, Air Resistance, Stiffness and Damping settings as below.
Apply the Xform modifier on the detach model. Step Four Select Gizmo in the Xform modifier and rotate, move the model as in screenshot
Step Seven Step Five Apply the reactor cloth modifier on the rotated model.
Page 26
Add the Rigid body collection, cloth collection and reactor plane in the scene. Add the plane in the rigid body collection. Add the model in the cloth collection.
Issue 02 March 2006
3ds max
Step Ten Step Eight Check the preview in the reactor Real -Time Preview window. And play the simulation by pressing “P”
Now apply the UVW Map, then Edit Mesh Modifier and last Unwrap UVW map. And disable the UVW mapping, Reactor cloth and Xform. Have a look your model, now half of your model is properly mapped. Do same thing for another part. Have fun.
Step Nine Select Max > Update Max and close the window.
Page 27
Issue 02 March 2006
maya
Render Animation into Wireframe Step One Turn on the Wireframe On Shaded shading option in the view port you plan on using for your render. This can be found in the menu in any of the model editor panels under Shading>Shade Options>Wireframe on Shaded.
Step Two Create an Ambient Light, and change the light’s Intensity value to 10, and it’s Ambient Shade value to 0 in the attribute editor. This will ensure that the light in the scene is flat and white.
Page 28
Issue 02 March 2006
maya Step Three After the ambient light is setup in the scene, switch to lighting display mode by pressing the 7 hotkey or by accessing the command through the model editor menu Lighting>Use All Lights. You’ll notice that the entire model is now completely a flat white colour, and the wireframes really show up.
Step Four Next, turn off all objects in your scene (in the model editor that you’re going to playblast from anyway) that you don’t want to show up in the render, because playblast rendering is just a screen grab of the active GL view, anything visible in the active view will show up in the render. In the view’s menu you can toggle off the model editor’s GL rendering of certain objects by unchecking the object categories in the Show menu.
Step Five Because the playblast render will be screen capturing whatever is in your view, the visible HUD objects will show up as well, like the View’s Axis and Camera Name. You should also shut these off as well, by going to Display > Heads Up Display. This is the step where you also set the background colour to white. You can do this in your preferences, or you can use the MEL command: displayRGBColor background 1 1 1;
Page 29
Issue 02 March 2006
maya Now you can see how your model appears to be only showing it’s wireframe, perfectly back culled. Next step is to set up the playblast options and let it render.
Step Six On the Time Slider, right click and go to the playblast OPTIONS at the bottom of the popup menu. Change the Viewer type to fcheck (this will render out image files as opposed to a single avi file. Since the GL view isn’t antialiased, your wires will be jagged and messy looking in your render, so an old trick is to set the render resolution bigger than the destination resolution, and scale the sequence down to your destination using a filtering algorithm, which will create smoother lines. So, since I was aiming for 640x480, I set my render resolution to 1024x768, and then did a batch action in Photoshop to have each image scaled down to 640x480. So there you have it. Easy as pie. You can even take the image sequence and use it as it’s own alpha channel if needed.
By: Chris Kiffen, Canada
Page 30
Issue 02 March 2006
www.cgarena.com CGArena brings you latest news and happenings 24 hours a day. Plus, join in our interactive forums to showcase your work, and get attention in the computer graphics community
Email: contact@cgarena.com
gallery
Yuka Lukasz Szeflinski, Poland lukx@alpha.net.pl Photoshop
Page 32
Issue 02 March 2006
gallery
Page 33
Issue 02 March 2006
gallery
Page 34
Issue 02 March 2006
gallery
Page 35
Issue 02 March 2006
gallery
Apple Ahmed Bahaa Hassan, Egypt ahmed@ahmed-vfx.com 3ds Max, Brazil, Photoshop
Yellow Room Mahir Celik, Turkey mahircelik@gmail.com 3ds Max, Vray Page 36
Issue 02 March 2006
gallery
Mining Colony Blowfish FX, India info@blowfishfx.com 3ds Max 7, Mental Ray, Photoshop
Head Eddie Faria, Canada eddiefaria@gmail.com 3Ds Max 8, Mental Ray, Photoshop Page 37
Issue 02 March 2006
gallery
High Lobby Pradipta Seth, India pradiptaseth@yahoo.co.in 3ds max and Photoshop
Nemo Kamlesh Jangir, India kam_jangir@yahoo.com 3Ds Max 6, Photoshop CS Page 38
Issue 02 March 2006
gallery
Rajeev Jagasia, Canada rockyj123@hotmail.com Maya, Photoshop, Doom 3 Radiant
Page 39
Issue 02 March 2006
submission
How to send in your images... We showcase the cream of reader images in E-Zine and on website - here’s how to get yours noticed
BY EMAIL
This is by far the quickest and easiest way to send your images to us. Send the images on ezine@cgarena.com and include the following details in the email. a) Your Name, Image Title, Software Used, Your Country b) JPEG format at 300 dpi (if possible) and any other detail you like to add.
Upload Images through Website Follow this link http://www.cgarena.com/submit.php
To Advertise: contact@cgarena.com