CGArena
VOLUME 5, ISSUE 3, JUN - JUL 10
Get Attention in the Computer Graphics Community
Interview
Jason Seiler
ZBrush
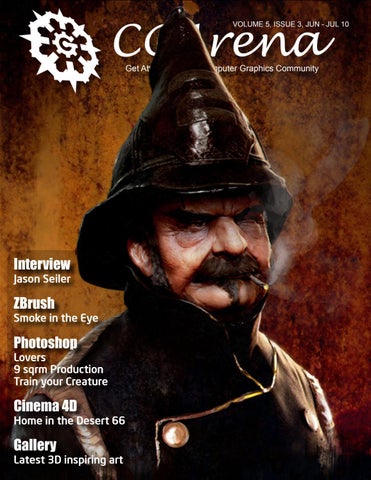
Smoke in the Eye
Photoshop
Lovers 9 sqrm Production Train your Creature
Cinema 4D
Home in the Desert 66
Gallery
Latest 3D inspiring art
VOL
5
Get Attention in the Computer Graphics Community Issue Contents
Volume 5, Issue 3 June - July 2010
05
Interview
Jason Seiler
16
Photoshop
Making of Lovers
22
Photoshop
9 Sqrm Production
30
ZBrush
Smoke in the Eye
36
Cinema 4D
Home in the Desert 66
44
Photoshop
How to Train your Creature
50
Gallery
Showcase of latest 3D art
Magazine Edited: Ashish Rastogi, India Magazine Cover Image: David Munoz Velazquez, Spain Magazine Design: Yousef Ikhreis, Jordan www.cgarena.com
Page 2
Issue 3 June - July 2010
Industry News
CGArena ‘Pixels’ Director Patrick Jean Boards Mothership
Exciting Automatic Skin Retouching Tool for Photographers
Production company Mothership announced that director Patrick Jean has joined the roster. Mothership, which operates as a sister company to Digital Domain, will represent the Paris-based director exclusively for commercial work in the United States. Jean joins Mothership on the heels of winning several industry awards for his short film “Pixels,” which has become an Internet sensation after its release April 7th, with over seven million views to date.
Digital Anarchy, a leading provider of cost-effective software for photographers and digital artists, announced their new Beauty Box Photo skin retouching software. The plugin provides an automatic, easy, and inexpensive way of smoothing skin and removing blemishes in photographs. Beauty Box Photo 1.0 is fully compatible with Adobe Photoshop CS5 and earlier versions of Photoshop and Elements.
Book
Blender Studio Projects: Digital Movie-Making - Start from scratchthe way it happens in the studio-and create fully rendered objects with Blender open-source 3D animation software and this real-world, roll-upyour-sleeves guide. No time is wasted-this book plunges straight into step-by-step instruction designed to help you build skills and create solid assets for film, video, and games. Blender is gaining clout in professional settings, and you can get a running start with this series of hands-on tutorials that encompasses multiple disciplines. ISBN - 978-0-470-54313-9
Training
“Pixels” garnered the young director Hollywood attention, with Adam Sandler’s production company Happy Madison picking up the rights and starting discussions with several Hollywood studios to turn the short into a feature length movie.
The software automatically identifies skin tones and creates an intelligent mask that limits the smoothing effect to skin areas while keeping facial details razor sharp. This process requires minimal input from the user and in many cases is fully automatic. Whether it is used for a glamour shoot, senior portraits or just a personal photo, Beauty Box achieves a consistently professional result.
Thinking Particles - Part 1 - In this DVD Hristo Velev starts from the very beginning by explaining what Thinking Particles actually is and then begins to build upon a solid foundation of theory and technical knowledge of the program. From there Hristo goes through an extensive set of basic concepts to guide you through the massive amount of features in Thinking Particles. After the basic concepts are covered he then goes through creating and entire project from start to finish to help you understand the entire process. With over 9 hours of training this DVD will help you understand Thinking Particles and start creating amazing effects.
www.cgarena.com
Page 3
Images are from animago AWARD 2008 & 2009 participants
We want you! Since 1997 the animago AWARD has honoured the best productions in the field of Digital Content Creation (DCC). In it‘s thirteen years of existence the animago AWARD has received over 10,000 international entries from more than 45 countries, including animations for film & TV, advertising spots, short films and industry productions as well as ambitious home productions. Regardless if you‘re an established VFX studio, creative freelancer or a visionary newcomer: Measure yourself with the best again this year and send in your entry till 30th of June via the website www.animago.com Visit us on www.animago.com for conditions, categories and all information! save the date: animago AWARD & CONFERENCE 28th & 29th of October 2010 event-location: the famous film production place of Germany Potsdam/Babelsberg near Berlin
Presented by:
Promoted by:
www.animago.com
Interview with
Issue 3 June - July 2010
CGArena
Jason Seiler Q. Hello Jason, could you tell us a bit about yourself and your background in CG and from where you have taken the training?
If you want something badly enough, you can do it
Sure. Well, I am an artist currently living in Chicago with my wife Kat and my two awesome daughters, Isabeau (6) and Ava (3). I have painted for publications such as TIME, GOLF Magazine, MAD, The New York TImes, The New York Observer, The Village Voice, The Wall Street Journal, The Weekly Standard, KING Magazine, and Penguin Group, to name a few. I also had the pleasure of working as a character designer for Tim Burton’s Alice in Wonderland. I worked on characters such as the Red Queen, the Bandersnatch, the Executioner, March Hare, and the Tweedles. That was a great experience. I also teach a high end advanced class on Caricature for Schoolism. For more information on that, please visit www.schoolism.com As far as my background in CG, there really isn’t much to say. To be honest, I never wanted to paint digitally and avoided it for quite a while. I didn’t really like much of the digital work that I was seeing at the time; it seemed to look too digital, too smooth and perfect. I am mostly self-taught, but I studied for a couple years at The American Academy of Art in Chicago. I love traditional painting the most, especially watercolor and oil. A few years back, my friend Joe Bluhm talked me about painting digitally. So, I bought the cheapest and smallest Wacom tablet that I could find, I think it cost me a $110. The first week that I had the tablet, I was called by Muscle Magazine to paint Arnold Schwarzenegger. I decided that it was a good time to start digital painting, and did my first ever digital painting for publication. I never had any sort of training at all when it comes to digital painting. In fact, I am horrible when it comes to computers. If there’s ever anything wrong with my computer, I have to call one of my friends to help and fix the problem. All that I knew when I started painting digitally is that I wanted my paintings to look more traditional than digital. I keep it simple, I don’t use much, I don’t manipulate or distort with the computer. I draw, and I paint. I use the paint brush tool and sometimes use layers. When I first started painting digitally, I was interested in painting everything as photorealistic as I could, and if you know how to render, achieving photo realism when painting digitally is easy to do. So my digital work at the beginning looked too digital for my taste. It’s taken me a few years or so to develop my painting technique so that it feels more traditional. I prefer to see brush work and layers of paint showing through, I enjoy texture in my work. So, when I paint digitally, I paint in the same sort of way that I would paint if I were painting traditionally. I sometimes start off with an under painting as you would when painting in oils. I can still get a very realistic look, while keeping the work brushy. The one thing I really love about painting digitally is that I can experiment so much. There’s so much you can do, and I learn so much with each painting I do. www.cgarena.com
Page 5
Interview with
Issue 3 June - July 2010
CGArena
Jason Seiler Q. Please tell us while painting caricature which things to watch or required for nice looking caricature. Obviously the most important thing is making sure that you capture the subject’s likeness. Exaggerating the subject’s features seems to be the most important thing to beginners, but it is important to understand how to exaggerate correctly. This comes from studying and understanding the skull and the muscles attached to the skull. Understanding the structure and foundation of what makes up the human face is good place to start. I would recommend buying a skull to study and draw. Draw people as much as you can realistically with no exaggeration. Try to find and locate the skull within their face. When I start a caricature, I make sure that I have at least 3 to 5 pictures of the person, from different views if possible. I look at their face and I decide where I feel the “weight” of their face is. Do they have a larger or high forhead, and a smaller chin, or a large heavy chin with a smaller forhead. Or, some people may have a long stretched out head with a high forehead and long chin. Does the person have a wide face or a narrow face? What’s the shape of the person’s head? Does it look like a box, a peanut, or an egg? Next I look at the eyes, nose, and mouth and decide where within the face they reside. How much space is around the inner face? Now look at the individual features, are the eyes close together, or farther apart, are they large or small, popping out, or sunken in. What’s the relationship between the eyes and the nose? Is it a long line nose, or a short chubby nose? What’s the relationship between the nose and the mouth? Is there a lot of space between the nose and mouth, or no space at all? How much space is there from the eyes to the mouth, or the mouth to the chin? These are some of the questions you must ask yourself when starting a caricature. After I have agreed on the shape of the person’s head and the placement of their features, I focus the rest of my attention to the subject’s eyes and mouth. The eyes MUST be 100%, if the eyes are wrong the entire caricature will suffer. I believe the eyes and mouth hold the key to capturing the essence and true character of a person. www.cgarena.com
Page 6
Interview with
Issue 3 June - July 2010
CGArena
Jason Seiler Q. Broadening forehand or chin, increase the size of ears, cheeks, shrinking nose, eyes... Is this caricature? What’s the actual definition of perfect caricature? For me “caricature” is not about picking out one feature and exploiting it. It’s about the face as a “whole”. Everything about a person’s face is special and unique. I pay close attention to a subjects eyes, nose and mouth, but I pay just as much attention to the subjects ears. For every action, there is a reaction. You cannot just exaggerate someone’s nose without it affecting the rest of the face. All features and structure must follow. Caricature is simply exaggerating the truth. Taking what really exists and pushing the truth while maintaining a solid likeness. If done correctly, a good caricature can capture a person so accurately that it can sometimes look more like the person than a photo ever could. By exaggerating the elements of truth found within their face, you can bring the subjects true character to the surface for all to see. I believe subconsciously our brains remember people in an exaggerated form of one way or another. For example, you can immediately pick out a close friend of family member out of a crowd of people without directly looking right at them. It’s because your mind remembers the shape and form as well as the placement of features that make your friends or family members recognizable. Q. Did anyone ever get angry on you for painting his/her caricature? No, not that I know of? But I am sure that there must be people who got upset or annoyed at how I have drawn or painted them. I know that a lot of the political work that I have done for The Weekly Standard has been seen by the subjects themselves. I have painted Obama several times now, and I’m almost certain that the President has seen at least a few of my paintings. I’m sure he’s more annoyed than upset. This past year I painted the Mayor of New York, Mayor Bloomberg, on the cover of The New York Observer. The New York Observer is on every street corner in the entire city, you can’t go anywhere without seeing it. So, I know the Mayor had to of seen my painting of him. Knowing this cracks me up and pushes me even more to do something memorable and more humorous with his face. Q. Please tell us about your correspondence course and which things you cover inside this? I teach a class on Advanced Caricature for Schoolism.com. How it works is students will watch a lesson which is usually two hours long. The student can pause, go back, take notes, sketch and so www.cgarena.com
Page 8
Interview with
Issue 3 June - July 2010
CGArena
Jason Seiler on. After watching the lesson of the week, the student is then given ten to fourteen days to complete the assignment. This deadline changes from week to week depending on what is expected that week for homework. Once the assignment is finished, the student uploads their home work to the Schoolism site, leaving questions and comments for me to go over with them. I then download their work and record a 25 to 30 minute critique on their work and then upload that critique to their file at www.schoolism.com I work on work done by each student, and every student is at a different place artistically, so each critique I do is very different. And one of the cool things about this is that the students at Schoolism have access to the rest of their classmates critiques as well as past critiques from previous semesters. So there are literally hours and hours of demos and critiques to soak up while taking the course. My critiques are honest and to the point. I look for each students strengths and then push them further in that direction, helping to develop their style. We work together to improve on areas that need work, and as long as the student puts in the time and effort, they always come out on top!I really enjoyed working at CIS on Invictus. I found the studio to have a relaxed attitude and working conditions were great. I keep going back there for short stints when they need me and like being able to jump around on a bunch of different areas of film work instead of just working in one area. Caricature is not only about how much you can exaggerate a person, there’s so much more to it than that. My course covers everything from sketching, and the importance of thumbnails . . . developing character, likeness as well as the essence of a person. How to exaggerate and push the features while keeping a strong likeness? Exploring shape and form as well as the unique relationships between the features on the face, finding the weight and so on. The course also covers painting in values as well as color temperature, and palettes. I go over skulls and understanding the anatomy of the face as well as teaching my techniques for painting hair. Finally, the last three lessons of the course are dedicated to creating a final piece of art that the student can use in their portfolio. These lessons cover techniques that I use for my editorial and illustration work. Putting all previous lessons together to create one final painting. www.cgarena.com
Page 11
Interview with
Issue 3 June - July 2010
CGArena
Jason Seiler Q. Please tell us something about your work “Scott Storch”. Well, I knew nothing about Scott Storch before doing this job. I was told by the art director that he was a slimeball and a jerk, and that they wanted him to be sitting on a toilet as if it is his throne. And because he is known for being a coke-head, they wanted him to have a bloody nose with an open shirt, and possibly holding a “pimp goblet”. This was all I was given as to what they wanted. I then read the article and found myself frustrated with Scott Storch, and downright disgusted with how he treats his mother and family. So, reading the article fully fueled my artistic attack on Scott Storch. I decided rather than painting a King-like toilet throne, that I would make this piece look disgusting and paint him in some random nasty public bathroom, with cockroaches, and so on. The overall look is more powerful. And I was told that the cover was the talk of Miami, was on the news and so on. My reference for Scott Storch was pretty bad, so I used many references of him to create the one face, and then I took pictures of a friend of mine in a bathroom for my pose and scenery. After gathering enough reference, I sketched out the piece and once the sketch was approved I began painting. I decided to paint with a grimy sort of palette, lots of greens. All of the gross elements such as the nasty toilet, blood, and stained walls, were made up, painted from my imagination. The bathroom that I shot pictures of for reference was actually a pretty nice looking bathroom in comparison. Q. When you received a commissioned work then which type of project details you generally receive from the client? It all depends really. Sometimes they don’t give me much at all and I have to come up with the idea. I don’t really prefer to work that way, because most times I am not familiar with the subject that they want me to paint. The way it usually works, is the art director will give me an idea of what they are looking and then I will take it to a new place. I’ll take their idea and come up with something that is hopefully more interesting to look at. Every job is different and every job has its challenges. Q. What hardware and software you use for your painting work and why? I work on a 21” Cintiq and a Mac Pro tower. I don’t know much more about my computer to tell you the truth. I don’t know all that much about computers. I know how to paint and draw and I use it as a tool. For www.cgarena.com
Page 12
Issue 3 June - July 2010
Interview with
CGArena
Jason Seiler my digital painting I prefer to use Photoshop. I like Photoshop the most because it’s simple. I only need a couple brushes, I set them the way I like and I paint . . . it’s not much more complicated than that. I also use Sketchbook Pro for sketching. Q. Please tell us about your hobbies and average daily day?
ends, but more casual as I hang out with everyone.
I don’t really have any hobbies. I get up pretty early on most days. I work all day long with maybe a 20 minute break, sometimes longer depending on what I have to work on that day. Sometimes my days are filled with critiques for Schoolism, and other days, I have to pack and ship books and DVD’s that people have ordered. Sometimes I need to just get out, so I will leave my studio for a couple hours and just go sketching somewhere in the city. No matter what I am working on, I try to finish my day by 4:30 P.M. or 5:00 P.M. in order to be home with my wife and kids. My kids go to bed around 8:00 P.M. so this only gives me a few hours to play with my kids, take them to the park or out to eat. And keep my weekends free from work; weekends are for family, going to the movies, or the zoo. I still sketch and draw on the week-
Q. Any piece of advice would you like to give to the upcoming artists? Sure. The only thing standing in your way is you. If you want something badly enough, you can do it. Push through the hard times; stay faithful to your dreams and goals as an artist. Work hard and it will pay off, if you quit, you will not succeed, simple as that. It is important to remain humble; you will always have areas in your life that need growth. So, remain humble, and teachable, and always move forward.
Web: www.jasonseiler.com Email: jseiler@jpusa.org
www.cgarena.com
Page 14
Tutorial
Issue 3 June - July 2010
by Alena Lazareva, Russia CGArena Software:
Making of Lovers
Photoshop
2D
In my picture the meeting of two enamored is represented. I used a lot of red color and also light effects; it emphasizes romanticism of a picture, hope you like it. STEP 1 - First I did a sketch in Photoshop using a Wacom tablet. I made a rough sketch; I decided to add different decorative details in the process of drawing. Each element of the picture I drew on a new layer, so you can change the color and transparency later, if necessary. STEP 2 - I painted the background completely brown and started to paint the body of men and women. By dark color I have noted a site of eyes and lips. I shall draw bodies gradually at each stage. I also started to draw a red satin cloth, while I drew it in two colors: red is the main color of the fabric, and dark red for the shaded area of cloth.
STEP 3 - Now I started to paint the body of lovers. I use a soft round brush to paint the body. I decided that the light will be on the right side. Later, I depict a spot in the form of rays of light. This light will make the picture more romantic. STEP 4 - I started adding details in the bodies of people. Now they began to look more attractive. Started to paint the face masks of the man and the woman. At this stage I shall add decorative elements for a mask, and now I while shall draw a basics of a mask. Also I have added a table and subjects on the table. www.cgarena.com
Page 17
Issue 3 June - July 2010
Tutorial
by Alena Lazareva, Russia CGArena
Making of Lovers STEP 5 - I added more details on the face. I stressed on the looks and the eyes because I considered it to be very important. I enriched the face in some pinkish shades, also added light, as well as textured the lips and added eye lashes. Mask - On the mask, I drew a lot of small decorative items to make it more appealing (Ornament, red and white stones). I also decided to add red feathers to the mask of the girl using thin brush. In the setting of a brush, I found Shape Dynamics.
STEP 6 - At this stage I have gradually finished bodies of people, now their skin is equal and smooth. There was no clear-cut color transition of the body; I used a Gaussian Blur (Filter-> Blur-> Gaussian Blur). But first, I select the layer with the body to blur occurred only inside the body and the edges were crisp. I often use a Gaussian Blur tool, when it is necessary to make a smooth color transitions. Curtains - Painted the curtains in east style on the new layer. Background curtains painted on the layer with the opacity of 30%50%. I have drawn all curtains in one shade.
www.cgarena.com
Page 18
Issue 3 June - July 2010
Tutorial
by Alena Lazareva, Russia CGArena
Making of Lovers STEP 7 - Illumination - very important stage in every image because in every picture there is an illumination. First, I painted light yellow color on the new layer. Then I applied the Gaussian Blur tool. Later, little reduced the opacity of a layer. Then I have moved this layer in a background of the man. STEP 8 - In next step I created a direct rays, now again apply the Gaussian Blur. Then I reduced the opacity of these two layers of 30-50%. This layer becomes beams of the sun, a layer is in the foreground.
STEP 9 - I have made the curtains layer little more transparent. I’ve decided to add more decorative elements, so I drew the fruit and glass of the wine. I have drawn each subject on a new layer and added more elements on a mask of the man, and
it began to look more realistic. Then I have drawn a structure of a coverlet of more smooth. STEP 10 - The candle flame - I drew the candle flame on a new layer, using 3 colors - yellow, red, white and applied the Gaussian Blur.
www.cgarena.com
Page 19
Tutorial
Issue 3 June - July 2010
by Alena Lazareva, Russia CGArena
Making of Lovers STEP 11 - Hair - First I drew the basics of the hair in one dark color. Then I painted curls of the lighter hairs. I used several colors to draw hair; it gives the effect of volume. To draw the hair I used the soft round brush. In the setting of a brush, I found Shape Dynamics. Fine hair painted using 2px brush. Blonde hair, I painted on the edge of the right side, because the light falls on the right...
STEP 12 - Now I painted the flower ornament on curtains with 10-20% opacity. I’ve decided to add more decorative elements, so I painted the fine tablecloth on the table.
Then I have added the details in the red feathers on the mask of a girl. To paint the feathers I used the soft round brush. Now the final picture is ready. Thank you!
Website: www.alenalazareva.com Portfolio: alenalazareva.cgarena.com Email: alenka.lazareva@mail.ru
www.cgarena.com
Page 20
Join the people behind the pixels in the world capital of digital imagination.
Los Angeles
share ideas
build relationships
advance your career
be inspired
French Roast © 2009 Fabrice O. Joubert, The Pumpkin Factory; Touch the Invisibles © 2009 Junji Watanabe, PRESTO Japan Science & Technology Agency
The 37th International Conference and Exhibition on Computer Graphics and Interactive Techniques
Los Angeles Convention Center Los Angeles, California USA Art Gallery • Art Papers • Birds of a Feather • Computer Animation Festival • Courses • Emerging Technologies Exhibition • Exhibitor Tech Talks • Featured Speakers • Game Papers • International Resources • Job Fair • Panels Posters • Research Challenge • SIGGRAPH Dailies! • Talks • Technical Papers • The Studio
FOR COMPLETE DETAILS:
www.siggraph.org/s2010
SPONSORED BY ACM SIGGRAPH
FOLLOW US ON:
Tutorial
Issue 3 June - July 2010
by Tomasz Jedruszek, Poland CGArena Software:
Making of 9 sqrm Production
Photoshop
2D
When you participate in any CG challenge you can be always sure it will be very difficult and require all your skills to participate and even more to win, which is best way at the moment to practice and upgrade you talent and skills. For one CG Challenge we had to paint an artwork resembling the atmosphere of early 50-60s B-movies. At first sight it was simple to do, as always CG Challenges are, but only in few minutes, when you think about it you realized how tricky and difficult it will be. Of course the simplest approach was to paint some kind of a creature from outer space or mutated and throws it in a town with streets full of pedestrians. Truly it is something could easily be produced, but will be that enough to win the challenge? Well, maybe but I doubt it, remember those guys back in 50 had totally different imagination about future and space, we didn’t even been on a moon yet! Therefore creatures they have created are one of kind in their own class, it would be tremendous effort to created monster like that and got the same effect (silly +ridicules) today. It could be easily just too ridicules and went into primitive copy of something already existed. That’s why I dropped that idea and tried to take this subject from other side, as I always do in my challenge works. APPROACH Most difficult moment of each work yet most important to eventually success or a loss of your artwork. To have an idea, great idea, and brilliant idea is that difference if the audience only notices your presence, give you standing ovation or simply love you forever, of course your work. As I said I decided to take totally different approach to this one, so it took me quite a time to find brilliant idea, different than the rest of entries ,original ,powerful ,yet still set in that b-movie mood , maybe even funny or little scary. Finally I spotted one picture on the internet. and that’s it! I ve got my idea. From this single picture I been able to build up my entire story and finally get right motivation and atmosphere to work. And as I said it takes time to have it but it is critical to success of your work. It is not very nice to talking only in compliments about yourself, so I only give you an example of my previous “icarus day” CG Challenge entry, it was the same way of thinking and quite the same approach which made it so powerful and successful, the painting itself wasn’t even detailed and polished, the story and idea was carrying www.cgarena.com
Page 23
Tutorial
Issue 3 June - July 2010
by Tomasz Jedruszek, Poland CGArena
Making of 9 sqrm Production emotions strong enough to get the jury on my side. I do not know how my “9 sqrm production” will end , but that is the point, having good motivation and pleasure working on this idea it is already successful , if not to the world then at least to myself as an artist. STORY Why this image did catch my eye. Well to be honest at first was the magnificent legs but then I like the relation between those two characters, from one side we have adult, sure, probably independent woman in some sort of sense -strong, from the other hand a fragile child playing on the floor, his perspective and world. There was also that feeling of protection from the woman to a child, I don’t even know if she is his mother but my first impression was like “heeeeeere’s mooommmmmy” and I love that to my artwork about B-movies. You see from some sort of point of view even simple play might look like catastrophe, and I did observe that when my son was playing, his bellowed kind of fun is to rip the heads of LEGO miniatures off, or throwing die cast cars around the house, recently he managed to take their tires off using his teeth. He also use to screaming during that but most remarkable thing he do is eating cookies shaped safari animals like lions , giraffes ,elephants but most favorites are turtles. So I decided go into his world and scale where he is a “giant monster” spreading chaos and destruction to a toy’s world. When I found that picture, I did create also his mother as a “monster” even more terryfying whatever that means, and my story been complete. From the very begin of the challenge I planned to take a part in both categories, image and movie, when I found this idea for image I already had a concept for the movie too, I decided to tell the story of a little monster and his mother in the movie and show the team creating b-movie class for image category.
www.cgarena.com
Page 24
Tutorial
Issue 3 June - July 2010
by Tomasz Jedruszek, Poland CGArena
Making of 9 sqrm Production
When I realize I would not be able to finish the movie category I was afraid if my image will be readable without this movie but I made couple clues and changes so I hope it is still quite clear what all is about. As you can see the scene is set in small room when the “team:” been filming their b-movie, each one of them using their own skills and talents, young boy is playing main character ,so does mom, and a father painting movie poster and probably been camera operator too. All decided to be painted in kind of 50s movie posters or magazines illustrations TECHNIQUE We starting with lose sketch, at this point the most important things are good plan the objects on the canvas, composition, attractive body poses, not like stiff animals, mass of course -we are trying to give them physical feeling on “wire” construction already, we drawing spine, and main bones, but also body build where is more mass and where is low. www.cgarena.com
Page 25
Tutorial
Issue 3 June - July 2010
by Tomasz Jedruszek, Poland CGArena
Making of 9 sqrm Production We do not afraid to make changes, after all we are doing this sketch to make any possible changes when it is still simple, not when it will be finished and polished -we save our time. When it is basically ready, we adding contour - I usually don’t paint like that, but as I said I am trying to give it a little bit of that 50s movie post-
ers feeling. After that we clear construction, best is to turn off the layer as we might (and we will) need that later on.
Time to color, again -it is not my regular way of work, I usually paint color composition first, but this way we going to get that comic book style. Now it is time to give the shapes a 3D feel - so we add shadows and lights, we going to use our construction again not to paint “in the air” but always check where those bones are under the skin etc
www.cgarena.com
Page 26
Tutorial
Issue 3 June - July 2010
by Tomasz Jedruszek, Poland CGArena
Making of 9 sqrm Production Of course this is only reconstruction of the process, as I never record my work, I simple do it too fast to think about capturing it , but you’ll get the picture - your job is to capture the 3D feeling and give it realistic look. Mixing colors , choosing palette and finally put them on shapes , paint those curves , gently , smooth... it is something you learn for years, picture after picture, and skills jumps to another level rather on each “hundred” instead of dozen, painted. So if you wonder how I did it, I can answer only one way -you just need to be patient and work hard you will see after a while you will do it almost automatically. Naturally you are not obligate to know every bone ,or muscle and how it reflect the light and cast shadow- it is simply countless possibilities and configurations for that , obviously you shall use some reference. If you have beautiful wife that part can be even fun, if not you still can us some photos - just be careful, painting 3D from 2D reference is much much difficult than from real object it simply require more artistic and geometric imagination. Finally we add some life to the picture, with brush switched to “dodge color” I made strongest highlights, in the air I placed some participles like dust etc, they make the scene living environment, they also separate plans adding depth feeling. And here we have it! Sounds like easy and fast? For me it is, years ago when I decided to go professional I promised myself never give up that all pleasure I have from painting.
www.cgarena.com
Page 27
Tutorial
Issue 3 June - July 2010
by Tomasz Jedruszek, Poland CGArena
Making of 9 sqrm Production I hope you like this short article , I did it with a purpose not to talk much about painting itself as I said it is only a matter of ‘your personal approach, patience and self determination to do it yourself. But I believe most of you will read this “making of” as a tutorial to help you in your works - that’s why I allocated so much space to “theory” part of creating each artwork as it is truly even more important than painting alone. Make your art disturbing, speechless, faster heartbeat, readable, catching and you will, when add as much yourself as possible to work and that is entire essence of doing it I believe.
Web: www.morano.pl Email: info@morano.pl
www.cgarena.com
Page 28
Please consider the environment before printing this magazine. Save Paper. 100% Environment Respect.
Tutorial
Issue 3 June - July 2010
by David Munoz Velazquez, Spain CGArena Software:
Project Overview Smoke in the Eye
ZBrush, Photoshop
3D
Hello everyone, in this tutorial I am not going to explain the modeling, nor the texturing or lighting but I will explain the post-production process which allows any image to touch the sky and this part is mostly missed in the makings/tutorials. Here is the finished model; I have done the painting in ZBrush using flat colors applied with modeling alphas.
www.cgarena.com
Page 31
Tutorial
Issue 3 June - July 2010
by David Munoz Velazquez, Spain CGArena
Proj. Overview - Smoke in the Eye
These are the Render Passes for this picture, which I will explain a bit by building this image. For me the first is to create the mask of the image, so I can keep changing the background to make it fit. I like to drop a bit of color straight away with the Color-pass, so I can adjust contrast while composing the full image. So the background and the figure are changing since the beginning. This is the image of the Photoshop layers; this is the order of the passes and corrections that are done. I think it is very useful to have certain order, in my case I rather doing 3 folders - the Model, Background and over the top Corrections. The Model folder contains sub foldwww.cgarena.com
Page 32
Tutorial
Issue 3 June - July 2010
by David Munoz Velazquez, Spain CGArena
Proj. Overview - Smoke in the Eye ers, one for each render pass and the main Model folder that contains them with the Mask-pass masking to see the background. All this work is non linear, I mean lot of things changes when applying some render passes, from the first pass Color to the background, Specular etc.. Depending on how the ones below are working, this is about playing until what you are looking not pops up, but this is an example. So I drop with the background and the Color-pass. Using the Hue and the Levels I make it almost blended in the background so I can build lighting. Here is the RimColor-pass, Screen mode. It has a coloration to make orange and some levels as well to make it stronger, a few brush touches to clean certain render things which I didn’t like.
I have masked the flesh to give a proper light and color. Again levels and Hue/Saturation for corrections. I have used Overlay for this layer mode.
www.cgarena.com
Page 33
Tutorial
Issue 3 June - July 2010
by David Munoz Velazquez, Spain CGArena
Proj. Overview - Smoke in the Eye The RIM02 render pass for the back/lateral light to achieve volume for the figure. I have colorized the render pass in blue and using the Levels. Screen mode. SKIN SPEC for the surface presence trying to avoid as much as possible for reflection. Also gives a lot of light to the face and I have masked the layer so just affect only to the face. Screen mode.
METAL SPEC pass, this one is for a bit of reflection in the areas I am looking because the render pass was too strong and homogeneous and I had to mask the areas that required less intensity. Screen mode.
www.cgarena.com
Page 34
Tutorial
Issue 3 June - July 2010
by David Munoz Velazquez, Spain CGArena
Proj. Overview - Smoke in the Eye REFLECTION pass, again masked in this case for the metallic parts, also some levels adjustments keeping the original color. Screen mode. Some painting corrections, especially to blend with the background.
Contrast for the full image and added light in the cigarette. Now the final retouches, I used to wait a day or something like that before I fully finish the image, so I can see it with fresh eyes, then I will do the final steps. Now I have blurred the background a bit, painted some small bits. The full image is a bit rotated and a bit of color correction to add more visible cold tones. The whole process is very enjoyable if you have all the required render passes then you can change anything very easily because you can retouch all the passes without breaking the rest of the blending that was already done. Also, this is cool for illustration to do some overpaint to get rid of the 3D looking and make it more expressive if you will, result always looks more interesting to me. Regards and I hope this is useful for you.
Website: www.munozvelazquez.com Email: munozvelazquez@gmail.com www.cgarena.com
Page 35
Tutorial
Issue 3 June - July 2010
by Jmb Moraes, Brazil CGArena Software:
Cinema 4D Making of Home in the Desert 66
3D
The legendary Route 66 (sixty-six) United States is an incredible source of inspiration, the scene of many movies and countless stories that fascinate us through the age. The scene “House in the Desert” came from all that it represents. This work shows the back of a house that has withstood the time, full of debris that tells the story trying to recreate some of that legend.
MODELING This scene almost completely modeled in Cinema 4D and used some xfrog libraries for the vegetation www. xfrog.com. This is a big project and contains lots of models but nothing new in the modeling which you have not read it before, I used polygons, spline, extrude a form from cylinders, cubes and spheres to model all the things in the scene.
www.cgarena.com
Page 37
Tutorial
Issue 3 June - July 2010
by Jmb Moraes, Brazil CGArena
Making of Home in the Desert 66
LIGHTING The desert climate has always been something mystical to me. I tried to recreate this climate effect of a yellowish light, using a light with 125% intensity and shadows are 100%”.
www.cgarena.com
Page 38
Tutorial
Issue 3 June - July 2010
by Jmb Moraes, Brazil CGArena
Making of Home in the Desert 66 To reproduce the effect of typical dust of the desert “pyrocluster-volume tracer added to the emitter”, have a look at the setting in the picture below.
Front view of scene - the “emitter” was located along the image of the scene. It is represented by the white rectangle View from the -all, the little blank sports are generated by the “emitter” they produce the effect of dust.
www.cgarena.com
Page 39
Tutorial
Issue 3 June - July 2010
by Jmb Moraes, Brazil CGArena
Making of Home in the Desert 66
The material is almost incredible, as “Density” is only “0.08.” Ps: For “Emitter”, have an “Environment” added to a node “Pyrowuster” - Volume tracer “. Then on a “Time line”.
www.cgarena.com
Page 40
Tutorial
Issue 3 June - July 2010
by Jmb Moraes, Brazil CGArena
Making of Home in the Desert 66 TEXTURING For the textures of the pickup, home and other objects was created inside body paint, so that objects were mapped and textured. Many of the textures created using the Dosch Design DVD and specialized sites like www.cgtextures.com, there is also material shaders available on site www.chdtextures.com.
www.cgarena.com
Page 41
Tutorial
Issue 3 June - July 2010
by Jmb Moraes, Brazil CGArena
Making of Home in the Desert 66
Blog: jmbmoraes.blogspot.com Portfolio: jmbmoraes.cgarena.com Email: jmbmoraes@gmail.com
www.cgarena.com
Page 42
Tutorial
Issue 3 June - July 2010
by Wanchana Intrasombat, Thailand CGArena Software:
Photoshop Making of How to Train your Creature
2D
These are the few important steps of my personal illustration “How to train your creature”. I used Photoshop CS2 and a Wacom Intuos4 for the painting. The inspirations came from my experience and some animation movies from Pixar studio. The concept story of the image is about the boy from the unbelievable island wanted to train his Dog + Parrot + monkey (creature). He wants to ride his creature and fly around the world. STEP 1 - I have created the sketch to make the best composition for telling the story to my image audience. In this picture I need some dynamic movement so the prominent point is very important. I have made the line that point to be the prominent. I have done the sketch in Photoshop (every process start in Photoshop and completed in Photoshop). In the sketch I have chosen the color that is in a quite dark tone (It will easy to make the light color). In this process, I have used the 2 layers, the first is just the line to control the composition and second layer is the color background.
STEP 2 - When I felt my sketch is quite nice, I have created the light and add the color to control the theme and tone. In this picture I made the light color on the top left and had the light effect in the light pink. In this process, I painted the light color in the background layer.
STEP 3 - I made the color for the prominent point (red) after that when I completed the sketch process. I started the painting on big canvas, just only for the character (prominent point)
www.cgarena.com
Page 45
Tutorial
Issue 3 June - July 2010
by Wanchana Intrasombat, Thailand CGArena
How to Train your Creature PAINTING PROCESS I had started with the main character. The sun light is coming from the top right and behind the head of the character. For this tutorial I made the biggest sphere to explain the light and reflect, Sun light is very brightening on the right and effect light is from the clouds that reflect from the sun light. The smaller sphere is to show light and reflects of the boy on the creature. In the process of painting the character I only used the round brush. (Opacity 100% and Flow 45-50%) I started from the dark tone of the character and then painted the light-color on the parts that light can shine on, such as cheekbone, eyeball, etc. Then add the reflect-color under the body of the character and completed the details.
When I completed the main character, I continued with the background. I followed the same process as used for the character but for the clouds I used different brush (Spatter 59 pixels 1) in the final process, set the layer to “Overlay”. This layer will help the picture in bringing more contrast. I have used the same painting process in every cloud. www.cgarena.com
Page 46
Thank you very much for reading, if you have any questions, please feels free to send me an email. Blog: victorior.blogspot.com Email: vic__unforce@hotmail.com
Have you created your CG Por tfolio?
www.cgarena.com
Sebastien Sonet, France contact@xxeb.net ZBrush, 3ds Max
Anto Juricic, Bosnia and Hezegovina monty.band@gmail.com Modo, ZBrush
Massimo Righi, Italy info@massimorighi.com Maya, Shave and Haircut
Marthin Agusta Simny, Indonesia marthin84@yahoo.com 3ds Max, ZBrush
Richard Max, Slovak Republic richard.maxo@gmail.com 3ds Max, Fusion, Photoshop, Lightroom
Emre Goren, Turkey emre_goren@hotmail.com 3ds Max, Mental Ray
Anderson Raso, Brasil riot_mind@hotmail.com 3ds Max, ZBrush
Su_woong, Han, Seoul Korea ayabaco@naver.com 3ds Max, Vray
Tomasz Strzalkowski, Poland t.strzalkowski@space.pl Maya, ZBrush, Photoshop
Federico Scarbini, Italy fede@federicoscarbini.com 3ds Max, ZBrush
Jason Baldwin, USA jasonsbaldwin@gmail.com Maya, Photoshop
Edward Fleissig fleissigmosaic@yahoo.com ZBrush, Photoshop
Daniel Peteuil, USA yansandp@gmail.com Maya, ZBrush, Mental Ray
Vladimir Panchenco, Ukraine kodg.pvv@mail.ru Rhino, Photoshop
How to send in your images... We showcase the cream of reader images in magazine and on website gallery. Here’s how to get yours noticed
Upload Images through Website Follow this link http://www.cgarena.com/submit.php This is by far the quickest and easiest way to send your images to us.
To Advertise: contact@cgarena.com