ISSUE 06 JULY 2006
CGArena
Get Attention in Computer Graphics Community
GALLERY
Showcase of latest inspiring art
PHOTOSHOP Vanishing Point
AFTER EFFECTS Sky Replacement
COMPOSITION
Create Depth in a Scene
INTERVIEW Soa Lee
3DSMAX
Making a 3d Virtual Beer
MATCHMOVING
Introduction of Boujou
3D CHALLENGE Haunted
contents
05 Interview
10 3d Challenge
14 Composition
16 Photoshop
20 Matchmoving
22 After Effects
Soa Lee
Haunted
Create Depth in a Scene
Introduction of Boujou
Vanishing Point
Sky Replacement
29 3ds Max
Making a 3d Virtual Beer (Part 2)
38 Gallery
Showcase of latest inspiring art
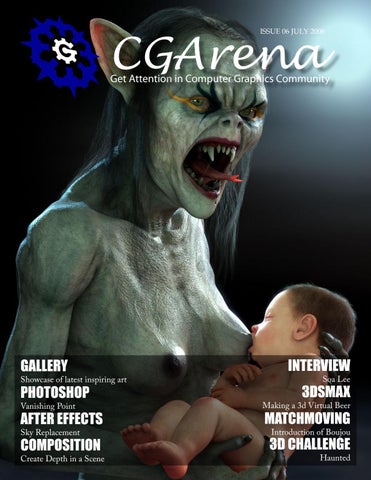
Magazine Designed, Written & Edited: Ashish Rastogi, India Magazine Cover Image: Dmitriy Kuznetsov, Russia Challenge Sponsors: Vertus, Duber Studio, Di-o-matic, ambientLight Source Videos provided by Artbeats
Page
Issue 06 July 2006
industry news Shrek 3 Final Cast Announced
Hollywood Camera Work Training DVD’s for animators, filmmakers, cinematographers
DreamWorks Animation announced today that the final cast for its upcoming computer-animated comedy “Shrek the Third” has been set. The original casts from “Shrek” and “Shrek 2” – Mike Myers, Eddie Murphy, Cameron Diaz, Antonio Banderas, Rupert Everett, Julie Andrews and John Cleese -- will reprise their roles in this third chapter of the Shrek story.
Hollywood Camera Work’s “The Master Course in High-End Blocking and Staging” is the ultimate Camera Training Disk with tons of 3D animations that would cover blocking actors and cameras. It’s a 6 DVD set (9 hours) on camera blocking. It covers everything from simple shots to multi-camera moving scenes. If you have any aspirations of producing movies, commercials, industrials, CG shorts, even just personal projects - you need this collection.
Joining the cast for “Shrek the Third” is an all-new ensemble of actors and comedians like Justin Timberlake, Cheri Oteri, Eric Idle, John Krasinski, Amy Poehler, Maya Rudolph, Amy Sedaris and Ian McShane. Slated for release on May 18, 2007, “Shrek the Third” is being directed by Chris Miller and co-directed by Raman Hui. The film is being produced by Aron Warner and executive produced by Andrew Adamson and John H. Williams.
There’s a half-hour of the training on their website. It’s normally $479...we worked out a coupon for 40% off for CGArena members and ezine readers. To get the discount, go to http://www.hollywoodcamerawork. us?cgarena=1 , select “Buy Now”, on the third checkout page, enter CGARENA in the School Acc# field. This will remove $191 from the price. The sale ends on 15th August. Source: www.hollywoodcamerawork.us
Buzzword of the Month Maquette - A maquette is a small clay sculpture of a movie character, typi-
cally an animal or other creature. It is a tool that helps all people involved with the film visualize the three dimensional shape of that character. Puppetry experts use maquettes in the design of an animatronics, and digital effects artists can scan their image into a computer to re-create them as computer graphics. A maquette helps bring consistency, along with model sheets, among the drawings of the same character by different animators. Maquettes can also be painted to establish color schemes for an animal, as was the case for Jurassic Park and The Lost World, where nearly every dinosaur was first made as a maquette before being built as an animatronic or computer generated figure.
Page
Issue 06 July 2006
interview
AN INTERVIEW WITH Soa Lee Q. Hello Soa, could you tell us a bit about yourself? Hello, I’m 3D illustrator, and lives with my husband in Korea. Nice to meet you Ashish. Q. In terms of CG, How did it all begin for you? My main interest was western painting (Fine art) in university years. But I also had an interest in Cell animation and when go on vacation; I began to make money from short animations. I heard words which make animation as more inexpensive and easy if use 3D tool. I began to learn because that is good for profile that can make all character and background alone and also do animation. Q. How long have you been in CG and what is your current job? 9 years will go by this year. At early years I did modeling and animation according to Korea’s situation. However, was interested in illustration and gradually learning 3D, but when working for game company, I have an opportunity to utilize 3D to illustration. 3D illustration’s possibility was felt, and started painting 3D illustration as a freelancer since that time I am doing this. Q. Tell us something about your latest work “Taurus”, are you going to create all the zodiac signs? Yes. :) Zodiac series have a large meaning of bold challenge to me. 3D illustration is little completion work number than letting effort and time up to now. It makes the scene where the animation is possible and the fact that it
Page
Issue 06 July 2006
interview
AN INTERVIEW WITH Soa Lee plans from the point which wears out only it does not have big merit all it expresses to, the production time is long is a weak point. Do planning 12 constellations; also I planned to use these series making as training tool for myself. Make various individual and express within proper time. Taurus is one of mythology of Zodiac. It is the most dynamic scene.
Q. In brief tell us about the making of Taurus, and how you achieved such a wonderful fluid simulation? I wanted to express skin form more realistically than old method. I wanted to study V-ray properly and used in rendering. After the drawing of Europa, I made cattle, waves, droplet etc. Totally, waves are texturing victory. I made Shader of lapping waves using Raytrace and Noise map. My husband made Droplet simulation by Real Flow in advance, then I composite the scene with the waves.
Page
Issue 06 July 2006
interview
AN INTERVIEW WITH Soa Lee Q. These days many artists moving to Maya and Zbrush for 3d work, there is any reason that you are sticking with 3dsmax? It’s Simple. Because more comfortable with max. Also, most of Korea’s game production is produced by 3D studio max, and when working with game company 3Dsmax is more efficient. On former days, I envied Maya’s mental ray, animation, and effects. However, latest 3D studio max’s rendering function shows excellent performance. I want to exhaust force in creative thing than learn new program. However, learning new programs can be very helpful in creation of new scenes. For example, Z-brush will be very useful in giving details to the models.
Page
Issue 06 July 2006
interview
AN INTERVIEW WITH Soa Lee Q. If you could invent your dream job, where would you work & what would be your job title? I do not want to do other job because I have two eyes and hand yet. However, might become painter of other style if did not choose CG. Sometimes, become a painter rather if think this work will bring harmful electromagnetic waves and wrist pain from computer.
Q. What’s the most useful thing you have learnt in 3d? When the character that I made moves, I thank that 3D is my tool. It is really impressive. Q. What are your hobbies? Sometimes, I play computer game. And when leave computer, I read book or watch a movie. On former days, I had a hobby that called ‘Playing piano’, but when I move in the new residence I cannot bring the huge musical instrument. Going on shopping with husband also could be hobby? Q. What advice would you give to aspiring artists? Why are you doing CG, let’s consider from time to time what is having and doing target. To master the CG, you need a lot of efforts and time. Sometimes work hard to get the satisfactory results but can become short passion. Prepares endure and start your work if your passion was prepared. Thanks a lot Soa for taking out sometime for us from your busy schedule. My pleasure.
Page
Issue 06 July 2006
i n f o @ d u b e r. c z w w w. d u b e r. c z
I n t e r m e d i at e
t r a i n i n g
DV D s
fo r
3 d
a r t i s t s !
Testimonials: “A must buy for everyone.” - Ashish, CGArena
“Portrait of a girl is an excellent set for those who are interested in seeing how to create and texture a human head from scratch.” - Wes Burke, CG|Underground
“This is the best head modeling dvd out to date!” - Chris Maddos
“The DVDs should buy anyone who wants to create organic models!” - Leoš “Sniffer” Janek, Pixel magazine
Organic modeling DVD - $27.80 USD UV Mapping DVD - $27.80 USD Texture Painting DVD - $27.80 USD Postage & Handling included! Shipping worldwide within 7 days! 10% off when purchasing all three!
challenge CGArena is proud to present “Haunted” Challenge (3D Challenge), 29 July - 15 Sep 2006, sponsored by Vertus, Di-o-matic, ambientLight and Duber Studio. We want different ideas and approaches in a more creative way.
Your Mission Create an image which shows Haunted look. This Challenge is a Work-In-Progress Challenge -- all contestants are required to post their work-in-progress images for community to critique/comment in order to qualify.
How the Challenge will be Run This challenge will be a WIP (Work in Progress) Challenge. Each challenger is required to submit Work In Progress (WIP) images, from the initial concept sketch to the final render. The purpose is that everyone can learn from each other, offer feedback and critiques. 1. Enter the Challenge by registering yourself on CGArena forum. 2. Submit your work in progress images in forum on a regular basis. 3. Participate in the community by critiquing other challengers works in the respective forums. 4. Submit your final entry till 15th September 2006, midnight 00:00 GMT. 5. There will be 3 winners in this 3D Challenge and CGArena, Sponsers and Judges decision will be final. Note: You are required to submit work in progress images, obtain feedback and give feedback to other challengers.
Final Image Size - Your final image dimensions should be print resolution. Do not send in a low-resolution. - A guideline is 1200 pixels wide and/or 1024 high, JPG, 300 DPI. - Send your final image in zip format with your complete shipping address and telephone number on email address ezine@ cgarena.com
First Prize * * Di-o-matic Character Pack - $1990USD
The Di-O-Matic Character Pack is an all in one suite gathering all the plugins Di-O-Matic has developed until now and much more to help you save time in your production. It’s a single CD, with a single installer but it’s jam-packed of tools you need for your character animation. However this won’t come with the VIP membership. It will be up to the winner to subscribe to be elligible to all VIP benefits.
Vertus Fluid Mask 2.0 - $199USD
The Fluid Mask is a highly advanced software tool designed to make life easier for everyone who creates cut outs. Built as a plug-in to Adobe Photoshop, Fluid Mask is the new next-generation cut-out tool. Behind the product is breakthrough technology that mimics the way the eye, optic-nerve and brain perform visual processing. It offers an intuitive, accurate and fast approach to cut outs.
Duber Studio Training DVD (3DVD’s) - $88USD
Duber Training DVD’s by Loocas Duber, contains over 18 hours worth of tutorials covering topics such as organic modeling, pelt mapping, classic mapping, painting maps (color map, bump map, specular map, reflection map) in English and Czech language.
Second Prize * * ambietLight Multibay Texture Bundle - $130USD
Multibuy Offer includes our entire range of Texture Packs. All of our packs are at a minimum of 1024 pixels square and are hand edited so that they tile perfectly, whatever application you use them in!
Duber Studio Training DVD (2DVD’s) - $59USD
Duber Training DVD’s by Loocas Duber, contains over 18 hours worth of tutorials covering topics such as organic modeling, pelt mapping, classic mapping, painting maps (color map, bump map, specular map, reflection map) in English and Czech language.
challenge Third Prize Duber Studio Training DVD (1 DVD) - $30USD
Duber Training DVD’s by Loocas Duber, contains over 18 hours worth of tutorials covering topics such as organic modeling, pelt mapping, classic mapping, painting maps (color map, bump map, specular map, reflection map) in English and Czech language.
Consolation Prize (Qualified Entries will receive) * * Duber Head Rigging Modeling Video Tutorial - $5USD
The entire process needed in order to create a fairly flexible, usable and fast head/face rig, that you can either further enhance or build on, or actually use as is in your character workflow. This one hour, fully narrated, videotutorial covers the head/neck rigging, operational jaw bone rigging and a bit more complex eyes and eye lids rigging. All titles marked with this sign ( * * ) available as downloadable from the sponser website.
This 3D Challenge is proudly sponsored by:
Get 2500 $ of award-winning plugins for
composition
Create Depth in a scene To make the 2D plane of your photograph spring into life you’ll need to create a convincing sense of depth. To do this you’ll need to lead the viewer’s eye into the picture by manipulating the foreground, middle ground and background elements of a scene. A simple line leading through these areas of a picture to your centre of interest can be effective picture a river snaking from the entire foreground to a tiny point on the horizon. Choice of lens and aperture are also vital component to creating depth. One of the easiest ways to give your pictures depth is by finding a natural frame. By positioning your subject in the middle ground of the Photoshop and finding a sharply rendered or blurred frame to occupy all or part of the foreground, you’ll be able to draw viewers into your scene.
Page 14
Issue 06 July 2006
photoshop
Vanishing Point Cloning away things in perspective was one of the hardest removal tasks of all. Luckily, this incredibly cool filter in Photoshop CS 2 not only simplifies removing things in perspective, it actually makes it fun.
Before
After Page 16
Issue 06 July 2006
photoshop Step One I started with the photo of Garage and my goal is increase the number of lamshades and add CGArena logo. Step Two Bring up Vanishing Point by pressing Ctrl + Alt + V or Filter > Vanishing Point. The Create Plane Tool should be selected by default. If not, select it. This will allow you to draw your Vanishing Point grid. It works like drawing a square, so start by clicking on one of the corners of what you want to outline. Drag and click on all 4 corners to create the grid. The bounding box and grid change colors to indicate the plane’s current condition. If your plane is invalid, move a corner node until the bounding box and grid are blue.
Page 17
Issue 06 July 2006
photoshop Step Three Drag the handles to increase the width and height of the grid. Now select the Stamp Tool and use the Stamp Tool just like you would if you weren’t in Vanishing Point, Alt + click on the area you want to sample, then click on the area you want to edit. If required Set “Heal” to “On” to allow the Stamp Tool to work like the Healing Brush tool. Remember to Option/Alt-click several times to keep the retouch looking random, and to keep from “repeat” cloning. When it looks good to you, click OK in the dialog. Since the cloning will appear on a separate layer, you can adjust it or easily erase any extra areas Now you cloned the Lamp shade, lets move forward. Step Four Now drag the layer of your artwork that you want to add in the scene or type text. Remember to Rasterize the layer before proceed. Press Ctrl + A to select the new layer and Press Ctrl + C to copy the layer. Now hide the visibility of this layer and add a new blank layer.
Step Five Now select the main background layer again and then Filter > Vanishing Point. Press Ctrl + V to paste the artwork and now when you move the artwork inside vanishing point then it automatically aligns with the perspective. Step Six Now we will create a floor perspective grid so that we can add/edit anything on the floor too. Step Seven Press Ctrl and drag the grid from the center as shown in the following image and your floor grid also start to come out.
Page 18
Issue 06 July 2006
photoshop
Step Eight After creating the floor Press OK and follow the same procedure as done for adding the artwork. And when done reduce the opacity and if required also change the mode. And that’s about it. Pretty cool feature. In fact, this is one of those filters that’s so amazing, you can wind up spending hours cloning away things that have no business being cloned away. Don’t say I didn’t warn you.
Page 19
Issue 06 July 2006
matchmoving Source Video: Artbeats
Introduction of Boujou In this issue we will like to understand the interface of the 2D3 Boujou. If this is not installed on your system then download a Demo version from the 2d3 website (www.2d3.com), the demo version is fully functional except you can’t export the data.
Step 1: When you first open the Boujou then you will see big icons on toolbar, Taskview sidebar on the left and divided into the Toolbox and the Artifact Tree. Below is the History toolbar and below this there is Timeline like many animation packages and on right Workspace Overlays Sidebar controls which overlays are displayed in the workspace. 2D, 3D and Graph view overlay controls.
Page 20
Issue 06 July 2006
matchmoving
Step 2: Go to Window > Use Large Icons to uncheck, so small icons shown in the interface and more space for you. Step 3: To import any sequence or movie in the Boujou, click on the Import Sequence icon on the left taskview sidebar. Import Sequence Dialog box will open and now you can browse for desired sequence.
Preview button must be pressed to view the preview of selected file. When you press the open button another dialog box will be shown where you change the Start or End frame of any image sequence or movie.
Move Type will be selected according to the footage and we already explained this in the previous issue. Name the sequence and Press OK. Now sequence will be shown in between of the interface. Now you can scrub the timeline to view the sequence or play the sequence from the controls in the toolbar. When you scrub or play the sequence then Boujou will cache the sequence in memory for faster viewing and total memory used can be seen in the status bar. When you run the simulation you can see the progress and estimate for simulation completion in the summary window, below the image sequence. And on which frame simulation is calculating can be seen on the top of image sequence.
Before closing this chapter please press a 3d button in top toolbar and you will see an interface like perspective view of any 3d package. Here all the simulated 3d points are available for viewing and for making adjustments. So now you understand the interface…and we will start the matchmoving in the next issue.
Page 21
Issue 06 July 2006
after effects
Sky Replacement
Source Video: Artbeats
Click on image to play the video Sky replacement can be from simple to complex according to the complexity of the scene and in this tutorial we will try to understand the basic principle of achieving this effect. Step 1: As always create a new composition and import your footage in which you like to replace the sky. Place the clip in the timeline. Step 2: Import the sky image of your choice and drag over the video.
Step 3: Select Sky layer and apply a Effect > Transition > Linear Wipe
Page 22
Issue 06 July 2006
after effects Step 4: Change the Transaction Completion percentage according to the area of vertical sky requirement. And feather the edges otherwise trasaction will be very sharp and noticeable.
Step 5: Now if you scrub the video then video is moving but the sky doesn’t move and that looks really bad. So select a video layer and open a Motion Controls dialog box Window > Tracker Controls and choose your video in Motion Source, this will create a tracker point on the composition window.
Page 23
Issue 06 July 2006
after effects Step 6: Choose any noticeable point in the video which is available in whole footage and drag the tracking point to that location and all this need to be done on the first frame of the video. When you move the tracking point then it automatically zoom the area, so you can place the tracking control at exact point. Leave the settings in the motion control dialog box to default and Press Analyze Forward Button.
But if there is no point which is available in whole footage then select Options in the motion control dialog box and change the confidence to Extrapolate Motion and press OK, so motion tracking is continue after selected point gone out of focus.
When tracking is completed then press the Edit Target button in the Motion control dialog box and check Sky layer is selected there. Now press Apply and it will open another dialog box and select X and Y as Apply Dimensions and press OK. Now if you scrub the video then sky also moving with the footage. Sometimes sky needs to move on few positions when the sky image is small.
Page 24
Issue 06 July 2006
after effects Step 7: Now the sky replacement is completed but you have notice that few objects are hidden inside the sky. So now we will fix that.
Final Step: Duplicate the video layer and place over the sky layer. Apply Effect > Keying > Color Difference Key and select Key Color as your sky layer. In few circumstances you don’t have to do anything else otherwise just tweak the settings in the Color Difference Key and voila now everything is fine and perfect.
Page 25
Issue 06 July 2006
your mission In May, your mission was to create a image on “Autumn” theme and sponsored by Realviz,Vertus, GPUTech, AmbientLight, Duber Studio and Redway3d. These are the winning images...
...........................................................................................................................
Francisco Morales Aviles, Mexico paco_morales01@yahoo.com
Aleksandar Nikolic, Serbia na2spr@yahoo.com
Raul Fabian, Romania raulfabi@yahoo.com
3ds max
Making a 3D virtual Beer (Part 2) By Paco Morales, Mexico paco_morales01@yahoo.com
We already covered following topics in the June issue... Modeling the Bottle Modeling the Bottlecap Modeling the Label Modeling the Lemon and cover the following topics in this issue... Modeling the Salt Shaker Modeling the Waterdrops Texturing Lighting and Rendering
There is more to building a convincing beer than just revolving a spline. It is the small details that bring credibility to your renders, and this tutorial aims to give you a step by step guide to do just that. While specific to 3dstudio max, most of the techniques can be applied to most other 3d apps.
Page 29
Issue 06 July 2006
3ds max Modeling the Salt Shaker Step 1: First, we do the shapes of the saltshaker, with (splines), one for each thing.
Step 2: Select the Salt Shaker and convert into editable mesh. Select the plogygons from where you want to sprinkle the salt and negative extrude the polygons around -1 mm.
Because, they have different material. 1 - the cap of the Salt Shaker 2 - another for the crystal 3 - And finally for the salt. We can take as reference the one that this drawn. Trace the shapes but we should not close them so when we apply a modifier this is going to weld them in its open extremes.
Once they finished the silhouettes, we apply the modifier for each silhouette, with the same values of the window.
Page 30
Issue 06 July 2006
3ds max Step 3: Bevel the selected polygons with -1 mm.
Modeling the Waterdrops Step 1: Create a cube and delete the below polygons as shown in the image.
Step 2: Move th vertices to form the shape like the following image. Step 4: Now again extrude the polygons with -3 mm and delete the polygons.
Page 31
Issue 06 July 2006
3ds max Step 3: Uniform scale the top and bottom vertices and move the middle vertices to create the shape of waterdrop.
Step 5: Unhide the shape of the botttle. and select the segments where you want to place the waterdrops.
Step 6: Invert the selection and delete them. Now we get the area where we want to place our waterdrops. Step 4: Apply the meshmooth modifier to form the shape of waterdrop.
Page 32
Issue 06 July 2006
3ds max Step 7: We get the following shape with Interpolation steps settings to 2. But we need to increase the steps to place our waterdrops.
Step 9: Collapse the mesh and delete the bottle. Apply meshmoth on the waterdrops.
Step 8: Apply the Scatter Compund Object and play with settings to scatter the waterdrops all over the bottle.
Page 33
Issue 06 July 2006
3ds max Texturing Step 1: I used Vray material for the label and other parts of the bottle. Used diffuse (composite maps) with masks for each color. For reflections I use falloff with Fresnel white to bitmap image (scale greys) because label is reflective. And apply the UVW mapping.
Step 2:
Page 34
For bottle use the following settings.
Issue 06 July 2006
3ds max Step 3: For Lemon texture used an bitmap in the diffuse channel and bump map too with UVW mapping.
Lighting and Rendering Step 1: I used one Vray Light in the scene and enable the global illumination with HDRI. And for reflection too used HDRI.
Step 4: Used the foillowing settings for the Salt Shaker.
Page 35
Issue 06 July 2006
3ds max
Step 2: Used vray for the renderer too and following are the settings.
Hope you enjoy this tutorial and if you have any queries or suggestions then please mail me.
Page 36
Issue 06 July 2006
3D Objects, Textures, E-books, Free digital Art Magazines, you will always find a way to be inspired in the : IT’S ART STORE
Gizelle for Miki by ExpressImage
Buy, sell, affiliate, there are so many ways to earn money with our Store
http://www.itsartmag.com
gallery
Daemon Dmitriy Kuznetsov, Russia daemon3d@mail.ru Softimage XSI, Photoshop, ZBrush 2 Page 38
Issue 06 July 2006
gallery
Wolfsschanze Stanislav Klabík, Czech Republic S.Klabik@seznam.cz 3dsmax, Maxwell, Photoshop Page 39
Issue 06 July 2006
gallery
Pressure and Stress Akira Hanzo, Romania akira_hanzo@yahoo.com 3dsmax
Page 40
Issue 06 July 2006
gallery
Pricilla Eldy Tendero. Saudi Arabia tribal_tuesday30@yahoo.com 3dsmax 7, Vray, Photoshop
Car Shaikh Azam, India the_punisher_840@hotmail.com Photoshop Page 41
Issue 06 July 2006
gallery
Dragonflies Antje Darling, USA antje@antjesgraphics.com Poser5, Photoshop
The Dark Knight Patrick Beaulieu, Canada squeezestudio@hotmail.com 3dsmax 8, Mentalray, Photoshop Page 42
Issue 06 July 2006
gallery
Suraagh Rasaan (The Detective) Snehal S Gopal, India thecggod@gmail.com 3dsmax 8, Zbrush, Photoshop
Page 43
Issue 06 July 2006
submission
How to send in your images... We showcase the cream of reader images in E-Zine and on website - here’s how to get yours noticed
BY EMAIL
This is by far the quickest and easiest way to send your images to us. Send the images on ezine@cgarena.com and include the following details in the email. a) Your Name, Image Title, Software Used, Your Country b) JPEG format at 300 dpi (if possible) and any other detail you like to add.
Upload Images through Website Follow this link http://www.cgarena.com/submit.php
To Advertise: contact@cgarena.com