CGArena
VOLUME 4, ISSUE 1 FEB - MAR 09
Get Attention in the Computer Graphics Community
PHOTOSHOP
GALLERY
Making of Birth
Latest 3d inspiring art
AFTER EFFECTS Animating Arrows
INTERVIEW Jason Edwards
ARTICLE
A Call for Humanity
3DS MAX
Making of Countess
VOL
4
Get Attention in the Computer Graphics Community Issue Contents
05
Interview
Jason Edwards
16
Photoshop
Making of Birth
24
After Effects
Animating Arrows
30
3ds Max
Making of Countess
41
Article
A Call for Humanity
74
Gallery
Showcase of latest 3D art
Volume 4, Issue 1 Feb - Mar 2009
Magazine Edited: Ashish Rastogi, India Magazine Cover Image: Yousef Ikhreis, Jordan Magazine Design: Yousef Ikhreis, Jordan www.cgarena.com
Page 2
Issue 1 Feb - Mar 2009
Industry News
CGArena Terry Clotiaux Joins Frantic Films VFX, a Prime Focus Group
Hong Kong to produce world’s first 3D sex movie
Frantic Films VFX, a division of Prime Focus Group, has announced that industry veteran Terry Clotiaux has joined the company as Senior Vice President / COO, Visual Effects Worldwide for Prime Focus Group, & Senior Executive Producer for North America.
A Hong Kong filmmaker aims to lure audiences back to the cinema with what what he says is the world’s first 3D erotic movie, according to a newspaper report.
Said Michael Fink, CEO, Frantic Films VFX, “We are absolutely delighted that Terry is joining us. Terry has produced visual effects for some of the largest VFX films ever made, and understands the business like no one else I’ve met.”
“Just imagine that you’ll be watching it as if you were sitting beside the bed.”
Book
SDhiu told that about 25 to 30 percent of the movie would be love scenes, including many close-ups. He said the actresses would appear to be only a few centimentres (inches) from the viewers, who would have to wear special glasses to enjoy the 3D effects.
Photoshop For Right-Brainers: The Art of Photomanipulation, 3rd Edition - Learn how to tap into the creative part of your brain to create amazing digital art in Photoshop CS4. This exciting, full-color guide is designed especially for artists and photographers who want to harness the thrilling potential of the new release of Photoshop. You ll go beyond cookie-cutter techniques and discover unique ideas for creative expression so you can create melting landscapes, perform face lifts, and find other lesser-known effects. Timesaving techniques allow you to devote more time to the creative process. ISBN - 978-0-470-39701-5
Training
Clotiaux holds VFX producing credits on such films as “Alexander,” “The Matrix Reloaded,” “The Matrix Revolutions” & “Independence Day,” which took home the Academy Award for Outstanding VFX.
Stephen Shiu Jnr., chairman of One Dollar Production, said he would use special effects to make the love scenes in his 30 million-Hong Kong dollar (four million US) “3D Sex and Zen” as realistic as possible.
Unreal Kismet - An Introduction In this demonstration the instructor starts off by giving a detailed explanation of commonly used kismet nodes. Once the foundation is laid its on to creating several interactive scripted sequences. Everything from dramatically revealing a character, to creating a camera fly through for your portfolio is covered. If you have never used the kismet editor you should be able to follow along and understand. Even if you are experienced using the Unreal Editor 3, you should pick up useful information throughout the DVD and the cost of this DVD+Download is $59.95
www.cgarena.com
Page 3
TheBest3D.com presents: Speed Painting & Modeling From 2D to 3D (and back) in mere seconds with Project Dogwaffle, Archipelis Designer & Curvy 3D. Easily draw and sculpt in 3D with a 2D mind! Curvy 3D v1.5 on SALE! for a limited time, save 50% off the regular price, using the discount coupon. Visit www.thebest3d.com/curvy for details
Rapid 3D prototyping starts with your digital photo! Make 3D avatars for Second Life, 3D animation and games in just seconds! Visit www.thebest3d.com/archipelis for more.
Project Dogwaffle Professional is on Sale! Save 50% off PD 2, PD Artist, PD Pro 3 or PD Pro 4 through March 15! Discover the joys of painting and animating!
Digital Painting has never been so much fun. PD Particles, powered by Project Dogwaffle, is only $19 as a download. Includes Penny Paint, the free plugin for cartoonists with a fast hand.
Special Offer for CGArena Readers HOT! the Big 50-50 Sale! Save 50% off most Project Dogwaffle products for 50 days, through March 15. Get the discount coupon at www.thebest3d.com/dogwaffle/sales/special_promos.html Also on sale, Curvy 3D v1.5 at 50% discount. See details at www.thebest3d.com/curvy
Interview with
Issue 1 Feb - Mar 2009
CGArena
Jason Edwards Q. Hello Jason, could you tell us a bit about yourself and your background in CG and are you self taught or taken some training?
Due to heavy price tag on Maya, I have considered making the move to Modo or possibly...
Hi, my name is Jason Edwards, I live in the U.K. and I’m a 3d Artist. I’ve been involved with ‘Digital’ Art since the end 1994. Before then and as far as I can remember, I’ve always had an ability to draw or paint, but I never took it seriously despite my family and friends going on at me to go to art school. I just wasn’t convinced I had a talent. I just wanted to do my thing and travel. After I’d ‘worked out’ my travel bug, I went back to work and got a job printing people’s photographs. But to pass the time while the photos were developing I would sit and draw my friends and colleagues as caricatures. Then one day purely by chance, the Director of the company approached me after he had seen my sketches hanging on the department walls and began to talk to me about my work and would I be interested in working on an Apple Mac with a bit of software called Photoshop that had the ability to manipulate photographs. I didn’t know what the hell Photoshop was at that time but it sounded like it could be fun so I agreed. But before I could take it on fully they wanted me to do an art test. I was given the task of creating a greeting card design from scratch which would be used in conjunction with peoples holiday snaps. So that night I sat down and did exactly as they’d asked. The following day I presented the work and they gave me the job on the spot, with a pay rise as well. The following months were then spent being trained to use Photoshop 3, an Agfa film recorder and scanner. Once I’d finished the training course my job as a photoshop operator began, and I ended up doing a whole gamut of work, from photo restoration to creating advertising posters along with more greeting card designs. After about 3 or 4 years with Photoshop I got into 3d and like Photoshop it was purely by chance. I’d bought my first copy of Computer Arts magazine and I’d seen images of the original Wipeout Game for the Playstation in it - I became hooked. A few copies later I got hold of Strata vision 3d on one of their cds and learnt that and the following summer I enrolled on an evening course for 3ds Max 2. After passing the course I landed my first 3d role at a company called GraphicFX (later to become Striker3d) using Lightwave 5.6 (a bit of shell shock coming from Max) to create a well known 3d comic strip here in the UK called Striker that features in our biggest tabloid newspaper, The Sun. I gradually moved up in the ranks in the 4 years I was there to become a ‘hands on’ Production Manager to oversee Britains first 3d produced comic book. The aforementioned jobs allowed me to hone my skills as a digital artist as well as get me up to speed with very tight deadlines; it was all learning on the job. Moving on from Striker, I went on to help create another 3d cartoon strip called The Premier, again for the Sun Newspaper. I was pretty much the senior guy there and was responsible for a lot of Storyboards, character models and rigs along with prop and environment modeling with 3 other very talented artists.
www.cgarena.com
Page 5
Interview with
Issue 1 Feb - Mar 2009
CGArena
Jason Edwards Q. So, you are a freelance character modeler, please tell us what qualities, skills character modelers must have and why you have chosen freelancing in place of fixed job? I think being a character modeler is one of the most challenging areas of 3d. I’m very passionate about characters, be them realistic or cartoon. Characters are all about evoking emotion, and enabling the audience or viewer to relate to something as opposed to an environment which is about mood or ambience. The most important aspects to know (in my opinion) straight off the bat are anatomy, form and observation. Without a grasp of these basics you are going to be in trouble, and of course there are the skills to put all these things together for an image or painting. Freelancing? Hmm? Yeah it has its perks but overall I actually hate it, it’s such a lottery trying to find the next job to pay the bills, for me it’s too much pressure just to have a life. Some people love the freelance circuit and hats off to them for doing it, but it’s not for me - I’m only visiting. (Laughs) I think I’m just bitter as I was one of the unlucky people to have been layed off full time work in the last year due to the so called cost cutting. Hopefully it will end soon and we can all get back to a bit of normality. Q. What is the reason of choosing Maya in your arsenal, in place of other 3d programs? Which thing you like to change or improved in future version of Maya? Well my choosing of Maya came from a) using Lightwave 5.6 and b) watching the dvd extras of the The Mummy movie when it came out in 1999. A colleague and I were watching it at work one lunchtime and we were staggered at the stuff ILM were churning out on that and also the Podrace for Episode 1 which I’m led to believe was made using Maya V1.5 – anyway we pretty much convinced ourselves that was the way to go with 3d, so we managed to get a demo of Maya 2.5 with Alias Wavefront in London for a couple of hours and we were sold, then it was a case of convincing the boss to get it, which we did! I’ve now used every version of Maya since then except Version 7. So I’m kind of married to it in that respect and am very biased toward it, I don’t even have to think when I use it anymore, I just do it. I’d would like to see just one version of Maya on the market with all the trimmings made available at a reasonable cost, not www.cgarena.com
Page 6
Interview with
Issue 1 Feb - Mar 2009
CGArena
Jason Edwards the heavy tag it has still right now and I must admit because of this I have recently considered making the move to Modo and possibly Blender. Q. Please tell us what is Outlaws tales? Outlaws Tales is an online 3d graphic novel told in the style of a Science Fiction Western. And before I say anymore, it’s not your typical attempt at a 3d comic/graphic novel, the characters aren’t from one of these procedural character creation software’s either, it’s all Maya, Zbrush and Photoshop, every element is custom built. I like to think it sits somewhere between gaming graphics and VFX. It’s also my personal project/ portfolio, inspired by Spaghetti Westerns and Sci Fi movies. Intially it was born out of frustration from working at Striker3d on their 3d cartoon strip. As much as I enjoyed the job there I always felt restrained from not being able to express myself as an artist and telling my stories. So after spending the good part of 3 years developing the story and characters, I’ve finally managed to almost complete the first chapter fully in 3d, which is online now at www.outlaws-tales.com . The project itself is massive and will probably take me another few years to finish it. I’m hoping to release a comic book of the first part this year and get it out there…I’d love to see it as a movie or even an episodic tv series like along the lines of Firefly or Heroes, that type of thing.
Q. Please tell us about your work on the HeadCases and how easy it was to create caricatures, where anatomy proportions are not practically possible? Headcases was my first big freelance gig over a year ago and was probably the most fun I’ve ever had on any single project so far. All the cg work for Headcases was created by Red Vision, a VFX house, with studios in Manchester and the other in London sharing the work load. I was based in the London Studio, and I was the only character modeler there. I was initially brought on board to help the character designer www.cgarena.com
Page 7
Madonna
Nicolas Sarkozy
Bill Clinton
Bono
Interview with
Issue 1 Feb - Mar 2009
CGArena
Jason Edwards ‘fix’ the characters that were sent from the Manchester studio to London for approval. Anything that didn’t resemble the concept art was given to me for correcting. There were a few messy meshes to deal with, I’m very particular with my meshes, and I must admit to sounding off after receiving a model with a 9 sided poly on it, I was not impressed. After about a week I think there was a realization that I was actually pretty good and from then on I was given full characters to build. I was building a full character in around 3 days complete with uv’s and textures, plus correcting the stuff from Manchester. I was lucky though as I had the character designer in the same studio, so if I had a problem with his sketches I could have him explain it or adjust it straight away without the back and forth. I managed to build up my own library of body parts in order to speed the process up as well and this was basically due to the fact that the show was of a certain style so there wasn’t a real need to keep making limbs over and over or clothing unless it was absolutely necessary. Overall creating the caricatures for Headcases didn’t really pose a great deal of problems for me personally. Though I do remember making the model of Amy Winehouse and getting it signed off only having to revisit it a day after because she had gone and changed her hairstyle from a black beehive style to a cropped blonde with a headscarf. But that’s a celebrity for you! I think the more extreme the caricatures were in their looks the easier they were to do because the characteristics are so clear you can just see what you have to do and go for it, the Amy Winehouse model is a prime example of this as opposed to a model I remade of Katie Holmes(a couple of times), she’s a pretty lady and has a subtle looking face so it’s harder to exaggerate the features. If anything, she has nice big eyes!
www.cgarena.com
Condo Rice
Amy Winehouse Page 9
Interview with
Issue 1 Feb - Mar 2009
CGArena
Jason Edwards Q. Do you do any preliminary drawings before you start modeling the character and how much drawing skills is necessary for the modeler? On Headcases we had a character designer so I didn’t have to worry about it but aside from that project everything else I’ve built, personal or otherwise has had at least one drawing done for it. I’m one of those people who likes a visual guide to work from, I think most modelers are anyway, it can help iron out problems early on in even before the modeling process too. I speak to 3d modelers here and there and there’s always one that says they don’t do any drawings before they model, some people can’t draw, but it I’d say it doesn’t hurt to doodle an idea or prepare by looking up some form of reference. You wouldn’t build a house without a plan would you? Concepts, designs and reference are absolutely critical, not just to the modeler but to the 3d artist as a whole. Q. Can you tell us in brief about the making of the Gordon Ramsay image? I was asked to do the Gordon Ramsay image by the kind people over at www.simplymaya.com as a downloadable character modeling tutorial. I’d done some work for them in the past and because of my experience as a character modeler on Headcases they asked me back and to come up with a character design and model it – my daughter actually came up with the idea of Gordon Ramsay, the guy is such a character, as soon as she said it, it was like ‘Yes!’ a no brainer really. The images here show the different stages of modeling. Most of it was built from polycubes in Maya, with a few nurbs here and there. The Uvs were unwrapped in maya and then finalised using the AutoratioUV plugin to keep everything the same size in the UV space and was then textured in Photoshop, because it was a cartoon character the textures were kept very simple. For the render, I didn’t want to uprez the model to keep it smooth, so instead I used an approximation node attached to the base mesh, it’s basically a Renderman technique but for Mental Ray in Maya. The skin shader is the MISSS Fast Skin shader the rest are blinns and phongE. The whole tutorial took about a week to produce as I’d do a couple of chapters a day. It was actually a pretty quick turnaround as well because there are around 23 chapters that cover pretty much the entire process from start to finish.
www.cgarena.com
Page 10
Interview with
Issue 1 Feb - Mar 2009
CGArena
Jason Edwards Q. You worked for discovery channel on a medical documentary, are you from the science background and if not then how much easy for you to create such things and from where you get the references? I actually worked for Red Vision again who were commissioned by Discovery to do the VFX for the show. I’ve never been one for sciences, being a character modeler helped, but saying that, I like to think I know my anatomy but there were areas where I would draw a blank even my own Anatomy for Artists book failed me, and I would have to either trawl through medical books available in the studio or spend a few hours on google picking up reference images. It was a very intense project to work on, I was really under the gun being pretty much the only modeler on the show while the other guys were doing all the animation, look dev, rendering and comps. I was churning out body parts by the bucket load. Apart from using Maya, Zbrush was my other tool of choice, it really came to the fore on quite a few occasions. I think the entire crew became qualified doctors by the end of the show. Q. Please tell us what mistakes modelers often do and would you like to give any 5 tips to the future wannabe character modelers? I think the biggest mistakes basically come from inexperience, modeling is a natural progression really, the more you do, the better you become(hopefully) like anything else. My top 5 tips for character modeler wannabes would be: 1. Learn anatomy and proportions. 2.
Use reference
3. Draw! Sounds crazy but drawing or sketching is probably one of the biggest underlying fundamentals of 3d. Plus it will get you away from the monitor. 4. Keep your meshes clean and of a good resolution. I see alot of models with too many polygons even in the early stages. Always start low rez and push the forms as far as you can before adding more polys. The mesh will be far more manageable for UV map creation as well. 5. Lastly, don’t hide away, join the forums and get some critics, but be prepared for it, your feedback won’t be all positive. But by taking on the more relevant and constructive comments and applying them to your work you will improve a lot faster.
www.cgarena.com
Page 13
Issue 1 Feb - Mar 2009
Interview with
CGArena
Jason Edwards Q. Are you working on any projects currently? If so, what are they? I’m not working on any features or tv stuff at the moment so I’m currently editing my new showreel which you can download from my website. So hopefully someone will like it and offer me a job. Outlaws Tales currently has 3 pages that need to be comped plus a whole plethora of storyboards, models and textures to do which will end up in my portfolio as well, plus I’m helping out over at www.simplymaya.com with a ton of brand new learning content. Q. Anything you like to add? It is your chance now to state your opinion about anything. If you possess ability as an artist, don’t waste it. I regret not listening when it mattered most. Nurture your talent and above all believe in yourself – be extraordinary.
Thanks a lot Jason for taking out sometime for us from your busy schedule. Many thanks CGArena for giving me this opportunity, all the very best to you. Web: www.outlaws3d.com
www.cgarena.com
Email: jayedwards3d@btinternet.com
Page 14
Tutorial
Issue 1 Feb - Mar 2009
by Vivien Hulbert, Canada CGArena Software:
Making of Birth
Photoshop
2D
One of my first priorities when I begin to imagine a new painting is portraying beauty and balance. My palettes will often shift, sometimes quite dramatically, things will change about, but I will always strive to achieve harmony in the flow of form. For “Birth”, I choose to depict the goddess of beauty, Venus. I wanted to paint a beautiful “real” woman -“real” meaning not too skinny, and not with gigantic silicone breasts – I have always admired and longed to have a really feminine, curvy body, but being pretty skinny myself, I just have to settle for painting them!:). So I hunted around for reference for quite sometime before finally deciding to use a shot by the talented photographer, Marcus J. Ranum. He does a lot of great stock and posts it on deviant art for all to use, completely free! His work is a great contribution to the art community and very inspiring. Please view his website here: www.ranum.com
In the first phase of the image, I loosely sketched the figure out to try to get basic proportions right away. I always use a flat color in the background, and usually change the color pretty often. I also roughly put in some blocks of color just to show where the light was hitting the body, and where other parts of the body were more shaded. I made a little starter palette and picked colors from there.
I was working at around 2800 x 5400 – not huge, but enough I think to get the detail I needed. I cropped and resized a few times so the size I gave is just an indication.
www.cgarena.com
Page 17
Tutorial
Issue 1 Feb - Mar 2009
by Vivien Hulbert, Canada CGArena
Making of Birth Once the torso seemed acceptable, I went on to shading, just to test the waters a bit.
www.cgarena.com
Page 18
Issue 1 Feb - Mar 2009
Tutorial
by Vivien Hulbert, Canada CGArena
Making of Birth Once I got a bit of the face done, I then started playing with the idea of having a very natural kind of background, with light colors, like on a beach at sunrise. I also started thinking about how her hair might look (even though in the image here it still looks like nothing more than a scribble). My eyes were getting tired of seeing the image always at the same angle so I flipped it. I decided that I would have given my Venus beautiful long hair, because I find long hair to be so wonderful and feminine. I sketched it in quickly so I would remember to work on it. Then I really went in and worked on the feet and started refining and finalizing the skin.
There was a lot of tweaking to be done yet: the thighs were too long, feet too small, arms and hands still had to be completely painted. I accentuated the curve in her hips slightly, and decided to make Venus a brunette and tested some hair brushes. Then I put in the first base of the skirt, but don’t ask me why I used red...!!! ???
www.cgarena.com
Page 19
Tutorial
Issue 1 Feb - Mar 2009
by Vivien Hulbert, Canada CGArena
Making of Birth I put the piece on hold for several months but then came back to it. I was tired of it and changed the colors and was thinking even of changing the whole theme. I abandoned the piece again for many more months, but the thought of the file sitting in my computer unfinished ate away at me until I decided to finally finish it. I had put it on hold for a number of reasons, one of them being that I wasn’t sure on how to do the lower portion of the background and I got frustrated with it. It had changed from her standing in water, to her with her feet in the sand, to her standing on ice! I was pretty sure about the long vertical format that I wanted, with the clouds behind the figure, but I honestly didn’t know where I wanted her to be. I decided I definitely wanted water nearby since in theory she was supposed to be emerging from the waters. I also really wanted to stay away from the classical “Venus in shell” theme so I did some research and looked at various birth of Venus paintings. I found lots of inspiration in Bouguereau (like always!) for the colors, and finally decided that I would quite simply have her standing amidst natural elements, like watery grass and flowers. After that it was a breeze, I was past my “painter’s block” and it was just a matter of painting it in what was missing and adjusting the colors. I tweaked the body a little more too; elongated the legs a tad, slimmed down the raised arm because it looked off, fixed the neck... I opted for a warm yellow-ish tone in the end, and I tried to give her body a surreal kind of “self-emanating” glow. When I was finished virtually all the painting, I flattened it and applied a warm yellow filter to the whole image, it can really help to tie the piece together at the end if you do this.
www.cgarena.com
Page 21
Tutorial
Issue 1 Feb - Mar 2009
by Vivien Hulbert, Canada CGArena
Making of Birth Here is the final image and in right is the original reference, for those who would like to view it:
Portfolio: vivien82.cgsociety.org Email: vivienhulbert@yahoo.it
www.cgarena.com
Page 22
Tutorial
Issue 1 Feb - Mar 2009
by Suzane Smith, Canada CGArena Software:
Animating Arrows
After Effects
3D
In this tutorial I will show you how you can bend, cross the arrows like you have seen in some commercials. This is very quick and easy tutorial but you can achieve advanced effects from this technique. 1Create New Composition and create a new solid layer (Ctrl+Y). Make it the same size as the Comp and select a green color or color of your choice for the layer. Name this layer as Background. 2Create another solid layer and keep the size 25% bigger than the previous layer. The color of this solid layer doesn’t matter.Name this layer as Arrow. 3Open the Arrow layer in the Layer Window. Using the Pen Tool, create a path you want the arrow to follow.
www.cgarena.com
Page 24
Tutorial
Issue 1 Feb - Mar 2009
by Suzane Smith, Canada CGArena
Animating Arrows For smooth curve in the middle or anywhere convert the points into Bezier and control the flow with the help of the handles. 4Create another Solid (you are thinking, how many solids we have to create but that’s it not more) This will be the tip of our arrow so make it 100 x 100 pixels and select black as the color. 5We need to use the Pen Tool once again to create the triangle shape for the arrow tip. Place the first control point in the upper left hand corner of the solid, the second at the middle right, and the third control point at the lower left corner. Close the mask to create the final shape. 6In order for the tip to rotate correctly, the Anchor Point for the layer needs to be moved to the base of the triangle. Use the Pan Behind Tool to do this. 7Apply the Effect > Generate > Stroke Effect to the Arrow Tip layer. Set the color of the stroke to the same green you selected for the background layer of your composition. Change the Brush Size to 10 and the Hardness to 100%. Finally change the Start amount to 30% and you will see only the sides and tip of the pointer are stroked. 8Select the Arrow Layer, press the M key to bring up the Mask Shape for the layer. Select Mask 1 in the Timeline and copy it (Ctrl + C)
9Select the Arrow Tip layer and press the P key to bring up the Position property for the layer. Select the Position property in the Timeline and paste the Mask Shape into the Position Property. You should see new keyframes in the layer. By moving the keyrames you can adjust the speed and length. If you scrub through the Timeline, you will see the Arrow Tip does follow the path, but it doesn?t turn. This can be fixed, by selecting the Arrow Tip layer in the Timeline and then from the Layer menu, select Transform>Auto Orient. www.cgarena.com
Page 25
Tutorial
Issue 1 Feb - Mar 2009
by Suzane Smith, Canada CGArena
Text Super Zoom Step 10Select the Arrow Layer and apply the Stroke effect to it. Set the color to Black, the Size to 35 and the Hardness to 100%. Move the Timeline Indicator to the beginning of the Timeline and create an initial keyframe for the Stroke End amount. Set the amount to 2%. Move to 4:00 in the Timeline and change the Stroke End amount to 100%.
Step 11Now we need green stroke around the shaft to match the stroke of the Arrow Tip, currently background is green and stroke too so you have not noticed but when the arrows overlap then you will notice this thing. With the Stroke effect selected in the Effect Controls Panels, duplicate the effect by pressing Ctrl+D. Change the Stroke 2 Color to match the color of the background layer. Change the Brush size to 50 pixels. Also change the Paint Style to On Transparent. Finally move the stroke2 above the previous stroke by dragging.
www.cgarena.com
Page 26
Tutorial
Issue 1 Feb - Mar 2009
by Suzane Smith, Canada CGArena
Animating Arrows Step 12Select the Arrow Layer and the Arrow Tip layer in the Timeline and Pre-Compose the two by Layer > Pre-Compose. That’s it, now you can make the duplicates of this precomposed layer, enable 3d layers and move the position to get the desired cool effect. Thanks for reading the tutorial, hope you like this. Don’t hesitate in sending me any queries. Email: suz.smith@hotmail.com
www.cgarena.com
Page 27
Tutorial
Issue 1 Feb - Mar 2009
by Plamen Iliev, Bulgaria CGArena Software:
Making of Countess
3ds max, ZBrush, Photoshop
3D
Hello, my name is Plamen Iliev and in this article I’ll try to explain the steps I took in creating my latest image called “Countess”. Coming up with a concept for a character after reading a story or novel is something I find very interesting and challenging. The reason being I have to really strain my brain and draw an image of a character from verbal descriptions and conversations, and I find that enjoyable. Being a fan of classic literature, abundant in aristocratic characters, I decided to create this model which I called “Countess”. This is a character of many contrasts. She’s supposed to walk with an air of nobility and importance about her. Her clothing has to convey the feeling of both frivolity (the loose, white shirt on top) and constraint (the tight, strapped skirt along with a laced corset). There are colour contrasts - black and white, textures and fabrics - natural cotton against synthetic latex. I originally intended to make her hold a cigarette which would’ve counterpoised a healthy expression, but I made a last minute change and gave her a riding crop which I thought was more appealing and suitable for a blue-blooded woman. Anyway, enough of the jabbering, let’s move on. Before I start modeling I usually make some really loose sketches, mostly gesture drawings and I pile up a selection of reference images to help me along the way, such as piece of clothing, faces, poses, light setups and so on. The head and body were separate meshes which I first modeled in 3ds Max and later sculpted in ZBrush. I created a simpler and lighter mesh from them (some call it remeshing, others retopologizing) which I imported back into Max. I used images of Karima Adebibe, known as one of the promo-models of Lara Croft, although I wasn’t after a particular likeness to the actual model, but I needed a sort of guide.
www.cgarena.com
Page 31
Tutorial
Issue 1 Feb - Mar 2009
by Plamen Iliev, Bulgaria CGArena
Making of Countess
www.cgarena.com
Page 32
Tutorial
Issue 1 Feb - Mar 2009
by Plamen Iliev, Bulgaria CGArena
Making of Countess I then moved on to the shoes, following a bottom-top modeling approach. The shoes are a sort of lacedstrapped short boots, which I created in 3ds Max. What’s really important about the shoes are the different pieces they consist of and the seams where they meet.
The next item was her skirt. This was inspired by the so-called pencil skirt, popular at the beginning of the 20th century and famous for impeding its wearer’s walk. I decided to extend on that and even add some straps. Seams were important here as well. The corset is an essential part of the character’s attire, a way to demonstrate her aristocratic background and affection for beauty.
The shirt was the most challenging piece of clothing. At first I was going to actually simulate it but decided against it and modeled a base mesh which I later rumpled in ZBrush.
www.cgarena.com
Page 33
Tutorial
Issue 1 Feb - Mar 2009
by Plamen Iliev, Bulgaria CGArena
Making of Countess
www.cgarena.com
Page 34
Tutorial
Issue 1 Feb - Mar 2009
by Plamen Iliev, Bulgaria CGArena
Making of Countess The hat was a simple model so the images speak for themselves. I also put her right hand in an opera glove to add a bit of asymmetry. I extracted the mesh from the body and retopologized it in ZBrush.
The model was rigged with biped. I prefer to rig as much of the objects as possible so that I could easily make changes to the pose if need be. After the rig was done I started experimenting with different poses. Once I liked the pose I began placing the lights. The lighting set up is as important as the modeling and texturing. I usually place a key light, a fill light and a key or kicker light, in other words a classic three point light rig. This time I used photometric lights and some of the sources use real-life profiles for the intensity, which added some irregularity to the light throw. Using color lights sort of glamorized the scene.
www.cgarena.com
Page 35
Tutorial
Issue 1 Feb - Mar 2009
by Plamen Iliev, Bulgaria CGArena
Making of Countess Unwrapping was pretty straightforward, less distortion and optimal texture space coverage are easily achieved with the Unwrap UVW modifier and the Pelt function. It took a lot of time as there were many objects I intended to use displacement maps on them. Once the unwrapping was done I had to make sure the Max to ZBrush pipeline worked correctly. That included no overlapping UV faces, proper UV region spacing for multi-meshes and no UV faces going overboard.
I added wrinkles to the shoes, skirt, corset and the shirt, paying attention to the way the character was posed and the type of the fabrics. The displacements were 4K or 8K maps and used 32-bits per channel. An 8K image with 32 bits per channel is 768MB in size so be prepared for some heavy loading and memory usage.
www.cgarena.com
Page 36
Tutorial
Issue 1 Feb - Mar 2009
by Plamen Iliev, Bulgaria CGArena
Making of Countess I used extensively the mr arch and design shader. It’s a material that could successfully simulate all kinds of surfaces. I used it for the latex/leather objects and the shirt. The shirt had some transparency and glow added. I also used some generic bump and specular mapping. I tried to layer many shaders, one on top of the other, and mix them to get a complex surface. Painting the maps for the skin was reduced down to just her face, left arm and legs. I used 4K maps and BodyPaint and Photoshop to paint them. I used varying colors and noisy brushes.
The eye consisted of two spheres, one for the white and the iris and another for the cornea that gave reflectivity and refractivity. It’s a good idea to use sss materials for the white, but this time I used a standard material with some self-illumination. www.cgarena.com
Page 37
Tutorial
Issue 1 Feb - Mar 2009
by Plamen Iliev, Bulgaria CGArena
Making of Countess The eyebrows are part of the facial texture and the eyelashes are created with hair and fur. Her hair wasn’t meant to look realistic but stylized instead so I made some tentacle-like meshes and texturized them with varying shades of blue and transparency at the edges; I also used hair and fur for individual hairs. After some intense light tweaking I was happy with the scene and rendered everything in a single pass along with an additional z-depth pass. I used Photoshop color correction and different colourizing layers and effects. Every once in a while I use the dodge and burn tools to accentuate or dull some parts of the image. I hope you’ve found the article useful. Feel free to contact me, rock on and see you around!
Web: www.piliev.com
www.cgarena.com
Email: cozmoz@abv.bg
Page 38
Futuristic Article BY
Yousef Ikhreis / Writer, Artist, Director
www.yousefart.com
OMER MY GRANDSON 2555 AD
“GAZA WILL STAY DISINFECTED FROM THE ROBOTS” Dedication To The Innocent Blood… To Gaza, The Courage… To all our families, brothers and children in Palestine May Your Souls Rest In Peace… - Yousef Ikhreis http://www.elfarra.org/gallery/gaza.htm
All images and concepts © Yousef Ikhreis Unauthorized reproduction is strictly forbidden. www.yousefart.com
All images and concepts © Yousef Ikhreis Unauthorized reproduction is strictly forbidden. www.yousefart.com
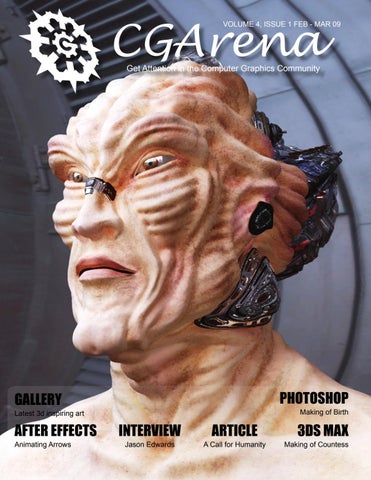
INTRODUCTION Yes, it's true; this is my grandson Omar in 2555 AD, not an alien. How I wished it is not my grandson. I don't want him to look like this, I wish I could have given my grandchildren a better future than this gloomy future doomed with technology concepts, lacking humanity and spirituality; I wish he will not curse me for what I've brought on him and his ancestors . I do not know if it is me or our human nature that makes us obsessed with chasing what is new. Our greedy instincts could be the reason behind the extinction of humanity. My rising from death was the initiation of my dream of a present, dark with the unknown intentions of the future. I can't stop myself ponder of the future and what it will hinder for us. I cannot stop myself from fearing our future and how it will be with its new dead concepts. Following are simple flashes of my digital vision of the upcoming future, images and concepts that are just rational predictions of what could happen.
All images and concepts © Yousef Ikhreis Unauthorized reproduction is strictly forbidden. www.yousefart.com
NEW AGES: New Ages: In the coming five centuries, humanity will witness big quick changes in a very short time, changes that are reflected in several ages. ﺍThe Genetic Age/1998 – 2145 AD: In this age, huge steps and developments in genetic science will take place and many human characteristics will be changed and manipulated. The Organic Age/ 2145 – 2270 AD: It'll be a result of the previous age. Genes will be changed according to a human's job and role in life; for example, he would be without feet, or with one hand, or have five eyes, or nine fingers in each hand, etc, and an electronic system will be developed to compensate him emotionally and psychologically. The Colors Age/2270 – 2389 AD: This age is again a result of the previous age, after distorting the human look; in this age you can change the color of your skin or eyes or voice as you like. The Eyelid Age/2389 – 2555 AD: This will be the last episode of humanity on earth.
All images and concepts © Yousef Ikhreis Unauthorized reproduction is strictly forbidden. www.yousefart.com
LIFE IN THESE AGES: WARS: In future wars, there'll be no need for weapons of mass destruction or heavy artillery, because they'll be useless; hacking internal electronic systems and networks between countries will be the future wars. Destroying or dominating the infrastructures of the enemy; military, financial, telecommunication, education, planning systems. .etc, consequently paralyzing the enemy. It already started; the late Russian war with Georgia is an excellent example. Imagine the budget countries are allocating to protect them from this nightmare. Specialized military units are created and trained. Wars will not last more than one hour. Weapons of mass destruction will be sent to other planets to be destroyed. The concept of traditional war will disappear in the first age (Genetic Age). Some might think that this is human kind dream, not to shed blood, but this is just the beginning of the end.
All images and concepts © Yousef Ikhreis Unauthorized reproduction is strictly forbidden. www.yousefart.com
RELIGION: In 2314, scientists will invent a new religion and impose it on all humans, “Worship of Numbers”. They will consider the science of numbers as the optimal truth that brings development and modernity to humans; as a result, religious men will be persecuted everywhere and tortured and will be subject to brain washing.
Animism
Hindu
Buddhist
Sikh
Tao
Confucio
Shinto
judaism Christian
Islam
NEW RELIGION SYMBOL
All images and concepts © Yousef Ikhreis Unauthorized reproduction is strictly forbidden. www.yousefart.com
OPEN BRAIN: Scientists believe that it’ll be better to keep the brain open to perform several enhancements and updates to the software that will be installed in it.
“The human brain needs expansion” Scientists Society 2336.
All images and concepts © Yousef Ikhreis Unauthorized reproduction is strictly forbidden. www.yousefart.com
All images and concepts © Yousef Ikhreis Unauthorized reproduction is strictly forbidden. www.yousefart.com
All images and concepts © Yousef Ikhreis Unauthorized reproduction is strictly forbidden. www.yousefart.com
All images and concepts © Yousef Ikhreis Unauthorized reproduction is strictly forbidden. www.yousefart.com
All images and concepts © Yousef Ikhreis Unauthorized reproduction is strictly forbidden. www.yousefart.com
CHANGING THE VEINS DIRECTIONS: Scientists will redirect all blood veins and arteries, believing that this will be better for the human body. The need for this operation started in the Organic age.
NUTRITION: Food as we know will be completely different in the future; its nature will change to become almost liquid so as not to waste time in eating. Eating will take place only while sleeping. 300 ml per day will be enough. As a result, excretion will change, pores will close and sweating will stop, intestines will shrink, and eventually, human will have no distinctive smell.
All images and concepts © Yousef Ikhreis Unauthorized reproduction is strictly forbidden. www.yousefart.com
The Contact Image is projected on the lens
COMMUNICATIONS: The open brain will have lots of electronic devices and key parts that will dominate its functions directly (in the automated electronic part). Some parts will be responsible for communications, it will be enough to request the code from the brain and immediately start writing the message, different types of attachments can be sent as well.
All images and concepts © Yousef Ikhreis Unauthorized reproduction is strictly forbidden. www.yousefart.com
NEW VISUAL MECHANISM: A new revolutionary visual mechanism will be used; it will depend on lenses connected to controlling centers in the back of the brain, it will enable humans to see clearly at night and see objects from tens and hundreds of miles; this is going to be achieved thru connectors planted in the back of the brain and directly connected to satellites, enabling the human to see clearly and accurately by changing the setting of the lens. These lenses will enable human to see hidden objects by benefiting from the existing objects in nature using them as reflectors.
All images and concepts © Yousef Ikhreis Unauthorized reproduction is strictly forbidden. www.yousefart.com
NEW MECHANISM FOR WRITING (EYELID WRITING): In 2413, a unique mechanism for writing will be developed, it will not need hands or fingers, or voice; it will be called the Eyelid Writing, and its age is named after it. This mechanism depends on placing a thin rubber layer under the eyelid; it contains small crystal circles arranged in a certain way, a glass layer is placed over the eye on the main lens. When a person wants to write, the crystal circles will come out of the rubber layer and start moving and printing the letters on the external lens, to be directly read, translated, and transferred to the recipients by the brain. This mechanism is known for its speed, ease of use, and can be used to write unconsciously; this way, any person can write and describe his dream while sleeping. This mechanism is also used in interrogations and is called (dancing with the dreams). This mechanism will evolve to writing by sending quick laser rays to the lens.
All images and concepts © Yousef Ikhreis Unauthorized reproduction is strictly forbidden. www.yousefart.com
MUSIC: Music will play a major role in the future and will be considered the second world language, it’ll help unifying the various languages by innovating a program that analyzes languages depending on that language’s music to find the meanings according to the mechanism of reactions, breathing, and heart beat. Beethoven symphonies will be considered as the most intelligent work humanity has come up with, and it will be recommended to the retarded and weak students to help them improve their logic. The 9th symphony will by the world’s national anthem.
All images and concepts © Yousef Ikhreis Unauthorized reproduction is strictly forbidden. www.yousefart.com
COSMETOLOGY: Human has exaggerated in his interest in cosmetology in an attempt to compensate his deformation and imperfections and to find a unique independent personality. NEW LOOK AND COLORS FOR THE FACE AND BODY In an advertisement that appears in Mers (formerly known as Marseilles) in 2409, “You can select and design your face, or select the color of your skin and in only 99 minutes. All you have to do is choose”. You’ll need a permit from the union and we’ll help you get it in 3 minutes. By using one of the new modern cosmetics technologies based on using various manufactured solid organic cartilages, genetically modified skins, and new industrial rays, you can design your face, eyes, voice and body the way you want.
All images and concepts © Yousef Ikhreis Unauthorized reproduction is strictly forbidden. www.yousefart.com
SELECT YOUR FAVORITE SKIN COLOR. OR WE CAN DESIGN IT FOR YOU. All images and concepts © Yousef Ikhreis Unauthorized reproduction is strictly forbidden. www.yousefart.com
DESIGN YOUR FACE All images and concepts © Yousef Ikhreis Unauthorized reproduction is strictly forbidden. www.yousefart.com
EARS: It became a custom to get rid of the ear pavilion by genetic engineering for beauty and functional reasons to benefit from this part by placing electronic devices to protect the human from noise and echo. HAIR: In this period, hair is perceived as one of the human's primitive ways of excrement, like the nails, and is seen very ugly and similar to animals. So the genes are modified so no hair will ever grow. TEETH: With time, teeth will fall gradually because the nature of food has changed to become liquid, so teeth are no longer needed. BREATHING: Humans will depend on electronic bronchia to help them breath and filter air from poisonous gases that are a result of the various gases in the atmosphere; these bronchia will help human's breath while asleep.
All images and concepts © Yousef Ikhreis Unauthorized reproduction is strictly forbidden. www.yousefart.com
GAMES AND ENTERTAINMENT: Games are powerful in subjugating the human’s desires and easily involving them in the main subject; in addition, games give the player several imaginary options without losing. None of the current games will be available in the future; games will projected in one of the magnifying lenses over the eye. To start a game, your brain will receive its rules and settings in one closing and opening movement of the eyelids. Group games will become popular (you can play with another player in Philippines and a third sleeping player “Cheater”). Sleeping while playing is prohibited and is considered cheating, because the sleeping player always wins due to using a large part of his subconscious and a part of his self controlling to the artificial brain. In the future, games will be considered as the first means of communication and the most effective ones; some games will be compulsory depending on the age group, and some games will be used in treating some illnesses such as phobia, schizophrenia, reincarnation, hysteria, etc.
All images and concepts © Yousef Ikhreis Unauthorized reproduction is strictly forbidden. www.yousefart.com
SPORTS: Sports will be limited to various contractions planned by the brain and sent to the muscles and nerves to perform, accompanied by music saved in the brain and images printed on an inner eye in the brain that represent preprogrammed interactive rhythms and natural scenes that can be selected by a person to help him feel the reality and enjoy it. The brain provokes the production of small amounts of certain hormones to increase the joy of the exercise. These exercises are performed while sleeping for concentration and to save time.
SLEEP: The bed will be a ball filled with organic liquids in which humans sleep; he'll breathe through the branchia. This method is considered one of the best sleeping methods, because it gives an equal exposure to all the body cells to the modified simulated gravity; thus, prolonging its life. Sleep duration will be 12 hours divided in 3 equal doses.
All images and concepts © Yousef Ikhreis Unauthorized reproduction is strictly forbidden. www.yousefart.com
EDUCATION: The ideal education stage will start in the 6th month of pregnancy. Babies will be taught through autosuggestions (sound, music, pictures, lighting, pressure, etc). There’ll be no schools or universities and humans will learn only while sleeping by receiving the information coming to their brains. Humans will be able to work efficiently at the age of five. Games will be an essential element in learning, and will be the official way to test human abilities.
TOURISM: Tourism will disappear from earth, all you want to see and feel is available in the form of games and 3D simulated programs that have sound, picture, scent, music, and any other stimuli. Google is already working on such project.
All images and concepts © Yousef Ikhreis Unauthorized reproduction is strictly forbidden. www.yousefart.com
SEX: There will be no traditional sex. It will be possible for two persons to have sex in totally different places using special electronic programs.
Lovers will communicate with each other, see the same romantic imaged pictures and hear the same sounds through one of the eye lenses and send an order to the brain to release the required sexual hormones. Music, temperature, humidity, scent, lighting, etc, will create the desired sexual peak. In case two lovers agree to have kids, one of them sends the genetic map to the other to make the baby; this map is later sent electronically to the babies’ factory.
All images and concepts © Yousef Ikhreis Unauthorized reproduction is strictly forbidden. www.yousefart.com
DISEASES: Nearly all the current diseases will disappear; new forms will appear because of the scientists' modifications on human nature and genes. Scientists will say that the Gods of numbers are punishing humans and causing errors in the numeric calculations of their brains and genes because they stopped worshipping the Gods and donating generously to Gods societies.
COMMERCE: The richest people on earth will be those who own the air and trade in it in cubic meters. When all the space on earth is sold and owned, competition on buying vertical meters and kilometer of air starts, starting on earth and ending with the entire surrounding atmosphere. These rich people gather their fortunes because of the high taxes they impose in return for all the information, messages, rays, and transportation means passing through their possessions.
TERROR: The cubic meters of air around earth will be the perfect place to perform terrorism and hacking of information.
All images and concepts © Yousef Ikhreis Unauthorized reproduction is strictly forbidden. www.yousefart.com
CRIME AND PUNISHMENT: Punishment and crime will be different from its current status. Punishment will depend on denying the person from some of the privileges he can control, such as adjusting the work of the electronic ear to stop hearing noise, changing the color of skin and eyes, designing a new face, adjusting the lenses, or playing group games which is like imprisonment, or making him play cruel and painful games.
EMOTIONS: Humans will no longer be able to make facial and body expressions, only artificial predefined smiles will remain. In this period, natural tears will be considered as a legend.
All images and concepts © Yousef Ikhreis Unauthorized reproduction is strictly forbidden. www.yousefart.com
ROBOTS: Robots will replace doctors, engineers, and workers. They will be planted in the brain's automated part; they are very small and very sophisticated.
All images and concepts © Yousef Ikhreis Unauthorized reproduction is strictly forbidden. www.yousefart.com
All images and concepts © Yousef Ikhreis Unauthorized reproduction is strictly forbidden. www.yousefart.com
THE HIGHER LEGISLATIVE COUNCIL: LAST DAY On 5/5/2555, after deliberation, the legislative council decides to allow some robots to conduct important operations to help the human brain correct and treat issues related to logic.
The truth commands the orchestra to stop playing music.
In the same day, one robot takes control of the human brain, and after 3 minutes, 10 seconds, and 7 milliseconds, the human kind is taken by the new master (the electro-mechanic Gods).
All images and concepts © Yousef Ikhreis Unauthorized reproduction is strictly forbidden. www.yousefart.com
The word (who runs fast can't see clearly). After all this accelerated scientific and uncivilized development in all life's aspects, it is very sad that we're still at loss in our blind search running and crawling around an imaginary truth, thinking that scientific materialistic development is the optimal pure solution for our terrestrial misery that we invented ourselves.
Music of the truth breaks all rhythms:
I wish all those efforts were channeled into ethical development and promoting our social status, there is no harm in a farmer getting tired from his long day in the field, or in a young man traveling for a week or month to visit his sick mom, or in a kid falling and hurting his knee while playing with friends then going back to his mom crying, or a girl mourning the death of her father; or from a village collecting money to help its poor, or from a young man donating blood for an elderly he doesn't know. All these are examples of honorable human acts, and they are better than becoming industrial machines or creating metal Gods who transform us to become like them. The Utopias of Aristotle and Farabi are known for their peace not technology. Globalization is an evil concept that aims at wiping out the traditions, variances and diversities accumulated since the creation of human kind.
To be continued… Can the Space Humans liberate the human race???
All images and concepts © Yousef Ikhreis Unauthorized reproduction is strictly forbidden. www.yousefart.com
THANKS: I would like to thank my friend Batter Qarden for his inspiration and support, Also Maha and Christina Esweh, Mahmoud Amera, Akram Smadi and Adey Al- Khatib
gallery
Viki yeo yeo1981@naver.com 3ds max, ZBrush, Photoshop
John Hayes, USA zugok@sbcglobal.net Modo, Photoshop
Chems Eddine Shames Drouich, Algeria welcomtoparadise@yahoo.com ZBrush, 3ds Max
Bonora Antonio, Italy principe_antonio@hotmail.it 3ds max
Guido Zatti, Italy info@guidozatti.com 3ds max, Vray, AE
Maksym Khirnyy, Germany maksymkhirnyy@gmail.com ZBrush, 3ds Max, Vray
Sinan Ilkaz, Turkey sinan@sdu.edu.tr 3ds max, Vray
Massimo Righi, Italy info@massimorighi.com Maya
Bernhard Rieder, USA usa@bernhardrieder.com 3ds max, Vray
Farkas, Hungary info@visualharmony.hu 3ds max, Vray, Photoshop CS2
Manuel Manfredi, Italy info@manuel3dart.com 3ds max, ZBrush Photoshop
Andrius Balciunas, Lithuania cryinghorn@gmail.com 3ds max, ZBrush, Mental ray
How to send in your images... We showcase the cream of reader images in magazine and on website gallery. Here’s how to get yours noticed
Upload Images through Website Follow this link http://www.cgarena.com/submit.php This is by far the quickest and easiest way to send your images to us.
To Advertise: contact@cgarena.com