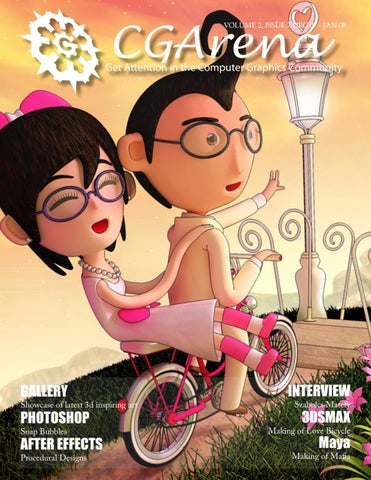
CGArena
VOLUME 2, ISSUE 7 DEC 07 - JAN 08
Get Attention in the Computer Graphics Community
GALLERY
Showcase of latest 3d inspiring art
PHOTOSHOP Soap Bubbles
AFTER EFFECTS Procedural Designs
INTERVIEW Szabolcs Matefy
3DSMAX
Making of Love Bicycle
Maya
Making of Mafia
05 Interview
Szabolcs Matefy
14 Photoshop Soap Bubbles
20 After Effects
Procedural Designs
36 Maya
24 3ds Max
Making of Love Bicycle
Making of Mafia
44 Gallery
Showcase of latest 3d art
Magazine Edited: Ashish Rastogi Magazine Cover Image: Ongie Ongushi
Page 2
Issue 7 Dec - Jan 2008
industry news SIGGRAPH Asia 2008 For the first time an ACM SIGGRAPH Conference and Exhibition on Computer Graphics and Interactive Techniques will be coming to Asia next year. From 10 - 13 December 2008, SIGGRAPH Asia 2008 will explore fresh, new horizons of innovation and excellence. The highest quality of ideas from the community is assured as all accepted papers will be published in the ACM Transaction on Graphics. SIGGRAPH Asia 2008 will feature works that provoke thought, explore ideas in innovative ways, address contemporary issues, interactively engage viewers in discovery, and stimulate their intellect and creativity.
Prime Focus Acquires Post Logic Studios and Frantic Films Prime Focus Group is close to reaching final agreement to acquire Post Logic Studios (with offices in Hollywood and New York) and Frantic Films (with offices in Los Angeles, Winnipeg and Vancouver) for a total consideration of USD 43 million, pending finalization of deal structure and applicable regulatory and statutory approvals. The acquisition will add rights over 55,000 square feet of prime real estate in the heart of Hollywood, and a talent pool of 200 new staff members. The acquisition will give the Prime Focus Group access to the R&D division of Frantic Films, which develops and markets visual effects software solutions. Frantic Films has worked on top Hollywood films including Fantastic Four: The Rise of the Silver Surfer, Grindhouse, Superman Returns, X-Men 3, Poseidon, Mr. Magorium’s Wonder Emporium and Journey 3-D.
Buzzword of the Month Lip Sync - Lip-sync or Lip-synch (short for lip synchronization) is a technical
term for matching lip movements with voice. It is used to match lip movements of animated characters. The lip sync technique to make an animated character appear to speak involves figuring out the timings of the speech (breakdown) as well as the actual animating of the lips/mouth to match the dialogue track. Lipsynching can be a very difficult issue in translating foreign works to a domestic release, as a simple translation of the lines often leaves overrun or underrun of high dialog to mouth movements. Early video games did not feature prominent use of voice, mainly being textbased. At most, games featured some generic jaw or mouth movement to convey a communication process in addition to text. However, as games become more advanced, lip sync and voice acting has become a major focus of many games.
Page 3
Issue 7 Dec - Jan 2008
interview
AN INTERVIEW WITH Szabolcs Matefy Q. Hi could you tell us a bit about yourself and your background in CG and are you self taught or taken some training? Hi!! I am Szabolcs Matefy, 37 and living with my wife and 2 kids in Budapest, Hungary. I am self educated in CG, mostly because in Hungary there were no CG education at all, when I started in the industry..
Q. How long have you been in CG and what is your current job? It was 1996 when I had turned my interest toward computer graphics. Before that I had strong relationship to the computers and graphics, but I hadn`t connected them until 1996. Now I’m character artist at Stormregion, a Hungarian game developer studio, doing artwork for marketing purposes.
Q. As you are working in the Game Developer studio, please tell us our readers which are the main thing to keep in mind while working on any part of game? The first rule is that you are a member of the team. Sometimes there are no possibilities to express yourself as you would. You are probably just the creative “hand” of art director, concept artist, etc. Second rule, you must be realistic. I mean that it’s easy to overwork on a 3d model or texture, but it’s not visible in the game, for example a tiny, but detailed badge on one of the straps of a sidekick character, who role is just to cross the street several times. We call it conscience detail. The detail is there, but unnecessary. The third and most important rule, that there is always something to learn. I don’t understand those saying he knows enough to make art for living. No, it’s not true. Time passes by, technology evolves, and limits are extended. A successful prev-gen artist is not successful next-gen artist by all means. We had a debate with one fellow game artist, who told me, that he knows enough to maintain his career, so it’s not necessary to him to learn normal maps, parallax maps, and their methods. Now that guy is not in the business and as far as I know he’s not employed by any of the serious game developer in Hungary. We call it professional humbleness.
Page 5
Issue 7 Dec - Jan 2008
interview
AN INTERVIEW WITH Szabolcs Matefy Q. What was your inspiration for the artwork “Fauna”? Please explain in detail about the modeling, texturing and problems encountered. I always loved mythic creatures, and females. I was inspired by paintings, their styles especially, but the character I had been in my mind for some three or four years, so it was time to do it. Hajime Sorayama had also a SheSatyre, but she was not soft enough (to my taste ). I was sketching one day in my living room, when I had an idea of a faun stealing grapes, and hiding behind a tree. Then I thought it’s a great opportunity to turn him into a she. For modeling sometimes I don’t know what fits to best to me, so at this time I made her in a polygon by polygon way. For UV mapping I relied a lot on XSI’s Walking on the Mesh feature, that helped me to maintain a rectangular shape of my UV island. It cause problems as well, in the form of stretching, but I was not afraid of doing some UV adjusting. The character has been textured and detailed in Zbrush. At first, I was using Mudbox, but I had way too many problems with it. It was too slow, I couldn`t make my displacement maps in 4k resolution. So I deleted my previous high resolution mesh, and waited until Zbrush3 released. Rendering skin shader and hair together caused me a lot of problem especially on my 32bit Windows XP. There was a tendency to crash whenever XSI memory consumption had reached the mythic 1.4 Gigabytes of physical memory. Thanks god Mario Ucci (aka Loganarts or Vibes at several forums) helped me a lot setting up hair rendering, and I had switched to Vista64, so all of my memory problems disappeared. Pass rendering and the new OS decreased the rendering time from 4 hour to less than an hour.
Page 6
Issue 7 Dec - Jan 2008
after effects
P r oc edu ral D e s i gns
Hello everyone, hope you are still with After Effects because many users shifting from this powerful software to some other “so called” complex programs. But my first love is After Effects, so I am still doing work with this and great to know you too like this software, that’s why reading all this.:-) These days you have figure out on the music channels, internet videos lots of abstract procedural shapes adding to the video to make everything cool. If you search the web you will find many stock videos DVD’s to help you in creating these types of effects. No need to say some are really very good. But as someone said there is nothing free in this world except this magazine and I don’t have money to buy those DVD’s, so today we will try to create a similar effect using a smoke image find it from the google images search. Step 1: Create new composition for duration of 5 sec. Drag the smoke image (search the web, many available for free) in the composition. Now our first work is to create an illusion of smoke is growing in the air.
Page 20
Issue 7 Dec - Jan 2008
after effects Step 2:
Create a rough closed mask around the smoke as per smoke shape.
Step 3: Select the smoke layer and press M twice to bring the mask properties. Press stopwatch in front of Mask Shape (make sure you are on 0:00s in timeline) and move the mask to the bottom (outside the composition). Step 4: Go to 5sec in the timeline and move the mask again on the top where it is before. If you play the timeline then you will see mask slowly revealing a smoke from bottom to top in 5sec. But you will notice the edges are quite sharp so increase the Mask Expansion and Mask Feather values. (It is possible that your smoke image have some default background, so play with the modes to remove that).
Step 5: Select smoke layer and apply Effect > Distort > Turbulent Displace. In this effect “Offset (Turbulence)” is the main setting. Goto 0 sec and press the stopwatch of Offset (Turbulence) then move the offset in the composition window in the bottom of the smoke. Goto 5 sec and move the offset on the top of the smoke like you have animated the mask before.
Page 21
Issue 7 Dec - Jan 2008
after effects Step 6: Now increase the Amount and Size in the Turbulent Displace settings. Play the timeline and this will give the illusion of flowing smoke in the air. Now your smoke is flowing and growing. So now you can move to the 8th step or follow the 7th too. Step 7: Select smoke layer and apply an Effect > Distort > Mirror, move the Reflection center in the middle of the image to get the mirror of the image, you can change the reflection angle too.
Step 8: Again select a layer and pre-compose Layer > Pre-compose. Step 9: Create new Comp, create 2 new different color solid layers (color as per your choice). Select a top layer and create an elliptical mask, feather the mask so both layers can blend. Apply Effect > Stylize > Roughen Edges. This will create a background for you. This step is not necessary and totally depends on your choice. Step 10: Drag a pre-composed smoke layer, apply Effect > Color Correction> Hue/Saturation, check the colorize button and move the values to colorize your smoke. Step 11: Make the several duplicates of this layer and rotate all of them at some angle. I choose 45 degree increment for all layers. Before rotating move the anchor point of the layer in the bottom of that layer.
Page 22
Issue 7 Dec - Jan 2008
after effects
Step 12: Change the color for every layer by hue/saturation. Most probably you need to change the mode of the layer to Darken, Multiply or something else. Experiment is the key here. That’s it your effect is ready. But if you like create more abstract designs in future with minimum work then create a null object, apply Effect > Expression Controls > Slider control or Point Control or both. And link the anchor point, rotation, position values to the slider using Pickwhip.
If you have any questions then please email me.
Page 23
Suzane Smith suz.smith@hotmail.com
Issue 7 Dec - Jan 2008
3ds max
Making of Love Bicycle Page 24
by Ongie Ongushi, Thailand ongushi@hotmail.com
Issue 7 Dec - Jan 2008
3ds max Concept Love is the light of life that makes color in the world. My inspiration for this image is from my older sister who will get married soon. I make this picture for her. I make the 2 versions of this image. First, (in the left) I would like to emphasize on the soft light that looks like the world of dream. For the second, (cover page of magazine) I would like the atmosphere of the picture to looks warm and joyful. Modeling The picture on the right is thumbnail sketch picture that make from Illustrator Program. It’s easy for me to design 3D picture. The model of the picture is applied in a free form pattern. I start from draw a bicycle and then I draw men and background consequently. I don’t use Biped for the model of men but I adapt the model as inflexible style. I would like to reduce the process because I don’t take it to make the animation picture. Furthermore, I use my style “Octopus style” for character so that the model will have long hands to make the difference. I make the high resolution model because I would like to render.
Page 25
Issue 7 Dec - Jan 2008
3ds max
Above you can see a VRayFur test which was done before using in the picture for making a grass on the ground. I used black and white picture from bitmap type and insert in Density for specify the result of VRayFur area .
Page 26
Issue 7 Dec - Jan 2008
3ds max
For the settings of grass size, I set it bigger than truth because I would like to make it to be cartoon pattern. The Distinctive point of this picture is the grass and street lamp. I will advise about material for two parts on next page.
Page 27
Issue 7 Dec - Jan 2008
3ds max Material For the material of the grass, I use Gradient for the part of Diffuse to make the color and dimension look more beautiful. I used dark green in the part of stub and light green in the part of top and add a little reflect that makes the grass looks fresh. For the material of the street lamp, I use Vray Light Mtl that makes the light shine by itself. I use light value about 10 and use Gradient Ramp for the real dimension.
Page 28
Issue 7 Dec - Jan 2008
3ds max
Lighting In the lighting part, I use 5 lights comprise of 4 Vray Lights and 1 Target Direct. For Color and brightness of Vray Light, I use various light value but all in the pink and orange color scheme. If you would like to make the picture have more dimension and more color, you can use Subdivs value about 15-20 that make the picture looks soft.
Page 29
Issue 7 Dec - Jan 2008
3ds max
Page 30
Issue 7 Dec - Jan 2008
after effects
P r oc edu ral D e s i gns
Hello everyone, hope you are still with After Effects because many users shifting from this powerful software to some other “so called” complex programs. But my first love is After Effects, so I am still doing work with this and great to know you too like this software, that’s why reading all this.:-) These days you have figure out on the music channels, internet videos lots of abstract procedural shapes adding to the video to make everything cool. If you search the web you will find many stock videos DVD’s to help you in creating these types of effects. No need to say some are really very good. But as someone said there is nothing free in this world except this magazine and I don’t have money to buy those DVD’s, so today we will try to create a similar effect using a smoke image find it from the google images search. Step 1: Create new composition for duration of 5 sec. Drag the smoke image (search the web, many available for free) in the composition. Now our first work is to create an illusion of smoke is growing in the air.
Page 20
Issue 7 Dec - Jan 2008
after effects Step 2:
Create a rough closed mask around the smoke as per smoke shape.
Step 3: Select the smoke layer and press M twice to bring the mask properties. Press stopwatch in front of Mask Shape (make sure you are on 0:00s in timeline) and move the mask to the bottom (outside the composition). Step 4: Go to 5sec in the timeline and move the mask again on the top where it is before. If you play the timeline then you will see mask slowly revealing a smoke from bottom to top in 5sec. But you will notice the edges are quite sharp so increase the Mask Expansion and Mask Feather values. (It is possible that your smoke image have some default background, so play with the modes to remove that).
Step 5: Select smoke layer and apply Effect > Distort > Turbulent Displace. In this effect “Offset (Turbulence)” is the main setting. Goto 0 sec and press the stopwatch of Offset (Turbulence) then move the offset in the composition window in the bottom of the smoke. Goto 5 sec and move the offset on the top of the smoke like you have animated the mask before.
Page 21
Issue 7 Dec - Jan 2008
after effects Step 6: Now increase the Amount and Size in the Turbulent Displace settings. Play the timeline and this will give the illusion of flowing smoke in the air. Now your smoke is flowing and growing. So now you can move to the 8th step or follow the 7th too. Step 7: Select smoke layer and apply an Effect > Distort > Mirror, move the Reflection center in the middle of the image to get the mirror of the image, you can change the reflection angle too.
Step 8: Again select a layer and pre-compose Layer > Pre-compose. Step 9: Create new Comp, create 2 new different color solid layers (color as per your choice). Select a top layer and create an elliptical mask, feather the mask so both layers can blend. Apply Effect > Stylize > Roughen Edges. This will create a background for you. This step is not necessary and totally depends on your choice. Step 10: Drag a pre-composed smoke layer, apply Effect > Color Correction> Hue/Saturation, check the colorize button and move the values to colorize your smoke. Step 11: Make the several duplicates of this layer and rotate all of them at some angle. I choose 45 degree increment for all layers. Before rotating move the anchor point of the layer in the bottom of that layer.
Page 22
Issue 7 Dec - Jan 2008
after effects
Step 12: Change the color for every layer by hue/saturation. Most probably you need to change the mode of the layer to Darken, Multiply or something else. Experiment is the key here. That’s it your effect is ready. But if you like create more abstract designs in future with minimum work then create a null object, apply Effect > Expression Controls > Slider control or Point Control or both. And link the anchor point, rotation, position values to the slider using Pickwhip.
If you have any questions then please email me.
Page 23
Suzane Smith suz.smith@hotmail.com
Issue 7 Dec - Jan 2008
3ds max
Making of Love Bicycle Page 24
by Ongie Ongushi, Thailand ongushi@hotmail.com
Issue 7 Dec - Jan 2008
3ds max Concept Love is the light of life that makes color in the world. My inspiration for this image is from my older sister who will get married soon. I make this picture for her. I make the 2 versions of this image. First, (in the left) I would like to emphasize on the soft light that looks like the world of dream. For the second, (cover page of magazine) I would like the atmosphere of the picture to looks warm and joyful. Modeling The picture on the right is thumbnail sketch picture that make from Illustrator Program. It’s easy for me to design 3D picture. The model of the picture is applied in a free form pattern. I start from draw a bicycle and then I draw men and background consequently. I don’t use Biped for the model of men but I adapt the model as inflexible style. I would like to reduce the process because I don’t take it to make the animation picture. Furthermore, I use my style “Octopus style” for character so that the model will have long hands to make the difference. I make the high resolution model because I would like to render.
Page 25
Issue 7 Dec - Jan 2008
3ds max
Above you can see a VRayFur test which was done before using in the picture for making a grass on the ground. I used black and white picture from bitmap type and insert in Density for specify the result of VRayFur area .
Page 26
Issue 7 Dec - Jan 2008
3ds max
For the settings of grass size, I set it bigger than truth because I would like to make it to be cartoon pattern. The Distinctive point of this picture is the grass and street lamp. I will advise about material for two parts on next page.
Page 27
Issue 7 Dec - Jan 2008
3ds max Material For the material of the grass, I use Gradient for the part of Diffuse to make the color and dimension look more beautiful. I used dark green in the part of stub and light green in the part of top and add a little reflect that makes the grass looks fresh. For the material of the street lamp, I use Vray Light Mtl that makes the light shine by itself. I use light value about 10 and use Gradient Ramp for the real dimension.
Page 28
Issue 7 Dec - Jan 2008
3ds max
Lighting In the lighting part, I use 5 lights comprise of 4 Vray Lights and 1 Target Direct. For Color and brightness of Vray Light, I use various light value but all in the pink and orange color scheme. If you would like to make the picture have more dimension and more color, you can use Subdivs value about 15-20 that make the picture looks soft.
Page 29
Issue 7 Dec - Jan 2008
3ds max
Page 30
Issue 7 Dec - Jan 2008
3ds max Rendering
Page 31
Issue 7 Dec - Jan 2008
3ds max Important points in render settings - Global switches: Please don’t choose of Default light. - Image Sample: Choose Type Adaptive suddivision and Antialiasing: chose Blend which make a job - Indirect illumination: Choose Irradiance map and Quasi-Monte Carlo. - Irradiance map: Choose Current preset: Medium, Hsph = 70, Interp = 50. (If you fill height numeric make your job don‘t have dark smoke which you don’t want that, but you need to use long time to rendering.) - Quasi-Monte Carlo GI: Choose Subdivs = 25 or more than that. - Environment: choose soft pink for make the environment. - RQMC Sampler: reduce numeric of noise for reduce back point. - Color mapping: choose HSV exponential for make the colorful ( look like a cartoon more than real picture). Effect : vraytoon , I choose Effect from environment > Atmosphere and then add Vraytoon . Make a job has a strange and more unique. Hope you like the making and the details explained.
Ongie Ongushi
http://ongushi.spaces.live.com ongushi@hotmail.com
Page 32
Issue 7 Dec - Jan 2008
www.cgarena.com CGArena brings you latest news and happenings 24 hours a day. Plus, join in our interactive forums to showcase your work, and Get Attention in the Computer Graphics Community
winners In Nov07, your mission was to create a image using the masking techniques on “Animals out of the zoo” theme and sponsored by Vertus - FluidMask. All Three Winners will get a copy of Fluid Mask 3
First Prize
Ronel k. Pabico, Philippines rpadc2002@yahoo.com
Second Prize Mehdi PourShayegan, Iran blue_shay@hotmail.com
Third Prize
Christopher Snow, Canada snow_christopher15@hotmail.com
maya
Making of
Mafia
by Choon Teck KOH (Lawrence), Singapore
Lawrence@teckinart.com
Page 36
Issue 7 Dec - Jan 2008
maya Introduction It has always been my biggest challenge to create a realistic CG full character model since my days in Savannah College of Art and Design, Savannah, Georgia. Very much encouraged and motivated by Prof. Greg Johnson, Prof. Craig Kovacs and Prof. Jose Silva, my passion in CG modeling has been growing. Upon my graduation in September 2007, this is my second attempt to create a realistic CG full character model. There is still great room for improvement. My model is inspired by the below image on Mafia. I wanted to create a surrendered Mafia who was caught by the police.
Modeling The head of my model was modeled and textured separately based on the teaching of the DVD “Essence: The Face”. With reference from www.3d. sk/ for texture, I used photographs for my 4k texture maps because I am trying to create a photo-real CG face. I used 1k photograph texture maps for the rest of the model. The suit, pants, gloves, gun, and shoes were modeled separately. The model was done in T-pose and I reposed it in ZBrush3. Lighting and rendering were done in Mental Ray. It took me more than a month to complete the model with the arrival of my baby girl. Hee!
Page 37
Issue 7 Dec - Jan 2008
maya The head was started with a very low resolution model. Details of the face were added in ZBrush. After modeling the head, I added eye lashes to it. Pardon me that these eyes needed more improvement. I created polygon eyelashes for the model. Having randomness in the length of the eyelashes make them look more realistic. The lower eye lid had less and thinner eyelashes.
Page 38
Issue 7 Dec - Jan 2008
maya Texturing I used the SSS shader, for this I changed the Diffuse Weight to the value of 0.1 The five maps that I used for the SSS shader are Epidermal Scatter Color, Subdermal Scatter Color, Back Scatter Weight and Bump Map. I used 4K texture maps for the head and 1K texture maps for the rest of the model. The color map was used for the Epidermal Scatter Color under the Subsurface Scattering Layer. The level of the color map was increased to make it looked over saturated and used it for the Subdermal Scatter Color under the Subsurface Scattering Layer.
The color map was turned into a high-contrast black and white image in Photoshop and used for the Subdermal Scatter Weight under the Subsurface Scattering Layer. After turning the color map into black and white, everything will be erased off except the ears and tip of the nose for creating the Back Scatter Weight map under the Subsurface Scattering Layer.
Page 39
Issue 7 Dec - Jan 2008
maya Below is the eyes texture:
The hair is created with Maya fur.
Page 40
Issue 7 Dec - Jan 2008
maya Below are other images with wireframe:
Page 41
Issue 7 Dec - Jan 2008
maya All images are rendered with Mental Ray with Ray Tracing. I also turned on the Pass Custom Alpha Channel under the Custom Entities. I used 2 spot lights. Below are the render settings:
Page 42
Issue 7 Dec - Jan 2008
maya Below is my lighting structure and settings:
Hope you like all these details and help you in creation of your image. Thanks for having me to show my humble artwork. Please pardon me as I am still learning. Choon Teck KOH (Lawrence) www.lawrencekoh.com Lawrence@teckinart.com
Page 43
Issue 7 Dec - Jan 2008
gallery
Super Snail Andres Hurtado, Spain andrebius@yahoo.com.mx Cinema 4D, Bodypaint
Asura Udom Ruangpisitporn, Thailand tucker_3d@hotmail.com Maya, Zbrush
The Great Flight Fabio Bautista, Colombia fabiobautista@hotmail.com 3ds max, Mental Ray
Merman Elite Vivek Ram, India markeviv@gmail.com Maya, Zbrush
Tiger Zoo Massimo Righi, Italy info@massimorighi.com Maya,
Exterior Cliante Laurentiu, Romania cliante@gmail.com 3ds max
Me and My Pet Cristian Mihaescu, Romania cristian.mihaescu@gmail.com Blender
JohnWorm Don Dixon, USA ddixon@greengrassstudios.com 3ds max
Taxi Station Maksym Khirnyy, Germany maksymkhirnyy@gmail.com 3ds max, Vray
Bike Paolomu, Italy paolo.mu@tin.it Cinema 4D, Photoshop
submission
How to send in your images... We showcase the cream of reader images in E-Zine and on website - here’s how to get yours noticed
Upload Images through Website Follow this link http://www.cgarena.com/submit.php This is by far the quickest and easiest way to send your images to us.
To Advertise: contact@cgarena.com