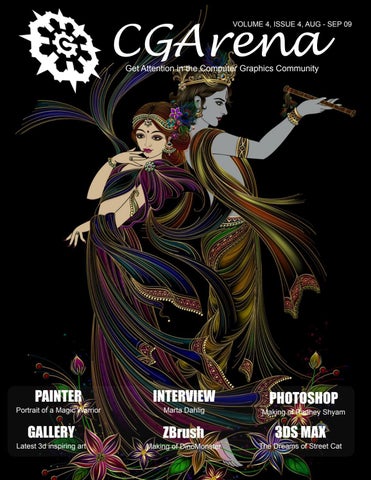
CGArena
VOLUME 4, ISSUE 4, AUG - SEP 09
Get Attention in the Computer Graphics Community
PAINTER
Portrait of a Magic Warrior
GALLERY
Latest 3d inspiring art
INTERVIEW Marta Dahlig
ZBrush
Making of DinoMonster
PHOTOSHOP
Making of Radhey Shyam
3DS MAX
The Dreams of Street Cat
VOL
4
Get Attention in the Computer Graphics Community Issue Contents
Volume 4, Issue 4 Aug - Sep 2009
05
Interview
Marta Dahlig
15
3D Challenge
Accident
20
Photoshop
Making of Radhey Shyam
30
ZBrush
Making of DinoMonster
38
3ds Max
The Dreams of Street Cat
48
Painter
Portrait of a Magic Warrior
54
Gallery
Showcase of latest 3D art
Magazine Edited: Ashish Rastogi, India Magazine Cover Image: Barnali Bagchi, UAE/India Magazine Design: Yousef Ikhreis, Jordan www.cgarena.com
Page 2
Issue 4 Aug - Sep 2009
Industry News
CGArena NVIDIA Launches World’s First Interactive RayTracing Engine
Autodesk 2010 Certification Now Available For Design Professionals
NVIDIA, the leader in GPU computing, introduced the NVIDIA®® OptiX™ ray tracing engine, part of a suite of application acceleration engines for software developers. NVIDIA acceleration engines make it easy to incorporate valuable, high-performance capabilities into applications, while simultaneously reducing development time.
Autodesk, Inc., announced that design and engineering professionals can become Autodesk Certified in AutoCAD 2010, Autodesk Inventor 2010, Autodesk Revit Architecture 2010, and AutoCAD Civil 3D 2010 software. Becoming Autodesk Certified allows professionals, and companies boasting Autodesk Certified employees, to validate their industry skills and knowledge, demonstrate expertise and gain credibility. Customer demand has contributed to the huge growth of Autodesk Certification over the past year, increasing the number of Autodesk Certified professionals to more than 100,000.
Book
Professionals can take training courses and the Certified Associate and Certified Professional exams at all Autodesk Authorized Certification Centers across the United States and Canada.
Professional MEL Solutions for Production - Maya Embedded Language is the heart and soul of Maya, the most powerful 3D application on the market today. MEL provides Maya with a versatility and adaptability unmatched in the CG industry. It is MEL that allows technical directors to customize Maya to fit each pipeline, to work around each limitation, and to write tools that expand Maya s already impressive set of capabilities. This book shows you how MEL is being (ab)used in high-end visual effects production by picking apart scripts written in the production of recent feature films. ISBN - 978-1598220667
Training
As the world’s first interactive ray tracing engine to leverage the GPU, the NVIDIA OptiX engine is a programmable ray tracing pipeline enabling software developers to easily bring new levels of realism to their applications using traditional C programming. NVIDIA application acceleration engines are available from the NVIDIA Developer Zone at no charge.
Visual Effects for Directors - Years in the making, Visual Effects For Directors is a massive 7 DVD set that covers everything you need to know about shooting Visual Effects. The course is intense training on everything from green screen, virtual set, 3D, camera tracking, and motion control, to character animation, motion capture, crowd replication, digital set extension, VFX cinematography, compositing, and much more. The course covers everything from basic visual effects to advanced techniques. This is training that everybody needs, from Directors and DPs to highly professional Visual Effects Artists.
www.cgarena.com
Page 3
Interview with
Issue 4 Aug - Sep 2009
CGArena
Marta Dahlig Q. Hello Marta, can you give our readers a short introduction please; age, location, employment etc?
Extremely against the nude shots which are chauvinistic, disrespectful or devoid of any thought Hello! :) I am 23 years old and live in Warsaw, Poland. For my official employment, a “regular” full time job – I currently work as a media planner at MPG media agency. I know – not too artsy... In fact, it’s an extremely analytic, number-crunching job. Maybe it doesn’t fit well with the image but I like the challenge the contrast is giving me… Illustrating I do out of passion. Currently I work as a cover illustrator for a few German publishing houses as well as prepare tutorials for Future Publishing’s ImagineFX magazine on a nearly monthly basis. Q. You are doing a professional painting from many years, so you started it just as a hobby or did you see the potential for your career? I started painting since my early childhood and treated it as a hobby for many years, never seeing it as a potential career path. At the age of 15, I moved into digital media out of curiosity and will to experiment, still with no intention to become professional. However, soon after I discovered all the possibilities standing before a CG artist and became tempted At the same time, however, I still wanted to try other things, such as something connected to advertising or marketing. In the end, I decided to take the middle path and am doing both things at once.
www.cgarena.com
Page 5
Sky Pirate © Copyright by Future Publishing
Interview with
Issue 4 Aug - Sep 2009
CGArena
Marta Dahlig Q. As you are self taught young artist, so you have any specific drawing techniques or tips for us? If yes, then please share with us. Basically every artist has their own specific way of working. I work mainly in Photoshop, with highly transparent brushes and apply layers of paint gradually, as it lets me control the outcome from the very beginning. Aside from that, I always paint on 4-5 layers tops and try to stick to as few basic custom brushes in Photoshop. Basically, my main tools is a regular airbrush and a Hard Round brush with its edges ragged. Depending on the occasion, I can also use more detail-oriented custom brushes, such as photo textures and the like. Q. Looking at your portfolio you have painted mostly the women’s, there is any specific reason of this, men’s are not so bad :-) There is no hidden message about it really, I just find women a much more graceful subject to paint! Lately I have been expanding my horizons a bit, however, painting not only men, but also animalistic characters. Some of that art should soon be uploaded to my online galleries! © Copyright by Future Publishing Q. After more than a year, we get a chance to view your new personal work, so where are you busy before that? I know it must’ve seemed I was lazy but in reality it has been the most intense year ever! I spent my whole painting time on commercial assignments, such as various cover illustrations and already mentioned ImagineFX tutorials. During that time I was also preparing my part of D’Artiste: Digital Painting 2 book as well as handles a few still developing projects. All of that has left me with no time to really do anything just for myself. www.cgarena.com
Page 7
Q. Have you used Wacom Intuos 4? How you rate this product (pros and cons) and how wacom tablets helps you in your artistic journey? My Intuos 3 broke just before the new version came out, so I purchased a medium Intuos 4 as soon as it was on sale. I absolutely love its looks and the feature I love the most is the detachable cable, as it was the cable part which first broke in my old tablet. I didn’t have the occasion to use the new wheel yet, as I still somehow cannot adjust my workflow to it. The only thing that for now bothers me a bit is the speed I seem to use the pen tips in – I’m already on my third! Speaking about Wacom tablets in general I have to say they have been nothing less than a blessing. I used to work on some cheap, low quality tablets before and the difference in workflow quality is astounding (not to mention the cheap ones used to break after 2 months of usage on average). The pen pressure levels in Wacom tablets are amazing and improve application of little details as well as encourage more finesse brush strokes.
Q. Please tell something about your latest work “Judith”, from where you get the inspiration and idea to paint this beautiful lady? I think it was around 8 or 9 years ago when I first heard about Judith. Ever since, I found her to be one of the most fascinating characters in history. There aren’t many strong ladies you can read about and what is more bold than a woman first seducing, then decapitating the leader of enemy’s army? ;) It’s hard to count the number of times I tried to depict her – each and every attempt was different: portrait shots, full body poses, standing, sitting – you name it! I think I have done around 8 or 9 sketches throughout the last 4 years and none was really good enough to be completed. This piece I started around October 2008 worked on it on and off till May 2009 between other projects.
Q. Various times we heard the negative point of view of female painters on painting the nude female to represent the skills or art or as a piece of entertainment, so as a female painter what’s your take on this and in your painting “Judith” where story actually demands but different pose can reduce the artistic nudity? I am extremely against nudity which is depicted just for the sake of it. Nude shots which are chauvinistic, disrespectful or devoid of any thought are not my thing at all. Nudity, in my understanding, is an artistic means just like any other. Nudity has to make a statement – if I paint a nude character, there has to be a true, strong reason for it. In case of Judith, I had two reasons to display the character nude: firstly, I wanted to create a deeply sensual scene. Secondly, I wanted to achieve a contrast between the body and the abundance of different textiles around the character, which couldn’t have been done with her being dressed.
www.cgarena.com
Page 8
Story of Judith
“In the second century B.C., as the powerful Assyrian army invades the Near East, the town of Bethulia is besieged by the cruel and domineering Holofernes, foremost general of the Assyrian emperor Nebuchadnezzar. If Bethulia yields, the whole country will fall into Assyrian hands. Discouraged, the city’s elders agree to surrender the famine-stricken city if they are not rescued within a few days. Judith, a young widow and most unlikely savior, challenges them to take responsibility for the future of their community. She enters the Assyrian camp where Holofernes, smitten with her remarkable beauty, invites her to a banquet. When he retires to his bed in a drunken stupor, they are left alone in his tent. Judith takes up his sword and decapitates him. With the Assyrian army thrown into confusion, Judith inspires the Israelites to launch a surprise attack from which they emerge victorious.” - Read and Watch the Detailed Making of Judith HERE
www.cgarena.com
Page 9
Umbrella Sky © Copyright by Future Publishing
Moths © Copyright by Future Publishing
Interview with
Issue 4 Aug - Sep 2009
CGArena
Marta Dahlig Q. What are your hobbies and please describe your free time, if you have any or are you the kind of lady who lives for her work all the time? Due to having a full-time job, I rarely have time for anything else other than painting in the evenings/nights, and at best end up having ~5hours of sleep during the night. On those rare occasions I am free, I do really typical things: I like to read (anything from historic novels to thrillers), watch movies, go out, spend time with my dog… The regular stuff. :)
Q. Anything you like to add? It is your chance now to state your opinion about anything! I am not really good with closing words, as there is no way not to sound cliché - it is the usual moment to state: “remember to be yourself”, “strive for that dream!”, “you can do anything” and all that…. Cliché or not, I believe in that! If you are willing to work hard, really hard, with a bit of talent, luck and sweat you are able to accomplish anything you want. The biggest success factor is the right motivation, patience and readiness to use the various opportunities that life places before us. If you know what you want and are willing to work your hardest day and night to achieve it, you are bound to be successful :)
Thanks a lot Marta for taking out sometime for us from your busy schedule. Hope you continue to paint the beautiful women’s and sometime men’s too.
Blog: dahlig.blogspot.com Online Gallery: blackeri.deviantart.com
www.cgarena.com
Page 13
3D Challenge
Issue 4 Aug - Sep 2009
CGArena
Image by Antonio Peres Vieirafilho
CGArena is proud to present “Accident” 3D Challenge, 10 Aug 2009 - 1st Oct 2009. Winners will be rewarded with special prizes from Side Effects Software, Pixologic, E-on Software, Eat3D and ambientLight. Express your creative ideas in a new and interesting way.
Your Mission Create a 3D image which justify the theme of Accident, this can be realistic or toony. This can be physical accident, attempt to stop the accident, accident of emotions or whatever you can think of. You can express the theme in a single shot or in several shots inside one image. You can even replicate the scene from a movie. You are allowed to show the artistic nudity in the image. This Challenge is a Work-In-Progress Challenge -- all contestants are required to post their work-in-progress images for community to critique/comment in order to qualify.
How the Challenge will be Run This challenge will be a WIP (Work in Progress) Challenge. Each challenger (teams are not allowed) is required to post Work In Progress (WIP) images, from the initial concept sketch to the final render to the post production on regular intervals in the CGArena forum. The purpose is that everyone can learn from each other, offer feedback and critiques. 1. Enter the Challenge by registering yourself on CGArena forum under Challenges > Accident > Your Real Name - Country 2. Submit your work in progress images in forum on a regular basis. Concept sketch/shot need to post within a week from the date you register yourself in the challenge. www.cgarena.com
Page 15
3. Participate in the community by critiquing other challenger’s works in the respective threads. Only constructive critiques/feedbacks are allowed to post, please avoid postings like “Good image”, “Wonderful Going”, “Nice Image” and so on... Don’t try to insult any artist, artistic skill, concept or country. Otherwise you can be disqualified from the challenge. 4. You are allowed to use any 3d software for the creation of artwork. Premade models or preset based softwares/plug-ins which allows creation of human models are not allowed to use. Sculpting softwares are allowed to use. 5. Once concept sketch is posted in the forum, you are not allowed to change the concept. If two similar concepts are posted then second similar concept participant is allowed to change the concept in the next 48hrs. 6. If you replicate the scene from a movie then that will be judge on the basis of realism and similarity with the shot. Try to add all the elements/props which are available in the movie shot. 7. Registration for the challenge will close on 15th Sep 2009, midnight 00:00 GMT. 8. Submit your final entry till 1st Oct 2009, midnight 00:00 GMT. 9. You are allowed to use any type of post- production in the final image to make artwork better and richer. Please avoid to add the elements in post-production which are 100% made in the 2D program or photographs. 10. There will be 3 winners, Judges, sponsors, CGArena decision will be final. 11. Winners will be announced on 9th Oct 2009. All prizes will be available in the downloadable format from the sponsors website.
Terms and Conditions 1.) Entrants agree to give permission to the sponsor to use all or any part of the artwork entered in this contest, (hereinafter, the ‘Work’) in the Company’s demonstration tapes (reels), promotional materials (ads, PR, etc.), booth graphics and presentations for the promotional purposes. 2.) Entrants will retain all rights to the Work. In addition, the Company will not sell for profit any materials or demo reels containing images or animations submitted by the Entrant. 3.) All the winners are requested to create a Making of the Image and only CGArena owns the right to release that making online or anywhere else. Without the consent of CGArena not allowed to release the making anywhere else. 4.) The Company, in exchange for this release, will provide a credit for the Work within the material in which the Work is used.
www.cgarena.com
Page 16
Final Image Size - Your final image dimensions should be print resolution (300 DPI). Do not send in a low-resolution. - A guideline is minimum 1680 pixels wide and/or 1050 high, JPG, 300 DPI. - Send your final image in zip or rar format with your name, complete shipping address, email, telephone number in a text file on email address accident@cgarena.com with email subject “your forum username”. When we received an email then you will get Automatic reply confirmation email.
First Prize - $9770 worth of prizes Houdini Master worth $7995 USD - Houdini Master is a full featured 3D animation and visual effects software renowned for its particle and dynamics tools. Houdini Master is perfect for visual effects artists, technical directors and CG supervisors who want to experience total control over their pipeline E-on software Vue 7.5 Infinite worth $895 USD - Vue 7.5 is the most efficient and advanced solution for creating, animating and rendering natural 3D environments. It offers a high-end 3D scenery solution for SFX studios, animators, illustrators, architects, matte painters and CG professionals. It is strongly focused on power, productivity and inter-operability with existing toolkits. Pixologic ZBrush 3.1 worth $595 USD approx. - ZBrush 3.1 gives you access to unparalleled power and control previously unknown in digital art creation software. Controls enable sculptors to create with a stylus and a tablet as intuitively as if they were using their hands on a block of clay. If at the end of the contest, ZBrush 4 will ready then provide ZBrush 4. Otherwise, provide the license available at that time, with a free upgrade to ZBrush 4 when released. ambientLight Multibuy Texture Bundle worth $175 USD approx. - This includes our entire range of Texture Packs. All of our packs are at a minimum of 1024 pixels square and are hand edited so that they tile perfectly, whatever application you use them in!. This pack includes Plant & Trees, Natural, Sky, Architectural, Roads textures. Eat3d Training DVD’s (2) worth $110 USD approx. - Our focus is to have the highest of quality training videos geared toward 3D Artists. We put an obsessive amount of time and effort into our work, and we are very proud of the results. So sit back and join us for a refreshing course in high quality next gen art. Winner can choose to download any 2 training DVD’s.
Second Winner - $1392 worth of prizes E-on software Vue 7 Complete worth $599 USD - Designed for experienced 3D artists and small studios, Vue 7 Complete provides a complete solution for natural 3D scenery. Vue 7 Complete includes all 12 additional modules for Vue 7. Vue 7 Complete also ships with an extensive collection of preset trees, buildings, scenes, characters, etc. www.cgarena.com
Page 17
Pixologic ZBrush 3.1 worth $595 USD approx. - ZBrush 3.1 gives you access to unparalleled power and control previously unknown in digital art creation software. Controls enable sculptors to create with a stylus and a tablet as intuitively as if they were using their hands on a block of clay. If at the end of the contest, ZBrush 4 will ready then provide ZBrush 4. Otherwise, provide the license available at that time, with a free upgrade to ZBrush 4 when released. Eat3d Training DVD’s (2) worth $110 USD approx. - Our focus is to have the highest of quality training videos geared toward 3D Artists. We put an obsessive amount of time and effort into our work, and we are very proud of the results. So sit back and join us for a refreshing course in high quality next gen art. Winner can choose to download any 2 training DVD’s. ambientLight Plants and Trees Texture Bundle worth $88 USD approx. - All of our packs are at a minimum of 1024 pixels square and are hand edited so that they tile perfectly, whatever application you use them in!.
Third Winner - $691 worth of prizes E-on software Vue 7 Complete worth $599 USD - Designed for experienced 3D artists and small studios, Vue 7 Complete provides a complete solution for natural 3D scenery. Vue 7 Complete includes all 12 additional modules for Vue 7. Vue 7 Complete also ships with an extensive collection of preset trees, buildings, scenes, characters, etc. Eat3d Training DVD worth $55 USD approx. - Our focus is to have the highest of quality training videos geared toward 3D Artists. We put an obsessive amount of time and effort into our work, and we are very proud of the results. So sit back and join us for a refreshing course in high quality next gen art. Winner can choose to download any 1 training DVD. ambientLight People Texture Bundle worth $37 USD approx. - All of our packs are at a minimum of 1024 pixels square and are hand edited so that they tile perfectly, whatever application you use them in!.
Respected Jury Alessandro Baldasseroni - I`m a 35 years old self taught artist. I was born and grown in Milan (Italy). I`ve been professionally in CG since 2001 and currently employed as a senior character artist at Blur Studio. Francisco Cortina - I’m a professional 3d artist who originally started out as a traditional artist. For some time now I’ve been operating as an independent contractor, running my own company called “Cortina Digital”. John Hayes - My background is in sculpting and 2D animation as both were my primary focus in Art College. Working in Sega as Senior Character Artist on Golden Axe, and became Character Art Lead part-way through that project.
www.cgarena.com
Page 18
Tutorial
Issue 4 Aug - Sep 2009
by Barnali Bagchi, UAE CGArena Software:
Making of Radhey Shyam
Photoshop
2D
INTRODUCTION This artwork was a personal project, an abstract representation of “Rasa Leela”. The ‘Rasa Leela’ or ‘Rasa Dance’ is a part of the traditional story of Krishna (Incarnation of Lord Vishnu), described in Hindu scriptures like “Bhagavata Purana” and literature such as “Geet Govind”, where he dances with Radha (His beloved) and her Sakhi’s (friends). This piece was created in Adobe Photoshop 7 without a graphic tablet. It was completely done with mouse and took me a little more than 10 days to complete. Since I wanted to render a 2D image of a dance form, the biggest challenge was to depict the rhythm and motion of the dance. So I hunted for reference for quite sometime before I came across some beautiful paintings by Shu Mizoguchi. His work is immensely inspiring and a great contribution to the digital art community. You can visit his website here: http://shu-littlebit.com In this tutorial I will share my techniques and will walk you through the many steps taken from initial concept to the final rendering of the image.
INITIAL SKETCH I sketched the figures on a piece of paper to get the proportions right. I then scanned it to my computer and kept it as the base and reference layer. This is how it looked.
BACKGROUND AND BODY COLOR Once I had the reference image it was important to decide the background colour of the final image. Deciding the final background colour helped me to select the colour of the main image. In this case I decided to keep the background colour ‘black’, thus I had a greater colour palette to work with as far as the main image was concerned. Since this is a traditional dance form, colour ‘gold’ was chosen for the ornament and the dress. However it was important not to outline the figures with any colour and stick to ‘black’ to differentiate the hands and feet. www.cgarena.com
Page 21
Tutorial
Issue 4 Aug - Sep 2009
by Barnali Bagchi, UAE CGArena
Making of Radhey Shyam Note: If the background colour is dark, the image should be drawn in lighter shades so as to make the main image prominent and vice versa. If the background of an image is black, it’s important to put the background in a ‘layer set’ and turn it off clicking the ‘eye’ on the layer window while working on the main image. I then outlined the figures with black brush strokes. I used hard round brush, diameter 3 px and also filled the body colours. Krishna is traditionally painted blue and Radha in flesh tint. Also painted the eyes and the lips. Note: To fill an area with colour, draw a path using the pen tool Right click on the path and select ‘make selection’ and use the paint bucket tool to fill the colour. Then hit Ctrl+D to deselect the path.
COLORING THE HAIR After outlining the figures and filling the body colour, I painted the hair. I filled the hair with a base colour, in the image I used ‘black’ and then to draw the hair strands, I used a hard round brush with 3px diameter and control ‘pen pressure’ to stroke each path that I made with the ‘pen tool’. I used 3 layers for Radha’s hair and 4 layers for Krishna’s hair. In each layer I made several brush strokes and then applied gradient to the layers individually.
www.cgarena.com
Page 22
Tutorial
Issue 4 Aug - Sep 2009
by Barnali Bagchi, UAE CGArena
Making of Radhey Shyam For Krishna’s hair I used the gradient
and for Radha’s hair I used the gradient
Making the Peacock Feather and Flowers After colouring the hair, I painted the flowers, leaves and the peacock feathers. For the peacock feather I used hard round brush with diameter 1px and made random lines
on a layer, then made another layer and made even more lines with the hard round brush, this time with the diameter 2px. I then applied two different gradients to the two layers and also applied inner shadow to one of them. After this I painted the flowers and the leaves and played with the colours and gradient to finally decide the best one.
www.cgarena.com
Page 23
Tutorial
Issue 4 Aug - Sep 2009
by Barnali Bagchi, UAE CGArena
Making of Radhey Shyam Painting the Dress And then I started to draw the dress. First I traced the outline of the dress with a hard round brush and applied ‘gold’ colour to it. I then turned on the background layer. Note: You can apply colour to a brush stroke by using the ‘blending option’. You can either use the ‘colour overlay’ or the ‘gradient’ tab to add any colour or gradient to a brush stroke. (To get the ‘Blending Options’ dialogue box, right click on the layer and select “Blending Options’ from the menu).
I then coloured the dress. I selected Pink, Violet, Blue and Green for Radha’s dress and Orange, yellow and brown for Krishna’s. To apply colour to the selected sections of the dress, I traced the path with the ‘pen tool’ and selected the area keeping the feather radius ranging from 5-8 depending on the amount of softness I wanted to render.
www.cgarena.com
Page 24
Tutorial
Issue 4 Aug - Sep 2009
by Barnali Bagchi, UAE CGArena
Making of Radhey Shyam Painting the Jewellery After painting the dress I painted the jewellery, mostly in ‘gold’ colour. Note: To copy a layer (in this case the coloured balls) hold down Ctrl+Alt and drag the layer to the desired location.
I then painted the flute in brown. With this the painting of the final image was complete.
www.cgarena.com
Page 26
Tutorial
Issue 4 Aug - Sep 2009
by Barnali Bagchi, UAE CGArena
Making of Radhey Shyam
This is how the final image looked like, after colouring the dress, ornaments and flute. This piece was not complete and I felt something was missing, so I thought of putting some flowers and leaves at the base of the image to give it a complete look. I painted some individual flowers and leaves in Gold and coloured them with the same colours that I used for the figures, mainly Pink, Blue, Yellow and Green for the leaves. The Image was mostly complete and I used some custom brushes to add the final strokes to the flowers and leaves.
www.cgarena.com
Page 27
Here is the final completed image. I hope you enjoyed reading this tutorial and thanks a lot for reading it. More Artwork: moonbeam1212.deviantart.com Email: bagchi.barnali@gmail.com
Tutorial
Issue 4 Aug - Sep 2009
by Damir G Martin, Croatia CGArena Software:
Making of DinoMonster
ZBrush
3D
I love comics, cartoons, movies, video games, and can’t stop admiring all the great art spawned trough that mediums. A dream from my childhood, to become professional CGI artist (after seeing Jurassic Park 1993) combined with my affection towards Dinosaurs that I started liking since I was a 10 years old, resulted in DinoMonsters concept. Idea behind DinoMonsters actually came to me when I was modeling one Dinosaur model. I started thinking how cool would be to make humanized dinosaur, or a dinosaurized man. That’s how it all started, and before you knew it, I made up 6 characters. At first I thought I had original idea, but later I discovered several similar concepts involving Dino man characters. So, you could say, they aren’t original, but by the great feedback I received from the 3D community from different forums, I guess I did a good job. The difficult part of DinoMonsters was to give them all distinctive look, and again, to keep the visuals together, as if they belong to the same team, and exist in the same universe. As an aspiring character artist, thinking about characters is more of a reflex to me. So, making them apart was easy, but getting them out of the head and into viewport is more challenging. But even if it was hard at some point to create them, with today’s great software it is all achievable. When you think about making something like this in 3d apps like Maya or Max few years ago, it would take three times longer period to get it done, and still wouldn’t look as nice as it looks today. We, who love and live CGI, are lucky to be living in renaissance era of CGI. It’s on us now to make it memorable by producing great and inspiring imagery for our future ancestors. STEP 1- This is how it looked in the beginning. Low poly model for DinoMonsters character. Same low poly object rendered in multiple angles. www.cgarena.com
Page 31
Tutorial
Issue 4 Aug - Sep 2009
by Damir G Martin, Croatia CGArena
Making of DinoMonster STEP 2 - In the below image, above the characters you can see the set of brushes I use to shape low poly object. To get the desired proportions and major shapes I use Move brush. Standard and inflate brushes are the best when you need to add volumes across the mesh.
Clay brush comes in handy when modeling muscles, especially later as you start to subdivide your mesh, and start adding more distinctive lines to the character.
STEP 3 - This is the phase where I am pretty much satisfied with the overall shape. Now I start with subdivisions, and gradually add more and more details to the model. In this phase, the model is more or less ready for next level. Accessorizing!
www.cgarena.com
Page 32
Tutorial
Issue 4 Aug - Sep 2009
by Damir G Martin, Croatia CGArena
Making of DinoMonster STEP 4 - In my case, I wanted to add some accessories to my DinoMonster. This is the good point for accessorizing, before you continue adding more details and color. I wanted things like pants, shirt, belt and guns. In the image shown, you see the shirt painted on top of the model. Basically, you need to mask part you want to turn into clothing. Select standard brush, stroke to freehand and by pressing ctrl, paint the mask where you want it to become clothes.
STEP 5 - After finishing up the mask where you want your clothes to appear, you need to go to Tool/Subtools palette and press Extract. The size of extract depends on couple of factors, so, If your clothes extract too thick, you can delete that subtool and try again, by adjusting the thickness setting. Rename your new subtool to appropriate name, so you don’t have problems later if you decide to make entire subtool tree into one mesh or any other complex subtool operation. Also, the newly extracted subtool is extracted at the subdivision level from the originating mesh. The lowest the better, too low, inaccurate. It just depends of what you want to do with the model later. If you intend to export it with all its subtools in third party app for say, animation, you would need to keep your polycount within the reasonable count. If you are staying in ZBrush, then you can be little bit less concerned with the poly count. www.cgarena.com
Page 33
Tutorial
Issue 4 Aug - Sep 2009
by Damir G Martin, Croatia CGArena
Making of DinoMonster
STEP 6 - Here you can see all the subtools created and refined. The guns were modeled outside ZBrush. When you complete all the subtools, you can carry on applying more details to the base character.
STEP 7 - I have couple of customized alphas that I created myself. When I decide which ones are the most appropriate I set up my brush. Specifically here I have used standard brush, stroke set to DragRect, and my preferred alpha. Z intensity was about 10- 14 set to sub. When the brush was setup, I started dragging texture rectangles across my model. When I’m done with texturing, I start adding the color.
www.cgarena.com
Page 34
Tutorial
Issue 4 Aug - Sep 2009
by Damir G Martin, Croatia CGArena
Making of DinoMonster STEP 8 - In this case, I used polypainting technique. Basically, you select brighter matcap material, preferably white matcap, and start painting directly on the model. When you finish painting/coloring your model you can start preparing for rendering.
Now, the model is posed and prepared for rendering of different matcaps for later compositing in Photoshop.
www.cgarena.com
Page 35
This is the final image. On the sides, you can see different matcap combinations used to create the image. In the compositing, I have additionally placed smoke, and water drops. Smoke is partially derived from photo, and partially painted. Water drops were painted in Photoshop.
Web: www.damirgmartin.com www.dinomonsters.com Email: airartg@gmail.com
Tutorial
Issue 4 Aug - Sep 2009
by Andrew Averkin, Ukraine CGArena Software:
The Dreams of Street Cat
3ds max
3D
INTRODUCTION Hi friends! I finished my new work, named “The Dreams Of Street Cat” and I will show you how I did this project with big pleasure. Usually ideas come to me during my rest, but not at this time. Someone disturbed my rest and it was my father. I needed to help him with repair of our apartment. It is very boring, I know, but it was needs to be done. Once, during repair, one cat came from the street to our apartment. A look of a cat was very sad and sorrowful, maybe cat was ill or simply got tired? Who knows, never mind, so the idea of a cat sitting in old room came to me as I saw this picture. So, let’s start. REFERENCE In this time I wasn’t needed to search different pictures for a project in the web, because all was in my hand and even a cat. I took the camera as a pistol of sheriff and began to shoot around. Room, windows, doors, old things, shoes, objects, all got under the shot of camera. When the set of pictures and textures was ready I began the modeling. MODELING For this project I used 3D Max 9. Above all things, I began work with background of cat, in order that our cat was not so alone in this strange world. Our
cat needs a house, sounds like that. I needed basis of picture, so I created floor, drawing the line and then extrude it. Walls and ceiling was done by the same method. In a window and door opening I inserted simple boxes and then put simple lighting, although I know that cats can see very well in the darkness. Usually I light my scene from the first steps of work, because I can initially see the work with light and it is better to imagine the end result. www.cgarena.com
Page 39
Tutorial
Issue 4 Aug - Sep 2009
by Andrew Averkin, Ukraine CGArena
The Dreams of Street Cat
When basis was ready I started to model different objects and things. At first I did a door, simple window, plinth, radiators and cornice for ceiling, using simple objects such, as Box, Cylinder, Plane, Lines and modifiers such as Extrude, Bevel, MeshSmooth, Edit Poly and few others.
www.cgarena.com
Page 40
Tutorial
Issue 4 Aug - Sep 2009
by Andrew Averkin, Ukraine CGArena
The Dreams of Street Cat Aborting old things from rooms I found an old, red scooter. I dreamed in childhood about such but now this lies in a trash dump, since I took picture of him. It is so sorry. So, I decided that a scooter would be well placed in my project.
Step by step I created new details which I found in our family apartment. Probably it was very funny for my neighbours and they look to me with surprise, how I ran in an apartment with a line and camera, studying different, old, nobody not needed objects like a mad man.
www.cgarena.com
Page 41
Tutorial
Issue 4 Aug - Sep 2009
by Andrew Averkin, Ukraine CGArena
The Dreams of Street Cat Moving forward, to fill the room by different things I decided to do slippers and shoes. I created slipper with a Plane and then converted it in Editable Poly. When slipper was ready I created Unwrap in those places where the UVW Map did not work correctly.
Then I copied slipper in an order to do a few other variants and simply modified them. It would be absolutely amazing, if I could copy things in reality, I would be able to do many useful things, but we still in 3ds Max.
www.cgarena.com
Page 42
Tutorial
Issue 4 Aug - Sep 2009
by Andrew Averkin, Ukraine CGArena
The Dreams of Street Cat As a type of shoes I decided to choose Converse, because it one of my favourite types of shoes, they are very comfortable, they practically not destroyable, and it is good to run from someone or from some problems in them and they look much better old than just from the counter of shop hehe. For Converse I also used Unwrap in some places.
In an order not to create disorder room, like many of my friends do when coming from work or playground, I decided to do a shelf in which I put slippers, shoes, box, and also an old suit-
case, probably same old as grand-dad. Mainly, all is done from simple objects like
box, cylinder, plane, lines, nothing difficult. Attention, attention, to all habitants of room, a cat wants to eat, repeat, a cat wants to eat - a radio began to speak! Oh boy, I forgot that a cat needs a food. I created banks with a food, bowl for cat and feed different forms, to interest a cat. www.cgarena.com
Page 43
Issue 4 Aug - Sep 2009
Tutorial
by Andrew Averkin, Ukraine CGArena
The Dreams of Street Cat Moving forward, I did a few details and finally finished with background. Last step in a modeling is our cat which I also did with Edit Poly and then Unwrap it.
For fur I used Hair and Fur modifier. For me this is comfortable enough and there are many interesting instruments in him, like real master of style or hairdresser, and this works also good with lines. So, I needed a fur and scissors, and also I needed a cat, which was running round me. But we worked in 3D space, so for this purpose I opened the new scene in which created a sphere and used Hair and Fur modifier for it. It was necessary to play with properties and after a few hours, when a fur of my shaggy creature was done, I saved these properties. www.cgarena.com
Page 44
Tutorial
Issue 4 Aug - Sep 2009
by Andrew Averkin, Ukraine CGArena
The Dreams of Street Cat Then I created the lines of direction of growth of hairs on a cat with Snap Tool and then chosen these lines in Hair and Fur. Also for the color of fur I used texture of a cat which I done before. I had to do a cat in other scene with Scanline Renderer, because Hair and Fur does not work with Vray. Maybe it was possible to convert fur in geometry, but then there would be too much polygons and my old computer would not survive.
Fur on a shoes brush also did with Hair and Fur and then converted into geometry. The same method I used for a carpet and for a floor brush, and then converted into proxy.
MATERIAL AND TEXTURES As I already said before, many textures I taken through the shots of camera and then, corrected them in Photoshop. Also I used a few textures from www.cgtextures.com. Here you can find large collection of textures which collected on a different theme in a high quality. Here are few examples of materials and textures from this project. www.cgarena.com
Page 45
Issue 4 Aug - Sep 2009
Tutorial
by Andrew Averkin, Ukraine CGArena
The Dreams of Street Cat
LIGHTING AND POST-PRODUCTION For lighting I used VRay Sun and VRay Physical Camera, and also one Vray Plane for lighting distant part of room. I did a few Render Elements, and then combined them in Photoshop. I needed render of all my scene with a cat, pass with fur and also foreground objects.
Else, I created ZDepth channel, which I combined with fur.
www.cgarena.com
Page 46
Tutorial
Issue 4 Aug - Sep 2009
by Andrew Averkin, Ukraine CGArena
The Dreams of Street Cat A little bit of colour correction, chromatic aberration and final picture was ready.
So, I got much pleasure and experience in the process of making of this project, a cat also got his sweet portion and repair of our apartment is waiting for me. Big thanks to all, hope you will take something on your own from this story.
Andrew Averkin
Email: andrewaverkin@yahoo.com www.cgarena.com
Page 47
Tutorial
Issue 4 Aug - Sep 2009
by Chaichan Artwichai, Thailand CGArena Software:
Painter, Photoshop Making of Portrait of a Magic Warrior
2D
This is my personal work that I’ve made for fun. It’s all start from a doodle sketch which become a finished piece and there are no references or planning in this work. I used the Painter 11, Photoshop CS 3 and Wacom Intuos 3 for creating this image. Let’s start the first step of this image. I have chosen Pencil-Brush in painter 11. At the first time I try this tool in painter 11, it is really great tool for sketch and simulate pencil stroke very realistic especially if you use it with intuos3 or 4 that can control the angle of the stroke softly. If you never touch it before I recommend!! As I have said before this is just a doodle sketch that I was playing with new tool, so it’s not much planed work. In the sketching process I’m not concern about structure so much. Just keeping the emotional of the line, control the tablet like its part of my hand and let the feeling burst any elements to appear in the frame.
When I finish from the painter I save the file as .psd file prepare for working in Photoshop. For the coloring process I always think in term of value at first because it important more than color but it’s doesn’t mean color is not important. A good composition come from a good arrangement of black and white value which impact the eye at first and we will talk about color later. www.cgarena.com
Page 49
Tutorial
Issue 4 Aug - Sep 2009
by Chaichan Artwichai, Thailand CGArena
Portrait of a Magic Warrior Create a new layer and set to multiply blending mode or if you have separated layer from painter just create a new layer under the line layer and fill it with middle value in gray scale slider. After filling with the middle value, I was thinking about the focal point of the picture it is a portrait and the face should be a good choice to be a focus and I want to make its white object by the skin which fills with the light from above. There are lot of tricks to make a good focal point and this is basic by make a big negative shape in the picture as a focal point and in this kind is a face which become white when turning it into notan. When the main value of any objects in the picture already filled I will not use pure black or pure white as a value always keep it about 95% in black value and 10% in the high white value(you can see color percentage in the gray scale slider in Photoshop).
I always use the normal round brush with a little customize in this process.
www.cgarena.com
Page 50
Tutorial
Issue 4 Aug - Sep 2009
by Chaichan Artwichai, Thailand CGArena
Portrait of a Magic Warrior Then it is time for coloring, fill the new layer with a green in low saturation value and set to multiply blending mode. The first color that I choose to fill in the frame is the main mood color of the picture also. Then I start a skin tone coloring by using soft light in blending mode try to get a bit red shade to make it pop up from the overall green environment.
Normal Mode
Softlight Mode
Detail 1
Detail 2
The final process is polishing by keeping the percentage of the color in the whole picture filling any elements into it as much as you want by thinking about the value, adjustment image by using the power of Photoshop at the end.
www.cgarena.com
Page 51
Tutorial
Issue 4 2 Aug Apr --May Sep 2009
by Chaichan Artwichai, Thailand CGArena
Portrait of a Magic Warrior
I hope this tutorial make you enjoy to painting more and if you have any comments you can contact me by my email….Thank you.
Web: chaichan-artwichai.blogspot.com Email: t_artwichai@hotmail.com www.cgarena.com
Page 52
Hyejin Moon, Korea bluemoon727@naver.com 3ds Max, ZBrush, Photoshop Antonio Bonora, Italy principe_antonio@hotmail.it 3ds Max, ZBrush
Massimo Righi, Italy info@massimorighi.com Maya, Mudbox, Photoshop
Hugo Costa, Portugal lw4d@hotmail.com Cinema 4D, Corel Photo Paint
Anto Juricic, Bosnia and Herzegovina monty.band@gmail.com Maya, Silo, ZBrush
Saman Khorram, Persia samysuns@gmail.com 3ds Max, XSI, Photoshop
Federico Scarbini, Italy fede@federicoscarbini.com ZBrush, Photoshop
Jorge Suarez, Argentina info@buildmultimedia.com.ar Lightwave
Kirill Boutourlin, Ukraine cyrilbut@gmail.com XSI, ZBrush
Ke Weilin, China keweilintuke@sina.com 3ds Max, ZBrush
Ivan Stalio, Italy uno@ivanstalio.com Modo
Farkas, Hungary info@visualharmony.hu 3ds Max, Vray
Karan Shetty, India karan.crazymonkey@gmail.com Maya, ZBrush, Photoshop
How to send in your images... We showcase the cream of reader images in magazine and on website gallery. Here’s how to get yours noticed
Upload Images through Website Follow this link http://www.cgarena.com/submit.php This is by far the quickest and easiest way to send your images to us.
To Advertise: contact@cgarena.com