1 minute read
Model 6210 Maintenance Manual
Steering and Controls
5.Use a fine tip flat head screwdriver to carefully press the connector’s latch toward the circuit board (VM).
Section 7.Component Procedures
Keypad
Keypad Installation
1.Install the ribbon cable connector into the VM. The connector will only install in one orientation. You will hear the latch click when the connector is fully inserted.


6.With the connector’s latch pressed, gently pull on the ribbon cable until the connector is released. Connector removal requires very little force when the latch is correctly pressed.


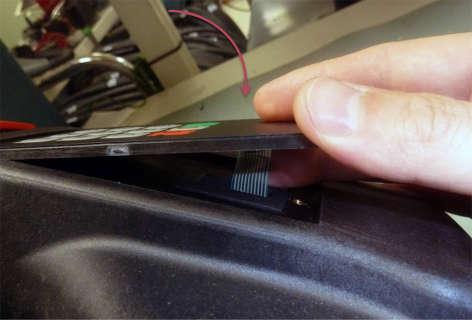
2.Insert the keypad mounting tabs into the control handle head.
Publication: 1146947, Revised: 12 Jan 2017 7-19
Section 7.Component Procedures
Model 6210 Maintenance Manual
KeypadSteering and Controls
3.Use the short end of an Allen key to gently bend the excess ribbon cable into the handle head away from the connector latch. Use extreme care when performing this step so that the ribbon cable is not creased.

5.Once the keypad is fully seated. Install the retaining screw. Torque the screw to 4.4in. lb. (0.5 Nm).

4.Carefully lower the keypad into the control handle head. Use a finger to help guide the excess ribbon cable into the handle head.


