15 minute read
THE FUEL SYSTEM (① Main Fuel Filter)
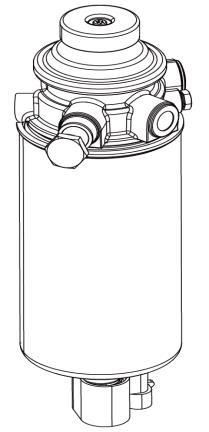
1. Raise the engine cover.
2. Make sure there is fuel in the fuel tank
3. Press the hand primary pump
4. Rerease the Fuel connector.
5. Using the starter key, turn the engine until air free fuel flows from the main fuel Filter to the fuel injection pump.
6. Close the connector on the main fuel Filter.
7. The engine is now ready to start
If the engine runs smoothly for a short time and then begins to run roughly, leave it at idle until it runs smoothly.
Important
Never use petrol, thinners or any other similar flammable material to clean the fuel filter.
► CHANGING THE OILS IN THE TRACTOR
Always use quality oils for engine or transmission oil
Refer to the table on page 60 and 61 for the change frequency.
► CHANGING ENGINE OIL
Park the tractor on a level surface, shut-off the engine and remove the sump plug & drain oil. Replace and check the sump plug and refill the engine with oil to the correct level on the Dipstick (approx. 1.98 gal)
The grade of oil to be used will depend on the ambient temperature. (API CJ-4 grade)
The tractor is shipped from the factory with 15W/40. For summer use over 77℉ use SAE 30
For temperatures between 32℉-77℉ use SAE20 or 15W/40. For temperatures below 32℉ use SAE 10W.
Important
When changing the oil always change the filter. Always use the same oil, as using different oils or specifications can cause damage. Dispose of the old oil as per local regulations.
► CHANGING THE TRANSMISSION OIL
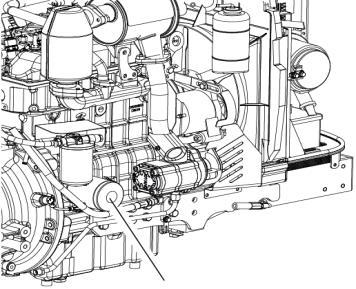
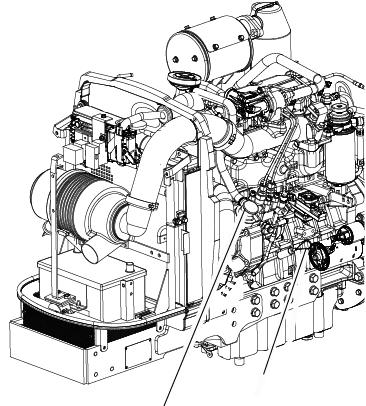
1. Allow the transmission oil to cool.
2. Remove the drain plug from bottom of the transmission and drain the oil.
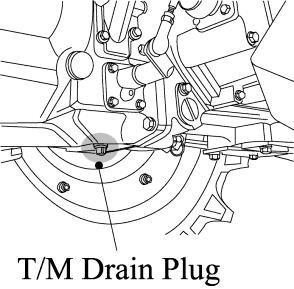
3. Replace and check the drain plug.
4. Refill the transmission to the correct level on the dipstick with new oil : Qty 35ℓ(9.25 US gal)
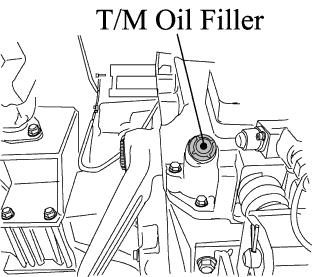
Important
Always use the same grade and specified oil as replacements. Dispose off the old oil as per local regulations.
► CHANGING OIL IN THE FRONT AXLE
1. Drain the oil from the center diff plug and the drain plug in each drive.
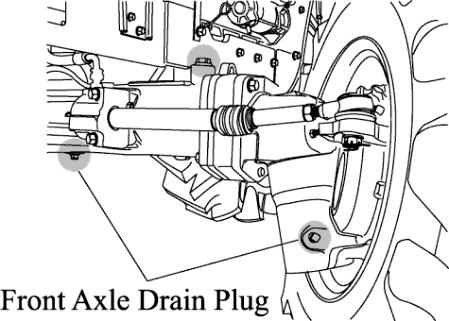
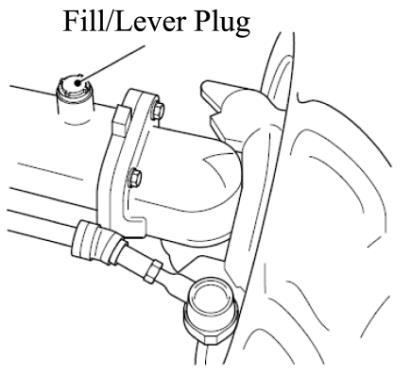
2. Replace and tighten all drain plugs.
3. Remove the Fill/Lever plugs from each final drive to vent air from the final drives.
4. Remove the dip stick from the filter hole and fill with Front axle oil capacity 8.2ℓ (2.17 US gal) and allow time for the oil to drain into the final drives.
5. Check the oil level with the dipstick and replace the Fill/Lever Plugs on both final drives and tighten
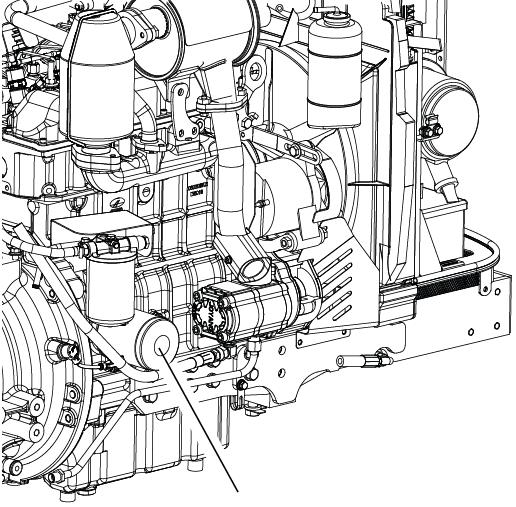
Some operators have found that when they fill up with the correct amount of oil, the level on the dipstick is too high due to the fact that it takes a while for the oil to run into the final drives. Opening the Vent plugs helps to speed this up. Important
► CLEANING AND CHANGING FILTERS
► ENGINE OIL FILTER
Using a filter wrench, turn the filter counterclockwise to remove it.
Lightly smear the rubber seal on the new filter with oil to ensure, turn it clockwise until the seal contacts the base and then turn it another 2/3 turn to tighten it.
► HYDRAULIC OIL FILTER AND ENGINE OIL FILTER CARTRIDGE
Remove the filter with a filter wrench.
To replace, apply oil or grease on the seal, fit by hand until the seal contacts bare, then turn it a 2/3rd turn further to tighten and check for leaks.
► CHANGING THE COOLANT
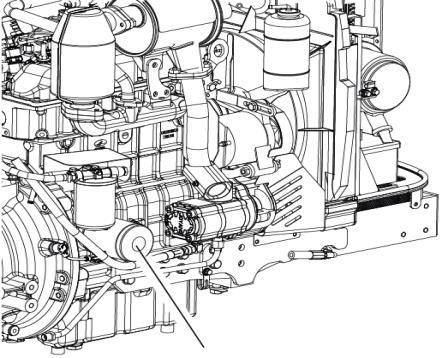
(1) Open the tap in front of the gear pump to drain the coolant.
(2) Open the radiator at the same time.
(3) To give a thorough clean, run a hose into the radiator and flush it out.
(4) Close the tap and refill the radiator with a coolant mixture of water and corrosion inhibitor or anti freeze.
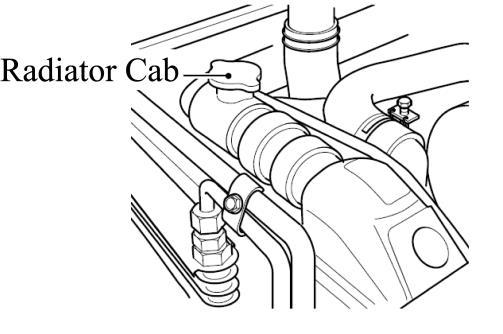
(5) Start the engine and allow it to run for approx, 5 minutes, check the water level again and top off if required.
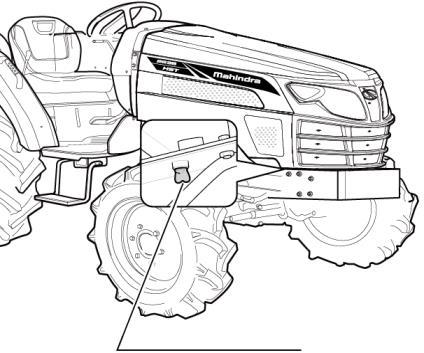
Caution
Do not remove the radiator cap on a hot engine.
Allow the engine to cool down and then turn the cap slowly to ensure, that there is no excessive pressure in the radiator.
Serious burns can result from the contents of pressurized, hot radiators
Allow the engine to cool down completely before opening the radiator. Caution
► ANTI FREEZE
Frozen cooling water can damage the engine. Before replacing the anti freeze solution flush the radiator.
Mix the anti freeze solution in accordance with the instructions applicable to the brand of anti freeze and the local climate.
Replace the solution in the radiator.
In the case of the loss of solution due to evaporation or overflow, replace with the original mixture ratio.
Important
Water or air under high pressure can distort the cooling fins on the radiator and Reduce their efficiency.
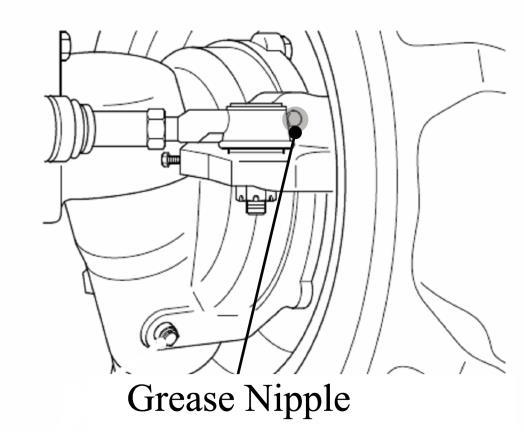
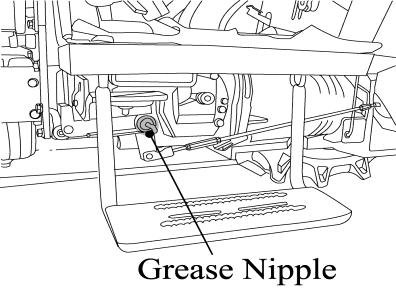
► GREASING THE TRACTOR
Grease the tractor according to the service schedule. (page 54)
Ensure that grease nipples are cleaned well before any attempt is made to grease them.

Adjusting The Clutch
Using the clutch over a period of time will increase the free play.
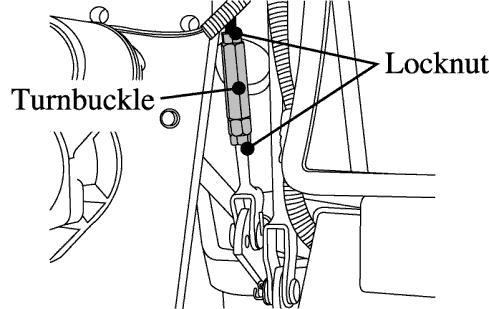
The correct free play of the pedal is 0.78~1.18 in To adjust, loosen the locknut on the turnbuckle and adjust. Check the adjustment and tighten the locknut if the free play is correct.
► ADJUSTING THE BRAKES
As is the case with the clutch, use of the brakes will change the pedal free play and the balance between the right and left pedal.
The correct pedal free play is 1.18~ 1.57 in.
■ Adjusting Method
Loosen the locknuts to adjust the brake. Turn the turnbuckle counterclockwise to increases the free play, or turn the turnbuckle clockwise to decreases. Tighten the locknut and confirm to fix the nuts. Check that the free play is correct and the same on both pedals to ensure even braking.

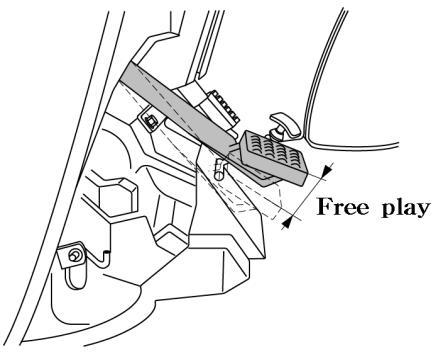
An uneven adjustment of the left and right pedal will result in one sided braking when the pedals are connected and can cause serious accidents, especially at high speeds.
Caution
Double check to ensure that free play is the same on both pedals
► ADJUSTING THE THROTTLE LEVER
If this level is either loose or difficult to move please consult your dealer for rectification of the problem.
► ADJUSTING TOE-IN
If the toe-in adjustment is incorrect it can cause the severe shaking of both the steering wheel and the entire tractor.
The correct toe in is 0.08~0.24in. We recommend that this adjustment is made by the dealer.
► CHECKING THE BATTERY
Check the Indicator
Green color – Good condition
Black color – Charging necessary
White color – Replace battery
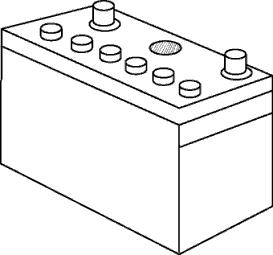
Important
Low electrolyte levels can cause premature battery failure and corrosion. Electrolyte contains acid and can cause serious burns.
Any spillage on skin should be washed off by running water immediately.
Caution
► BATTERY MAINTENANCE
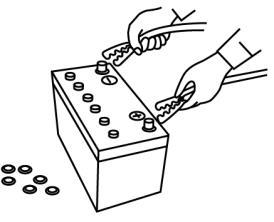
Low temperatures will affect the performance of batteries so take particular care of it in winter. For the long-term storage of the tractor, remove the battery and keep it in a cool dry room.
If it is on the tractor while stored, disconnect the negative terminal.
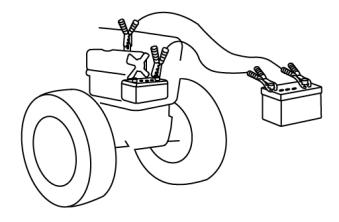
Batteries will self discharge if left for a period of time without use.
To keep them in good condition charge them once a month in summer and every second month in winter. When replacing the original battery, ensure that the replacement battery is the same size. Failure to do so can cause problems with the electrical circuit.
► BATTERY CHARGING
-A boost charge is only for emergencies. It will partially charge the battery at a high rate and in a short time.
-When using a boost-charged battery, it is necessary to recharge the battery as early as possible.
Failure to do this will shorten the battery’s service life.
Caution
Always disconnect the negative terminal first when removing the battery and always connect the positive terminal first when fitting the battery. When connecting the battery leads make sure not to reverse the polarity. Quick charging will reduce battery life.
Disconnect the terminals prior to charging the battery to avoid damage to the circuit and electrical instruments.
► FAN BELT ADJUSTMENT
1.Loosen the alternator pivot bolt.
2.Move the alternator in order to increase or decrease the belt tension.
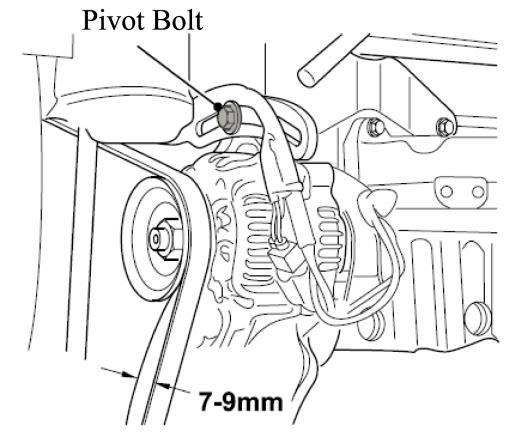
Tighten the alternator pivot bolt and the link bolt to 22 N.m (16 lb ft)
► SERVICING THE AIR CLEANER
■ Cleaning the Air Cleaner Dust Valve
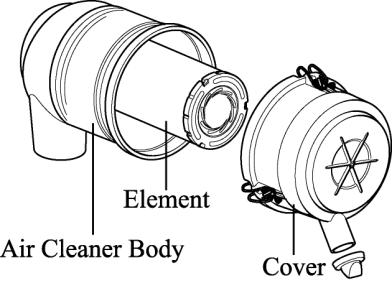
Check that the dust valve is not blocked.
Inspect the rubber flaps for cuts and nicks and check that the rubber has not perished. Renew if necessary.
To remove dust from the dust valve, squeeze it between thumb and fingers.
Wipe around the dust valve to removedust collected on the outside.
■ Cleaning/ Changing the Element
Release the three clips on the air cleaner end cover and Remove the element. Remove dust by blowing compressed air through the element.
Check the element for damage, if necessary, change the elements. Check all hoses for condition and tightness.
Never beat the element on a stone or concrete floor/wall to clean it.
Check all connections and hoses especially on the clean side of the air cleaner to ensure no dusty air can enter the engine.
Important
Check the element for flaws by putting a light inside the element. When reassembling, make sure all surfaces seal correctly to keep dust out. When working in dusty conditions increase the service frequency.
► Replace the element after cleaning it 5 times or if it is damaged.
Checking Hoses And Lines
The fuel lines, radiator hoses, hydraulic and rubber hoses are consumables, which deteriorate by age and use.
Check them regularly and replace if faulty.
Damaged fuel lines leak and cause fires.
Damaged radiator hoses can cause hot water burns and in severe cases seize the engine. Caution

► CHECKING THE WIRING HARNESS AND FUSES
Loose wires make inferior connections and damaged wires can cause short circuits, fires, burnt wiring or reduce the efficiency of the components. Replace or repair any faulty wiring or insulation.
If a fuse burns out again after it has been replaced, do not replace it with wire or a high capacity fuse, find the cause and rectify it or get an auto electrician to do so. Where insulation is chafed or peeled off, recover the area with a good quality insulation tape. Where wiring comes out of it’s fitting, replace it correctly with the standard fitting.

Incorrect wiring or fuses can cause fires to both the tractor and surrounding area so get the dealer to check it annually. Likewise, fuel pipes and wiring age with use.
Ask your dealer to check it at least once every 2 years and replace as required
► REPLACING FUSES
The circuit has 8 blade type fuses in its wiring circuit
(See diagram on page 90).
When a fuse has blown replace it with one of the same value. Using a large capacity fuse or wire burns out the wiring system. Use fuse tongs to replace fuses.
► MAIN FUSES
The wiring harness is equipped with 3 main fuses whose function is to preserve the wiring.
However, when a main fuse blows the entire circuit is dead. Always check the reason & rectify before replacing with a fuse of the same value.
To indicate that the fuse is blown it will be discolored.
Always check the reason for a blown fuse otherwise the new fuse is also likely to blow.
NEVER EVER USE WIRE in a place of correct grade fuse.
► SERVICE PRIOR TO DAILY AND SHORT TERM STORAGE.
Wash the tractor and keep it clean.
Fill the tank to avoid condensation and rust.
Lower any attached implement to the ground before parking the tractor.
For long-term storage consult your dealer
Maintenance
For daily or short term storage
Clean the tractor and remove all dirt from field work. Fill the fuel tank to avoid condensation and rust.
Lower the implement to the ground.
Keep it in a machinery shed or, if not available cover the unit if left outside. In very cold conditions it is advisable to remove the battery and keep it inside in a warm environment. This will ensure effective starting when the tractor is required.
When the outside temperature is below 32℉, replace the antifreeze completely or drain the coolant to protect the engine from damage from frozen coolant.
When washing the tractor ensure that the water does not get near electrical components or the oil filter points. To prevent short circuits remove the ignition key. Do not wash the tractor when the engine is running.
Long-term storage
When the tractor will not be used for a long time carry out the cleaning as for short term storage.
Drain the oil and replace it with new oil.
Run the engine for approx. 5 min. to ensure that it has new oil throughout the engine.
Drain the coolant from the radiator and remove the ignition key.
Attach a tag to both the key and the steering wheel saying “No coolant”.
Lubricate all grease and oil points on the tractor.
Check the pressures and add a small amount of extra pressure.
Lower any implement to the ground or store in a shady dry place.
Disconnect the clutch by using the clutch disconnecting arm.
Place a piece of wood under each tire to preserve the tire.
After refilling the engine with coolant, run the engine for approx. 5-10 min. at 1500-2000rpm every month as a corrosion prevention measure.
Either remove the battery or the negative terminal as mouse damage to wiring can cause short circuits and fires.
Remove the ignition key and store it in a safe place.
Re-use after long term storage.
Carry out a full check of all oils and coolant.
Refit the battery and run the engine at idle for 30 min. to ensure optimum engine life.
The cab fully conforms to the international standard as far as safety and soundproofing are concerned. It can be provided with ventilation, heating and air-conditioning systems. It is available in the following version.:
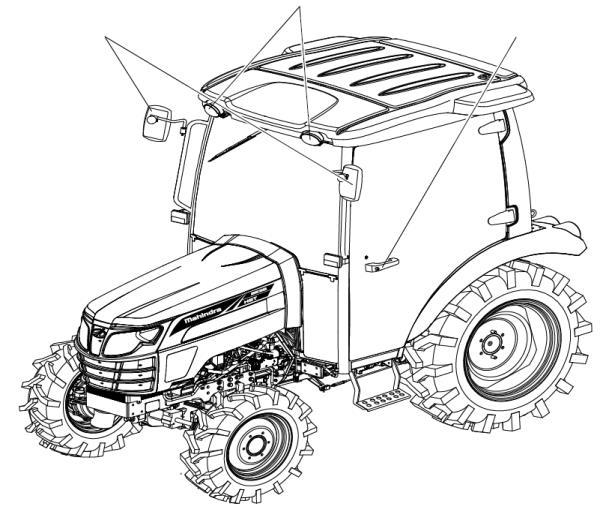
● Cab with ventilation and heating systems
● Cab with ventilation, heating and air-conditioning systems.
The cab is in full conformity with the international standards as to the cab’s soundproofing.
Be very careful when operating in small spaces and always protect your ears whenever other working equipment is generating dangerous noise levels.
Remember that steering, braking and operational performances are highly influenced by the implements mounted, the trailers transported and the ballasts applied to the tractor.
Caution
When transporting heavy loads (exceeding the weight of the tractor) reduce the speed under 15 Km/h..
Caution
Caution
All the implements mounted onto the tractor must be safely secured.
Caution
Be very careful during implement hitching and unhitching operations. When using implement supports, be sure they are suitable and sufficiently strong.
Instrument And Related Parts
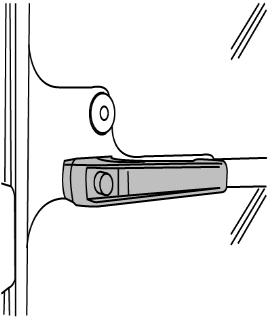
■ Doors:
The doors are provided with key locks.
To open from the outside, when unlocked, depress the push button.
To open from inside, push the lever downwards.
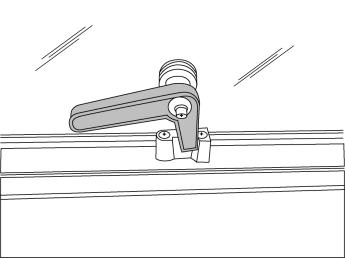
■ Rear Window:
The rear window is fitted with a central handle for opening. When opened it is held in place by two dampers.
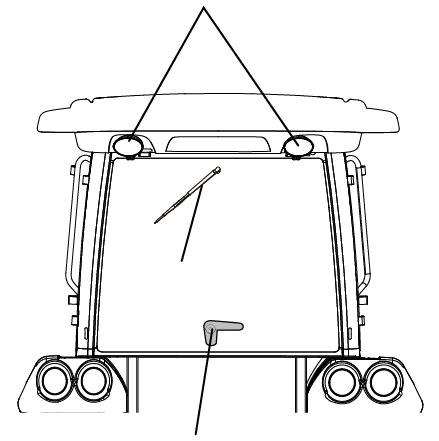
■ Working lamps (front and rear) :
The working lamps are located on the cab roof (two in the front and two in the rear) .
They are switched on by means of the special switches on the roof console
Working Lamp
Rear Mirror
Working Lamp
Door Handle
Rear Wiper
Door Handle
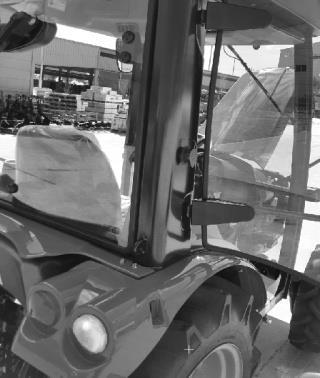
■ Rearview mirrors.:
The cab is provided with rearview mirrors on both sides. They can be adjusted and folded, whenever necessary, to avoid interference with external obstacles. The mirrors have a telescopic arm to allow positioning for maximum convenience by the user. Remember that mirrors must always be positioned in compliance with road traffic regulations when driving on a public highway.

■ Cab Ceiling:
The ceiling is padded with insulation material to block heat radiation into the cab and keep the temperature down when working in very sunny areas. The cab platform is covered with a “firm grip” carpet in the most commonly used areas. It is recommended to keep this carpet clear of earth, mud, etc, so that the operator may get on and off the tractor in full safety.
► How to Controls the Cabin
■ Ventilation
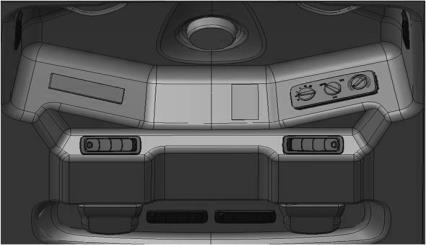
The ventilation unit is housed in the cab ceiling. To switch it on and adjust it, turn the electrical fan switch to the desired speed. The cab becomes slightly pressurized when the ventilation system is in operation, so that fresh air can enter only by way of the filter installed in the rear section of the cab roof. The fan switch can be operated only after the ignition key is inserted. The air flow can be regulated and directed by suitably positioning the air diffusers. Air can be taken in fresh from outside or recycled from within the cab by way of the relative side inlets.
■ Re-circulation inlets fully closed: Air is taken in entirely from outside the cab through the rear grille and filtered through a paper element positioned behind the grille.
N.B-it is very important that the air diffusers never be completed closed so as to allow for a steady air flow.
To obtain a greater pressurization inside the cab, it is necessary to take in air from the outside, therefore the inside air recirculation grille should be fully closed.
■ Working lamp switch
The front and rear working lights are ON when the button is pushed. The instrument cluster illuminates when the work light indicator lamp is on.
■ Wiper control switch
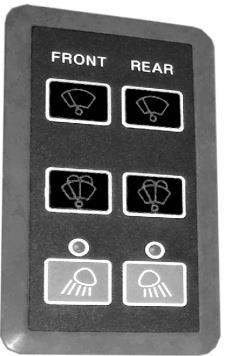
- Switch ON
The Wiper switch is ON when the top button is pushed. The Washer switch is ON when the Mid-button is pushed.
- Switch OFF
Once again push the buttons.
Wiper switch
Washer switch
Working lamp switch
■ Windscreen Washer tank
Check the level of windscreen washer fluid in the plastic reservoir located at the Real of the cab.
During winter, it is advisable to add a suitable antifreeze or methyl alcohol to the windscreen washer fluid.
■ Interior Lamp
Push the button to light on and push it again to light off.
■ Blower control switch
Three position rocker switch
Blower Control Switch
■ Temperature control
Set temperature control as required fully clockwise for maximum cool and fully counterclockwise for heat.

Temperature control
■ Air conditioner switch
To operate the air conditioner the blower must be on the blower speed temperature control and all vents must be adjusted to obtain the best cooling for the ambient temperature and dust conditions. Under normal operating conditions, and with the windows and doors closed, temperatures in the cab of 6ºC to 15 ºC (10 ºF to 25 ºF) less than the ambient temperature will occur. When operating the air conditioner system, the moisture level is decreased.
NOTE:
1) During cold weather, with ambient temperature above 0 ºC (32 ºF) operate the air conditioner at least once per month for a period of 10 to 15 minutes. This will lubricate the seals to prevent them becoming brittle and help prevent the loss of refrigerant from the system.
2) The system is equipped with an environmentally safe refrigerant, R134a. Never recharge the air conditioning system with refrigerant other than R134a as this will result in loss of cooling and permanent damage to all air conditioning components

■ Circulation diffuser
With the circulation vent set in any position outside air will still be pulled into the cab.
■ Heating System
General description
The heater is switched on and adjusted by rotating the control knob at the roof console, then switching on the blower and setting the selector to the preferred speed .
To warm the cab up quickly, the knob should be rotated fully clockwise and the blower set to speed 3.
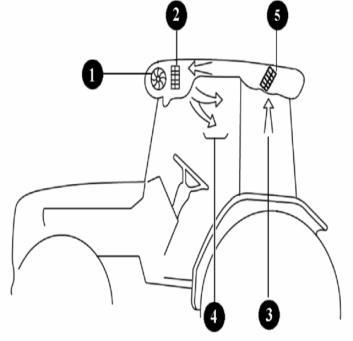
The screen is demisted or defrosted by air directed through a slot vent .
For defrost or fast demist, all other vents should be closed off.
IMPORTANT:
Ventilation is provided by a single blower unit serving both the heating system and the air conditioning system.
After reaching the desired temperature adjust the system to suit your needs.
NOTE: For ideal system operation, the engine must run at 1000 rpm
Before starting the engine, make sure the system is off (by turning off the ventilation fan) so as not to overload the battery.
After the system is at full power for a long period of time, never turn it off suddenly but let it first idle for about 20 seconds.
► SYSTEM CONFIGURATION
The heating system consists of two units:
1. An electric heater and blower unit installed behind the roof console.
2. A power supplying set, consisting of an auxiliary alternator located at the front of the engine and driven by a belt directly linked to the engine pulley.

If the air does not come out from the diffusers right away as soon as the system is started, turn off immediately and identify the fault.
N.B-Never turn on the heating system when working in dusty environments.
► COMPRESSOR BELT ADJUSTMENT
Check the compressor belt tension regularly and adjust if required.
The correct tension is when the center of the belt is pushed with a finger and it moves in approx. 10 mm (0.39 in) as shown in the picture.
To adjust the belt, loosen or tighten the nut as shown in the picture.
► AIR CONDITIONING SYSTEM
The system is designed to ensure optimum temperature inside the cab and maximum comfort and safety for the operator.
However, it is advisable to consult our specialized workshops whenever repairs or adjustments need to be performed.
Do not approach the system with open flames, as any escape from the circuit may produce a lethal gas.
①
The presence of air and water in the system could jeopardize its efficiency.
-The air is uselessly compressed by the compressor and no cooling effect is produced.
-Moisture has a tendency to obstruct prevent cooling efficiency.
② Check belt tension; when finger pressure is applied to the mid-point between both pulleys.
③ Condenser fins must always be duly clean using water or an air set.
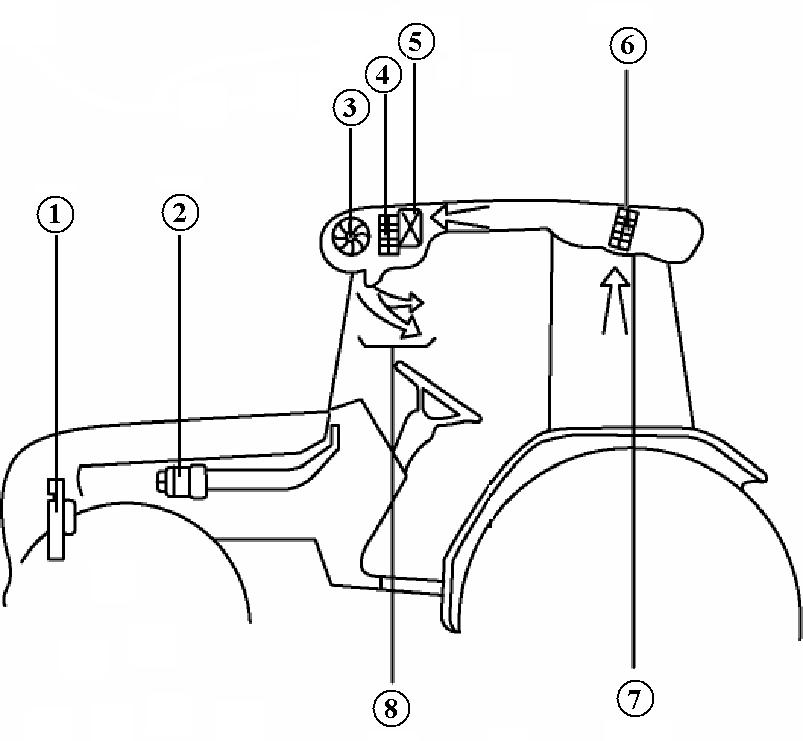
2. Checking the air conditioning system charge
(1) Check the refrigerant charge.
A. Run the engine at 1500rpm
B. Set the air conditioning system at the coldest for 5 minutes.
C. Check sight glass for clear sight or cloudy.
If the air conditioning system is operated without being charged, The lubrication in the compressor can cause damage. Caution
■
Radio, CD player (Option)
For operation refer to the Radio, CD player manufacturer’s instructions.
■ Cup Holder
For bottles and personal belongings.
■ 12-V socket
It is possible to use a 12-V 120-W accessory by connecting it to the power socket.
