2 minute read
Lubrication & Maintenance


This section gives the full details of the service procedures necessary to maintain your tractor at peak efficiency while the lubrication and maintenance chart provides a ready reference to these requirements.
Checks And Service
► PRE-START CHECKS
To avoid problems it is recommended that a range of checks be carried out daily before starting the tractor.
For full details of the items and frequency please refer to the tables on page 53,54 and 55
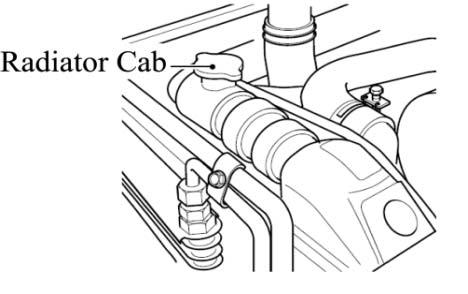
► ENGINE COOLANT
Remove the radiator cap and ensure that the coolant is up to the filler neck and that it is clean with the correct anti-freeze or anti corrosion inhibitor in it.
If the coolant is a rusty color, drain the system completely and refill with the correct mixture of water and anti-freeze or corrosion inhibitor.
► ENGINE OIL
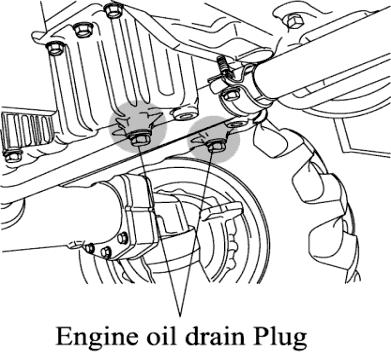
Pull out the stick, wipe it and dip it in the oil sump. Ensure that oil level is between the upper and lower marks near the upper mark. If it’s too low add oil, but never after the 100 hrs of service interval.
Do not overfill the crankcase with oil.
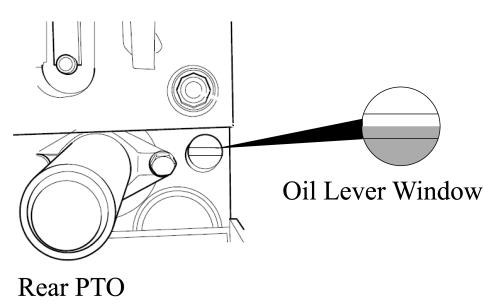
► TRANSMISSION OIL

Check the level with the dipstick on top of the transmission in the rear of the seat. If the level is low add oil through the filler hole.
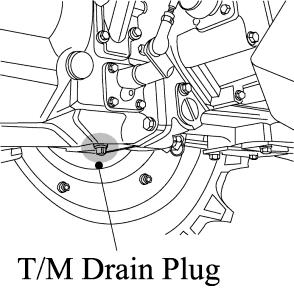
Always ensure that you use the correct oil for topping off or oil changes Caution
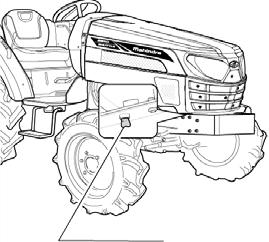
► FUEL
The Fuel Filler is located on the rear of the seat. Use the fuel gauge to check the fuel level and top off if it’s too low.
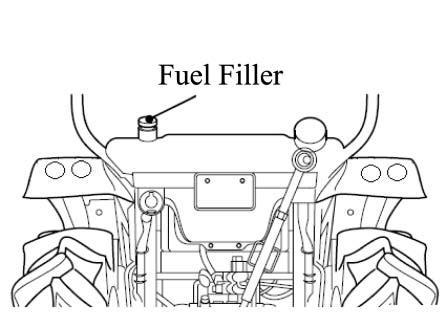
It is a good practice to refill the tank immediately after use to avoid condensation
► TIRE PRESSURE
The air pressure used in the tires has a direct bearing on the life of the tire and its performance in the field.
Ensure that the tire pressures are correct and in accordance with the table on page 48. To make a visual judgment see the drawing on the right.

It is strongly recommended that tire pressures are checked with a proper gauge only & visual inspections are relied upon.
Important
Excess tire pressure can cause accidents! Danger
► STEERING
Ensure that the steering wheel does not have excessive free play.
► BRAKE
Ensure that the left and right brakes are adjusted correctly so they operate simultaneously. The correct free play on the brake is 1.18-1.57 in (30~40 mm).
► CLUTCH
Ensure that the clutch is adjusted correctly. Correct free play on the clutch pedal is 0.78-1.18 in (20~30mm).
Incorrect clutch adjustment can cause excessive wear and reduced tractor performance. Caution
► ELECTRICAL
Check the operation of all gauges, switches, horn, lights and indicators.
► INSTALLING LOADER
1.Connect the P port of the loader control valve to the line on the tractor marked P(from the PTO valve)
2.Connect the T port on the loader control valve to the line on the tractor marked T.
3.Connect the remaining line from the control valve to the line on the tractor marked P1 ( to the transmission housing).
► DETACHING THE LOADER (LOADER CONNECTING PORT)
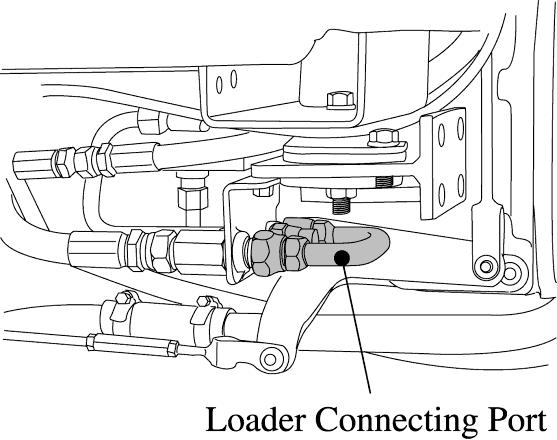
1.Detach the hydraulic hoses of the loader.
2.Assemble the cap (PF1/2) with pipe comp (PF1/2).
Maintenance And Adjustment Schedule
These intervals are for operation under normal conditions and need to be reviewed under severe conditions to a greater frequency.
Chassis
Trans mission oil every 500hours or 12months after first 50hours
Free play of clutch pedal ○ (0.78-1.18in)
Free play of brake pedal ○ (1.18-1.57)
State of both brake pedals
Operation of each lever
Free play of steering wheel
Adjust so that both operate simultaneously and brake at the same time
Check daily
Toe-inCheck every 300hours
Grease in front wheel hub
Grease each nipple
Wheel nut fastening torque
Grease every 300hours
Tighten if loose Front : 1600~1800 kgf-cm (116~130ft-lbs)
Rear : 1600~1800kgf-cm (116 ~ 130 ft-lbs)