8 minute read
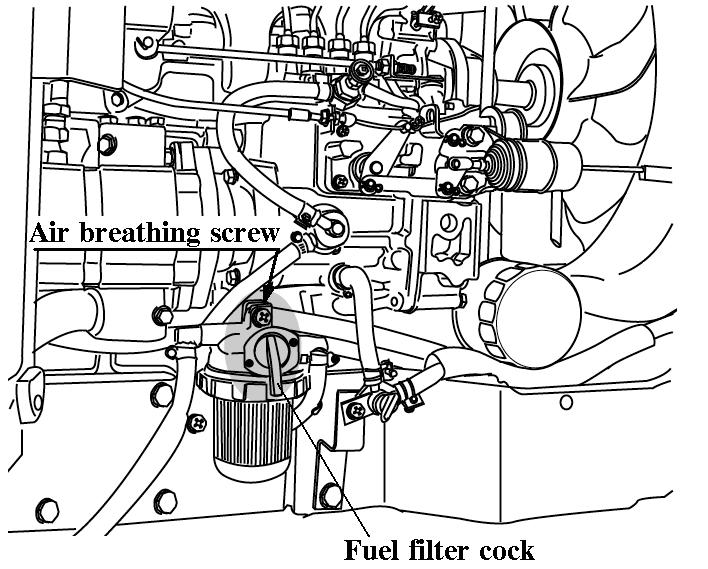
BLEEDING THE FUEL SYSTEM


1) Fuel filter cock 「 ON 」
2) Open the cock on the fuel injection pump
3) Fill the tank with fuel and turn the ignition key to on.
4) Start the engine and allow it to run for a while
5) Close the fuel injection pump cock.
6) The bleeding of the system is now finished.
Changing The Oils In The Tractor
Always use quality oils as engine or transmission oil (refer to the page 60)
Refer to the table on page 60,61 and 62 for the change frequency.
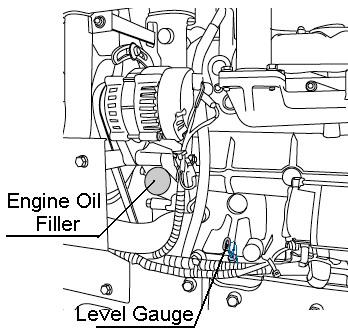
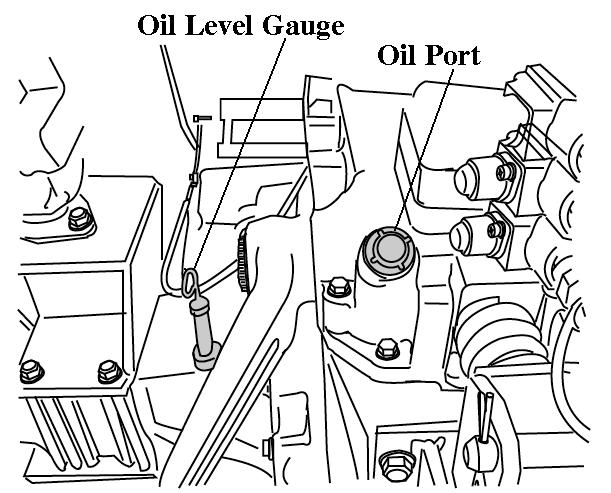
▶ Changing engine oil.
Park tractor on level surface, shut-off engine
Remove sump plug & drain oil.
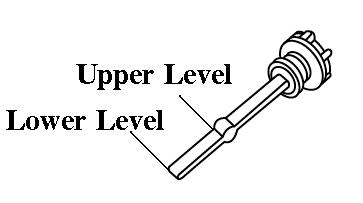
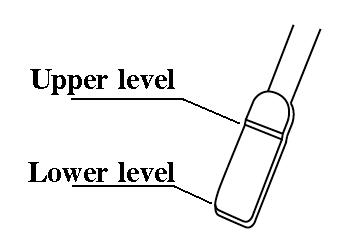
Replace and check the sump plug and refill the engine with oil to the correct level on the dipstick (approx. 1.85 gal)
The grade of oil to be used will depend on the ambient temperature.
The tractor is shipped from the factory with 10W/30
For summer use over 77℉ use SAE 30
For temperatures from 32℉-77℉ use SAE20 or 10W/30
For temperatures below 32℉ use SAE 10W important
When changing the oil always change the filter. Always use the same oil, as using different oils or specifications can cause damage. Dispose off the old oil as per local regulations.
▶ Changing the transmission oil
Remove the drain plug from bottom of the transmission and drain the oil.
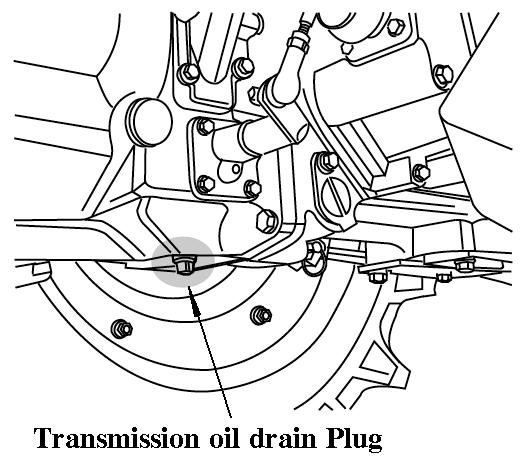
Replace and check the drain plug.
Refill the transmission to the correct level on the dipstick with new oil :qty 34ℓ(9 US gal) important
Always use the same grade and specified oil as replacements Dispose off the old oil as per local regulations.
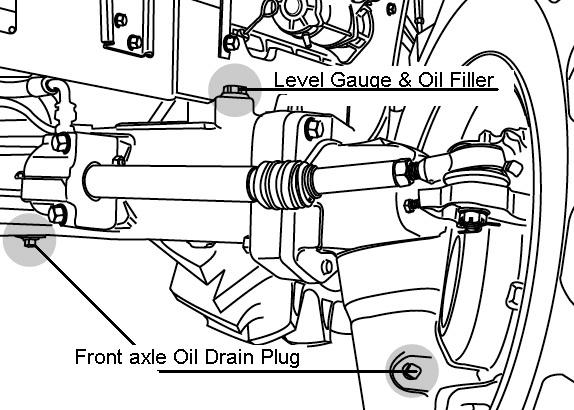
▶Changing the front axle oil
Drain the oil from the left and right drain plugs. Replace and check the drain plugs.
Fill with new oil to the correct level in the filler hole (qty 9.3ℓ) (2.46 US gal)
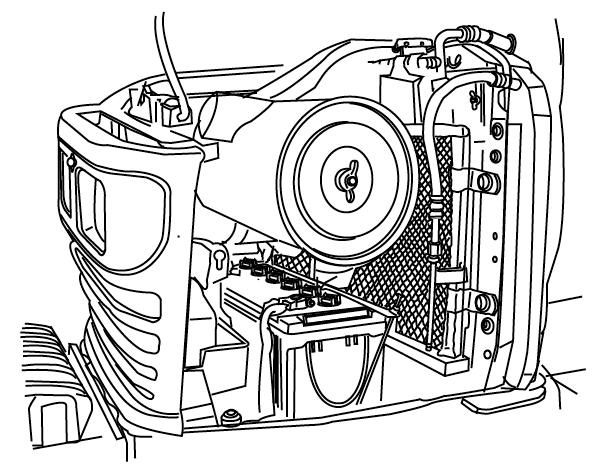
Cleaning And Changing Filters
■ Engine oil filter
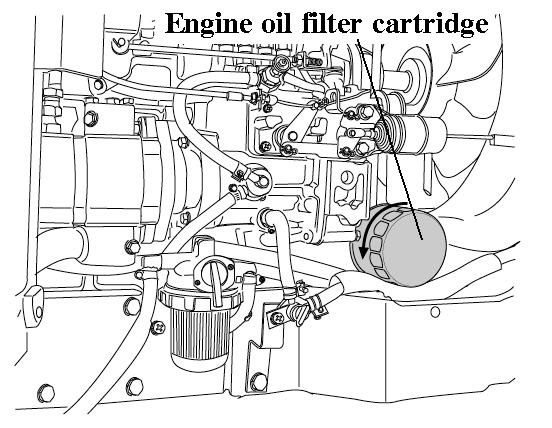
Using a filter wrench turn the filter anti clockwise to remove it. Lightly smear the rubber seal on the new filter with oil to ensure, turn it clockwise until the seal contacts the base and then turn it another 2/3 turn to tighten it.
■ FUEL FILTER
This is the primary filter and removes water and coarse dirt from the fuel. To clean it first close the tap then remove the filter and wash it. After replacing it bleed the air from the filter important
Never use petrol (gasoline) thinner or similar inflammable material to wash the primary fuel filter.

After replacing the filter always bleed the system (see page 57)
▶ HYDRAULIC OIL FILTER
Remove the filter with a filter wrench.
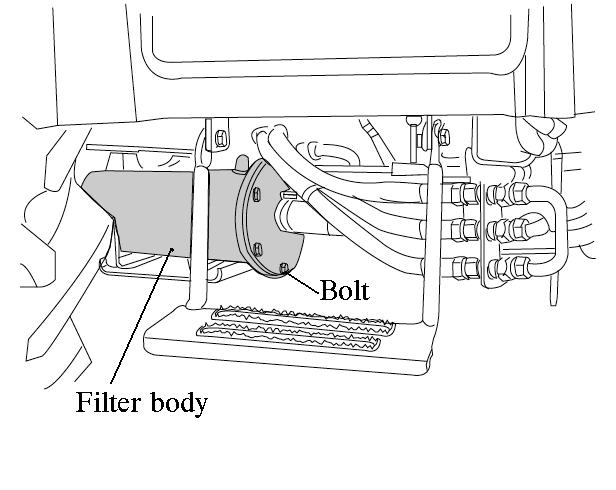
To replace, apply oil or grease on the seal, fit by hand until seal contacts bare, then turn it 2/3rd turn further to tighten it check for leaks.
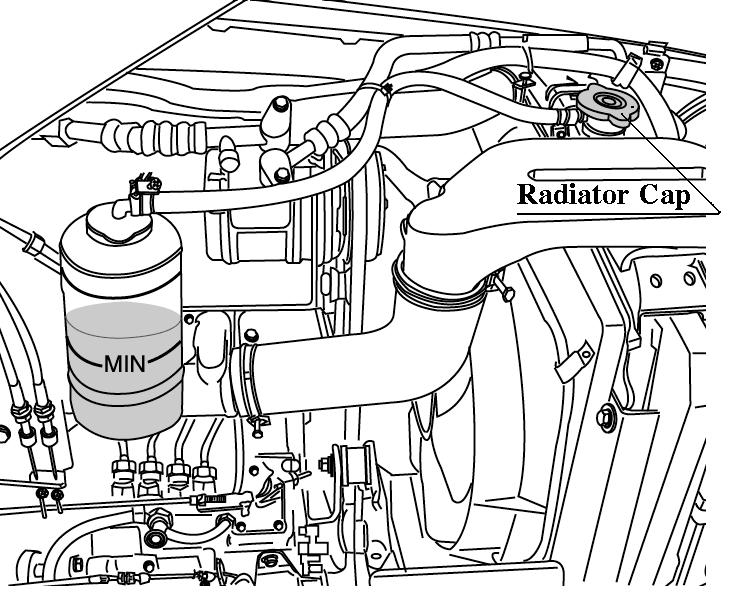
Changing The Coolant
(1)Open the tap in front of the gear pump to drain the coolant.
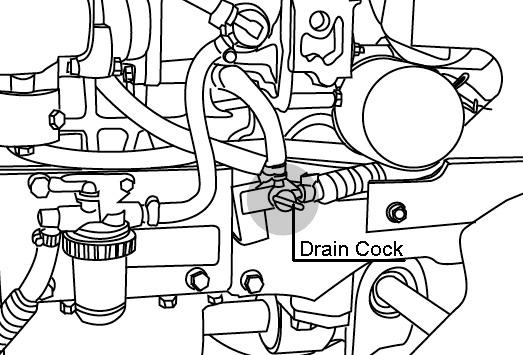
(2)Open the radiator cap at the same time.
(3)To give a thorough clean run a hose into the radiator and flush it out.
(4)Close the tap and refill the radiator with a coolant mixture of water and corrosion inhibitor or anti freeze.
(5) Start the engine and allow it to run for approx 5 minutes, check the water level again and top up if required
Do not remove the radiator cap on a hot engine. Allow the engine to cool down and then turn the cap slowly to ensure, that there is no excessive pressure in the radiator. Caution
Serious burns, can result from the contents of pressurized, hot radiators. Allow the engine to cool down completely before opening radiatorcap. Caution
▶ Anti freeze.
Frozen cooling water can damage the engine. Before replacing the anti freeze solution flush the radiator. Mix the anti freeze solution in accordance with the instructionsapplicable to the brand of anti freeze and the locals climate. Replace the solution in the radiator.
In case of loss of solution due to evaporation or overflow, replace with the original mixture ratio.
▶ CLEANING THE RADIATOR AND COVER
Insects, grass straw and dust can all block the radiator ,condenser and reduce its efficiency.
Remove the radiator cover to clean it and the radiator.
Release the bolt and pull to remove the cover.
Then clean the radiator between the fins and tube by using clean water.
Water or air under high pressure can distort the cooling fins onthe radiator and reduce its efficiency.
important
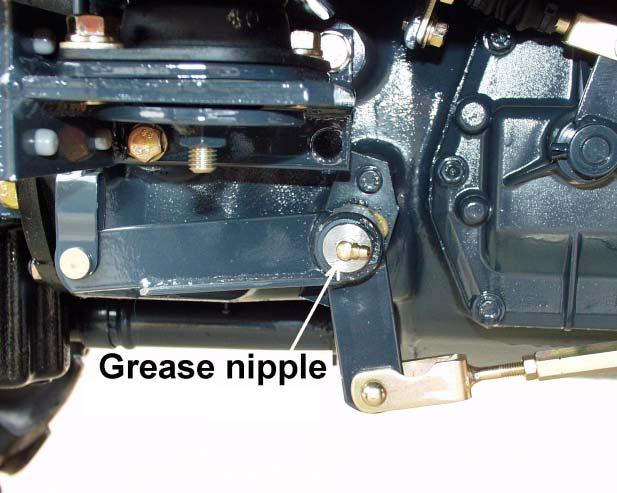
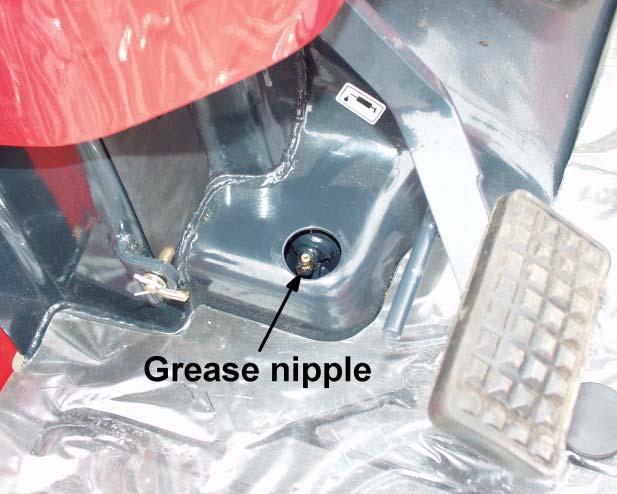
Greasing The Tractor
Grease the tractor according to the service schedule (page 57 and 59)
Ensure that grease nipples are cleaned well before any attempt is made to grease them.
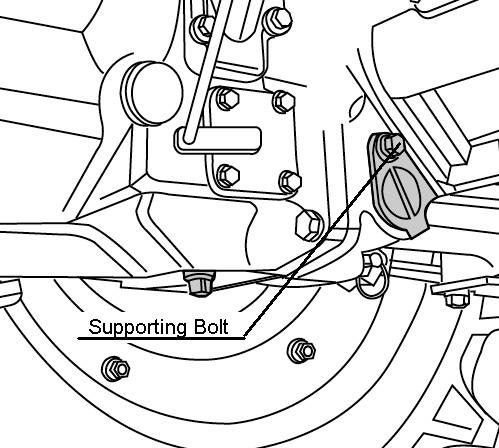
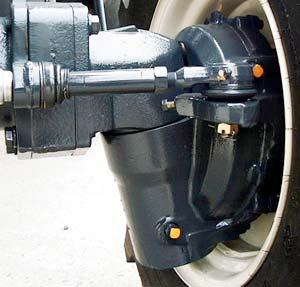
Gap Adjustment On The Front Axle
Lift the front with a hydraulic jack to get the wheels of the ground.
Then loosen the nut and tighten the bolt fully and turn the bolt ½to loosen again in order to roll the center pivot metal freely and tighten the nut again.
While the wheels arte still off the ground, move the axle on the center pivot as a final check that the gap is set correctly on the top of the pivot metal
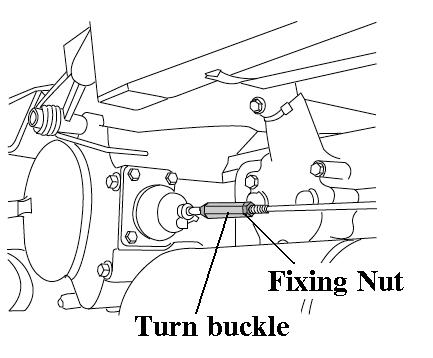
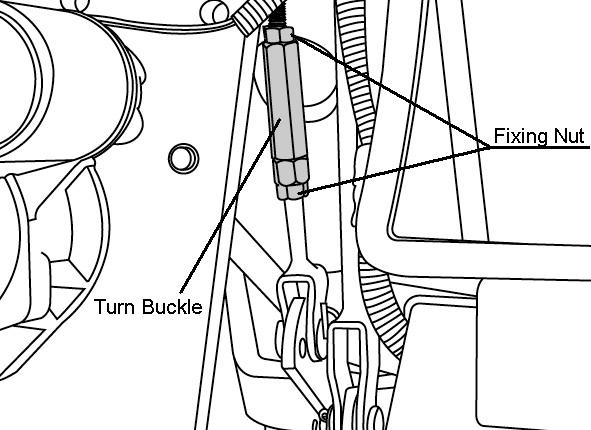
Adjusting The Clutch
Using the clutch over a period of time will increase the free play.
The correct free play of the pedal is 0.78~1.18 in To adjust, loosen the locknut on the turnbuckle and adjust.
Check the adjustment and tighten the locknut if the free play is correct.
Adjusting The Brakes
As is the case with the clutch, use of the brakes will change the pedal free play and the balance between the right and left pedal.
The correct pedal free play is 1.18~1.57 in
▶Adjustment method.
Loosen the locknuts at each end and turn the rod to adjust the brake. Turning it anticlockwise increases the free play, clockwise decreases it. Tighten the locknuts.
Check that the free play is correct and the same on both pedals to ensure even braking
Caution
Uneven adjustment of the left and right pedal will result in onesided braking when the pedals are connected and can cause serious accidents, especially at high speeds.
Double check to ensure free play is the same on both pedals
Adjusting The Throttle Lever
If this lever is either loose or difficult to move please consult your dealer for rectification of the problem.
ADJUSTING TOE-IN
If the toe-in adjustment is incorrect it can cause severe shaking of both the steering wheel and the entire tractor.
The correct toe in is 0.08~0.24in. We recommend that this adjustment is made by the dealer.
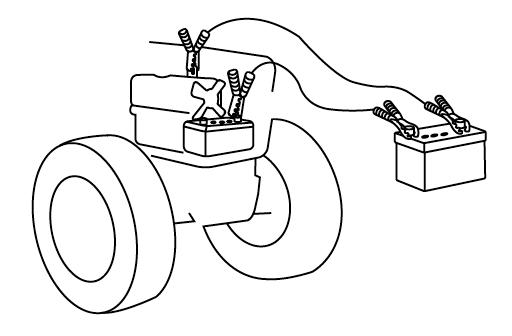
Checking The Battery
The electrolyte level of the battery can evaporate during use thus lowering the level.
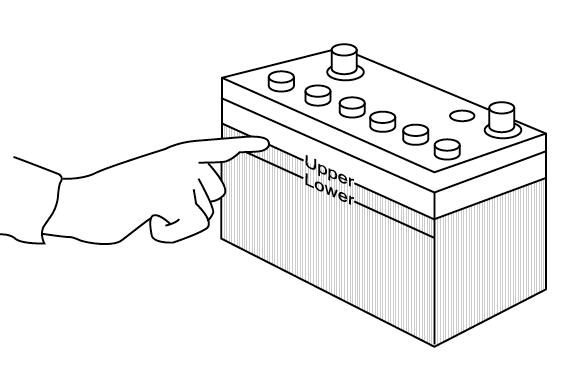
Where it does so replace it with distilled water. Where a spillage has reduced the level, replace it with electrolyte.
important
Low electrolyte levels can cause premature battery failure and corrosion.
Electrolyte contains acid and can cause serious burns. Any spillage on skin should be washed off by running water immediately.
Caution
▶BATTERY MAINTENANCE
Low temperatures will affect the performance of batteries so take particular care of it in winter. For long-term storage of the tractor remove the battery and keep it in a cool dry room. If it is on the tractor while stored, disconnect the negative terminal. Batteries will self discharge if left for a period of without use time.
To keep them in good condition charge them once a month in summer and every second month in winter.
When replacing the original battery, ensure that the replacementbattery is the same size. Failure to do so can cause problems with the electrical circuit.
▶BATTERY CHARGING
-A boost charge is only for emergencies.It will partially charge the battery at a high rate and in a short time.
-When using a boost-charged battery,It is necessary to recharge the battery as early as possible.
Failure to do this will shorten the battery’s service life.
Always disconnect the negative terminal first when removing the battery and always connect the positive terminal first when fitting the battery. When connecting the battery leads make sure not to reverse the polarity. Quick charging will reduce battery life.
Caution FAN BELT ADJUSTMENT
Disconnect the terminals prior to charging the battery to avoid damage to the circuit and electrical instruments.
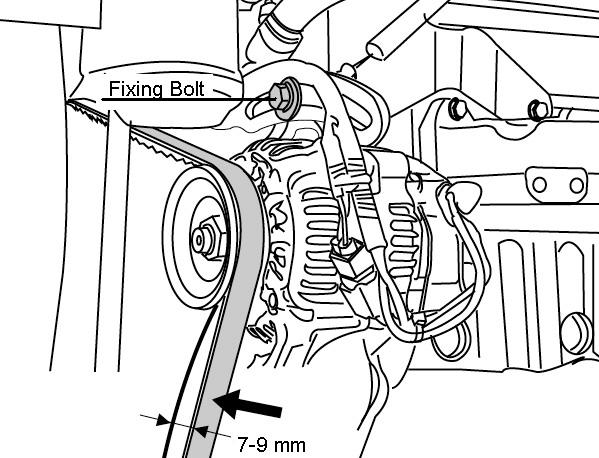
Check the fan belt tension regularly and adjust if required.
The correct tension is if the center of the belt is pushed.
With a finger it moves in approx. 7 to 9 mm (0.28 to 0.35 in) as shown in the picture.

To adjust the fan belt loosen the top bolt on the alternator, Move the alternator to the desired position and tighten the bolt.
Also ensure that the bolts at the bottom of the alternator are tight.
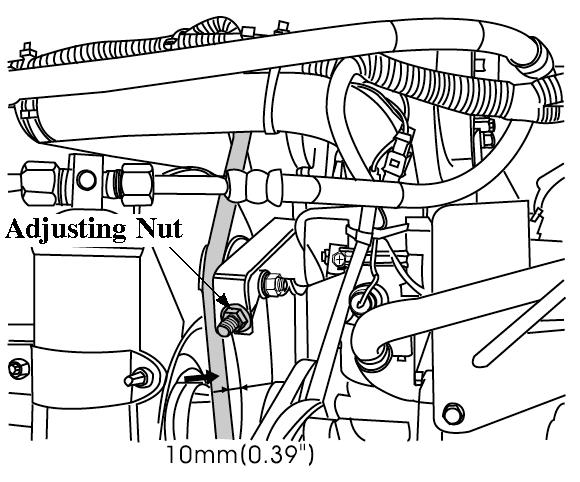
Air Conditioner Compressor Belt Adjustment
Check the compressor belt tension regularly and adjust If required.
The correct tension is if the center of the belt is Pushed With a finger it moves in approx. 10 mm (0.39 in) as shown in the picture.
To adjust the belt, loosen or tighten the nut as shown in the picture.
Servicing The Air Cleaner
To remove the dust from the evacuator valve squeeze it between thumb and fingers to let excess dust out and wipe around the valve to keep it clean from outside.
To clean the main element, remove the right fan cover. Remove the element by unloading the wing nut. Remove dust by blowing it out of the element with Compressed air.Check the element to ensure it is not damaged.Reassemble the element.
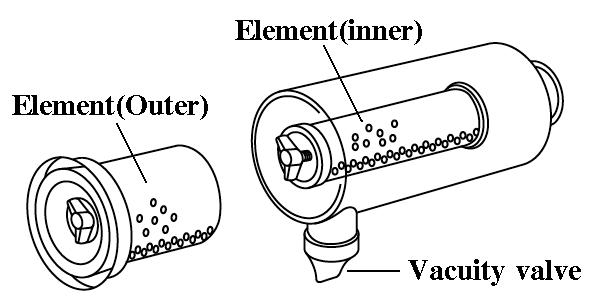
Important
Never beat the element on a stone or concrete floor/wall to clean it Check all connections and hoses especially on the clean side of the air cleaner to ensure no dusty air can enter the engine.
Check the element for flaws by putting a light inside the element. When reassembling make sure all surfaces seal correctly to keep dust out. When working in dusty conditions increase the service frequency.
▶Replace the element after cleaning it 5 times or it is damaged.
CHECKING HOSES AND LINES.
The fuel lines, radiator hoses, hydraulic and rubber hoses are consumables, which deteriorate by age and use.
Check them regularly and replace if faulty.
Damaged fuel lines leak and cause fires.
Damaged radiator hoses can cause hot water burns and in severe cases seize the engine. Caution
Checking The Wiring Harness And Fuses
Loose wires make inferior connections and damaged wires can cause short circuits, fires burnt wiring or reduce efficiency of components.
Replace or repair any faulty wiring or insulation.
If a fuse burns out again after it has been replaced, do not replace it with wire or a high capacity fuse, find the cause and rectify it or get an auto electrician to do so.
Where insulation is chafed or peeled off, recover the area with a good quality insulation tape. Where wiring comes out of it’s fitting replace it correctly with the standard fitting.
Incorrect wiring or fuses can cause fires to both the tractor and surrounding area so get the dealer to check it annually.
Likewise fuel pipes and wiring age with use.
Important
Ask your dealer to check it at least once every 2 years and replace as required
▶ REPLACING FUSES
The circuit has 8 blade type fuses in its wiring circuit
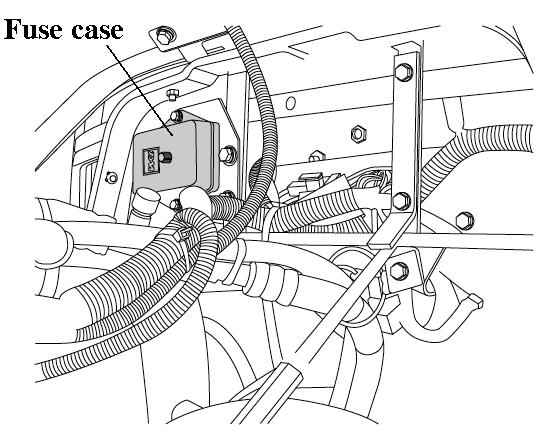
(See diagram on page 104)
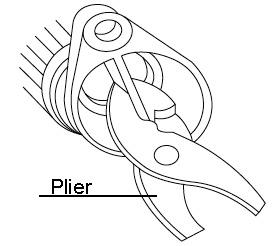
When a fuse has blown replace it with one of the same value. Using a large capacity fuse or wire burn out the wiring system. Use fuse tongs to replace fuses
▶ MAIN FUSES
The wiring harness is equipped with 3 main fuses who’s function is to preserve the wiring. However when a main fuse blows the entire circuit is dead. Always check the reason & rectify before replacing the fuse of the same value.
To indicate that the fuse is blown it will be discolored.
Important
Always check the reason for a blown fuse otherwise the new fuse is also likely to blow.
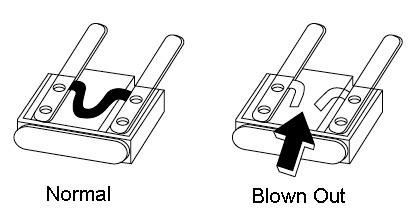
NEVER EVER USE WIRE in place of correct grade fuse.
SERVICE PRIOR TO DAILY AND SHORT TERMS STORAGE.
Wash the tractor and keep it clean. Fill the tank to avoid condensation and rust.
Lower any attached implement to the ground before parking the tractor. For long-term storage consult your dealer


