1 minute read
REPLACING A BUCKET


Removal
STEP 1
Place the bucket flat on flat, horizontal ground. Operate the attachment controls so that the arm/bucket linkage pin is not gripped by the weight of the dipper.
STEP 2
Stop the engine and remove the starter switch key.
STEP 3
CD00E096 Remove the retaining rings and pins.
STEP 4 STEP 5

CD00E099 Start the engine, disengage the attachment from the bucket and retain the linkage seals for re-use.
Installation
STEP 1
Make sure the bucket is in a stable position.
STEP 2
Remove the bucket pins.

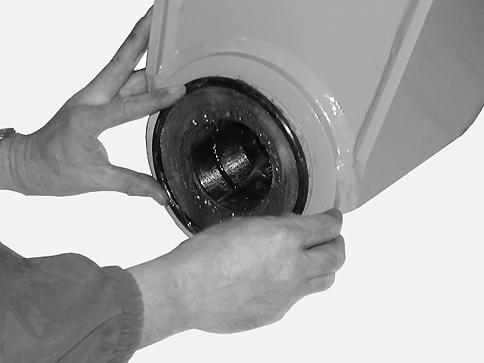
CD00E097 CD00E099 Install the linkage seals on the arm bushing shoulders. Change them if necessary.
STEP 3
Start the engine. Extend the bucket cylinder rod to bring it into its housing. Stop the engine and remove the starter switch key.
STEP 4
CD00E100 Install the arm/bucket linkage pin and then install the retaining pin and ring.
STEP 5
Start the engine and bring the bucket connecting rod into its housing. Stop the engine and remove the starter switch key.
STEP 6

CD00E096 Install the connecting rod/bucket linkage pin and then install the retaining pin and ring.
STEP 7
Push the seals back into their housings.
STEP 8
Adjust the arm/bucket shimming. See “Shimming the bucket” .
STEP 9
Grease the linkages.


