10 minute read
TROUBLESHOOTING

from Komatsu Hydraulic Excavator PC160-6K PC180LC-6K PC180NLC-6K Operation Manual SN 34014, 34026 and up

PHENOMENA THAT ARE NOT FAILURES
Note that the following phenomena are not failures:
1. When the arm is pulled in, the speed of movement will drop momentarily when the arm is more or less vertical.
2. The arm speed will drop momentarily when the bucket teeth are more or less horizontal.
3. When starting or stopping the swing, noise will be emitted from the brake valve.
4. When going down a steep slope at low speed, a noise will be emitted from the travel motor.
METHOD OF TOWING MACHINE
WARNING
When towing the machine, use a wire rope that has ample strength for the weight of the machine that is being towed.
If the machine sinks in mud and cannot get out under its own power, or if the drawbar pull of the excavator is being used to tow a heavy object, use a wire rope as shown in the diagram on the right. Place pieces of wood between wire ropes and body to prevent damage to ropes and body. At this time, never use the towing hole which is intended only for light-weight towing.
USING METHOD FOR LIGHT-WEIGHT TOWING HOLE
WARNING
The shackle must always be used.
Hold the rope level and direct it straight to the track frame.
Move the machine slowly in the Lo mode.
The track frame has been equipped with a towing hole to pass the shackle through for towing light objects.
In this case, the traction load must be 130 KN or less.
PRECAUTIONS ON PARTICULAR JOBSITES
1. When carrying out digging operations in water, if the work equipment mounting pin goes into the water, carry out greasing every time the operation is carried out.
2. For heavy-duty operations and deep digging, carry out greasing of the work equipment mounting pins every time before operation.
After greasing, operate the boom, arm and bucket several times, then grease again.
AM091130A
IF BATTERY IS DISCHARGED
WARNING
When checking or handling the battery, stop the engine and turn the starting switch key to the OFF position before starting.
The battery generates hydrogen gas, so there is danger of explosion. Do not bring lighted cigarettes near the battery, or do anything that will cause sparks.
Battery electrolyte is dilute sulphuric acid, and it will attack your clothes and skin. If it gets on your clothes or on your skin, wash it off immediately with large amounts of water. If it gets in your eyes, wash it out with fresh water, and consult a doctor.
When handling battery, always wear protective goggles.
When removing the battery, first disconnect the cable from the ground (normally, from the negative - terminal). When installing, install the positive + terminal first. If a tool touches the cable connecting the positive terminal and the chassis, there is danger that it will cause sparks.
If the terminals are loose, there is danger that the defective contact may generate sparks that will cause an explosion. When installing the terminals, install them tightly.
When removing or installing, check which is the positive + terminal and negative - terminal.
When removing disconnect the cable from the ground terminal first
When installing, connect the cable to the positive (+) terminal first.
AD052940A
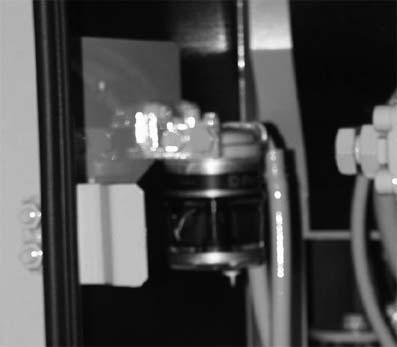
STARTING ENGINE WITH BOOSTER CABLE
When starting the engine with a booster cable, do as follows:
Precautions when connecting and disconnecting booster cable
WARNING
When connecting the cables, never contact the positive + and negative - terminals.
When starting the engine with a booster cable, always wear safety glasses.
Be careful not to let the normal machine and problem machine contact each other. This prevents sparks from generating near the battery which could ignite the hydrogen gas given off by the battery. If hydrogen gas explodes, it could cause serious injury.
Make sure that there is no mistake in the booster cable connections. The final connection is to the revolving frame, but sparks will be generated when this is done, so connect to a place as far as possible from the battery. (However, avoid connecting the cable to the work equipment, as conduction is poor.)
Use care when removing the cables from the machine that has been started. Do not allow the cable ends to contact each other or the machine, to avoid hydrogen explosion.
NOTICE
● The size of the booster cable and clip should be suitable
for the battery size.
The battery of the normal machine must be the same capacity as that of the engine to be started.
Check the cables and clips for damage or corrosion.
Make sure that the cables and clips are firmly connected.
Connecting the booster cables
Keep the starting switch at the OFF position. Connect the booster cable as follows, in the order of the numbers marked in the diagram.
1. Make sure that the starting switches of the normal machine and problem machine are both at the OFF position.
2. Connect one clip of booster cable (A) to the positive + terminal of the problem machine.
3. Connect the other clip of booster cable (A) to the positive + terminal of the normal machine.
INCORRECT
AD052980A
4. Connect one clip of booster cable (B) to the negative - terminal of the normal machine.
5. Connect the other clip of booster cable (B) to the engine block of the problem machine.
Starting the engine
1. Make sure the clips are firmly connected to the battery terminals.
2. Start the engine of the normal machine and keep it to run at high idling speed.
3. Turn the starting switch of the problem machine to the START position and start the engine. If the engine doesn’t start at first, try again after 2 minutes or so.
Disconnecting the booster cables
After the engine has started, disconnect the booster cables in the reverse of the order in which they were connected.
1. Remove one clip of booster cable (B) from the engine block of the problem machine.
2. Remove the other clip of booster cable (B) from the negative terminal of the normal machine.
3. Remove one clip of booster cable (A) from the positive + terminal of the normal machine.
4. Remove the other clip of booster cable (A) from the positive + terminal of the problem machine.
AD052981A
OTHER TROUBLE
ELECTRICAL SYSTEM
( ): Always contact your Komatsu distributor when dealing with these items.
In cases of abnormalities or causes which are not listed below, please contact your Komatsu distributor for repairs.
Problem Main causes Remedy
Lamp does not glow brightly even when the engine runs at high speed
Lamp flickers while engine is running
Charge level monitor does not go out even when engine is running
Abnormal noise is generated from alternator
Starting motor does not turn when starting switch is turned to ON
Pinion of starting motor keeps going in and out
Starting motor turns engine sluggishly
Starting motor disengages before engine starts
Pre-heating monitor does not light
Oil pressure monitor does not light up when engine is stopped (starting switch at ON position)
Outside of electrical heater is not warm when touched by hand. Defective wiring
Defective adjustment of fan belt tension
Defective alternator Defective wiring (● Check, repair loose terminals,disconnections) ● Adjust V belt tension For details, see “EVERY 250 HOURS SER-
VICE” on page205.
(● Replace) (● Check, repair)
Defective alternator (● Replace)
Defective wiring Insufficient battery charge Defective starting motor
Insufficient battery charge Defective safety relay
Insufficient battery charge Defective starting motor
Defective wiring Insufficient battery charge
Defective wiring Defective heater relay Defective monitor
Defective monitor Defective caution lamp switch
Defective wiring Disconnection in electric heater Defective operation of heater switch (● Check, repair) ● Charge (● Replace)
● Charge (● Replace)
● Charge (● Replace)
(● Check, repair) ● Charge
● Charge (●Replace) (● Replace)
(● Replace) (● Replace)
(● Check, repair) (●Replace) (●Replace)
CHASSIS
( ): Always contact your Komatsu distributor when dealing with these items.
In cases of abnormalities or causes which are not listed below, please contact your Komatsu distributor for repairs.
Problem Main causes Remedy
Speed of travel, swing, boom, arm, bucket is slow
Pump generates abnormal noise
Excessive rise in hydraulic oil temperature Lack of hydraulic oil
Clogged element in hydraulic tank strainer
Loose fan belt
Dirty oil cooler
Lack of hydraulic oil
Track comes off
Abnormal wear of sprocket
Bucket rises slowly, does not rise Track too loose
Lack of hydraulic oil Add oil to specified level, see “CHECK BEFORE STARTING” on page197.
Clean, see “EVERY 2000 HOURS SERVICE” on page217.
Check fan belt tension, see EVERY 250 HOURS SERVICE Clean, see “EVERY 500 HOURS SERVICE” on page209. Add oil to specified level, see “CHECK BEFORE STARTING” on page197.
Adjust track tension, see “WHEN REQUIRED” on page182.
Add oil to specified level, see “CHECK BEFORE STARTING” on page197.
ENGINE
( ): Always contact your Komatsu distributor when dealing with these items.
In cases of abnormalities or causes which are not listed below, please contact your Komatsu distributor for repairs.
Problem Main causes Remedy
Engine oil pressure monitor lights up
Steam is emitted from top part of radiator (pressure valve) Engine oil pan oil level is low (sucking in air)
Clogged oil filter cartridge
Defective tightening of oil pipe joint, oil leakage from damaged part Defective engine oil pressure sensor
Cooling water level low, water leakage Loosen fan belt
Dirt or scale accumulated in cooling system ● Add oil to specified level, see
“CHECK BEFORE STARTING” on page197. ● Replace cartridge, see "EVERY 500
HOURS SERVICE" (●Check, repair)
(●Replace sensor)
Add cooling water, repair, "CHECK BEFORE STARTING" Check fan belt tension, see "CHECK BEFORE STARTING" Change cooling water, clean inside of cooling system, see "WHEN REQUIRED"
Radiator water level monitor lights up
Engine does not start when starting motor is turned Clogged radiator fin or damaged fin Defective thermostat Loose radiator filler cap (high altitude operation) Defective water level sensor
Lack of fuel
Air in fuel system
Defective fuel injection pump or nozzle Starting motor cranks engine sluggishly Preheating monitor does not light up Defective compression Defective valve clearance Contaminated fuel Lift pump not working fuel filter clogged fuel lines blocked ● Clean or repair, see "EVERY 500
HOURS SERVICE" (●Replace thermostat) ● Tighten cap or replace packing
(●Replace sensor)
● Add fuel, see "CHECK BEFORE
STARTING" ● Repair place where air is sucked in, see "EVERY 500 HOURS SER-
VICE" (●Replace pump or nozzle)
see "ELECTRICAL SYSTEM"
(Adjust valve clearance) Drain & clean fuel system Check/replace pump change filters check/ blow out lines
ENGINE (cont’d)
Problem Main causes Remedy
Exhaust gas is white or blue
Exhaust gas occasionally turns black Too much oil in oil pan
Improper fuel
Combustion noise occasionally makes breathing sound Abnormal noise generated (combustion or mechanical)
Defective nozzle Defective compression
Defective turbocharger Add oil to specified level, see "CHECK BEFORE STARTING"
Clogged air cleaner element Change to specified fuel
● Clean or replace, (●Replace nozzle) (●See defective compression ● Clean or replace turbocharger
above) Defective nozzle (●Replace nozzle)
Low grade fuel being used Overheating Damage inside muffler Excessive valve clearance ● Change to specified fuel ● Refer to "Radiator water level monitor lights up" as above (●Replace muffler) (●Adjust valve clearance)
ELECTRONIC CONTROL SYSTEM
If an error code appears on the machine monitor display (normally displays TIME), follow the countermeasure table as shown below in the self-diagnosis.
Machine monitor failure display
Monitor display Failure mode Remedy
E02 TVC valve system error
E03 Swing brake system error
E05 Governor system error
CALL Operation cannot be continued
IN case where the monitor will not display no error code and work equipment or swing operaIf the pump override switch is set to the ON position, operation can be carried out, however, have the TVC valve system inspected by your Komatsu distributor. (✽)
Set the swing override switch to the On position to release the brake. If applying swing brake, manually operate swing lock switch. In this case, have the swing brake system inspection immediately by your Komatsu distributor. (✽)
The governor cannot carry out control. Operate the governor lever manually. To secure at the full position, there is a mounting hole for the lock bolts in the bracket. In this case, carry out inspection immediately by your Komatsu distributor. tion cannot be carried out.
Place the machine to a safe posture, and carry out inspection immediately by your Komatsu distributor.
Carry out inspection immediately.
(✽) For detail of operating the pump override switch and the swing override switch, see “SWITCHES” on page66.