3 minute read
Hydraulic Quick Coupling System

from CASE QC50 H QC65 H QC80 H QC90 H QC100 H QC130HQuick coupler for Dseries excavators Opertor’s Manual

Warning
Crushing Hazard!
Never put your hands inside the quick coupler when the engine is running. Turn off the engine and wait for all movement to stop�
Failure to comply could result in death or serious injury�
WARNING Hazard to bystanders!
ALWAYS make sure the work area is clea of bystanders and domestic animals before starting this procedure� Know the full area of movement of the machine� Do not permit anyone to enter the area of movement during this procedure�
Failure to comply could result in death or serious injury�
NOTICE: The quick coupler extends the length of the arm. Make sure to check the operating range of the coupled attachment in order to avoid risk of hitting the cab or the machine frame.
NOTICE: Never operate with a quick coupled hydraulic breaker over a long period of time, in order to reduce the risk of premature wear, failures or breakage of the quick coupler. Never use the breaker as a lever, as the stress would be borne by the quick coupler cylinder.
NOTICE: Make sure to read and understand the Operator’s Manual of the hydraulic quick coupler for proper installa- tion, usage and maintenance.
NOTICE: The CASE CONSTRUCTION quick coupling system is supplied by the high pressure hydraulic system of the machine. Refer to Chapter 8 for the maximum working pressure of the hydraulic system. Make sure to use a quick coupler that is suitable for proper and safe operation with high pressure hydraulics. For information consult the CASE CONSTRUCTION dealer.
Attachment engagement
To engage the attachment using CASE CONSTRUCTION quick coupling system proceed as follows:
1� Make sure the attachment to be installed is laying safely on fat and level ground.
2� Select the H work mode.
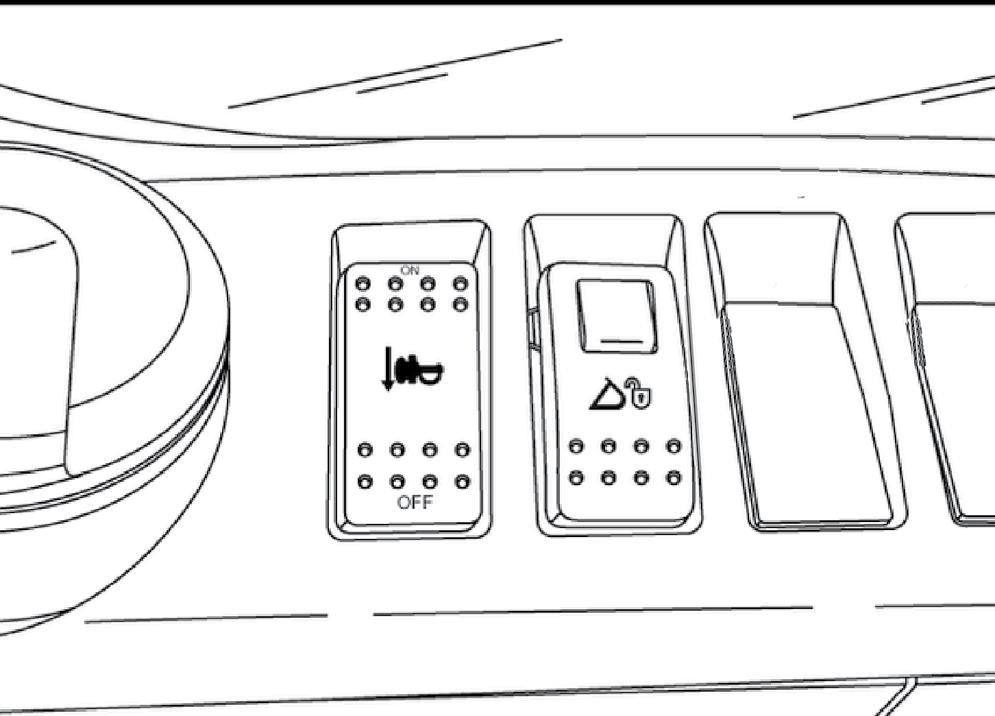
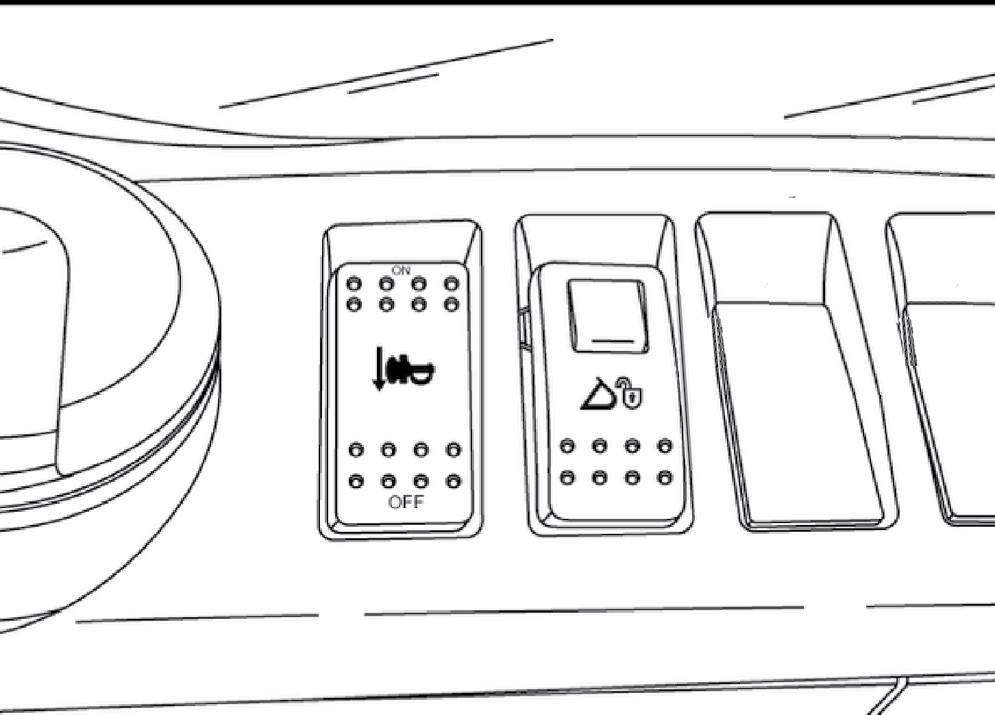
3� Slide the lock device and press the back side of the quick coupler switch (1) to set the unlocking status of the quick coupling system. The audible alarm device starts sounding.
4� Extend the bucket cylinder rod completely and maintain the hydraulic pressure for approximately 5 - 10 s so that the front lock retracts proceed as follows:
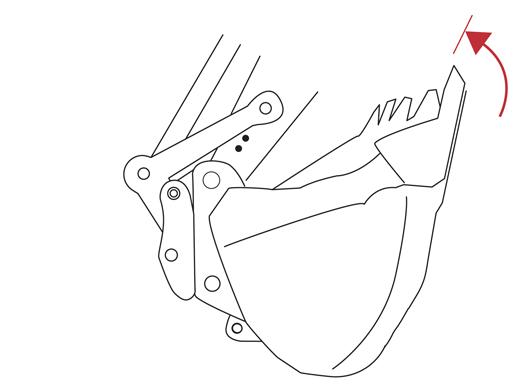
7� Operate the arm control to raise the arm and operate the bucket control to extend the bucket cylinder rod completely.
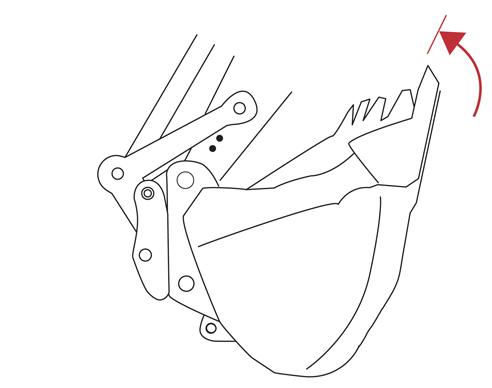
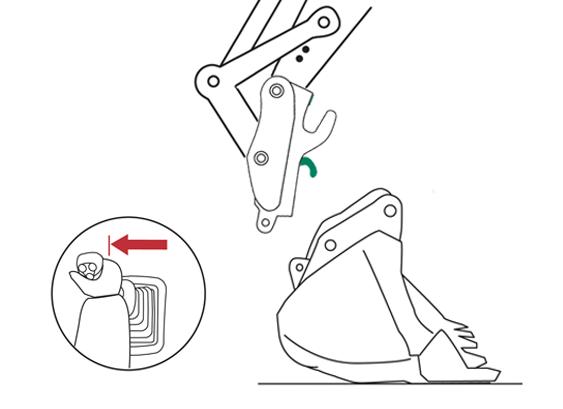
5� Operate the arm and bucket controls so as to bring the quick coupler hook (2) around the attachment pin (3)..
8� Raise the arm until the attachment pin is visible from the operator’s seat.
NOTICE: The quick coupler extends the length of the arm and with certain attachments there is the risk to hit the cab in some operating positions. With this kind of attachments, it may not be possible to raise the arm until the attachment pin is visible from the operator’s seat.
6� Operate the bucket control lever so that the pin is completely engaged in the quick coupler hook.
9� Press the front side of the quick coupler switch (1) to set the locking status of the quick coupling system. The audible alarm device stops sounding.
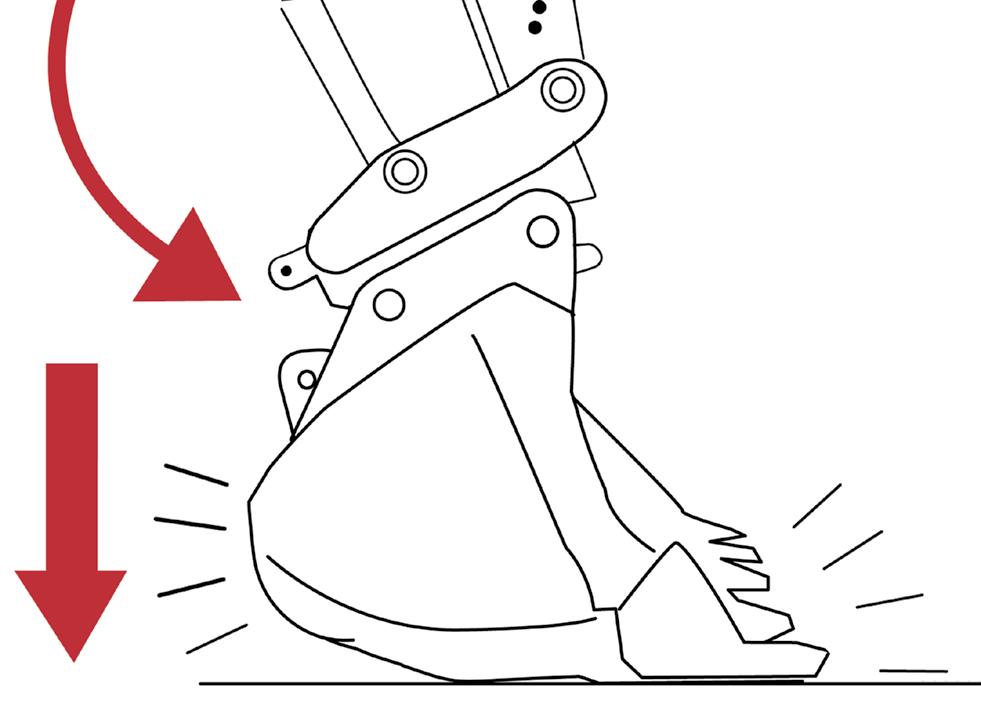
12� To ensure that the bucket/attachment pins are se- curely held by the quick coupler, apply force to the bucket/attachment by pressing it against the ground.
NOTE: This operation is commonly known as “Bump Test” or “Ground test”.
NOTICE: If the quick coupler is used in conjunction with an hydraulic breaker, do not apply force with the chisel.
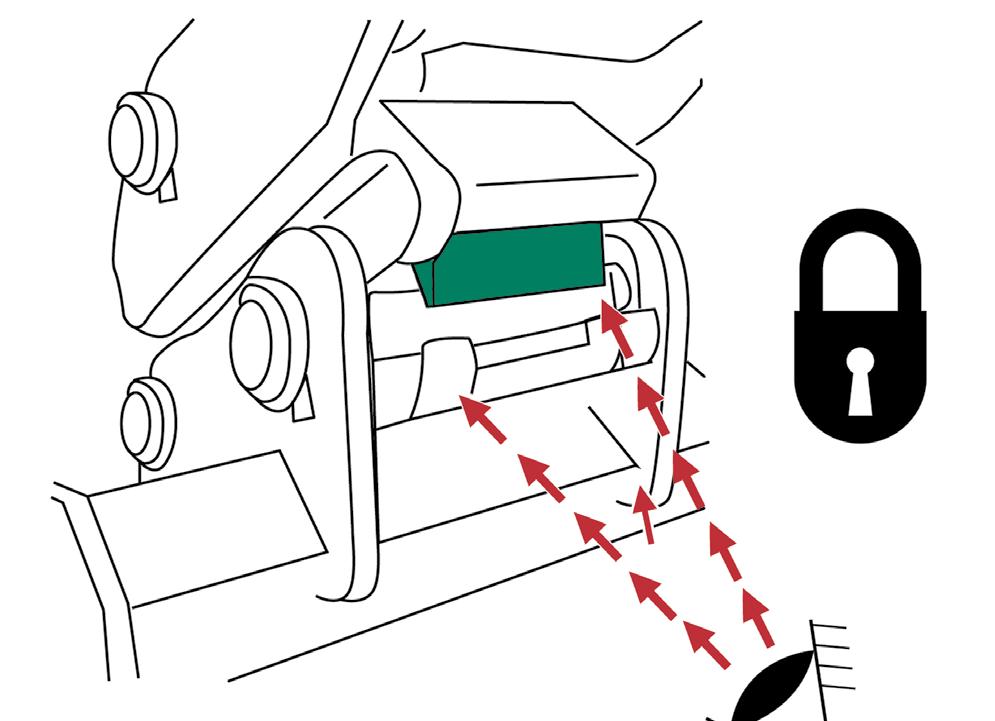
10. Maintain the hydraulic pressure in the bucket cylinder for approximately 5 - 10 s to allow the latching hook to close.
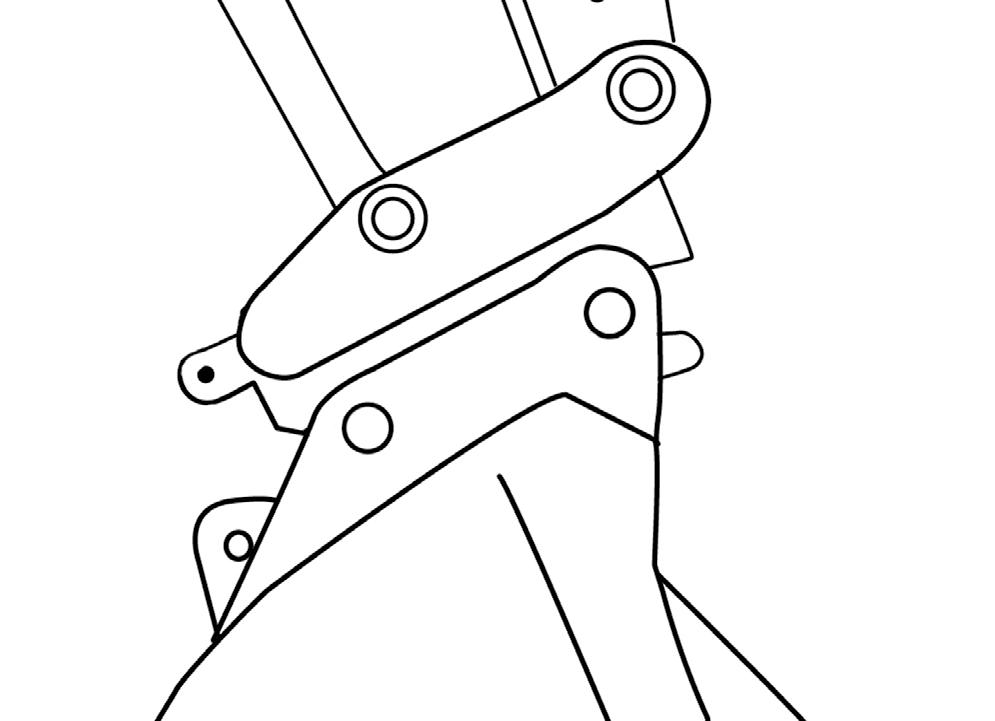
11. Confirm that the attachment pin is correctly engaged in the latching hook.
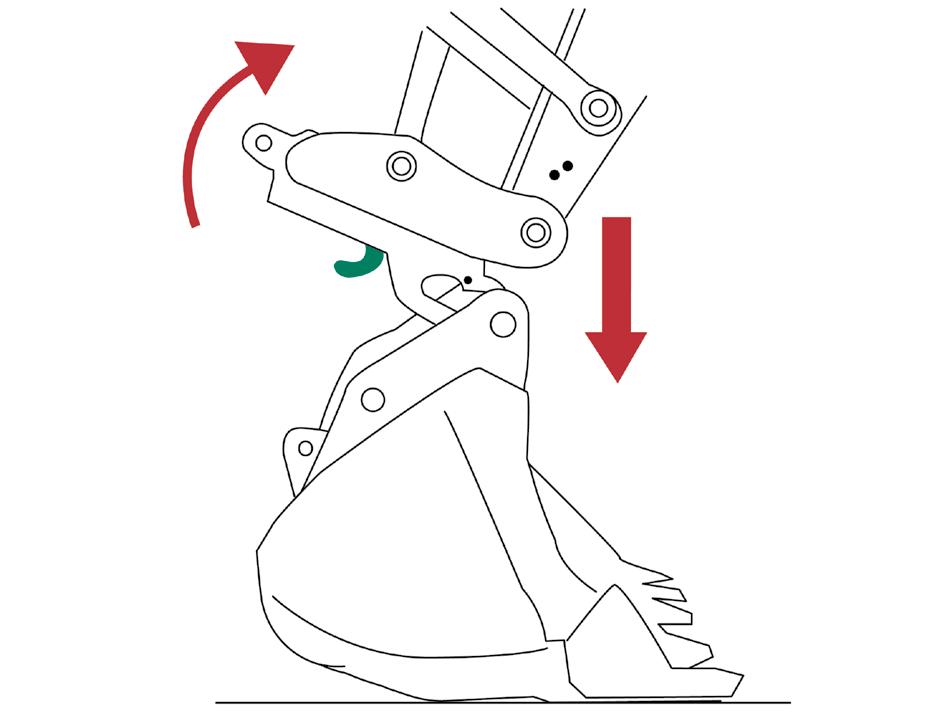
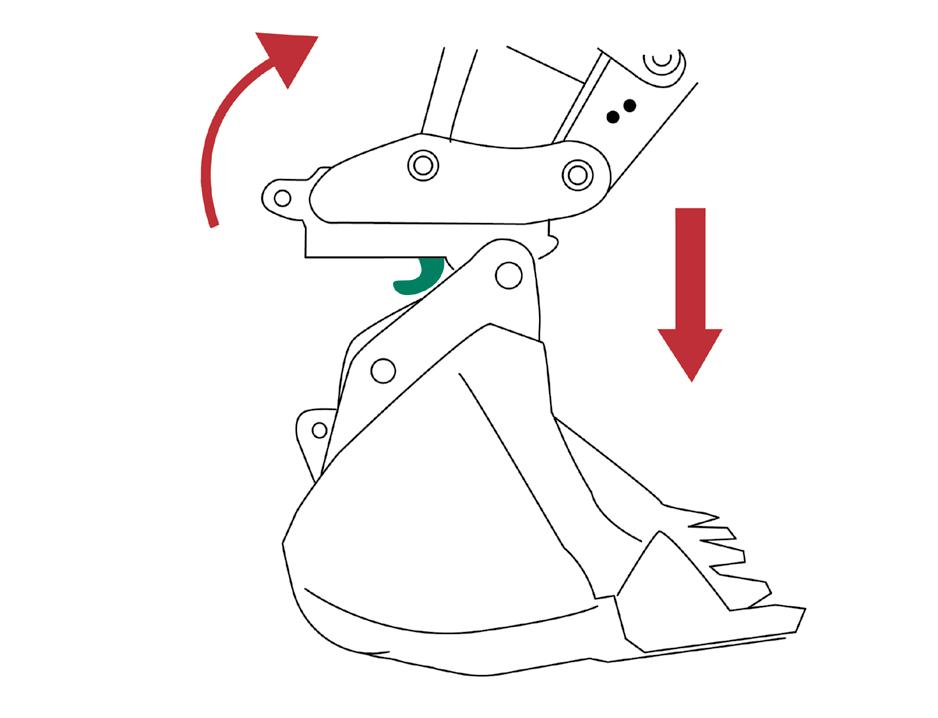
NOTE: the latching hook has a different color to ease the visual conirmation of the engagement of the pin.
NOTICE: If visual conirmation is not possible from the operator’s seat, get down from the machine and make sure that the attachment pin is correctly engaged in the latching hook.
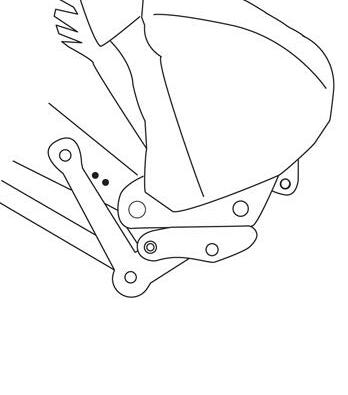
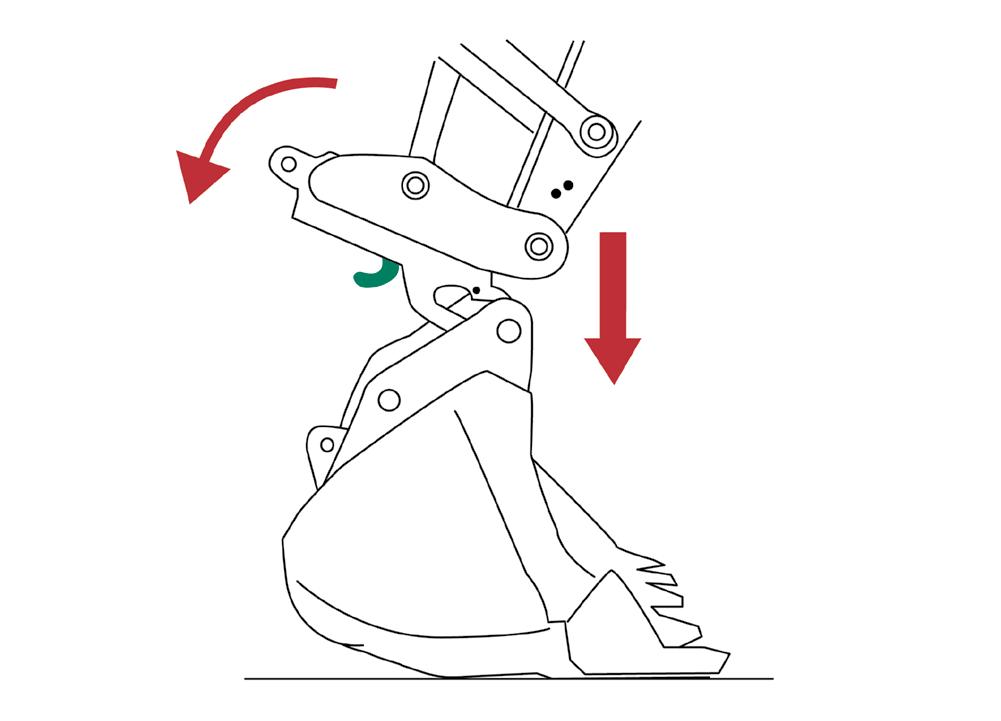
1� Operate the arm and bucket controls so that the arm is practically vertical, sloping slightly towards the cab, to release the safety device.
1
2� Slide the lock device and press the back side of the quick coupler switch (1) to set the unlocking status of the quick coupling system. The audible alarm device starts sounding.
3� Extend the bucket cylinder rod completely and main- tain the hydraulic pressure for approximately 5 - 10 s so that the latching hook retracts.
5� Operate the arm control to unhook the attachment.
6� Press the front side of the quick coupler switch (1) to set the locking status of the quick coupling system. The audible alarm device stops sounding.
4� Operate the bucket and arm controls to lay the attachment safely on fat, level ground.