5 minute read
Tracks, Rollers and Idlers

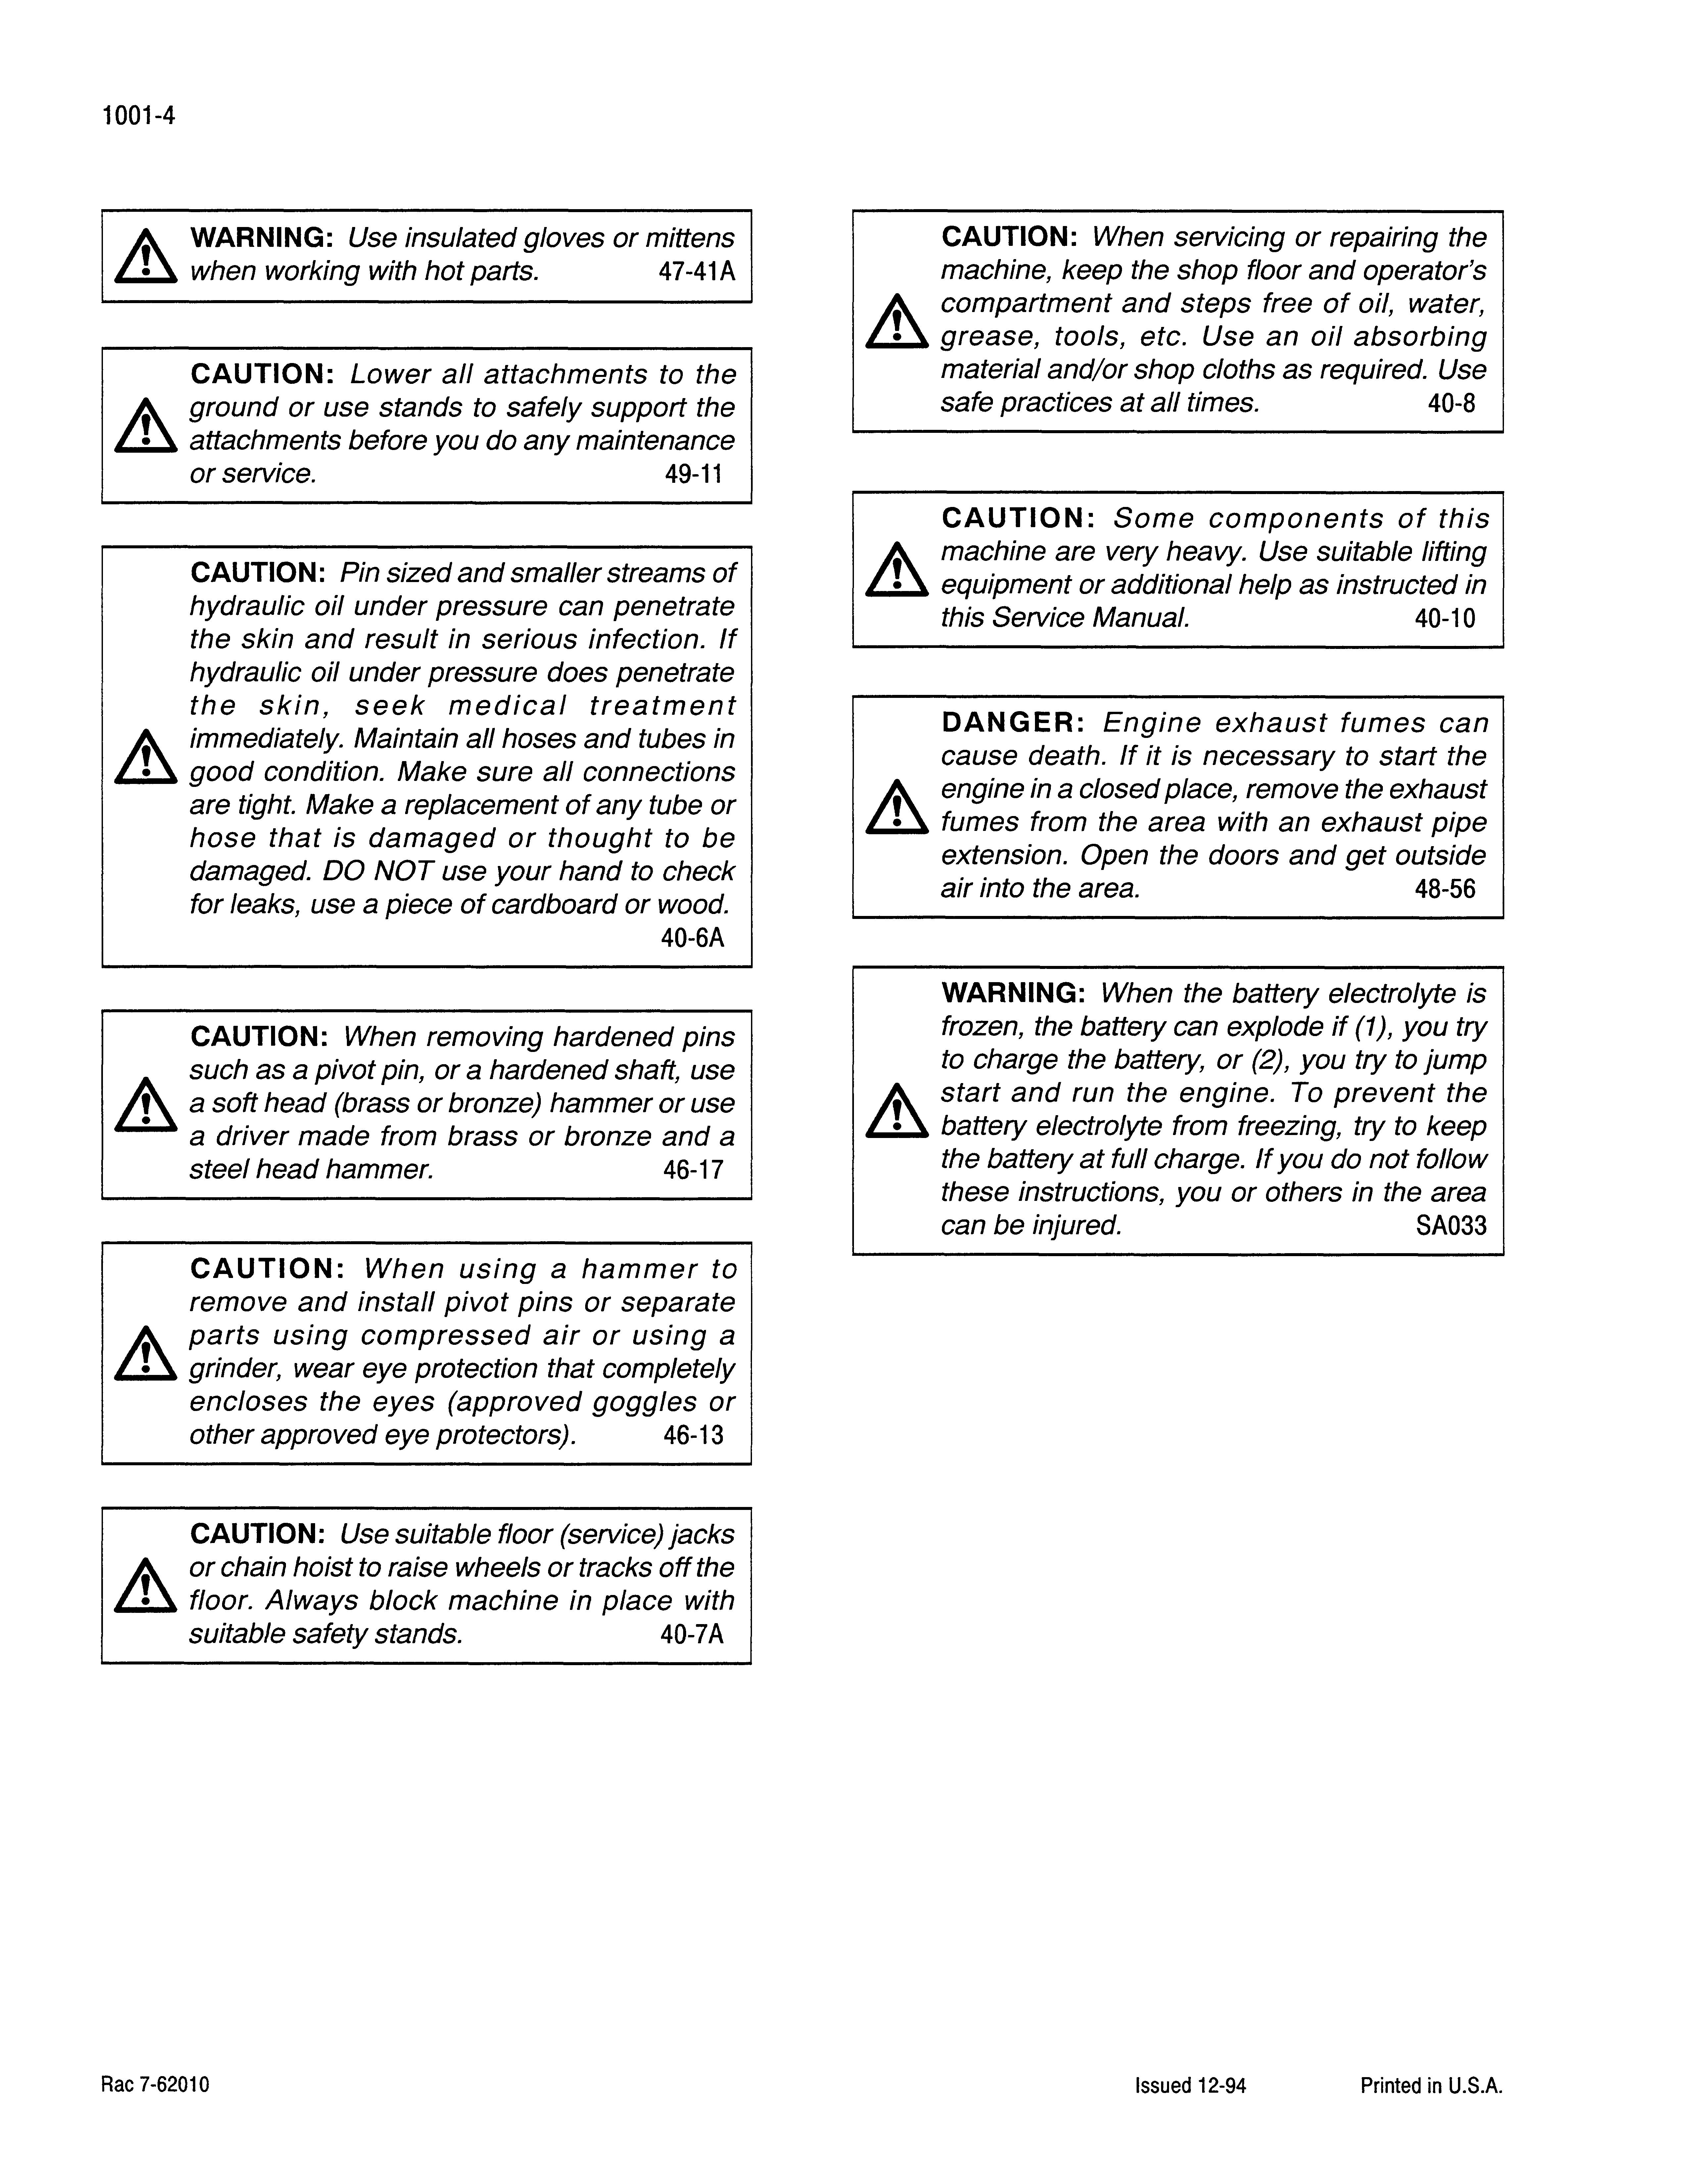
.. WARNING: Use insulated gloves or mittens when working with hot parts. 47-41 A
CAUTION: Lower all attachments to the .. ground or use stands to safely support the attachments before you do any maintenance or service. 49-11
CAUTION: Pin sized and smaller streams of hydraulic oil under pressure can penetrate the skin and result in serious infection. If hydraulic oil under pressure does penetrate the skin, seek medical treatment .. .. Maintain all hoses and tubes in good condItIon. Make sure all connections are tight. Make a replacement of any tube or hose that is damaged or thought to be damaged. DO NOT use your hand to check for leaks, use a piece of cardboard or wood. 40-6A
CAUTION: When removing hardened pins such as a pivot pin, or a hardened shaft, use a soft head (brass or bronze) hammer or use a driver made from brass or bronze and a steel head hammer. 46-17
CAUTION: When using a hammer to remove and install pivot pins or separate .. parts using compressed air or using a grinder, wear eye protection that completely encloses the eyes (approved goggles or other approved eye protectors). 46-13
CAUTION: Use suitable floor (service) jacks .. or chain hoist to raise wheels or tracks off the floor. Always block machine in place with suitable safety stands. 40-7A
CAUTION: When servicing or repairing the machine, keep the shop floor and operator's .. compartment and steps free of oil, water, grease, tools, etc. Use an oil absorbing material and/or shop cloths as required. Use safe practices at all times. 40-8
CAUTION: Some components of this .. are very heavy. Use suitable lifting eqUIpment or additional help as instructed in this Service Manual. 40-10
DANGER: Engine exhaust fumes can cause death. If it is necessary to start the .. engine in a closed place, remove the exhaust fumes from the area with an exhaust pipe extension. Open the doors and get outside air into the area. 48-56
WARNING: When the battery electrolyte is frozen, the battery can explode if (1), you try to charge the battery, or (2), you try to jump .. start and run the engine. To prevent the battery electrolyte from freezing, try to keep the battery at full charge. If you do not follow these instructions, you or others in the area can be injured. SA033
CLEANING
GENERAL INFORMATION
GEARS
Clean all metal parts except bearings, in a suitable cleaning solvent or by steam cleaning. Do not use caustic soda for steam cleaning. After cleaning, dry and put oil on all parts. Clean oil passages with compressed air. Clean bearings in a suitable cleaning solvent, dry the bearings completely and put oil on the bearings.
INSPECTION
Check all parts when the parts are disassembled. Replace all parts that have wear or damage. Small scoring or grooves can be removed with a hone or crocus cloth. Complete a visual inspection for indications of wear, pitting and the replacement of parts necessary to prevent early failures.
BEARINGS
Check bearings for easy action. If bearings have a loose fit or rough action replace the bearing. Wash bearings with a suitable cleaning solvent and permit to air dry. DO NOT DRY BEARINGS WITH COMPRESSED AIR.
NEEDLE BEARINGS
Before you press needle bearings in a bore always remove any metal protrusions in the bore or edge of the bore. Before you press bearings into position put petroleum jelly on the inside and outside diameter of the bearings. Check all gears for wear and damage. Replace gears that have wear or damage.
OIL SEALS, O-RINGS AND GASKETS
Always install new oil seals, O-rings and gaskets. Put petroleum jelly on seals and O-rings.
SHAFTS
Check all shafts that have wear or damage. Check the bearing and oil seal surfaces of the shafts for damage.
SERVICE PARTS
Always install genuine Case service parts. When ordering refer to the Parts Catalog for the correct part number of the genuine Case replacement items. Failures due to the use of other than genuine Case replacement parts are not covered by warranty.
LUBRICATION
Only use the oils and lubricants specified in the Operator's or Service Manuals. Failures due to the use of non-specified oils and lubricants are not covered by warranty.
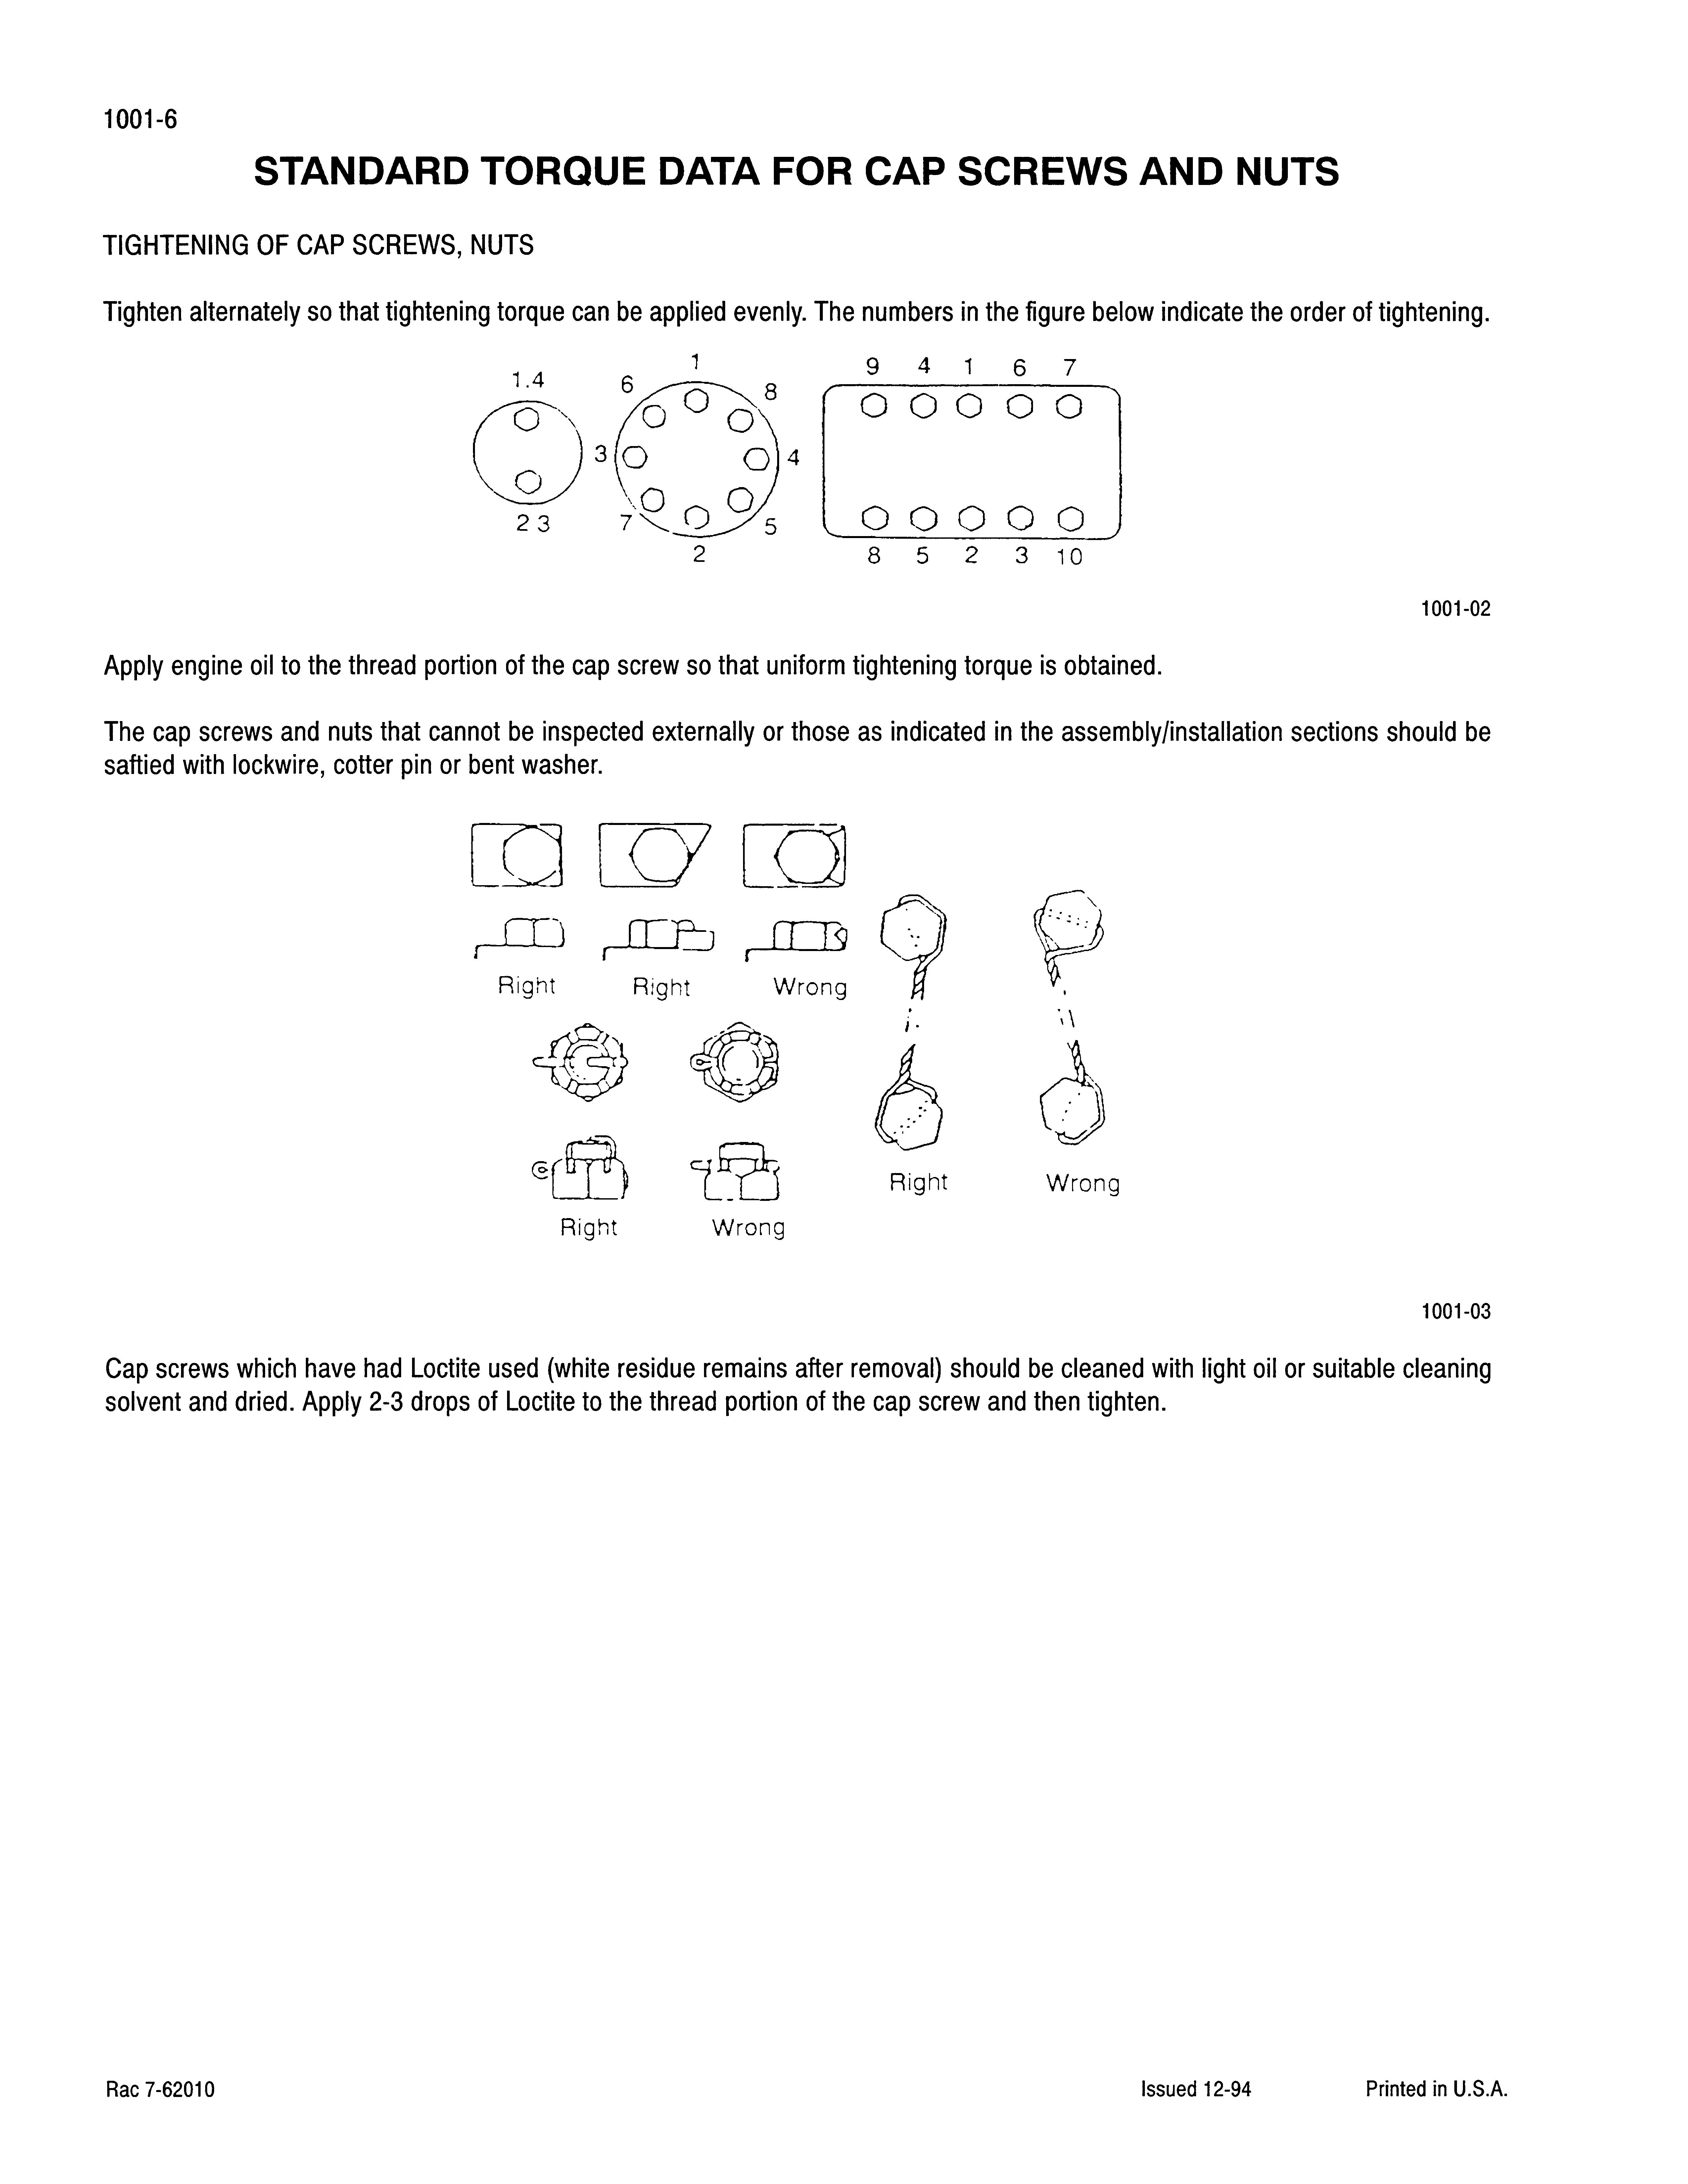
STANDARD TORQUE DATA FOR CAP SCREWS AND NUTS
TIGHTENING OF CAP SCREWS, NUTS
Tighten alternately so that tightening torque can be applied evenly. The numbers in the figure below indicate the order of tightening.
9 4 1 6 7 00000
00000
8 5 2 3 10
Apply engine oil to the thread portion of the cap screw so that uniform tightening torque is obtained.
1001·02
The cap screws and nuts that cannot be inspected externally or those as indicated in the assembly/installation sections should be saftied with lockwire, cotter pin or bent washer.
Right Right Wrong
Right Wrong Right Wrong
1001·03
Cap screws which have had Loctite used (white residue remains after removal) should be cleaned with light oil or suitable cleaning solvent and dried. Apply 2-3 drops of Loctite to the thread portion of the cap screw and then tighten.
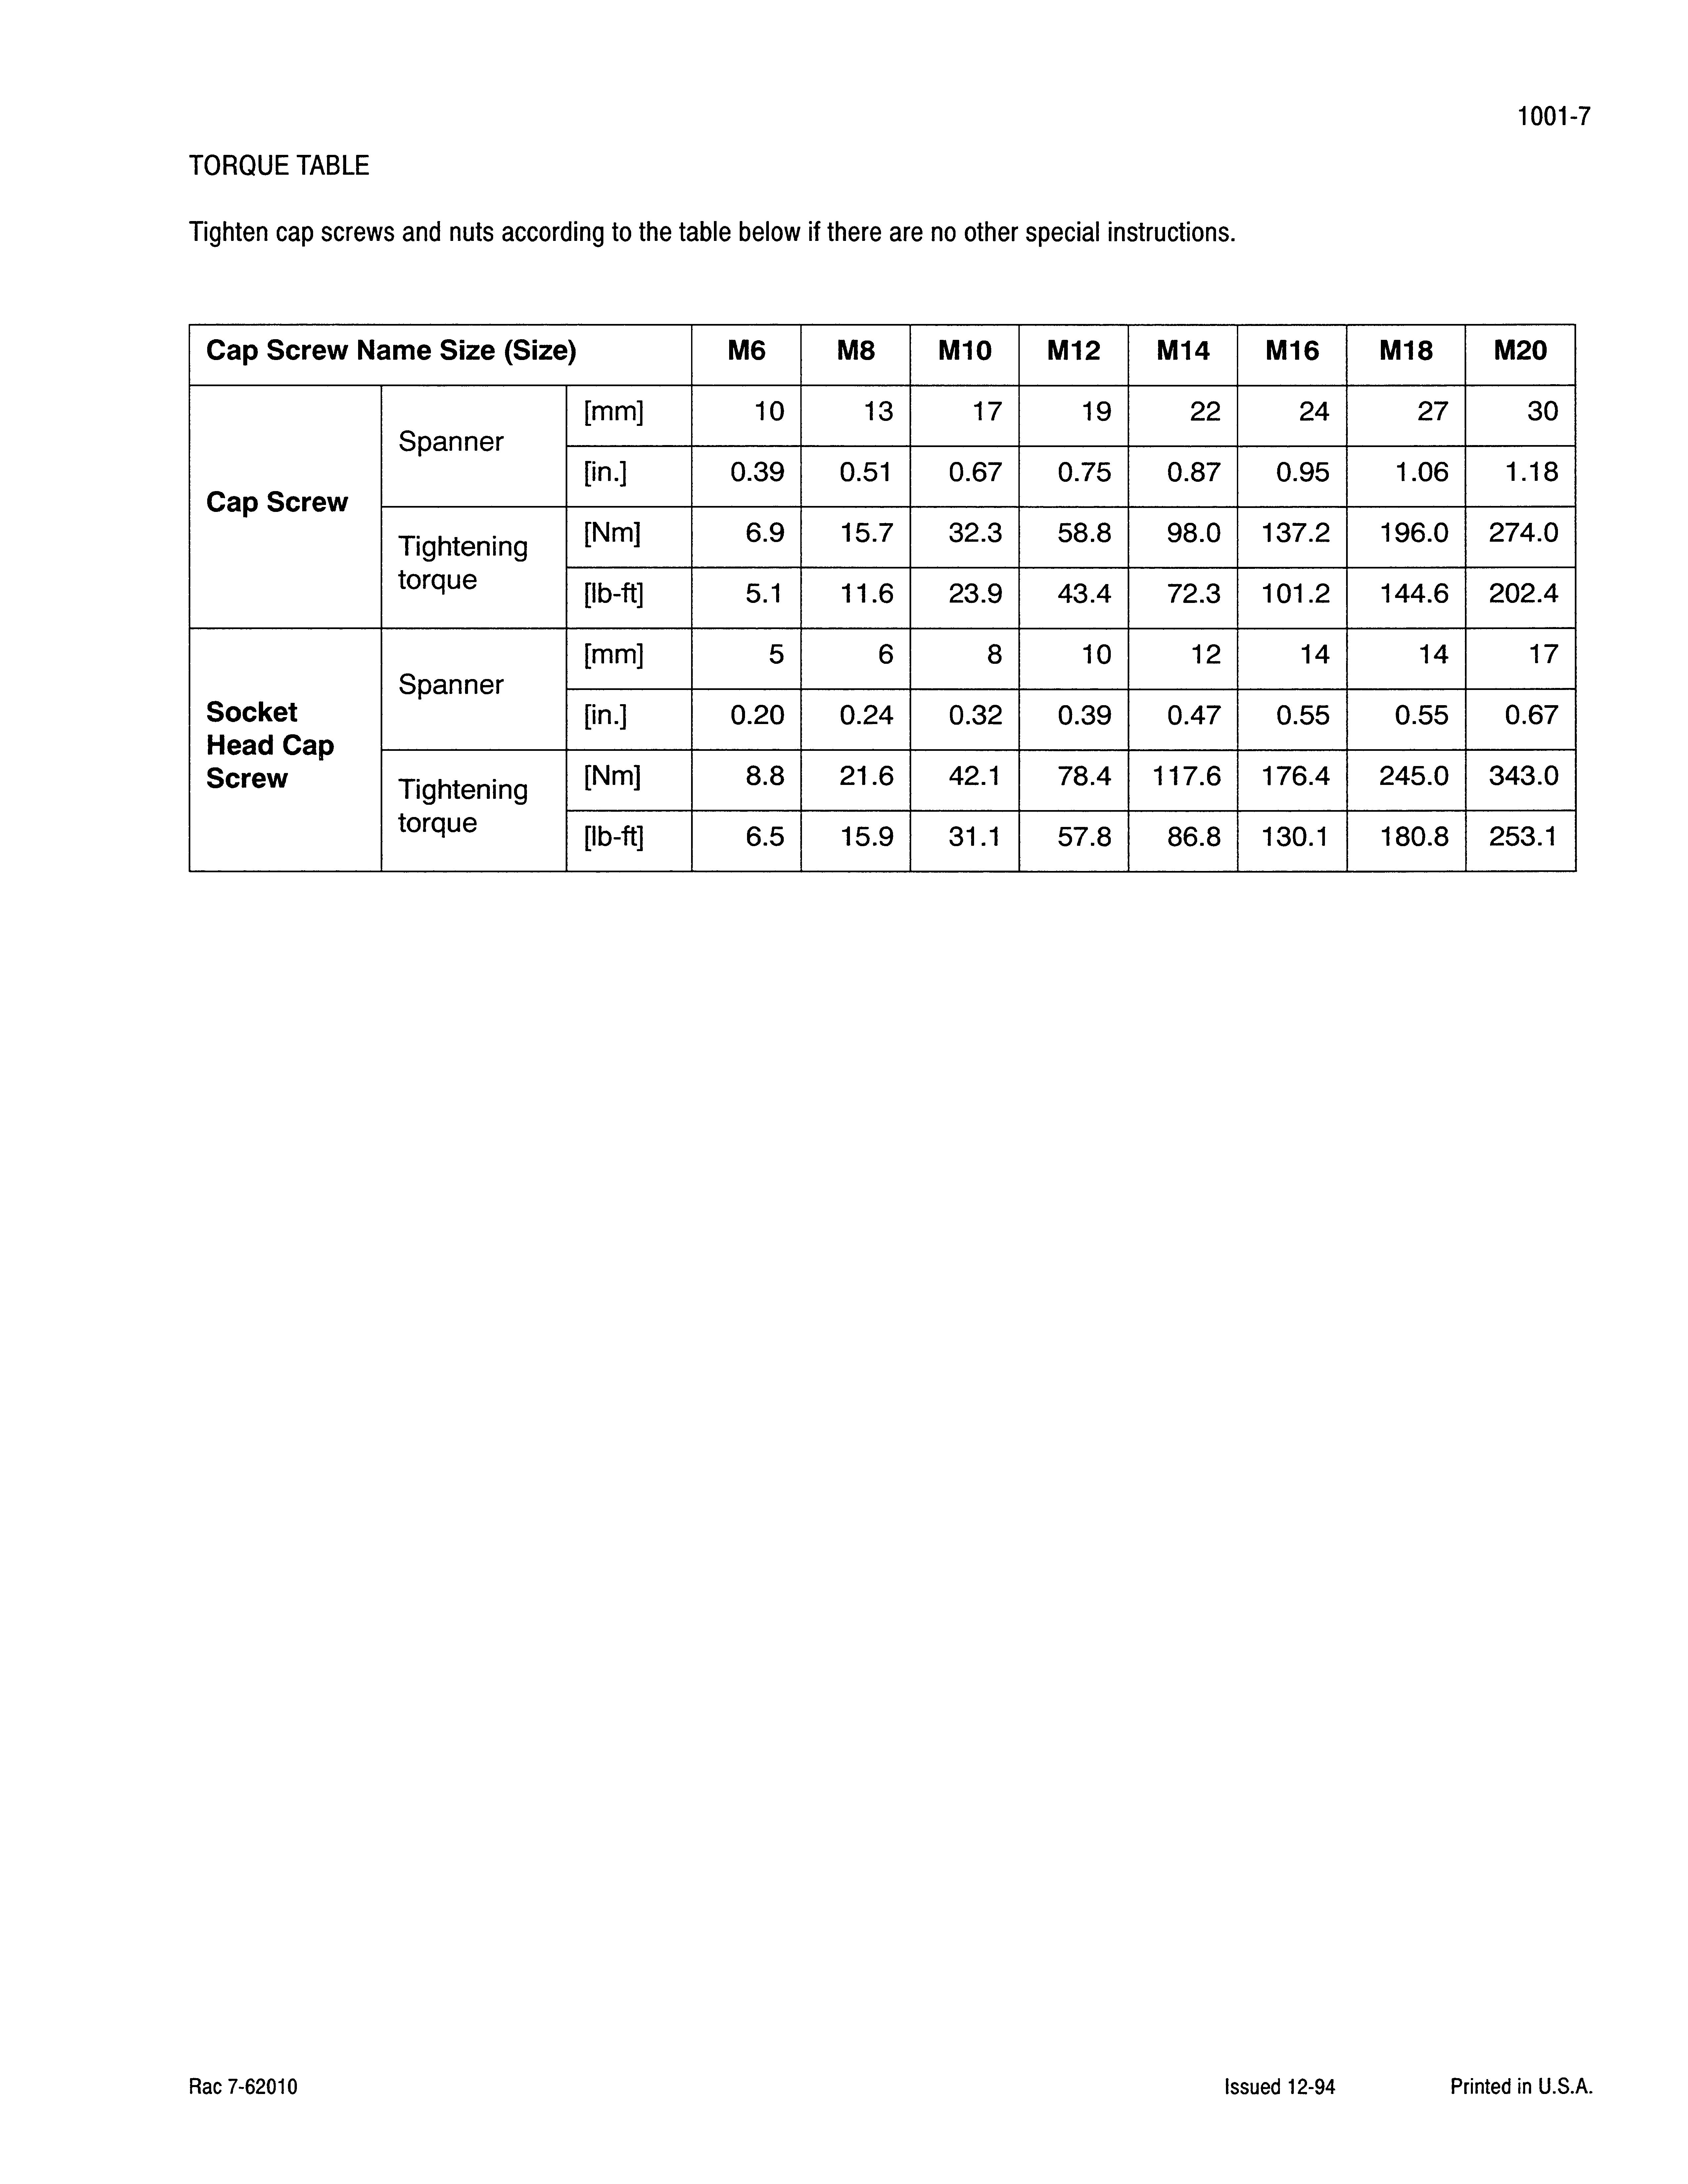
TORQUE TABLE
Tighten cap screws and nuts according to the table below if there are no other special instructions.
Cap Screw Name Size (Size) M6 M8 M10 M12 M14 M16 M18 M20
Cap Screw
Spanner [mm] 10 13 17 19 22 24 27 30
[in.] 0.39 0.51 0.67 0.75 0.87 0.95 1.06 1.18
Socket
Spanner [mm] 5 6 8 10 12 14 14 17
[in.] 0.20 0.24 0.32 0.39 0.47 0.55 0.55 0.67
Head Cap

Section 1002
SPECIFICATIONS
CASE CORPORATION 700 State Street Racine, WI 53404 U.S.A.

CASE CANADA CORPORATION
3350 SOUTH SERVICE ROAD BURLINGTON, ON L7N 3M6 CANADA Bur 7-11250 © 1998 Case Corporation Printed in U.S.A. June, 1998