7 minute read
OPERATING INSTRUCTIONS


WARNING: Always check work area to avoid accidents. The following are examples of dangerous work areas: slopes, overhangs, timber, demolitions, fire, high walls, drop offs, backfills, rough terrain, ditches, ridges, excavation, crowded parking lots, heavy traffic and closed areas. Use extreme care when in areas such as these. Be on the look out for edges, slides or falling objects. Beware of brush and undergrowth or other obstacles that conceal dangerous conditions. For night operation keep all the machine mounted lights on. Replace burned out lights immediately. Always shut-off engine when leaving operator’s seat. Before moving machine or attachments, be sure people in the area are clear of the unit. Walk completely around the machine before mounting and sound horn. Do not start suddenly at full throttle against a tow chain or cable. Take up slack carefully. Be sure exhaust system is free from leaks under the hood. (When operating inside a closed cab, always keep a vent to outside air open at all times) Avoid applying brakes continuously on long grades. Select the proper gear entering the grade. Keep engine exhaust manifolds clear of combustible trash. Shut engine off before cleaning it. Keep people clear of the attachments and tools while they are in a raised position to prevent injury.
54
OPERATING INSTRUCTIONS BEFORE STARTING THE ENGINE
CAUTION: Quickly respond to initial problems requiring maintenance and downtime will be reduced. Check the machine each morning before beginning work make a walk around inspection.
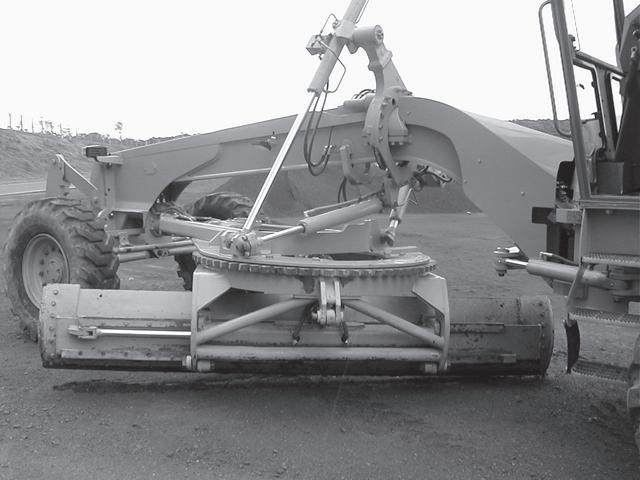
1. Check if the tires are worn, cut or not properly inflated. 2. Check if the blade, cutting edges and bits are worn or damaged. 3. Check circle adjustment. 4. Check for damaged or failed instruments and other operator’s compartment components. 5. Check leakage on tandem case. 6. Check any leakage or damage to cooling system hoses. 7. Check engine oil and hydraulic lines and hoses for leaks.
It’s also recommended to check Electrical system Check insulation parts, worn cables and terminals loose Bolts Check for loose or missing parts Hydraulic system Check leakages, twisted hoses, hoses rubbing against other components Lubrication Check all grease points related on periodic maintenance table
55
1. Fill the fuel tank only with the specified fuel, with the engine off. Take care to avoid entrance of dirt or foreign matter while filling tank.
!WARNING: Extinguish all smoking materials or open flames before checking and/or filling the fuel tank. 2. Check the fluid levels of the following: a) Engine crankcase b) Engine cooling system c) Transmission system d) Hydraulic system e) Axle housing and rear tandem housings 3. Lubricate all points where lube fittings are provided. Refer to lubrication and service guide for instructions and location. 4. Check tire inflation pressure.
WARNING: Do not inflate tires with flammable gases or air from systems utilizing alcohol injectors. Explosion and personal injury may be resulted. 5. The cooling system of the unit is filled at the factory with a 50/50 mixture of water and
Ethylene Glycol Case 331-511 antifreeze for protection to -37ºC (-34ºF). It is not necessary to drain this solution before placing the machine in service. IMPORTANT: Do not run the engine in closed areas without proper ventilation to remove poison exhaust gases. Warn all people who may be working around your machine before starting the engine. Sound horn before starting or operating the machine. Never leave the machine unattended with the engine running.
6. Start engine. Check all instruments and gauges for normal indication. Operate controls and check for normal operation. WARNING: Do not use hands to search for pressure leaks. ! Fluid escaping under high pressure can penetrate skin causing serious injury.
WARNING: Remove front wheel lean shipping bolt before operating machine.
Before unloading the machine from the truck, remove the wheel lean lock bolt and store it in the block provided on the front axle. Whenever the machine is to be transported by truck, install the lock bolt with spacer after loading. Operating the machine with the lock bolt installed will result in reduced maneuverability. NOTE: The lock bolt may be used to maintain the front wheels in a vertical position in the event of a damaged wheel lean hydraulic hose.
56
1 2
1. WHEEL LEAN LOCK BOLT LOCATION 2. ARTICULATION LOCK PIN (STORAGE POSITION) SHALL BE USED ONLY FOR MACHINE TRANSPORT

FIRST SERVICE INTERVALS
The following items are to be done during the Run-In Period and are in addition to the items in the Lubrications/Maintenance Charts in this manual.
AFTER FIRST 100 HOURS OF OPERATION
Have your dealer do the After Delivery Check .........................................................See After Delivery Check in this manual
Change the rear axle differential and planetary oil when the axles are new or repaired ................................................. See Rear Axle in this manual Change the transmission oil and filter when the transmission is new or repaired .................................See Transmission Specifications in this manual Check all hose clamps, tighten as required.
SEAT BELT
Always securely fasten your seat belt before operating the machine. From time to time, carefully inspect the seat belts for worn areas and replace belts when needed.
WARNING: Securely fasten your seat belt. Your machine is equipped with a ROPS cab or canopy for your protection. The seat belt can help insure your safety if it is used correctly and maintained. Never wear a seat belt loosely or with slack in the belt system. Never wear the seat belt in a twisted condition.
57
RUN-IN
1. Operate the machine with a light load for the first 50 hours. Efficient engine operation is obtained with the engine coolant temperature held in the GREEN area of the gauge.
Operating engine with coolant temperature below this range will result in incomplete combustion of fuel, higher fuel consumption with less power and will cause harmful gummy deposits within the engine.
WARNING: Never lubricate, service or adjust the machine with the engine running, except as called for in the Operation and Maintenance Instruction Manual to prevent accidents.
The tightening torque of the 16 mounting capscrews is 508 Nm (51,6 kgf.m; 375 lb.ft). If cab enclosures are installed, be sure all cab accessories, such as windshields wipers, latches, glass, hinges, seat belts, etc. are in good condition. Always keep windows clean.
WARNING: If replacement of glass is necessary, be sure to use safety glass or equivalent.
d) Check tandem wheel nuts. e) Check wheel lock nuts.
2. Inspect entire unit after the first 10 hours of operation.
Tighten all loose bolts and check all brake and control adjustments. Check the hydraulic and electrical systems.
After the first 100 hours of operation on a new unit or after major repairs perform the following services: a) Change transmission oil filter element. WARNING: Fluid under ! pressure. Turn cap or cover slowly to relieve pressure before removing it.
b) Change hydraulic oil filter element. c) Check the ROPS mounting capscrews after the first 50 hours of operation and periodically thereafter.
WARNING: The protection offered by the ROPS structure ! may be impaired if it has been subjected to any modification or damage. IMPORTATNT: DISCONNECT THE MASTER SWITCH AND CONNECTORS J1, J2, J3 FROM E.C.U. AND T7 FROM T.V.P. BEFORE WELDING ON MACHINE.
58
BOOSTER BATTERY CONNECTIONS TO MACHINE BATTERIES (JUMP START)
WARNING: Batteries contain acid and explosive gas. Explosion can result from sparks, flames or wrong cable connections. To connect the jumper cables correctly to the battery of this machine, see the correct method shown on this page. Failure to follow these instructions can cause serious injury or death.
WARNING: Battery explosion and/or damage to electrical components can result from improper connection of booster batteries or charger. Connect positive to positive and negative to negative. Externally, battery acid can cause burns and blindness, and taken internally it is poison.
Two persons are required for this procedure. Make sure the person making the connections is wearing face protection. NOTE: Make sure the batteries are not frozen. Do not use batteries that have been frozen. Replace the batteries if the batteries have been frozen.
1. Open the engine hood. Sit in the operators seat and have the other person make the connections. 2. Make sure the jumper batteries are 24 volts. 3. If using another machine for power, make sure the two machines DO NOT touch. 4. Connect the positive (+) jumper cable to the positive (+) battery terminals first. 5. Connect the negative (-) jumper cable to the negative (-) terminal on the jumper batteries on the other machine. Connect the other end of the negative (-) jumper cable to a good frame ground away from the batteries. 6. Start the engine according to the instructions in this manual. See Starting the Engine in this manual. 7. Have the other person disconnect the jumper cables in the reverse order that they were connected in. Close the engine hood.
59