1 minute read
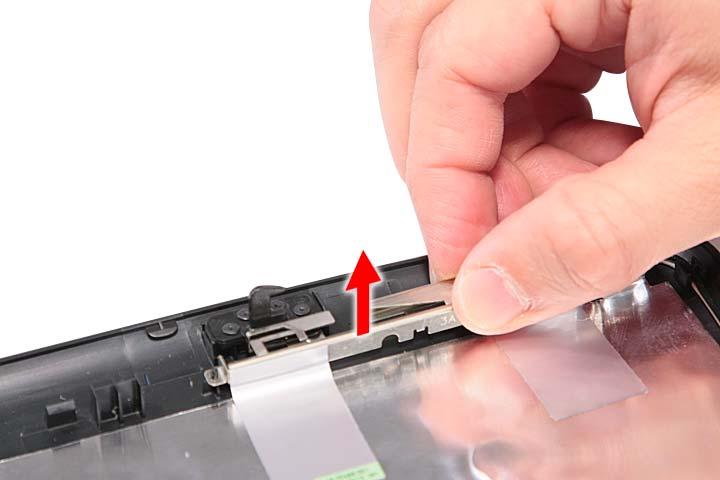
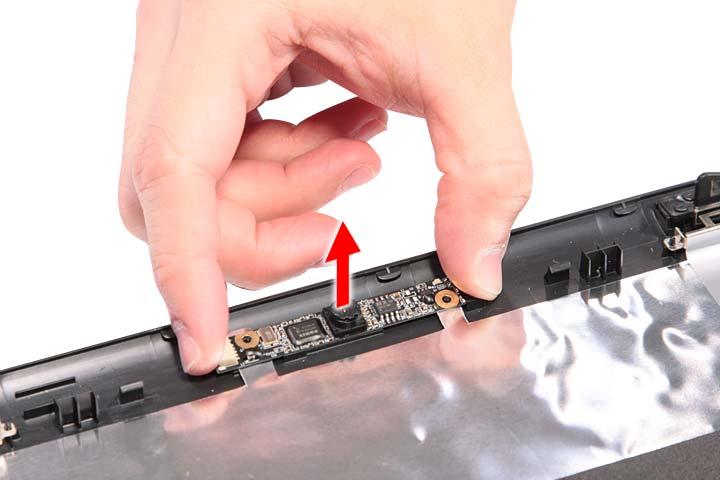
Removing the Web Camera


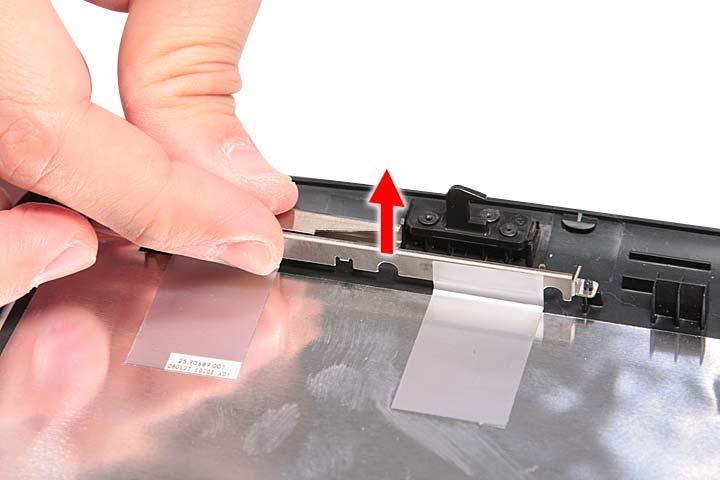
NOTE: There is no need to remove the antenna unless you really need to replace it.
1. See “Removing the Battery Pack” on page 50. 2. See “Removing the SD dummy card” on page 51. 3. See “Removing the ExpressCard dummy card” on page 51. 4. See “Removing the Lower Cover” on page 52. 5. See “Removing the WLAN Board Modules” on page 54. 6. See “Removing the Middle Cover” on page 62. 7. See “Removing the Heatsink Fan Module” on page 64. 8. See “Removing the CPU Heatsink Module” on page 65. 9. See “Removing the LCD Module” on page 67. 10. See “Removing the LCD Bezel” on page 88. 11. See “Removing the LCD panel with the Brackets” on page 89.
Troubleshooting
Use the following procedure as a guide for computer problems. NOTE: The diagnostic tests are intended to test only Acer products. Non-Acer products, prototype cards, or modified options can give false errors and invalid system responses. 1. Obtain the failing symptoms in as much detail as possible. 2. Verify the symptoms by attempting to re-create the failure by running the diagnostic test or by repeating the same operation. 3. Use the following table with the verified symptom to determine which page to go to.
Symptoms (Verified) Power failure. (The power indicator does not go on or stay on.) POST does not complete. No beep or error codes are indicated.
POST detects an error and displayed messages on screen. Other symptoms (i.e. LCD display problems or others). Symptoms cannot be re-created (intermittent problems). Go To “Power System Check” on page 99.
“Power-On Self-Test (POST) Error Message” on page 102 “Undetermined Problems” on page 116 “Error Message List” on page 103
“Power-On Self-Test (POST) Error Message” on page 102 Use the customer-reported symptoms and go to “Power-On Self-Test (POST) Error Message” on page 102 “Intermittent Problems” on page 115 “Undetermined Problems” on page 116

