3 minute read
Remove HDD/BIOS Password Utilities

This section provides you with details about removing HDD/BIOS password:
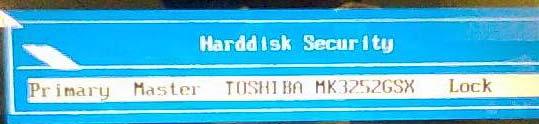
Remove HDD Password:
Advertisement
If you key in the wrong HDD password three times, an error is generated.
To reset the HDD password, perform the following steps: 1. An error code is generated for unlocking the HDD. Note down this code.

2. Execute the UnlockHD.EXE file to create the unlock code in DOS Mode using the format UnlockHD [Encode code] with the code noted in the previous step, as follows:
UnlockHD 76943488

3. Select 2 to obtain the password. This password which can be used for unlocking the HDD.
Password :46548274
4. Shut down the computer by pressing down the Power button for 4 seconds. 5. Turn on the computer and key in the password to unlock the HDD.
Removing BIOS Passwords:
To clear the User or Supervisor passwords through hardware, open the WLAN door and use a metal instrument to short the J1 jumper.

Cleaning BIOS Passwords
To clean the User or Supervisor passwords using software utilites, perform the following steps: 1. From a DOS prompt, execute clnpwd.exe
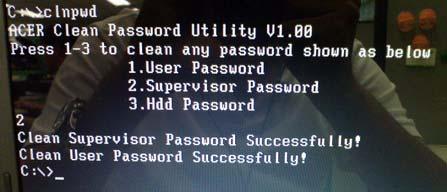
2. Press 1 or 2 to clean the desired password shown on the screen.

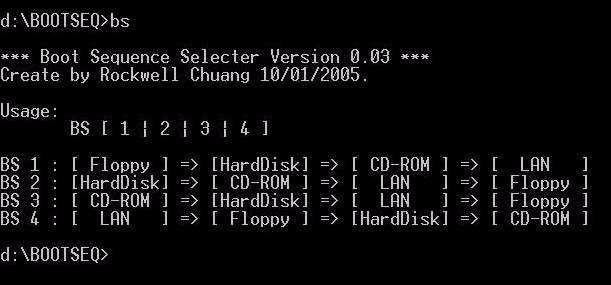
Using Boot Sequence Selector
The Boot Sequence Selector allows the boot order to be changed without accessing the BIOS. To use Boot Sequence Selector, perform the following steps: 1. Enter into DOS. 2. Execute BS.exe to display the usage screen.
3. Select the desired boot sequence by entering the corresponding sequence. For example, enter BS2 to change the boot sequence to HDD | CD ROM | LAN | Floppy.
The DMI (Desktop Management Interface) Tool copies BIOS information to EEPROM to be used in the DMI pool for hardware management. When the BIOS displays Verifying DMI pool data it is checking that the table correlates with the hardware before sending to the operating system (Windows, etc.). To update the DMI Pool, perform the following steps: 1. Boot into DOS. 2. Execute dmitools. The following messages report to screen to confirm completion: • dmitools /r ==> Read dmi string from bios • dmitools /wm xxxx ==> Write manufacturer name to eeprom (max. 16 characters) • dmitools /wp xxxx ==> Write product name to eeprom (max. 16 characters) • dmitools /ws xxxx ==> Write serial number to eeprom (max. 22 characters) • dmitools /wu xxxx ==> Write uuid to eeprom • dmitools /wa xxxx ==> Write asset tag to eeprom (max. 32 characters) The following examples show the commands and the corresponding output information.
Read DMI Information from Memory Input:
dmitools /r
Output:
Manufacturer (Type1, Offset04h): Acer
Product Name (Type1, Offset05h): TravelMate xxxxx
Serial Number (Type1, Offset07h): 01234567890123456789
UUID String (Type1, Offset08h): xxxxxxxx-xxxx-xxxx-xxxx-xxxxxxxxxxxx
Asset Tag (Type3, Offset04h): Acet Asstag
Write Product Name to EEPROM
Input:
dmitools /wp Acer
Write Serial Number to EEPROM
Input:
dmitools /ws 01234567890123456789
4 ). Write UUID to EEPROM ( Create UUID from Intel WFM20.pdf ) Input:
dmitools /wu
5). Write Asset Tag to EEPROM Input:
dmitools /wa Acer Asstag NOTE: When using any of the Write options, restart the system to make the new DMI data effective.
You can use the MAC.BAT utility to write the MAC.CFG file to the EEPROM under DOS mode. 1. Use a text editor (for example: Notepad) to open the MAC.CFG file. You can see the MAC.CFG contents as below:

WriteData = ‘001122334455' MAC value
StartAddr=7A MAC address
WriteLeng=6 MAC value length
KeepByte=0 don’t care
2. In DOS mode, run the MAC.BAT file to write MAC values to eeprom.

