1 minute read
Replacing the optical drive


Replacing the keyboard cover
v Tools you need to complete this task
Flat-blade driver Scribe or non-marring tool - OR -
Phillips #0 screwdriver
Screws removed during this task:

To replace the keyboard cover: 1 Complete the steps in “Preparing the notebook” on page 55. 2 Remove the two keyboard cover screws from the inside of the battery compartment.
3 Turn your notebook over so the top is facing up. 4 Open the LCD panel to the fully opened position. 5 Insert the small flat-blade screwdriver under each of the hinge covers and gently pry them up.
2 black M2.5×5 (Keyboard cover)
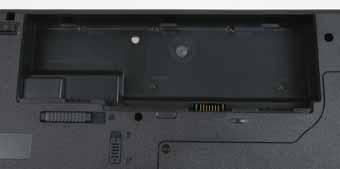
Screw Screw
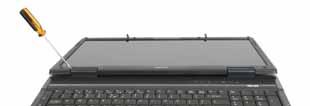
6 Insert the small flat-blade screwdriver under each end of the keyboard cover and gently pry it up.
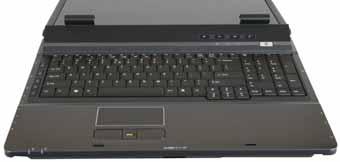
7 Pull the cover off the notebook by lifting the back corners of the cover. Be careful to not damage the LCD panel.
8 Replace the keyboard cover by first inserting the tabs located on the front of the cover into the slots provided, then pressing down on the back. Press down on the cover in several places until it clicks in place. The cover is correctly mounted when you can run you finger along the cover and find no loose spots. The cover should be flat all the way across.

Caution: If the cover is not correctly replaced, your notebook could be damaged when you try to close the LCD panel. 9 Close the LCD panel. 10 Turn your notebook over so the bottom is facing up. 11 Replace the screws removed in Step2.