1 minute read
Removing the LCD with Brackets


Step Size (Quantity) Color Torque 1~2 M2.5 x L6 (2) Black 3 kgf-cm
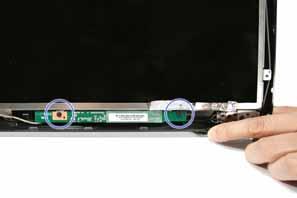
15. Turn the inverter board over. 16. Disconnect the 2P cable from the inverter board, then disconnect the inverter board cable from its connector.

17. Remove the inverter board.
1. See “Removing the Battery Pack” on page 53. 2. See “Removing the Lower Cover” on page 55. 3. See “Removing the DIMM” on page 56. 4. See “Removing the WLAN Board Module” on page 57. 5. See “Removing the Hard Disk Drive Module” on page 58. 6. See “Removing the Optical Drive Module” on page 59. 7. See “Removing the CPU Heatsink Module” on page 62. 8. See “Removing the CPU” on page 63. 9. See “Removing the Keyboard” on page 64. 10. See “Removing the Middle Cover” on page 65. 11. See “Removing the LCD Module” on page 68. 12. See “Removing the LCD Bezel” on page 86. 13. See “Removing the Inverter Board” on page 88.
Step Size (Quantity) Color Torque
1~2 M2.5 x L6 (2) Silver 2.5 kgf-cm
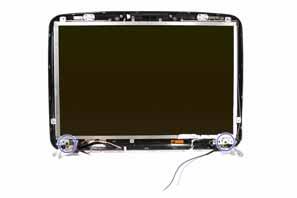
15. Detach the LCD with the brackets from the back cover, then turn it over.

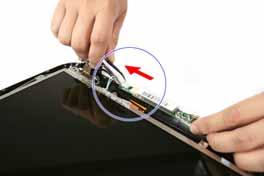
16. Detach the acetic tapes holding the cables to the back panel.


