35 minute read
Starting and Driving


Break-in Period
Jeep vehicles do not require a rigid break-in procedure However, extra care for the first 500 miles will pay dividends. During the flfst 100 miles, drive at varying speeds up to 50 mph. Then dnve at increasingly higher speeds-not exceeding 55 mph-until your mileage reaches 500 (Observe all local, state, and national speed llmits.)Ouring the entire 500 miles avoid driving at full throttle or at top speeds, and avoid steady speeds or excessive idling. Avoid shifting into gear after starting a cold engine without a warm-up of at least 15 seconds. Fast starts and quick stops should be avoided. For the flfst 1,200 miles, do not expect top economy from your vehicle. Engines tend to use more fuel and 011 until they are broken in. Driveability and performance generally improve as the engine breaks in. Check engine oil regularly and be alert for any indication of overheating in any component of the vehicle. Allow for proper break-m-at least 1,200 miles-before requesting engine adJustments ... 1f then needed
Carbon Monoxide Warning
Avoid inhaling exhaust gases as they contain carbon monoxide which is colorless and odorless. Carbon monoxide is a dangerous gas which can be lethal.
Guard against carbon monoxide by proper maintenance. If exhaust sound changes, if fumes are detected in the vehicle. or if the underside of the vehicle is damaged ... immediately have a competent mechanic inspect the exhaust system and adJacent panels for damage, m1slocated parts, or open or loose Joints which could allow entry of fumes into the vehicle interior. Until repairs are made, the vehicle should be driven with all side windows fully open. The exhaust system should be inspected every time the vehicle 1s raised for servicing.
To allow proper operation of the vehicle's ventilation system. always keep front ventilation inlet grille clear of snow, leaves, and all other obstructions.
Sitting, in a parked vehicle with the engine running for an extended period is not recommended.
Do not run engine 1n a confined area such as a garage since exhaust fumes contain deadly carbon monoxide. When vehicle 1s stopped 1n an unconfined area with the engine running for any more than a short period, adjust heating and ventilation system to force fresh outside air into the vehicle as follows:
Fresh Air Ventilation
CJ Models with Top
Pull out AIR knob and turn FAN control to MAX setting.
Cherokee-Wagoneer-Truck
Use heater and ventilation controls to direct fresh air into the vehicle. Depress HEAT or DEFROST pushbutton, activate blower by rotating FAN switch toward the HI position and open one or both fresh air inlets (temperature control lever should be in OFF position). Safety Precautions

•If, while driving, a vent window is open or a side door window is open only slightly (rather than half to fully open), always provide for a flow of fresh air into the vehicle interior by opening the fresh air vents. •On Cherokee and Wagoneer models, the tailgate window should always be closed while driving. •On CJ models with a top, always keep liftgate and/or rear windows closed while driving. On models equipped with a fabric top, do not drive with tail flap up. Fasten the tail flap to the tailgate or rear panel unless the side panels are also up.
•On Trucks equipped with a cargo cap or cover, passengers should never occupy the cargo space in the pickup box while the engine is running. Keys
When you receive the keys to your new Jeep vehicle, record the key code numbers which are stamped on the knock-out plugs. Remove the plugs and store them in a safe place.

Key Knock-Out Plugs
If you lose your keys, a Jeep dealer or any competent locksmith can replace them if the key code numbers are available. •Key with square head (stamped "D" on knock-out) fits the ignition switch (all models), door locks (Cherokee,
Wagoneer and Truck), and the tailgate rear window 7

WARNING: Placing the transmission gearshift lever in Park on vehicles with automatic transmission or in gear on vehicles with manual transmission is not a substitute for using the parking brake. Always set the parking brake-especially when parking on an incline-when leaving the vehicle unattended.
Starting
You start a cold engine differently than a warm engine. Follow the instructions here and your engine will start easily.
Cold Engine
Turn ignition key to on position and shift gearshift lever to neutral (and, if equipped with manual transmission,
depress clutch).
2 Press accelerator pedal to floor, then release it. This will preset the automatic choke. In extreme cold weather (near or below 0° F), or If the vehicle has been sitting idle for several days, repeat this procedure once or twice. 3 Turn key to start-release key when engine starts. If engine starts but fails to continue running, turn key to start again. 4 Allow engine to warm up for at least 15 seconds. Hold foot on brake. Engage transmission, release brake gradually, and drive away.
Warm Engine
Turn key to on position and shift gearshift lever to neutral (and, 1f equipped with manual transmission, depress clutch) 2 Press accelerator pedal 1/2 to 3/4 way down and hold. DO NOT pump the pedal. 3 Turn key to start position until engine starts, then release key. If engine fails to start, hold pedal to floor while starting-release key then release pedal gradually as engine gains speed.
Warm-Up
Once the engine has started, allow 1t to warm up for at least 15 seconds. Do not tap the accelerator to reduce engine speed pnor to shifting unless the speed Is excessively high. Hold foot on brake. Engage transmission, release brake gradually, and dnve away. During cold weather or if pavement is slippery, let engine idle for a bit after starting to allow proper warm-up before engaging transmission. Idle speed may be reduced after about 30 seconds by tapping the accelerator pedal lightly.

To stop the vehicle, simply release the accelerator, depress the brake pedal and. as the vehicle slows down to a near stop, again depress the clutch pedal and move the gearshift lever to the neutral position. Avoid resting the foot on the clutch while driving and do not shp .. the clutch. Slipping the clutch causes excessive heat, which can result in clutch damage. This is especially important to remember when operating a vehicle equipped with a snow plow. 4-Speed Manual Transmission
Synchronous meshing is provided in second, third, and fourth gears. First and reverse provide greater gear reduction than is available with a 3-speed manual transmission. Operate the same as for the 3-speed manual transmission, going one step beyond into a 4th forward position. Downsh1fting, going back from 4th to 3rd and then to 2nd, can be used to help reduce vehicle speed and achieve pulling power at low speeds. When downshifting be sure you shift progressively from 4th to 3rd to 2nd to 1st without skipping any gear Recommended ahlft •peed• for normal driving are 10 mph from 1 at to 2nd, 20 mph from 2nd to 3rd, and 40 mph from 3rd to 4th. I 3 R L r 2 �Speed nanual Transmlnlon 4 Shift Pattern
To engage reverse gear, push the spring-loaded shift lever to the far right and then forward. DO NOT attempt to engage reverse while the vehicle is moving. To stop the vehicle, simply release the accelerator, depress the brake pedal and, as the vehicle slows down to a near stop, again depress the clutch pedal and move the gearshift to the Neutral position. Avoid resting the foot on the clutch while driving and do not "slip" the clutch. Slipping the clutch causes excessive heat, which can result in clutch damage. This is especially important to remember when operating a vehicle equipped with a snowplow. Automatic Transmission
The operating ranges for the automatic transmission are shown on the indicator on the steering column.
The pointer indicates the operating range selected when the gearshift lever is moved.
A safety start switch prevents starting the engine unless the gear selector ism P (Park) or N (Neutral).
The column-mounted gearshift lever must be lifted slightly for ease of operation, except that when shifting from N (Neutral) to 1 Drive-no lift is required.
To provide power and acceleration for passing, downshift transmission to a lower gear (with the gearshift lever in D position) by pressing the accelerator to the floor.
To start the vehicle in motion, move the gearshift lever to the operating range desired, and then depress the accelerator. You may find it helpful to apply the brakes to prevent the vehicle from lurching as the transmission engages. The selector has six positions:
P Park-This position engages the transmission lock which must be used only when stopped, parked, or when startmg the engine. After shifting into Park always check for positive lock engagement. On an incline, also apply parking brake fully. WARNING: Do not use the automatic transmission Park position as a substitute for the parking brake. Always set the -
parking brake when leaving the car unattended. � R ReverM-For backing the vehicle Before moving the selector lever to R. always stop the vehicle (except when freeing vehicle from snow. mud or sand-see page 72) N Neutral-For starting the engine (with brakes applied)
Do not coast in neutral at any time-leave the selector lever in one of the drive positions. D Drive-For all normal open road dnvmg. The shift into D from 1st or 2nd can be made at any time. 2 Drive 2-For moderate grades and to assist braking on clear. dry pavement or in mud or snow. Transm1ss1on will automatically shift only into low or 2nd gear-not into high gear

1 Drive 1-For hard pulling at low speeds such as when traveling in deep mud. sand. snow. going up or down steep grades. Before attempting to go down steep grades, stop the vehicle and shift into 1st. This will assure that the downsh1ft has been accomplished.
Four-Wheel Drive Systems
All Jeep vehicles are equipped with a transfer case which transmits engine torque to all four wheels by using "live" front 13

and rear axles The front axle 1s driven by a drive shaft and differential in the same manner as the rear axle in a conventional two-wheel drive vehicle. Torque is delivered from the engine to the transmission and transfer case. which in turn, propels the front and rear propeller shafts When in 4-wheel drive, the rear wheels are pushing while the front wheels are pulhng-th,s provides four points of torque and traction for the "go anywhere" mob1hty that makes Jeep vehicles ideally suited for multi-purpose usage.
The Quadra-Trac · Transfer Case, standard on Wagoneers and optional on CJ-7, Cherokee, and Truck models with automatic transmission, provides the correct amount of torque to both front and rear axles at all times for "Full-Time 4-Wheel Drive."
The Model 20 Dual-Range Transfer case is standard on CJ, Cherokee, and Truck models with manual transmissions.
Quadra-Trac•-Full-Time 4-Wheel Drive
Quadra-Trac is a registered trademark of Jeep Corporation signifying Quad (4-wheel) plus Trac (traction). This system is available only on models with automatic transmission and ullhzes a unique controlled-slip third differential which automatically transmits continuous torque to both front and rear axles in direct proportion to their needs for maximum vehicle control, power, and traction. It is equally at home on the road or off the road It 1s ideally suited for 4-wheel drive operations in normal dry road conditions or in situations with mixed dry and slippery surface conditions In rugged off-road situations 1t constantly adJusts to the terrain, sending the right amount of torque to the axle where it's needed. With the exception of the Emergency Drive and the optional Low Range Reduction Unit, the Quadra-Trac System operates automatically.
WARNING: A// four tires used on vehicles equipped with Quadra-Trac MUST be of the same type and size and inflated within the specified pressure range at all times. Unlike t,res could cause poor performance, poor steering, unusual noises, or premature wear of drive train components. Refer to Tires and Wheels section.
Emergency Drive
In some emergency situations-as in the case of the vehicle becoming high-centered or stuck due to wheel spinning-it may be beneficial to nullify the differential action between the front and rear axles by actuating the emergency drive control.
• Refer to the Special Driving and Emergency Situations section for further Information on when and when not to use 4-wheel drive and for special driving techniques. • On vehicles equipped with manual-type selective drive hubs, place hubs in LOCKED position before shifting to 4-wheel drive. Refer to Selective Drive Hubs in the Maintenance section for operating instructions. On vehicles equipped with automatic-type hubs, the vehicle must be stopped or slightly moving (1 or 2 mph) before shifting into 4-wheel drive. Otherwise damage to the transfer case may result.
2-Wheel Drive High Range Into 4-Wheel Drive High Range Shifts, or 4-Wheel Drive High Range into 2Wheel Drive High Range Shifts
All Models
Maintain vehicle speed and move shift lever into desired position. Letting up on the accelerator pedal or depressing the clutch pedal may provide easier shifting.
4-Wheel Drive Low Range Shifts
CJ Models
To shift into 4-wheel drive low range, reduce vehicle speed to 1 or 2 mph. Depress clutch pedal and pull lever rearward into 4-wheel drive low (4L). Release clutch pedal and continue pulling lever while vehicle is moving, until assured of full engagement of 4-wheel drive low.
To shift out of 4L into 2-wheel drive high range (2H) or 4wheel drive high range (4H), depress clutch pedal and move lever forward into 2H or 4H as desired. This may be done at any vehicle speed.

CherokH-Truck To shift into 4-wheel drive low range (4L), reduce vehicle speed to 1 or 2 mph. Move shift lever through the U-shaped pattern all the way into 4-wheel drive low range (4L) in one continuous motion.
NOTE: If transfer case is in 4-wheel drive high range (4H), it may be easier to first shift into 2H, then shift into 4L in one continuous motion. To shift out of 4L into 4-wheel drive high range, reduce vehicle speed to 1 or 2 mph, depress clutch pedal and pull lever rearward into 4H position.
To shift into 2-wheel drive high range (2H), continue moving lever forward into 2H position. 19
Self-Adjusting Drum Brakes
Jeep brakes adjust themselves automatically, saving you the time and cost of periodic brake adjustments. The adjustment occurs (if necessary) when you apply the brakes while moving in reverse, which happens often enough during normal driving to keep the brakes in adjustment. If you find your brake pedal at an abnormally low position, put the vehicle in reverse and apply the brakes-repeat the forward and reverse apphcation three or four times. II this procedure does not restore normal brake pedal position, have the brake fluid and linings checked by your dealer. WARNING: Don't "ride" the brakes by resting your foot on the pedal. After going through deep water (or an automatic wash) dry brakes by gentle intermittent pedal action while dflvmg at very slow speeds.

Disc Brakes
Ventilated-rotor front disc brakes (optional on CJ models) provide fade-resistance plus maximum stopping ability and control under a wide variety of speed. weather and road conditions. Disc brakes are self-adjusting and should be relined when necessary.
Power Brakes �
With power disc brakes (optional on CJ models: standard on Cherokee. Wagoneer. and Truck). your braking effort receives a power assist from eng1nf! vacuum. s1gn1f1cantly reducing the effort necessary in braking. Even after the engine stops, the built-in vacuum reserve system assists for one or two brake applications. With no vacuum rHerve, substantially grHter pedal effort is needed for braking.
Brake System Warning Light
The brake system warning light in the instrument cluster will glow red 1f there 1s a loss of hydraulic pressure in the brake system (also indicates parking brake engagement) As the key 1s turned to start the engine. the light should glow If 1t doesn't glow. the bulb may be burned out and should be checked 1mmed1ately. However. 1f the bulb glows while the vehicle 1s in motion and the parking brake 1s released, it 1s a warning that pressure 1s lost and calls for 1mmed1ate repair. The warning light does not indicate fluid level in the master cylinder. which must be regularly inspected (see Maintenance section). 21

Parking Brake
T1e step-on parking brake pedal mechanically operates cables to the rear brakes when applied. To set parking brakes, push the service brake pedal down with the right foot at the s,1me time you apply the parking brakes with your left foot. Before driving, release parking brakes by pulling out on the
Brake Release lever. If possible, avoid using parking brakes in lreezing weather or when brakes are known to be ovt1rheated. A1ways apply parking brake fully when leaving the vehicle unattended, and especially when parking on inclines, or when 11wpecting or working under the hood or anywhere around th(, vehicle.
Perking Brake Warning Light
H,e parking brake warning light will glow when the parking t,1 ake is set and the Ignition is in the on position. It will r.;,)ntinue to glow until the parking brake is released. (Same t'ght as for brake system warning.) NOTE: Place automatic transmission in Park or manual transmission in Reverse when leaving your vehicle and set the parking brake.
Twelve Ways to Save Gasoline
1 First, determine to drive in a manner that saves fuel, attitude is an important element of economy driving. 2. Avoid "jack-rabbit"' starts. Acceleration should be smooth with either manual or automatic transmission, getting into high gear early. Up to five times as much fuel can be used in a full throttle start. 3 Hold a steady accelerator pedal position when possible. Steady speeds are ideal for economy; unnecessary speed wastes gas. Fuel economy in most vehicles, when driven at a steady speed, drops gradually as speed increases above 40 mph and drops fairly rapidly above 55 mph. 4. Watch traffic conditions ahead to anticipate speed changes. Losing vehicle momentum means extra gasoline must be consumed to regain it. Good drivers avoid braking by adjusting speed to traffic flow. 5. Choose routes which avoid stop-and-go traffic, if possible. Starting from a stop uses much more fuel than cruising at a steady speed. 6. Accelerate gradually before going uphill to build up momentum and avoid the need to open the throttle unnecessarily.
7.Turn off the engine when stopped for more than a minute, ,ding requires a rich fuel mixture, and running the engine unnecessarily for even a minute burns more gasoline than needed for restarting. 8.Winter driving conditions cut economy-good reason for preparing your vehicle for cold weather use. Change to winter grade crankcase 011 for better fuel economy through reduced engine friction. 9. Let a cold engine warm up while driving at a light throttle for the first mile or so, not with the vehicle sitting still. Warm-up will be faster and with less wear. 10. Check tire pressure regularly. Underinflat,on increases rolling resistance of the tires which has a marked effect on fuel usage. For best comfort, fuel economy and tire life, tires should be inflated as recommended in the Tires and Wheels section of this manual 11. Maintain your vehicle as recommended in this manual. A tuned-to-specifications engine will give you better fuel economy and performance. Common wasters of gasoline are: •Idle speed faster than specification •Idle adjustment rich •Initial spark retarded from spec1f1cat1on Six-cylinder vehicles sold for principal use in high altitudes (above 4000 feet elevation) were built with a manual altitude compensation device. For ad1ustment of this device and required timing ad1ustments, refer to page 110. ·• � 12. Drive courteously. The thoughtful driver invariably 1s a driver whose actions provide better fuel economy. How to Check Gas Mileage Accurately

1. Select a service station with a level driveway. near a freeway-type road. and have the tank filled brim-full. 2. Record the odometer reading in tenths of a mile. 3. Cruise the vehicle on a freeway-type road at a steady speed of 50 mph for at least 60 miles. 30 miles out and 30 miles back to the same service station and gas pump 4. Have the tank filled, again brim-full. Record the amount in tenths of a gallon. 5. Record the odometer reading. and calculate the exact miles driven in tenths of a mile 6. Divide the miles driven by the number of gallons used. to obtain gas mileage.
A handy Gas Mileage Record form is provided on page 128. 23
Ammeter
This instrument is used on Cherokee, Wagoneer, and Truck models to indicate battery charging or discharging. With ignition and all accessories off-the pointer should be centered at zero. Immediately after starting, the pointer may indicate a high rate of charge ( + ). However, as the battery becomes charged, it will drop back toward zero. When the battery is fully charged, the pointer is slightly on the charge side ( + ).
The electrical system should be checked whenever:

• The pointer indicates discharge(-) or no charge for an unusual length of time. • The pointer indicates a high rate of charge ( +) for an unusual length of time.
Tachometer
�he electric tachometer sweephand indicates engine revolutions per minute (RPM). To achieve maximum performance, do not operate engine in the area marked in red. Operation in the red zone could be detrimental to the engine. (Optional on CJ models.)
Oil Pressure Gauge
This gauge indicates oil pressure but not oil level. Pressure mvari�s wit� en�ine speed'. temperature, and oil viscosity. Cold engines give higher readings. Sustained high speeds cause • • . -··· ._. · . : lower readings. Sudden turns or stops can cause a mo• • menta.ry pressure drop. Normal readings are 20 to 60 psi in city driving, 45 to 60 psi at highway speeds. Hot engine idle pre_ssure of 13 psi is satisfactory. Consistently lower readings indicate possible malfunction or low oil level. Stop for a service check immediately. D> &, :i' :i' u, ::;' C
Light Switch � I» i :I
The light switch regulates the lighting by being pulled, pushed or rotated.
The switch has three push-pull positions. With the control knob pushed all the way in, all lights are off. Pulling the control knob out halfway operates the parking lights, and all the way out operates headlights and parking lights. Both positions also operate the taillights and the instrument cluster lights.
Rotate the knob clockwise to dim the instrument cluster lights and counterclockwise to turn the dome and courtesy lights (optional on CJ models) on. -0 "O .. D) u, :I 25
less the ignition key is in the on or accessory position. Hold the switch up to raise the window and down to lower 1t. The switch is spring-loaded and will return to the mid-pos1t1on when released. The window may also be operated by turning the square-headed key in the lock of the exterior side of the tailgate. To assure proper operation, make sure the tailgate is fully closed. WARNING: Do not drive with the tailgate window open even slightly. Poisonous exhaust fumes could be drawn into the vehicle passenger compartment. Electric Clock

To set the hands of the clock, pull the adjustment knob out. Hands of a fast-running clock should be turned backward, slow-running clocks forward. Clock speed will then be corrected automatically after one or two adjustments. Optional on all models.
Cigarette Lighter
The lighter heats when pushed in, and pops out automatically when ready for use. To preserve heating element, do not hold the lighter in heating position. The lighter operates when ignition key is turned to the on position.
Ashtray
Front ashtray(s), located in or under the instrument panel and the rear seat ashtray on Wagoneer models with the full bench front seat, may easily be removed for cleaning. To remove, push tray tab down and pull out. To install, simply push the tray into position. On Cherokee "S" and Wagoneer models with bucket seats, the rear seat ashtrays are located in the door trim panels. To remove, pull upward. To install, simply push the tray into position.
Glove Box
To open the glove box door, press the pushbutton. On models equipped with a lock, use the oval-headed key to lock and unlock.
Heating and Ventilating
The fresh air heater and defroster system is designed to provide fresh air ventilation for summer driving or fresh heated air within the vehicle for winter driving. In winter, keep accumulated snow away from air inlet grille in front of windshield for proper operation of the heater. 31

CJ Models
The heating and ventilating controls are located Just to the left of the instrument cluster. Pull out on the AIR Control Knob to allow maximum airflow through the heater coils. To increase the airflow, turn the FAN Control Knob. The temperature 1s regulated by the amount the HEAT Control Knob is pulled out. Pull out on the DEF Control Knob to direct warm air to the windshield for defrosting.
Heating and Ventilating Controls CJ Models
For warm weather driving, pull the AIR Knob out for fresh air ventilation. For maximum fresh air to the passenger compartment turn the FAN Control Knob.
Cherokee-Wagoneer-Truck
Heating and ventilating controls are grouped together at the left side of the instrument cluster. The controls consist of three airflow pushbuttons, a sliding Temperature Control lever and a FAN Switch With the OFF pushbutton pressed, the heater system will not operate. Do not operate the fan with the OFF pushbutton pressed-the fan motor could overheat.
The HEAT pushbutton directs outside air over the heater coils and to the heater outlets under the dash near the floor. The DEF pushbutton directs the heated air to the outlets at the top of the instrument panel to defrost the windshield. The temperature of the heated air can be regulated by sltding the lever located below the pushbuttons. The temperature 1s raised as the lever is moved to the right into the red area. Move the FAN Switch to one of its three "on" pos1t1ons for circulation of fresh or heated air
AM/FM Stereo Multiplex Radio
Band Selector-Slide the band selector to the right for AM operation and to the left for FM or FM/Stereo operation. Left-Right Speaker Balance-Adjust the left-right speaker balance control to confine the sound output to either right or left speaker. or to blend the sound as desired between the speakers.

Front to Rear Speaker Balance Control
The speaker balance control on Cherokee "S" and Wagoneer models is located at the bottom of the instrument panel and adjusts the volume between front and rear speakers. Rotating the knob to the extreme right or left confines the sound output to either the front or the rear speakers, or blends the sound between the speakers as desired FM Radio Tips
FM and FM/stereo broadcasts have some characteristics which do not appear in AM broadcasting. These cond1t1ons g· are not due to any fault in your radio: • The effective range of FM and FM/ Stereo broadcasts 1s approximately 20 miles. When driving away from a staf': ••• •• t1on 1t may become necessary to fine-tune the radio and turn up the volume as the station becomes weaker. When the hissing or popping noise (which indicates a weak broadcast signal) becomes too strong, tune to another station. • Tall buildings, hills, or depressed roadways may cause garbled or weak reception or even temporary Joss of the program. • When you pass near the broadcasting tower of an FM station. that station may cut out another station to which you are listening even though you do not change your dial setting. This may even switch back and forth several times until you get a little farther from the tower. This condition is temporary and will clear up as you move away from the offending tower. • In some cases, these conditions can be helped by flneturnng. If not, tune to another station. 37
Seat Belts
Seat belts are provided for protection of the driver and occupants of the vehicle. Constant and proper use of seat belts is a wise precaution. Make rt a habit to wear belts properly and see that passengers follow your example.
CJ models are equipped with lap belts only for the front and rear seat occupants. On Cherokee, Wagoneer, and Truck models, the front seat outboard positions have a lap and a shoulder belt that are permanently connected at the latch plate. The lap belt has a retractor reel that locks when you atop pulllng the belt out. The shoulder belt has an inertiallocking retractor that locks only when the vehicle stops abruptly to allow upper body freedom of movement in normal situations. A plastic comfort clip on the shoulder belt allows the belt to be adjusted to reduce the pressure of the belt across the shoulder and chest. The center position, on vehicles with bench seats, is equipped with a manually adjustable lap belt.
A seat belt reminder system is provided on Cherokee, Wagoneer, and Truck models, and consists of a FASTEN BEL TS indicator light and a buzzer. The light wrll come on whenever the ignition is turned to the on or start positron, whether or not the driver has buckled up. It w,11 go off automatically after about 4 to 8 seconds. The buzzer will sound only if the driver has failed to fasten hrs seat belt and the rgnitron rs turned to on or start positron; rt wrll go off automatically after about 4 to 8 seconds of buzzing. The warning light and buzzer work independently of each othe� and only fer the driver's seat. The rear seat outboard positions are equipped with automatic-locking lap belt retractors. Rear seat center positions have manually adjustable lap belts. D •

To "Buckle-Up"
Front Seat Lap-Shoulder Belt
• Adjust front seat to satisfactron of driver (if vehicle has bench-type seat) and �,t erect and well back in seat. • Pull the lap-shoulder llelt from the retractors in one continuous motion so the shoulder portion of the belt crosses your shoulder and chest and insert metal latch plate into buckle until you hear a "cltck·· and feel rt latch. If pulling motion was stopped short so that the latch won t reach the buckle. let lap belt rewind rnto the retractor to release locking mechanism. Then. pull belt out to the proper 47
• For outboard seats equipped with automatically locking retractors, pull belt from retractor in a single continuous motion and insert metal latch plate into buckle until a "chck" is heard. If latch won't reach, let belt rewind to release locking mechanism so belt can be pulled out to the proper length. Adjust belt low and snug across hips by pulling belt in direction of retractor.

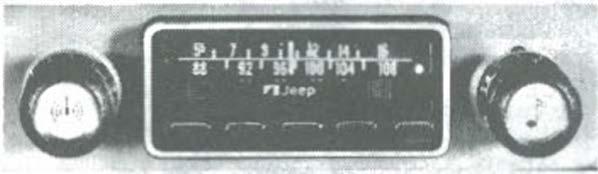
Adjustable Shoulder Belt Comfort Clip
• For center seat, insert metal latch plate until "click" is heard. Adjust belt low and snug across hips by pulling on free end of webbing at the latch side of the belt. To Disconnect and Stow Belts
• To unfasten belts, press pushbutton in center of buckle. • When not In use, front seat lap-shoulder belts can be stowed by allowing them to rewind into their retractors.
The shoulder belt comfort clip can be adjusted so that shoulder belt slack will be fully taken up by the retractor. Never use the same lap-shoulder belt on more than one person at a time and do not wear shoulder belt under the arm. Such uses increase the chcfnce and severity of inJury in the event of an accident. • Belts, buckles, latch plates, retractors, reminder systems, comfort clips, and anchors should be inspected periodically. Webbing should be replaced 1f fraying or cuts havendeveloped. Depending upon amount of use and exposure to sunlight, dirt, and abrasion, belt webbing strength may deteriorate over a period of years. In such cases, belt assemblies should be replaced. • If your vehicle has a three-passenger front or rear benchtype seat, be sure each seat belt latch plate is inserted into the correct buckle. It's possible-especially for children-to get the middle and outboard seat buckles mixed up. For front seats, belt routings can be checked visually; for rear seats, manually trace webbings to their anchors by slipping your hand between the seat cushion and the seatback. • Belt assemblies should be replaced in the event that they have experienced major collision loads. • Connecting bolts should be tightened to the correct torque. You dealer can check this. 49

• When cleaning belts, use a mild soap or detergent with warm water. Rinse them thoroughly and dry them in the shade. Never dye or bleach belts (this may weaken fabric). When Children Are Passengers
For children five years of age or under, use of a child restraint 1s recommended. These include child seats, child harnesses, or infant earners complying with Federal Motor Vehicle Safety Standard (FMVSS) 213. The American Safety Belt Council (which also concerns itself with child seats), gives the following tips on buying and using child restraints: • Look for a label saying that the infant carrier or child seat meets FMVSS 213 standards. • Look for a statement in the seat's accompanying literature saying that the manufacturer has run his own "dynamic" test on the seat (There are about half a dozen such products on the market.) • If possible, put the earner in the center of the back seat rather than up front with you. The back seat is more safe for a child. • Read all instructions carefully and follow to the letter.
Many infant carriers and child seats have a webbed strap coming from the top of the back of the carrier. This strap
should be fastened down when you are traveling by attaching it to a back seat safety belt. • Many children aged four and five are too big for child seats and too small for regular seat belts (especially in the front seat, where the shoulder harness 1s likely to come right across their faces or necks). Put such children in the back seat, where seat belts don't have shoulder harnesses, and strap them in. While seat belts are not as protective for them (because their body weight and flex1b1hty differ from adults), seat belt use is recommended. Children should never be left alone in a vehicle. If the occasion so requires, be sure to set the parking brake and remove the ignition key which also locks the steering wheel (and transmission on vehicles with automatic transmission) .
Windshield Positioning-CJ Models
You can dnve with the windshield up or down. To lower the windshield:
• Lower soft top or remove hard top, if equipped. • Turn holddown knobs counterclockwise to remove them.
Stow them in the glove box or, after lowering the windshield, replace them in the instrument panel by turning them clockwise.
and 1f the tires were balanced on the vehicle, they should be rebalanced.
The cost of rotating and balancing tires is the owner's responsibility, but 1s an expense that will be offset by extended tire life.
1FRONT m m FRONT I I ROTATING 5 TIRES Radial Tire Rotation § I ,ow··· I
4 TIRES .... ... m lo� I .... I: I
� Tire Pressures
Correct tire pressures depend on tire size. tire ply, gross vehicle weight (GVW) rating, vehicle load and the type of dnv1ng. For satisfactory 4-wheel dnve operation. a Jeep 4-wheel dnve vehicle MUST be equipped with the same size tires of equal circumference on all four wheels. The tires must then be inflated to the pressures recommended by Jeep Corporation-at all times.
Tire inflation should be checked and ad Justed to recommended pressures periodically (at least monthly), especially when extreme changes (20°F) in average seasonal temperatures occur. Tire inflation pressures should be checked and adjusted when the tires are cold-driven less than 2 miles at moderate speeds of less than 40 mph after the vehicle has been at rest for at least 6 hours. •
Do not reduce inflation pressure if the tires are hot-driven over 10 miles in excess of 60 mph-as tire pressure may increase as much as 6 psi over cold pressures. If tire pressure must be ad1usted while hot, temporarily set pressure at 6 psi ( 10 psi for sustained high speeds) greater than those specified (but not over the maximum inflation pressure shown on the tire) until such time as cold inflation pressure can be checked and adjusted.
The correct tire inflation pressures for your vehicle, under any given set of driving conditions. may be determined by referring to the Tire Inflation Pressures (PSI) table. "Cold" inflatlon 59

Front
Place the Jack under the axle tube, just outboard from the shock absorber mounting bracket near the wheel to be changed. CAUTION: The jack must not touch the shock absorber mounting bracket. Rear
Place the jack under the axle tube, between the spring attaching U-bolts, near the wheel to be changed. WARNING: Check the stability of the vehicle after it is raised and do not work under vehicle without a safety stand supporting it. The jack is for changing wheels only. Tire Changing
If you plan to change a tire yourself, follow this routine to assure that you've done it right and safely.
• Park on a level, firm surface. • Stop the engine and set the parking brake. • Place the automatic transmission in Park or the manual transmission in reverse. • Never start the engine with the vehicle on a jack. TracLok rear axles, especially, can roll your car off the jack even with one rear wheel off the ground.
• Block the tire diagonally opposite to the flat tire to prevent forward and backward movement. • Remove the spare tire and jack, but note their position for easy replacement. NOTE: On Cherokee, Wagoneer and Truck models, remove and replace the spare tire as follows:
Remove the spare tire from the rear undercarriage by loosening the lug nut with the lug wrench until the spare tire holding arm may be swung to the left. Make sure that the nut Is loosened sufficiently to allow easy movement of the holdingarm. To install the spare tire, place it on the holding-arm with the valve stem side of the tire facing down, and move the holding-arm up and to the right, over the nut. Center the tire on the holding-arm with the valve stem side of the tire facing down, and tighten the nut until the tire is held firmly in position. • Allow ample working space on the side of the vehicle, particularly if the flat tire is on the left side and you are on the highway shoulder • Pry off the wheel cover before raising the vehicle. Use the flat end of the lug wrench and start prying at the edge opposite the tire valve.
structions (page 60). •Before raising the vehicle, loosen the wheel nuts, turning counterclockwise about one-half turn. However, don't re
move the nuts until the wheel Is raised.
•After changing the tire, and before lowering the vehicle, snug up the wheel nuts In an alternating sequence, and with uniform snugness. •Lower the vehicle until the tire Just touches the ground, then tighten the wheel nuts firmly (75 foot-pounds
torque), and with the same alternating sequence. •Lower the vehicle fully, then snap the wheel cover firmly
into place by starting directly over the valve stem.
WARNING: Stow the jack, lug wrench, and spare tire properly to prevent them from becoming dangerous projectiles ,n the event of a quick stop or collision.

Wheel Balancing
Wheel balancing with the wheel on the vehicle is recommended with the exception of rear wheels on vehicles equip
ped with the optional Trac-Lok differential.
Front Wheel Bearing Adjustment
Adjustment of wheel bearings is critical because It establishes the running clearance of the wheel bearings. Adjustment that is too tight preloads the bearings and causes them to run hot. Loose bearings permit the drum hub to shift its
position on the bearings as the thrust loads vary with acceleration, braking, and cornering. Loose bearings can also cause erratic steering.
Rear wheel bearings on the J-20 Truck (Model 60 Full-Floatmg Rear Axle) are adjustable. Rear wheel bearings on all
other models (Model 44 Rear Axles) do not require
adjustment.
Front End Alignment
Whenever uneven tire wear is evident, or when front end shimmies, front end all�pt should be checked.
Your Jeep dealer will be happy to assist you in determining
the problem and correcting it, so you will only pay for work that is actually needed. 63