DOWNLOAD LINK
For some reason if link does not work download this pdf and then click
Product: WHEEL LOADER
Model: 966G WHEEL LOADER 3ZS
Configuration: 966G Wheel Loader 3ZS00001-UP (MACHINE) POWERED BY 3306 Engine
Operation and Maintenance Manual (Custom) 367-7349 and Quick Coupler For Wheel Loaders
Media Number -GEBU0024-00 Publication Date -01/10/2010 Date Updated -12/10/2010
i04090229
Maintenance Interval Schedule
SMCS - 6700
When Required
Quick Coupler - Clean/Inspect
Every 250 Service Hours or 3 Months
Quick Coupler - Clean/Inspect/Replace
Product: WHEEL LOADER
Model: 966G WHEEL LOADER 3ZS
Configuration: 966G Wheel Loader 3ZS00001-UP (MACHINE) POWERED BY 3306 Engine
Operation and Maintenance Manual (Custom) 367-7349 and Quick Coupler For Wheel Loaders
Quick Coupler - Clean/Inspect
SMCS - 6129-040; 6129-070
Personal injury or death can result from improperly checking for a leak.
Always use a board or cardboard when checking for a leak. Escaping air or fluid under pressure, even a pin-hole size leak, can penetrate body tissue causing serious injury, and possible death.
If fluid is injected into your skin, it must be treated immediately by a doctor familiar with this type of injury.
Note: Do not weld on the quick coupler without consulting your Caterpillar dealer.
Note: Clean the quick coupler prior to inspection in order to properly inspect the quick coupler.
1. Inspect the hydraulic lines and the hydraulic fittings for damage or for wear. Repair any worn components or replace any worn components. Repair any leaking components.
2. Inspect the locking pins that secure the quick coupler to the wheel loader.
3. Inspect the steel material of the quick coupler for cracks.
4. Inspect the warning signs and labels. Replace warning signs or labels that are missing. Replace warning signs or labels when you cannot read the warning signs or labels. Refer to the Operation and Maintenance Manual, "Safety Messages"for additional information.
Copyright 1993 - 2025 Caterpillar Inc.
Rights Reserved.
Network For SIS Licensees. Fri Apr 4 02:46:24 UTC+0530 2025
Product: WHEEL LOADER
Model: 966G WHEEL LOADER 3ZS
Configuration: 966G Wheel Loader 3ZS00001-UP (MACHINE) POWERED BY 3306 Engine
Operation and Maintenance Manual (Custom) 367-7349 and Quick Coupler For Wheel Loaders
Quick Coupler - Clean/Inspect/Replace
SMCS - 6129-040; 6129-070; 6129-510
i02056595
Personal injury or death can result from improperly checking for a leak.
Always use a board or cardboard when checking for a leak. Escaping air or fluid under pressure, even a pin-hole size leak, can penetrate body tissue causing serious injury, and possible death.
If fluid is injected into your skin, it must be treated immediately by a doctor familiar with this type of injury.
Note: Do not weld on the quick coupler without consulting your Caterpillar dealer.
Note: Clean the quick coupler prior to inspection in order to properly inspect the quick coupler.
1. Remove the cover assemblies from the back of the quick coupler.
2. Clean the inside of the quick coupler in order to properly inspect the inside of the quick coupler.
3. Inspect the components inside the quick coupler for the following problems:loose bolts, oil leaks, broken parts, missing parts and cracked components
4. Inspect the hydraulic lines and the hydraulic fittings for damage or for wear. Repair any worn components or replace any worn components. Repair any leaking components.
5. Inspect the steel material of the quick coupler for cracks.
6. Reattach the cover assemblies to the back of the quick coupler.
7. Inspect the warning signs and labels. Replace warning signs or labels that are missing. Replace warning signs or labels when you cannot read the warning signs or labels. Refer to the Operation and Maintenance Manual, "Safety Messages"for additional information.
Note: Perform all repairs before placing the quick coupler back into operation.
Product: WHEEL LOADER
Model: 966G WHEEL LOADER 3ZS
Configuration: 966G Wheel Loader 3ZS00001-UP (MACHINE) POWERED BY 3306 Engine
Operation and Maintenance Manual (Custom) 367-7349 and Quick Coupler For Wheel Loaders
i01828834
Welding on Machines and Engines with Electronic Controls
SMCS - 6700
Proper welding procedures are necessary in order to avoid damage to the electronic controls and to the bearings. The following steps should be followed in order to weld on a machine or an engine with electronic controls.
Note: If you are welding on a work tool, remove the work tool from the host machine before welding.
1. Turn off the engine.
2. Turn the battery disconnect switch to the OFF position. If there is no battery disconnect switch, remove the negative battery cable at the battery.
3. Clamp the ground cable from the welder to the component that will be welded. Place the clamp as close as possible to the weld. Make sure that the electrical path from the ground cable to the component does not go through any bearing. Use this procedure in order to reduce the possibility of damage to the following components:
Bearings of the drive train
Hydraulic components
Electrical components
Other components of the machine
NOTICE
Do NOT use electrical components (ECM or sensors) or electronic component grounding points for grounding the welder.
4. Protect any wiring harnesses from the debris which is created from welding. Protect any wiring harnesses from the splatter which is created from welding.
5. Use standard welding procedures in order to weld the materials together. Copyright 1993 - 2025 Caterpillar Inc. All Rights Reserved. Private Network For SIS Licensees.
Product: WHEEL LOADER
Model: 966G WHEEL LOADER 3ZS
Configuration: 966G Wheel Loader 3ZS00001-UP (MACHINE) POWERED BY 3306 Engine
Operation and Maintenance Manual (Custom) 367-7349 and Quick Coupler For Wheel Loaders
Media Number -GEBU0024-00 Publication Date -01/10/2010 Date Updated -12/10/2010
i02044488
Storage
SMCS - 0355
Place the quick coupler on a pallet. Store the pallet on level, solid ground.
Coat the wedges or the pins with grease. Coat the surfaces that contact the work tools with grease. Coat the bores for the mounting pins with grease. Plug the hoses or cap the hoses. Copyright 1993 - 2025 Caterpillar Inc.
Product: WHEEL LOADER
Model: 966G WHEEL LOADER 3ZS
Configuration: 966G Wheel Loader 3ZS00001-UP (MACHINE) POWERED BY 3306 Engine
Operation and Maintenance Manual (Custom) 367-7349 and Quick Coupler For Wheel Loaders
Media Number -GEBU0024-00 Publication Date -01/10/2010 Date Updated -12/10/2010
i02060887
Shipping
SMCS - 7500
If the quick coupler has been removed from the host machine, lay the quick coupler on a pallet. Secure the quick coupler to the pallet.
If the quick coupler is mounted on the host machine, raise the quick coupler slightly away from the ground.
Copyright 1993 - 2025 Caterpillar Inc. All Rights Reserved. Private Network For SIS Licensees. Fri Apr 4 02:45:31 UTC+0530 2025
Product: WHEEL LOADER
Model: 966G WHEEL LOADER 3ZS
Configuration: 966G Wheel Loader 3ZS00001-UP (MACHINE) POWERED BY 3306 Engine
Operation and Maintenance Manual (Custom) 367-7349 and Quick Coupler For Wheel Loaders Media Number -GEBU0024-00
Lifting and Tying Down
SMCS - 7500
i04090130
NOTICE
Improper lifting or tie-downs can allow the load to shift and cause injury or damage.
Weights and instructions are listed herein. This information is applicable to units that are manufactured by Caterpillar.
Table 1 Part
Lifting the Quick Coupler
Note: Do not use steel cables, chains, or hooks in the mounting holes in order to lift the quick coupler. Damage to the mounting holes of the quick coupler would be a result.
For lifting the quick coupler, use properly rated lifting slings. Position the lifting device for level lifting. Position any hydraulic hoses in order to prevent any damage to the hoses.
Illustration 1 g02297639
Tying Down the Quick Coupler
Note: Do not tie the quick coupler down using the pin bores. Damage may occur to the pin bores.
Tie down the quick coupler. Use cables, restraining bands, or straps that are strong enough to secure the load and strong enough to prevent the load from shifting. Secure any hydraulic hoses in order to prevent damage to the hoses.
Copyright 1993 - 2025 Caterpillar Inc. All Rights Reserved. Private Network For SIS Licensees. Fri Apr 4 02:45:18 UTC+0530 2025
Product: WHEEL LOADER
Model: 966G WHEEL LOADER 3ZS
Configuration: 966G Wheel Loader 3ZS00001-UP (MACHINE) POWERED BY 3306 Engine
Operation and Maintenance Manual (Custom) 367-7349 and Quick Coupler For Wheel Loaders
Media Number -GEBU0024-00 Publication Date -01/10/2010 Date Updated -12/10/2010
i03700900
Transport Position
SMCS - 7500
NOTICE
For specific information on your host machine, refer to the Operation and Maintenance Manual of your host machine.
In order to transport the quick coupler, lay the quick coupler on a pallet. Secure the quick coupler to the pallet.
Copyright 1993 - 2025 Caterpillar Inc. All Rights Reserved.
Private Network For SIS Licensees. Fri Apr 4 02:45:05 UTC+0530 2025
Product: WHEEL LOADER
Model: 966G WHEEL LOADER 3ZS
Configuration: 966G Wheel Loader 3ZS00001-UP (MACHINE) POWERED BY 3306 Engine
Operation and Maintenance Manual (Custom) 367-7349 and Quick Coupler For Wheel Loaders
Hydraulic System Air Purge
SMCS - 5050-542-AI
NOTICE
Care must be taken to ensure that fluids are contained during performance of inspection, maintenance, testing, adjusting and repair of the machine. Be prepared to collect the fluid with suitable containers before opening any compartment or disassembling any component containing fluids.
Refer to Special Publication, NENG2500, "Caterpillar Tools and Shop Products Guide", for tools and supplies suitable to collect and contain fluids.
Dispose of all fluids according to local regulations and mandates.
1. Check the valves on the host machine. The valves must be in the OPEN position. Refer to the Operation and Maintenance Manual of the host machine for the different positions of the valves.
2. If a work tool is connected to the quick coupler, disengage the work tool. Remove the work tool from the quick coupler.
3. Start the host machine. Run the host machine until the hydraulic oil temperature reaches the normal operating temperature for the hydraulic oil.
4. Engage the quick coupler and disengage the quick coupler for three times in order to purge the air from the hydraulic system.
i02055845
Copyright 1993 - 2025 Caterpillar Inc.
Rights Reserved.
Network For SIS Licensees. Fri Apr 4 02:44:55 UTC+0530 2025
Product: WHEEL LOADER
Model: 966G WHEEL LOADER 3ZS
Configuration: 966G Wheel Loader 3ZS00001-UP (MACHINE) POWERED BY 3306 Engine
Operation and Maintenance Manual (Custom) 367-7349 and Quick Coupler For Wheel Loaders Media Number -GEBU0024-00
Operation
SMCS - 6129; 7000
Operating the Quick Coupler
Improper attachment of work tools could result in injury or death.
Do not operate this machine until you have positive indication that the coupler pins are fully engaged. Check for engagement by:
1. Tilt the work tool down.
2. Put downward pressure on the work tool.
3. Back the machine up and make sure there is not any movement between the work tool and the quick coupler assembly.
NOTICE
Auxiliary hoses for work tools must be removed before the quick coupler pins are disengaged.
Pulling the work tools with the auxiliary hoses could result in machine damage.
i04089542
Note: Some machines may have a device that is used to lock the third function valve. Refer to the Operation and Maintenance Manual of the host machine for additional information.
In order to operate the quick coupler, use the control for the third function valve.
In order to engage the quick coupler, move the control for the third function valve in a forward direction.
In order to disengage the quick coupler, move the control for the third function valve in a rearward direction.
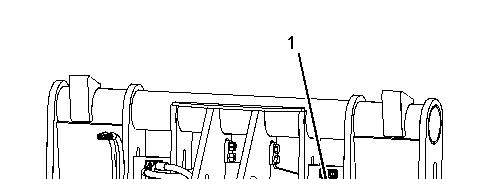
1 g02297033
When you engage the quick coupler, Verify that the quick coupler is fully engaged with the work tool. Visually check the indicators (1) for each of the wedges.
Copyright 1993 - 2025 Caterpillar Inc. All Rights Reserved. Fri Apr 4 02:44:44 UTC+0530 2025
Illustration
Product: WHEEL LOADER
Model: 966G WHEEL LOADER 3ZS
Configuration: 966G Wheel Loader 3ZS00001-UP (MACHINE) POWERED BY 3306 Engine
Operation and Maintenance Manual (Custom) 367-7349 and Quick Coupler For Wheel Loaders
Daily Inspection
SMCS - 6700-040
Personal injury or death can result from improperly checking for a leak.
Always use a board or cardboard when checking for a leak. Escaping air or fluid under pressure, even a pin-hole size leak, can penetrate body tissue causing serious injury, and possible death.
If fluid is injected into your skin, it must be treated immediately by a doctor familiar with this type of injury.
NOTICE
Accumulated grease and oil on a work tool is a fire hazard.
Remove debris with steam cleaning or high pressure water at any time a significant quantity of oil is spilled on the work tool.
Note: If major repairs to the quick coupler are required, consult your Caterpillar dealer.
Note: Clean the quick coupler prior to daily inspection in order to properly inspect the quick coupler.
i02055801
1. For the maximum service life of the quick coupler, make a thorough daily inspection before you mount a work tool to the host machine.
2. Inspect the quick coupler for the following conditions: loose bolts, oil leaks, broken parts, missing parts and cracked components. Check the overall condition of the quick coupler. Check the overall condition of the hydraulic system.
3. Inspect the warning signs and labels. Replace warning signs or labels that are missing. Replace warning signs or labels when you cannot read the warning signs or labels. Refer to the Operation and Maintenance Manual, "Safety Messages"for additional information.
4. Inspect the condition of the hydraulic lines and the hydraulic fittings.
5. Check the mounting pins for the quick coupler.
6. Check the lifting device, if equipped. If damage is present do not use the lifting device. Contact your Caterpillar dealer for repairs.
7. Perform all repairs before you put the quick coupler into operation.
8. Lubricate the fittings for the wedges. Refer to Operation and Maintenance Manual, "Quick Coupler-Lubricate" for additional information.
Product: WHEEL LOADER
Model: 966G WHEEL LOADER 3ZS
Configuration: 966G Wheel Loader 3ZS00001-UP (MACHINE) POWERED BY 3306 Engine
Operation and Maintenance Manual (Custom) 367-7349 and Quick Coupler For Wheel Loaders
Quick Coupler Installation and Removal
SMCS - 6129-010
Installation Procedure
i04089271
Note: Before you install the quick coupler, verify that the hydraulic system of the host machine meets the following requirements:
• The control of the quick coupler must be protected against inadvertent operation.
• When the quick coupler is engaged, there must be no buildup of pressure on the side of the cylinder that disengages the pins of the quick coupler.
• When the pins of the quick coupler are disengaged, the pins will be held in the disengaged position by the hydraulic system.
1. Clean all of the pins. Clean all of the bores for the pins.
2. Align the lower bores of the quick coupler with the bores of the lift arms of the host machine.
3. Install the pins into the lower bores. Lock the pins.
4. Move the tilt linkage until the bores of the tilt linkage are aligned with the upper bores of the quick coupler.
5. Install the pins into the upper bores. Lock the pins.
6. Check the position of the stops on the quick coupler. The usage of stops is determined by the requirements of the host machine. Refer to the Operation and Maintenance Manual of the host machine for additional information.
7. Connect the hydraulic lines from the quick coupler to the hydraulic fittings on the host machine. Refer to the Operation and Maintenance Manual of the host machine for additional information.
8. Open the valves on the host machine (if equipped). Valves are not always equipped on the host machine.
9. Before you operate the quick coupler, Purge the air from the hydraulic system. Refer to the Operation and Maintenance Manual, "Hydraulic System Air Purge" for additional information.
Removal Procedure
1. Place the quick coupler on a surface that is solid and level.
2. Stop the engine of the host machine.
3. Release the pressure in the hydraulic system. In order to release the pressure in the hydraulic system, turn the engine start key to the ON position. Do not start the engine. Cycle the hydraulic controls. Activate the third function of the hydraulic system. Cycle the control for the third function.
4. Turn the engine start key to the OFF position.
5. Close the valves on the host machine (if equipped). Valves are not always equipped on the host machine.
Personal injury or death can result from improperly checking for a leak.
Always use a board or cardboard when checking for a leak. Escaping air or fluid under pressure, even a pin-hole size leak, can penetrate body tissue causing serious injury, and possible death.
If fluid is injected into your skin, it must be treated immediately by a doctor familiar with this type of injury.
NOTICE
Care must be taken to ensure that fluids are contained during performance of inspection, maintenance, testing, adjusting, and repair of the product. Be prepared to collect the fluid with suitable containers before opening any compartment or disassembling any component containing fluids.
Refer to Special Publication, NENG2500, "Dealer Service Tool Catalog" for tools and supplies suitable to collect and contain fluids on Cat products.
Dispose of all fluids according to local regulations and mandates.
6. Place a suitable container below the hydraulic fittings in order to catch any hydraulic oil that may escape. Slowly disconnect the hydraulic lines. Plug the ends of the hydraulic lines or connect the hydraulic lines.
7. Dispose of the hydraulic oil in a suitable manner.
8. Remove the pins from the upper bores of the quick coupler.
9. Remove the pins from the lower bores of the quick coupler.
10. Start the engine of the host machine. Carefully move the host machine away from the quick coupler.
Note: If the quick coupler is stored for an extended period of time, place grease in the bores of the quick coupler and coat all of the surfaces of the pins with grease.