2 minute read
Control the Circle, Control the Shot


Our students are always looking for more consistent results. The fastest way to achieving a more consistent result is to create the same exact conditions of impact for each swing you take. This requires a skill called Low Point Control, or the ability to hit the ground in the same place every time. Regardless of the direction, the success of the shot begins with solid, ball-first contact. Think about all those chunked wedges you have hit. My guess is that you never cared how straight you hit them because the shot had already failed by landing short of your planned yardage. Eliminating ground first contact ensures the ball will advance to the target and give you a higher chance of making a par or better.
Image 1
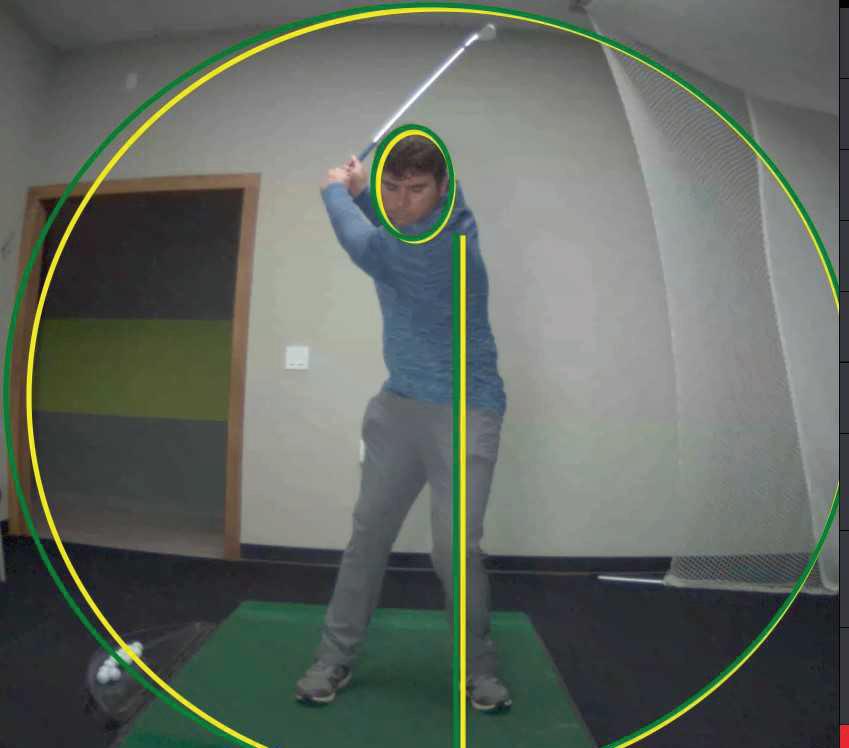
is a visual that I use to help my students understand where the lowest point of the swing begins. It illustrates the yellow circular path that the club makes around the body centered around the lead shoulder. The yellow vertical line represents the starting position of where the club will first make contact with the ground. The ball is represented by the blue circle. Notice the ball is positioned to be hit before the club hits the yellow line. The goal of the backswing to create power by turning without moving the low point behind the ball! Image 2 is one we see a lot with our students at the top of the backswing. Notice the head has moved away from the target and is now sitting in the red circle. You can also see the vertical line which shows the low point of the swing has moved the same direction as the head, now positioned behind the golf ball. This movement of the low point in the backswing raises the chances of this player striking the ground with first, causing chunks and fat shots
Image 1 that land short of the target. Image 3 shows a backswing that keeps the low point of the swing to the target side of the golf ball, ensuring a ball first strike. Notice how the head is more centered in the yellow circle and that the hands are much higher than the previous swing. This extra swing length will add more potential power to the shot. My favorite drill to help my students get rid of the sway away from the target is to have them place the target side of Image 2 their head against the side of a doorframe and get into their normal swing posture. The goal is to turn the shoulders close to 90 degrees while keeping contact with the doorframe. I recommend doing this on a daily basis for 30-40 times, until the muscles Learn to make this happen automatically. Image 4 shows the set up for this drill and Image 5 shows the proper turn while keeping the connection. Make your backswing more centered and I know you will hit the ball more solid!
Image 3 Image 4 Image 5


Dave Souza is Franchise Owner/Center Manager of GOLFTEC West Hartford, CT. He can be reached at DSouza@GOLFTEC.com or 860-222-2299 www.GOLFTEC.com/GolfLessons/West-Hartford


