Technical Area
GRUPO BIb
ENSAYO TEST NORMA REGULATION
Absorción de agua Water absorption
Fuerza de rotura Breaking strength
Resistencia a la flexión Modulus of rupture
Abrasión superficial Surface abrasion
Resistencia al cuarteo Crazing resistance
Resistencia a la helada Frost resistance
Productos domésticos y de piscina Household chemicals and swimming pools salts
Ácidos a baja concentración Low concentration of
10545-4
GRUPO BIa
Porcelánico Esmaltado Glazed porcelain tiles
Pavimento Gres Espesorado y Porcelánico Satinado Glazed thick floor tiles and Satin Porcelain
GRUPO BIIa
Pavimento Gres Gres floor tiles
GRUPO BIII
Revestimiento Wall tiles
NORMAS DE RESISTENCIA AL DESLIZAMIENTO
El CTE (Código Técnico de la Edificación) es el marco normativo que establece las exigencias que deben cumplir los edificios en relación con los requisitos básicos de seguridad y habitabilidad establecidos en la Ley de Ordenación de la Edificación (LOE).
El término Resbaladicidad fue introducido por el CTE en sus Documentos Básicos del año 2006, recientemente actualizado al DB-SUA (Documento básico de Seguridad de Utilización y Accesibilidad), parte 1 (Seguridad ante el riesgo de caídas).
Para saber si un suelo es adecuado a la normativa en cuestiones de Resbaladicidad debemos tener en cuenta los siguientes ensayos.
SLIP RESISTANCE STANDARD
The CTE (Technical Building Code) is the regulatory framework that establishes the requirements that buildings must meet in relation to the basic safety and habitability requirements set out in the Law on Building Regulations (LOE). The term Slipperiness was introduced by the CTE in its Basic Documents of 2006, recently updated to DB-SUA (Basic Document on Safety in Use and Accessibility), part 1 (Safety against the risk of falls).
To find out whether a floor is suitable for the Slipperiness standard, the following tests must be taken into account.
Bases a baja concentración Low
UNE-EN-ISO 10545-7 Consultar ficha técnica Consult technical sheet
Consultar ficha técnica Consult technical sheet Consultar ficha técnica Consult technical sheet -
UNE-EN 16165 Anexo C.
Esta norma describe un método de ensayo para superficies de tránsito peatonal. Con ella determinamos la resistencia al deslizamiento por el método del péndulo en fricción. El ensayo se realiza en húmedo.
This standard describes a test method for pedestrian traffic surfaces. With it we determine the sliding resistance by the friction pendulum method. The test is carried out wet.
RESISTENCIA AL DESLIZAMIENTO (Rd) NON-SLIP RESISTANCE (Rd) CLASE CLASS
Rd ≤ 15 0
15 < Rd ≤ 35 1
35 < Rd ≤ 45 2 Rd > 45 3
Clase mínima exigida a los suelos en función de su localización. Minimum class required for flooring depending on its location.
UNE-EN-ISO 10545-11
Requerido Requested Requerido Requested Requerido Requested Requerido Requested
UNE-EN-ISO 10545-12 Requerido Requested Requerido Requested
UNE-EN 16165 Anexo B
AN 3.3
Esta norma evalúa la resistencia al deslizamiento en pavimentos donde existe el riesgo de presencia de sustancias que favorecen el resbalamiento con tránsito calzado. Sobre plano inclinado con ángulo variable impregnado por un agente lubrificante, mide el ángulo inclinado que permite estar de pie con seguridad con un calzado estandarizado.
En función del ángulo de inclinación adquirido, la cerámica recibe las denominaciones desde la R 9 hasta la R 13.
This standard evaluates the slip resistance on pavements where there is a risk of the presence of substances that favour slipping with foot traffic. On an inclined plane with a variable angle impregnated with a lubricating agent. It measures the inclined angle that allows safe standing with standardised footwear. Depending on the angle of inclination obtained, the ceramic is called R 9 to R 13.
ÁNGULOS DE ACEPTANCIA MEDIOS CORREGIDOS (aTOT) CORRECTED AVERAGE ACCEPTANCE ANGLES (aTOT)
CLASE DE RESISTENCIA AL DESLIZAMIENTO SLIP RESISTANCE CLASS
Normal / Normal 6º ≤ aTOT ≤ 10º R9
Media / Medium 10º < aTOT ≤ 19º R10
Alta / High 19º < aTOT ≤ 27º R11
Fuerte / Strong 27º < aTOT ≤ 35º R12
Muy fuerte / Very strong: 35º < aTOT R13
UNE-EN 16165 Anexo A. AN 3.2
Esta norma evalúa la resistencia al deslizamiento en pavimentos donde existe el riesgo de presencia de sustancias que favorecen el resbalamiento con tránsito descalzo. Sobre plano inclinado impregnado por una solución jabonosa, se mide el ángulo de inclinación que permite estar de pie con seguridad con el pie descalzo. Según el ángulo de inclinación la cerámica recibe las denominaciones Clase A, B y C.
This standard evaluates the slip resistance on pavements where there is a risk of the presence of substances that favour slipperiness with barefoot traffic. On an inclined surface impregnated with a soap solution. It measures the angle of inclination that allows safe standing with bare feet. Depending on the grade, ceramics are designated as Class A, B and C.
ADHERENCIA Y ÁNGULO DE INCLINACIÓN MEDIO ADHERENCE AND AVERAGE ANGLE OF INCLINATION
CLASE DE RESISTENCIA AL DESLIZAMIENTO SLIP RESISTANCE CLASS
Media / Medium: ≥ 12º A
Alta / High ≥ 18º B
Fuerte / Strong: ≥ 24º C
UNE-EN16165 Anexo C
UNE-EN 16165 Anexo C. UK SRG
Prueba de péndulo medidor del coeficiente de fricción.
El método se basa en un taco de goma que barre de una manera controlada una zona del suelo establecida. El carácter deslizante del suelo tiene un efecto directo y medible en el valor de la prueba del péndulo (PTV, Pendulum Test Value). Puede realizarse tanto en condiciones secas como en entornos contaminados.
Coefficient of friction pendulum test.
The method is based on a rubber block that sweeps in a controlled manner over a defined area of the floor. The slipperiness of the soil has a direct and measurable effect on the Pendulum Test Value (PTV). It can be performed in dry conditions as well as in contaminated environments.
0 - 24
25 - 35
> 36
DCOF STANDARD ANSI A326.3:2021
Riesgo alto de deslizamiento High slip potential
Riesgo moderado de deslizamiento Moderate slip potential
Riesgo bajo de deslizamiento Low slip potential
El Instituto Nacional Estadounidense de Estándares (ANSI) publicó el A137.1-2012 un ensayo para evaluar el coeficiente de fricción (DCOF) de superficies duras de baldosas cerámicas.
Las mediciones, normalmente en húmedo, nos proporcionan datos sobra la interacción entre el sensor, lubricante y el azulejo puesto a prueba bajo unas condiciones controladas. Según el estándar ANSI 137.1-2012, las baldosas adecuadas para espacios interiores sobre los que se espera se camine en húmedo debe tener un DCOF húmedo con un valor mínimo de 0,42 en el AcuTest.
Con esta prueba no se predice la probabilidad de resbalabilidad, más bien permite comparar diferentes azulejos o evaluar cómo una superficie ha cambiado en el tiempo.
The American National Standards Institute (ANSI) published A137.1-2012 a test to evaluate the coefficient of friction (DCOF) of hard surfaces of ceramic tiles. The measurements, usually wet, provide us with data on the interaction between the sensor, lubricant and the tile under controlled conditions. According to the ANSI 137.1-2012 standard, tiles suitable for interior spaces that are expected to be walked on while wet, must have a wet DCOF with a minimum value of 0.42 on the AcuTest.
With this test, the probability of slipperiness is not predicted, rather it allows to compare different tiles or evaluate how a surface has changed over time.
SELECCIÓN DE BALDOSA EN FUNCIÓN DEL USO · TILE SELECTION ACCORDING TO USE
Se clasifican, en función de su valor de resistencia al deslizamiento, Rd, de acuerdo con lo establecido en la siguiente tabla: They are classified, according to their slip resistance value Rd, in accordance with the following table:
CARACTERÍSTICAS DEL SUELO FLOOR CHARACTERISTICS
No aplica · Does not apply
Zonas interiores secas: superficies con pendiente menor al 6%.
Dry indoor areas: surfaces with a slope less than 6%.
Zonas interiores secas: superficies con pendiente igual o mayor al 6% y escaleras.
Dry indoor areas: surfaces with a slope equal to or greater than 6% and stairs.
Zonas interiores húmedas tales como las entradas a los edificios desde el espacio exterior (1), terrazas cubiertas, vestuarios, duchas, baños, aseos, cocinas, etc: superficies con pendiente menor que el 6%.
Indoor areas subject to water such as areas leading into buildings from outside (1), covered terraces, changing rooms, showers, bathrooms, toilets or kitchens: surfaces with a slope of less than 6%.
Zonas interiores húmedas superficies con pendiente igual o mayor que al 6% y escaleras.
Indoor areas subject to water: surfaces with a slope equal to or greater than 6% and stairs.
Zonas interiores donde, además de agua puede haber agentes que reducen las resistencias al deslizamiento (grasas, lubricantes, etc.. ) tales como cocinas industriales, mataderos, zonas de uso industrial, etc.
Interior areas where, apart from water, there may be agents that reduce slip resistance (grease, fat lubricants, etc.) such as industrial kitchens, abattoirs, or industrial use areas, etc.
Zonas exteriores: Piscinas (2)
Outdoor areas: Pools (2)
(1) Excepto cuando se trate de accesos directos a zonas de uso restringido. Except when they lead directly into areas of limited use.
(2) En zonas previstas para usuarios descalzos y en el fondo de piscinas, en las zonas en la que profundidad no exceda de 1’5 m In areas where users are expected to go barefoot and in the bottom of pools, in areas no deeper than 1'5 m.
SELECCIÓN DE BALDOSA EN FUNCIÓN DE SU UBICACIÓN · TILE SELECTION ACCORDING TO LOCATION
La resistencia a la abrasión es representada por la resistencia al desgaste superficial. La cerámica está clasificada con un código que indica su uso apropiado. A este código se le conoce como PEI (Porcelain Enamel Institute), y tiene un rango de 0 a 5, que indica la resistencia al desgaste que soportará la cerámica según la Norma UNE-EN-ISO 10545-7.
Abrasion resistance is represented by surface wear resistance. Ceramics are classified with a code that indicates their appropriate use. This code is known as PEI (Porcelain Enamel Institute), and has a range from 0 to 5, which indicates the wear resistance that the ceramic will withstand according to the UNE-EN-ISO 10545-7 Standard.
ZONA DE COLOCACIÓN PLACEMENT AREA
CLASE CLASS
Pavimentos sometidos a tráfico ligero. Generalmente se pueden colocar en dormitorios y baños de viviendas privadas. Floor tiles in light traffic areas. These can be generally applied in the bedrooms and bathrooms of private houses. 1
Pavimentos sometidos a tráfico medio-ligero. Se pueden colocar en todas las habitaciones de las viviendas privadas, a excepción de la cocina
Floor tiles in medium-light traffic areas. These can be applied in all the rooms of private houses, except kitchens. 2
Pavimentos sometidos a tráfico medio. Pueden ser colocados en todas las habitaciones de las viviendas privadas, incluyendo habitaciones de hotel con sus respectivos cuartos de baño, etc...
Floor tiles in medium traffic areas. These can be applied in all the rooms of private houses, including hotel bedrooms with their bathrooms, etc... 3
Pavimentos sometidos a tráfico medio-pesado. Se pueden instalar en cocinas, locales públicos, excluyendo los lugares de tráfico intenso.
Floor tiles in medium-heavy traffic areas. These can be applied in kitchens, publics locals, excluding the places of intense traffic. 4
Pavimentos adaptados a tráfico muy intenso (según proyecto de NORMA ISO-10545-Parte 7).
Floor tiles adapted to very heavy traffic (in accordance to ISO-10545-Parte 7 regulation project). 5
Las baldosas cerámicas están sometidas a la agresión química, consecuencia de la limpieza, contaminación ambiental en exteriores y vertidos de productos en suelos.
La agresión química se traduce en pérdida de brillo, cambio de tono, de color o menor resistencia a las manchas.
Esta corrosión variará en función del tipo de superficie.
Ceramic tiles are subject to chemical aggression as a result of cleaning, environmental pollution outdoors and spillage of products on floors. Chemical aggression results in loss of gloss, change of tone, change of colour or reduced resistance to staining. This corrosion will vary depending on the type of surface.
RESISTENCIA QUÍMICA · CHEMICAL RESISTANCE
CLASE CLASS RESISTENCIA A LOS PRODUCTOS DE LIMPIEZA RESISTANCE TO CLEANING PRODUCTS
RESISTENCIA A LOS ÁCIDOS Y LAS BASES RESISTANCE TO ACIDS AND ALKALINES
A Sin efecto visible No visible alterations Sin efecto visible No visible alterations
B Clara modificación del aspecto Clear alteration of appearance Clara modificación del aspecto Clear alteration of appearance
C Menos resistencia que B Less resistant than B Menos resistencia que B Less resistant than B
RESISTENCIA A LAS MANCHAS · RESISTANCE TO STAINS CLASE CLASS
Mancha eliminada con agua.
Stain disappears with water.
Mancha eliminada con agente limpiador fácil.
Stain disappears with low concentrated cleaning product.
Mancha eliminada con agente limpiador fuerte y métodos mecánicos.
Stain disappears with high concentrated cleaning product and mechanical assistance.
Mancha eliminada con disolventes.
Stain disappears with solvents.
Mancha persistente. Stain remains.
Con la finalidad de conseguir un acabado lo más natural posible, los azulejos de manera intencionada pueden variar en color, textura o apariencia, tanto en pavimentos como revestimientos, dependiendo del diseño del fabricante.
A continuación, se muestra la clasificación estética en función de la variedad gráfica y tonal que puede tener un producto en concreto:
In order to achieve a finish that is as natural as possible, tiles may intentionally vary in color, texture or appearance, both in floor and wall, depending on the manufacturer’s design.
Next, the aesthetic classification is shown based on the graphic and tonal variety that a specific product can have: Vx
VARIACIÓN VARIATION
V1 Apariencia uniforme
Uniform appearance
V2 Variación ligera
Slight variation
V3 Variación moderada
Moderate variation
V4 Variación sustancial
Substantial variation
La variación entre las piezas en una misma producción son muy leves. El valor tonal es el mismo siendo muy uniformes entre ellas y de textura lisa.
The variation between the pieces in the same production are very slight. The tonal value is the same, being very uniform among them and with a smooth texture.
Las variaciones son leves, incluyendo diferencias claramente distinguibles en la textura y/o dibujo.
Variations are slight, including clearly distinguishable differences in texture and / or pattern.
Las variaciones de los colores y/o texturas de una pieza son indicativos de los colores y gráficas del resto de piezas. De una pieza a otra puede variar significativamente.
Variations in the colors and / or textures of a piece are indicative of the colors and graphics of the rest of the pieces. From one piece to another it can vary significantly.
Diferentes texturas y/o colores presentes en una misma pieza y en el resto de piezas de la producción. Ofrecen una diversidad única e irrepetible en su colocación.
Different textures and / or colors present in the same piece and in the rest of the pieces of the production. They offer a unique and unrepeatable diversity in their placement.
Por otro lado, la variación ambiental afecta en mayor o menor medida a la percepción del color en distintos ambientes de luz. La diferencia entre los focos blancos de una tienda con luz solar o la luz cálida puede hacer cambiar nuestra percepción tonal. Por ello, hay que tener en cuenta estas propiedades antes de instalar cerámica.
On the other hand, environmental variation affects to a greater or lesser extent the perception of color in different light environments. The difference between the white spotlights in a store with sunlight or warm light can change our tonal perception. Therefore, these properties must be taken into account before installing ceramic tiles.
MANIPULACIÓN · HANDLING
Tras la recepción del material en obra, las baldosas deben ser manipuladas con determinadas precauciones para evitar daños en su superficie.
La manipulación debe realizarse con cuidado y prestando especialmente atención a las baldosas de gran tamaño, para las que se aconseja ir de una en una por dos operarios, que deben hacerlo con guantes para evitar lesiones. También pueden utilizarse sistemas regulados de ventosas, previa limpieza para evitar cualquier daño a la superficie El material debe colocarse lo más próximo posible a la zona que se va a revestir, y no sacar las piezas hasta el momento de su instalación. Una vez se extraen deben colocarse sobre algún soporte de corcho u otro tipo de material.
Hay que tener especial cuidado a la hora de manipular el material para evitar roces entre piezas o otros materiales que puedan dañar la superficie, tanto de rayado si superponemos piezas y arrastramos, como de algún agente manchante o despuntados de piezas sobretodo si se trata de material rectificado.
Se aconseja no marcar con lápiz la superficie.
After receiving the material on site, the tiles must be handled with certain precautions to avoid damage on their surface.
Handling must be done with care and paying special attention to large tiles, for which it is advisable to go one at a time by two operators, who must do it with gloves to avoid injuries. Regulated suction cup systems can also be used, after cleaning to avoid any damage to the surface.
The material should be placed as close as possible to the area to be covered, and the pieces should not be removed until they are installed. Once they are extracted, they must be placed on cork or another type of material support.
Special care must be taken when handling the material to avoid friction between pieces or other materials that may damage the surface, both from scratches if we overlap pieces and drag, as well as from some staining agents or blunting of pieces, especially if it is rectified material.
It is advisable not to mark the surface with a pencil.
Alaplana Cerámica ha elaborado una serie de recomendaciones, que se detallan a continuación, ofreciendo una guía para una correcta colocación de los productos cerámicos. La primera consideración que se debe de tener en cuenta a la hora de presentarlo en proyecto o prescripción es su destino y uso. A partir de ahí, la correcta colocación de los azulejos asegurará su durabilidad evitando roturas o posibles problemas futuros. Para ello, será de vital importancia el uso de materiales de agarre adecuados dependiendo del tipo de producto, asegurando así su durabilidad y resaltando la belleza del ambiente. En todos los casos es necesario que la ejecución del trabajo la hagan alicatadores profesionales optimizando las prestaciones tanto técnicas como estéticas para obtener un resultado inmejorable.
Alaplana Ceramica has developed a series of recommendations, which are detailed below, offering a guide for the correct placement of ceramic products. The first consideration that must be taken into account when presenting it in a project or prescription is its destination and use. From there, the correct placement of the tiles will ensure their durability avoiding breakages or possible future problems. For this, the use of suitable grip materials will be of vital importance depending on the type of product, while ensuring its durability and highlighting the beauty of the environment. In all cases, it is necessary that the execution of the work is carried out by professional tilers, optimizing both technical and aesthetic performance to obtain an unbeatable result.
SELECCIÓN Y DISEÑO DEL PRODUCTO CERÁMICO
Es de gran importancia en el momento de la selección del producto cerámico tener en cuenta diversas especificaciones a parte del diseño.
En función de su uso y destino: público/privado, interior/exterior, pavimento/ revestimiento, entre otros, hay que prestar especial atención a las exigencias técnicas tales como: resistencia a la helada, resistencia química, resistencia al deslizamiento, resistencia al rayado así como las características dimensionales (ver apartado de Características Técnicas Clasificación normalizada según UNE 14411).
Una vez seleccionado el azulejo y vistas las características de éste, se determinarán los soportes de colocación, así como los materiales de agarre y rejuntado.
REPLANTEO DEL ESPACIO
Previa limpieza habrá que hacer un replanteo general del espacio a revestir en niveles, aplomado, comprobación de huecos y disposición de tramas de juntas teniendo en cuenta tanto los huecos como carpinterías, preinstalaciones o mobiliario fijo.
Para la correcta colocación posterior es importante respetar los tiempos de fraguado y maduración de los soportes para que puedan aguantar correctamente las cargas evitando que posibles tensiones y movimientos estructurales afecten a las capas superiores. Debe al mismo tiempo comprobarse la nivelación, asegurando una superficie homogénea, lisa y sólida exenta de polvo, cal, grasas y humedad para una correcta adhesión.
Los soportes muy lisos o de baja absorción, sobre todo en los proyectos de reforma, como los revestimientos existentes (cerámicos, terrazo o piedra natural) requerirán el uso de adhesivos cementosos tipo C1 o cementosos mejorados tipo C2, incluso de una aplicación de imprimación previa específica que mejoren la adherencia.
En los soportes de elevada absorción de agua se puede aplicar una imprimación sellante para reducir la absorción de agua y facilitar el extendido del adhesivo.
Es importante también en esta fase tener presente los formatos de piezas que se van a utilizar, así como la colocación entre ellas para reducir al mínimo el corte de las baldosas, evitando recurrir a cortes muy estrechos que afectarán en gran medida a la estética del ambiente.
SELECTION AND DESIGN OF CERAMIC PRODUCTS
It is of great importance when selecting the ceramic product to take into account various specifications apart from the design.
Depending on its use and destination: public / private, interior / exterior, floor / wall, among others, special attention must be paid to technical requirements such as: frost resistance, chemical resistance, slip resistance, scratch resistance as well as the dimensional characteristics (See Technical Characteristics Section: Standardized classification according to UNE 14411).
Once the tile has been selected and the characteristics of the tile have been studied, the placement supports, as well as the gripping and grouting materials, will be determined.
LAYOUT OF THE SPACE
After cleaning, it will be necessary to do a general rethinking of the space to be covered in levels, plumbing, checking the gaps and arrangement of joint frames taking into account both the gaps and carpentry, pre-installations or fixed furniture.
For the correct subsequent installation, it is important to respect the setting and maturing times of the substrates so that they can withstand the loads correctly, preventing possible tensions and structural movements from affecting the upper layers. Leveling must be checked at the same time, ensuring a homogeneous, smooth, and solid surface free of dust, lime, grease, and moisture for correct adhesion.
Very smooth or low absorption substrates, especially in renovation projects, such as existing coatings (ceramic, terrazzo, or natural stone) will require the use of type C1 cementitious adhesives or improved type C2 cementitious adhesives, including a specific prior primer application that improves adherence.
On high water absorption substrates, a sealant primer can be applied to reduce water absorption and facilitate spreading of the adhesive.
It is also important at this stage to keep in mind the formats of the pieces to be used as well as the placement between them to minimize the cutting of the tiles, avoiding resorting to very narrow cuts that will greatly affect the aesthetics of the environment.
Para que se pueda apreciar la calidad, y las prestaciones de los productos cerámicos, debemos asegurarnos de que han sido bien colocados, tanto desde el punto de vista técnico como estético.
Para esto, es imprescindible, que la colocación de las baldosas cerámicas sea realizada por un profesional experimentado y conocedor de la técnica y de los materiales a utilizar.
A continuación, se exponen algunas recomendaciones generales a tener en cuenta para la correcta colocación de un revestimiento con baldosas cerámicas
In order to appreciate the quality and performance of ceramic products, we must ensure that they have been properly laid, both from a technical and aesthetic point of view. For this, it is essential that ceramic tiles are laid by an experienced professional who is familiar with the technique and the materials to be used. The following are some general recommendations to be taken into account for the correct installation of a ceramic tile covering.
CONSEJOS DE COLOCACIÓN GENERAL
1. Para formatos rectangulares, la colocación trabada nunca debe superar el 20% de la longitud del lado que se aplica.
2. En colocación con cemento cola, no mojar las piezas.
3. Nivelar las superficies antes de aplicar elementos de fijación (morteros, cementos, cola, etc.)
4. Respetar las juntas de dilatación perimetrales y estructurales.
5. Colocar el producto mezclando varias cajas y verifica la uniformidad de tono.
6. En producto porcelánico, utilizar cortadora eléctrica refrigerada por agua y con disco específico para porcelánico.
7. Agujereado de porcelánico: a.- Utilizar brocas para porcelánico. b.- No utilizar el percutor en el taladro. c.- Taladrar a bajas revoluciones. d.- Empezar con brocas finas y terminar ajustando con la broca definitiva. e.- Refrigerar la broca en uso.
8. Limpiar con productos no abrasivos.
Finalizada la colocación debemos proteger el acabado cerámico recién colocado de las inclemencias del tiempo, heladas, y secado prematuro.
ESPECIFICACIONES DE PRODUCTOS RECTIFICADOS
1. Tener especialmente cuidado en la manipulación de las piezas. Los bordes rectificados se prestan a una fácil rotura o despuntado por su canto vivo.
2. No mojar las piezas antes de colocarlas ya que pueden sufrir una ligera deformación que dificulte su colocación.
3. El lugar de colocación debe estar maestreado con un fraguado mínimo a tres días.
4. Seguir con precisión las instrucciones de amasado y aplicación del fabricante de mortero.
5. Aplicar cemento cola con llana dentada.
6. Pese que el material rectificado se presta a una colocación sin junta es aconsejable dejar una junta mínima de 2mm evitando así cualquier tipo de problema dimensional y eliminación de tensiones. La junta se realizará con mortero específico para esta labor y con llana de goma.
7. Se debe colocar por paños completos.
8. Proteger los pavimentos de tránsito en su fase de endurecimiento.
9. Seguir con precisión las instrucciones del fabricante de mortero.
10. Rejuntar con mortero específico para esta labor y llana de goma.
GENERAL LAYING TIPS
1. For rectangular formats, the locked placement should never exceed 20% of the length of the side to be applied.
2. When laying with glue cement, do not wet the pieces.
3. Level the surface before applying fixing elements (mortars, cements, glue, etc.)
4. Respect the perimeter and structural expansion joints.
5. Place the product mixing several boxes and check the uniformity of the tone.
6. For porcelain products, use a water-cooled electric cutter with a specific disc for porcelain.
7. Porcelain holes:
a.- Use drill bits for porcelain.
b.- Do not use the hammer on the drill. c.- Drill at low revolutions. d.- Start with fine bits and finish adjusting with the final bit. e.- Refrigerate the drill bit in use.
8. Clean with non-abrasive products.
Once the installation is finished, we must protect the newly placed ceramic finish from weather, frost, and premature drying.
RECTIFIED PRODUCTS SPECIFICATIONS
1. Be especially careful when handling parts. The ground edges lend themselves to easy breaking or blunting due to their sharp edge.
2. Do not wet the pieces before placing them as they may suffer a slight deformation that makes their placement difficult.
3. The place of placement must be mastered with a minimum setting of three days.
4. Precisely follow the mixing and application instructions of the mortar manufacturer.
5. Apply glue cement with a notched trowel.
6. Although the rectified material lends itself to a placement without a joint, it is advisable to leave a minimum joint of 2mm, thus avoiding any type of dimensional problem and elimination of stress. The joint will be made with specific mortar for this task and with a rubber trowel.
7. It must be placed by full cloths.
8. Protect traffic pavements in their hardening phase.
9. Follow the mortar manufacturer's instructions precisely.
10. Grout with specific mortar for this job and a rubber trowel.
Para un correcto funcionamiento del producto cerámico hay que tener en cuenta cuatro tipos de junta: For a correct functioning of the ceramic product, four types of joints must be studied:
JUNTAS ESTRUCTURALES
Son juntas cuya finalidad es absorber los posibles movimientos de la estructura. Independientemente del tipo de revestimiento utilizado, se rematan usualmente con materiales de elasticidad duradera, tales como, másticos, cubrejuntas externos, perfiles o cubre cantos de plástico o metal, entre otros.
JUNTAS PERIMETRALES
Su objetivo es evitar la acumulación de tensiones. En pavimentos se deben dejar juntas en los límites de encuentro con elementos verticales (muros, tabiques, pilares, ...).
Las juntas perimetrales deben ser continuas y con una anchura no inferior de 1,5 cm, deben llegar hasta el soporte y normalmente quedarán ocultas por el rodapié. También pueden ocultarse rellenando la junta con un material elástico duradero tal como un mástico o silicona.
JUNTAS DE PARTICIÓN
Se plantean para grandes superficies pavimentadas o revestidas creando subdivisiones. Su función es evitar que se acumulen dilataciones y contracciones.
Pueden rellenarse con perfiles, materiales elásticos duraderos o con material de relleno de las juntas de colocación, siempre y cuando el material de agarre se haya secado por completo, es decir, haya trascurrido al menos un mes desde su colocación. La anchura de las juntas de partición no debe ser inferior a 5mm.
STRUCTURAL JOINTS
These are joints whose purpose is to absorb the possible movements of the structure. Regardless of the type of coating used, they are usually finished with materials of durable elasticity, such as mastic, external joint covers, profiles or plastic or metal edge covers, among others.
PERIMETER JOINTS
Its objective is to avoid the accumulation of tensions. In pavements, joints must be placed in meeting limits with vertical elements (walls, partitions, pillars, ...).
The perimeter joints must be continuous and not less than 1.5 cm wide, they must reach the support and will normally be hidden by the bullnose. They can also be hidden by filling the joint with a durable elastic material such as a mastic or silicone.
PARTITION JOINTS
They are proposed for large paved or tile walls creating subdivisions. Its function is to prevent the accumulation of dilations and contractions.
They can be filled with profiles, durable elastic materials or with filler material for the installation joints, as long as the bonding material has completely dried, that is, at least one month has elapsed since its installation. The width of the partition joints should not be less than 5mm.
ESPECIFICACIONES DE PRODUCTOS RECTIFICADOS LAYING JOINTS
Es la separación que se deja entre baldosas para compensar desviaciones dimensionales, evitar posibles desconchados o por razones funcionales o estéticas. Las especificaciones de rejuntado se recogen en la norma UNE-EN 13888.
De los diferentes tipos de rejuntados se recomienda utilizar el de fraguado rápido, con ellos nos aseguramos de mayor uniformidad en el color y la textura. Dependiendo del tipo de colocación de las baldosas, se recomienda seguir estas pautas de tiempos de espera:
• Si la colocación se ha realizado con adhesivo cementoso con fraguado rápido deberá realizarse pasadas como mínimo 4 horas.
• Si el adhesivo cementoso no dispone de fraguado rápido se iniciará su rejuntado pasadas 24 horas.
• En el caso de haber usado mortero de cemento, es recomendable esperar entre 10 y 15 días.
Teniendo en cuenta que las juntas de colocación también juegan un papel estético importante hay que tener en cuenta el color que se va a utilizar, por ello en el caso de utilizar colores de juntas contrastados es conveniente anteriormente comprobar la facilidad de limpieza. Al mismo tiempo, y de vital importancia, es el ancho de la junta. En caso de optar por una junta mínima la separación aconsejable no debe ser inferior a 1,5mm, ya que no permitirá que el material de rejuntado penetre bien, y por lo tanto no evitará el contacto entre las baldosas.
Cuando vayamos a rejuntar hay que asegurarse de que las juntas estén limpias y exentas de partículas, en el caso de tener que limpiarlas no hacerlo con herramientas que puedan producir rayas en la superficie. Se aconseja limpiar inmediatamente con agua tras la instalación para evitar que los residuos cementosos se endurezcan y adhieran a la superficie, evitando el arrastre del material sobre la superficie y la utilización de estropajos
It is the separation that is left between tiles to compensate for dimensional deviations, avoid possible chipping due to functional or aesthetic reasons. The grouting specifications are included in the UNE-EN 13888 standard.
From the different types of grouts, it is recommended to use the fast-setting one, so we ensure greater uniformity in color and texture. Depending on the type of tile placement, it is recommended to follow these waiting time instructions:
• If the installation has been carried out with cementitious adhesive with rapid setting, it should be grouted after at least 4 hours.
• If the cementitious adhesive does not have a fast setting, its grouting might be conducted after 24 hours.
• In the case of having used cement mortar, it is advisable to wait between 10 and 15 days.
Bearing in mind that the installation joints also play an important aesthetic role, the color to be used must considered; therefore, in the case of using contrasting joint colors, it is advisable to first check the ease of cleaning. At the same time, and of vital importance, is the width of the joint. In case of opting for a minimum joint, the advisable separation should not be less than 1.5mm, since it will not allow the grouting material to penetrate well, and therefore will not prevent contact between the tiles.
When we start grouting we must make sure that the joints are clean and free of particles, in the case of having to clean them do not do it with tools that can cause scratches on the surface. It is recommended to clean immediately with water after installation to prevent cement residues from hardening and adhering to the surface, avoiding the dragging of the material on the surface and the use of scourers.
LIMPIEZA TRAS LA COLOCACIÓN
Una vez las juntas secas, es conveniente limpiar lo antes posible para retirar los restos de cemento, materiales de sellado de juntas o cualquier residuo que haya quedado sobre la superficie.
Hay que tener especialmente precaución en no usar productos de limpieza ácida sobre revestimientos recién colocados, ya que el ácido reacciona con el cemento no fraguado y puede deteriorar las juntas o soporte cerámico. Se recomienda impregnar la superficie con agua limpia antes y después del uso de estos agentes de limpieza. Si la limpieza se hace al cabo de tres o cuatro días debe realizarse con productos profesionales específicamente formulados para esa función. En la mayoría de los casos un buen agente para la limpieza es una solución ácida diluida como el vinagre de limpieza.
En el caso de utilizar productos químicos se aconseja realizar una prueba en una zona poco visible para comprobar que es adecuado y no altera la superficie. Los productos de limpieza altamente enérgicos pueden causar daños irreparables en la superficie.
El material pulido tiene mayor predisposición a la aparición de manchas debido a la aparición de microporos que se originan en el proceso de pulido. Para los materiales pulidos, se requiere un tratamiento de limpieza diferente al resto de materiales. Se recomiendan las siguientes especificaciones:
• Limpiar con una esponja húmeda antes que endurezca el material de rejuntado para evitar posibles rayados en la superficie.
• Usar acetona o aguarrás para pintura o alquitrán, desincrustante ácido exento de ácido fluorhídrico para restos de material de obra, y para zonas con mayor suciedad detergentes para suelo, lejía o amoniaco en baja concentración diluidos en agua.
• Evitar la excesiva humedad en su limpieza y mantenimiento.
• En aquellas áreas con mayor sensibilidad a manchas como pueden ser las cocinas, es recomendable aplicar un impermeabilizador para facilitar la limpieza del material
• No aplicar ceras, aceites, ni detergentes sólidos con partículas abrasivas sobre las superficies brillantes. Los pulidos no toleran el uso de ácidos y álcalis de alta concentración.
MANTENIMIENTO
Las tareas de mantenimiento habituales para el material cerámico consistirá en la limpieza periódica mediante un lavado con agua o solución diluida con detergente.
Debemos tener en cuenta las siguientes recomendaciones:
• Evitar productos que deterioren su superficie como es el caso de los ácidos fuertes (salfumán).
• Tener precaución con posibles golpes, punzamientos o caídas que puedan rayar, romper o deteriorar la superficie.
• No encharcar el suelo de agua. Su filtración podría dañar al forjado o manifestar humedades en el techo de la vivienda inferior e instalaciones.
• No sujetar elementos pesados en el revestimiento siendo necesario profundizar hasta encontrar el tabique.
• Es recomendable proteger los apoyos de los elementos del mobiliario que vayan a ser susceptibles de ser movidos para evitar el rayado o abrasión por arrastre no intencionado.
• En caso de la aparición de hongos por la presencia de humedad en el recubrimiento se eliminará lo antes posible con lejía doméstica previa comprobación en un sitio poco visible y se determinarán las causas de dicha humedad para evitar se produzcan en futuras ocasiones.
• En el caso de revestimientos porosos es habitual aplicar tratamientos superficiales de impermeabilización con líquidos hidrófugos y ceras que mejorarán su comportamiento frente a las manchas.
Once the joints are dry, it is advisable to clean as soon as possible to remove the remains of cement, joint sealing materials or any residue that has remained on the surface.
Particular care must be taken not to use acidic cleaning products on newly laid coatings, as the acid reacts with unset cement and can damage the joints or ceramic support. It is recommended to impregnate the surface with clean water before and after the use of these cleaning agents.
If the cleaning is done after three or four days, it should be done with professional products specifically formulated for that function. In most cases a good cleaning agent is a dilute acidic solution like cleaning vinegar.
In the case of using chemical products, it is advisable to carry out a test in an inconspicuous area to verify that it is suitable and does not alter the surface. Highly vigorous cleaners can cause irreparable damage to the surface.
Polished material has a greater predisposition to the appearance of stains due to the appearance of micropores that originate in the polishing process. For polished materials, a different cleaning treatment is required than other materials. The following specifications are recommended:
• Clean with a damp sponge before the grouting material hardens to avoid possible scratches on the surface.
• Use acetone or turpentine for paint or tar, acid haze remover (except hydrofluoric acid) for remains of construction material, and for areas with more dirt, soil detergents, bleach or low concentration ammonia diluted in water.
• Avoid excessive humidity in cleaning and maintenance.
• In those areas with greater sensitivity to stains such as kitchens, it is advisable to apply a waterproofing agent to facilitate cleaning of the material.
• Do not apply waxes, oils, or solid detergents with abrasive particles on shiny surfaces. Polishes do not tolerate the use of highly concentrated acids and alkalis.
MAINTENANCE
The usual maintenance tasks for ceramic material will consist of periodic cleaning by washing with water or a solution diluted with detergent.
Please read the following recommendations:
• Avoid products that deteriorate its surface such as strong acids (chlorhidric acid).
• Be careful with possible blows, punctures or falls that could scratch, break or deteriorate the surface.
• Do not flood the floor with water. Its filtration could damage the slab or show dampness on the roof of the lower house and facilities.
• Do not hold heavy elements on wall tiling, being necessary to go deep until you find the partition.
• It is advisable to protect the supports of the furniture elements that are likely to be moved to avoid scratching or abrasion due to unintentional dragging.
• In case of the appearance of fungi due to the presence of humidity in the coating, it will be eliminated as soon as possible with household bleach after checking in an inconspicuous place and the causes of said humidity will be determined to prevent them from occurring in future occasions.
• In the case of porous coatings, it is usual to apply waterproofing surface treatments with water-repellent liquids and waxes that will improve their behavior against stains.
FORMATO CUADRADO SQUARE FORMAT
MULTIFORMATO · MULTIFORMAT
NOTA IMPORTANTE:
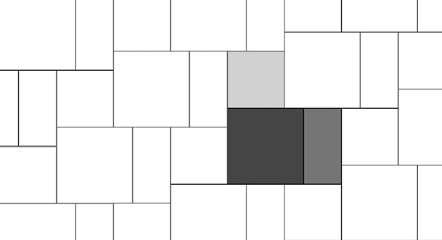
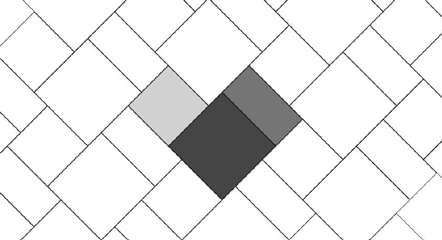
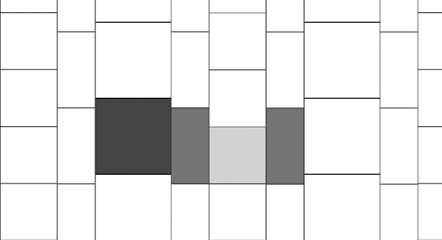
Para colocaciones modulares de colecciones multiformato, se exige una junta mínima de 5 mm. A continuación, se muestran algunas soluciones de colocación:
IMPORTANT NOTE: For modular placement of multi-format collections, a minimum joint of 5 mm is required. Here are some laying solutions:
Colocación tradicional formato cuadrado. Traditional square format laying.
Colocación formato cuadrado a 45º. Square format laying at 45º.
FORMATO RECTANGULAR · RECTANGULAR FORMAT
Colocación formato cuadrado con junta corrida horizontal. Square format laying with horizontal running joint.
Colocación formato cuadrado con junta corrida vertical. Square format laying with vertical running joint.
60x60cm · 24”X24” I 39% 30x60cm · 12”X24” I 39% 45x45cm 18”X18” I 22% 60x60cm 24”X24” 42% 30x60cm 12”X24” 18%
FORMATO RECTANGULAR - MADERAS · RECTANGULAR FORMAT - WOODS
NOTA IMPORTANTE: No colocar los formatos 15X90/23X120/25X100/30X150 con una traba superior al 20% del lado de mayor longitud. La empresa declina toda responsabilidad en caso de la no observancia de esta nota.
IMPORTANT NOTE:
Do not place the 6”X36”/9”X47”/10”X40”/12”X60” formats with a lock of more than 20% on the longest side. The company declines all responsibility in case of ignoring this note.
Colocación tradicional formato rectangular en horizontal. Traditional rectangular format laying in horizontal.
MULTIFORMATO · MULTIFORMAT
NOTA IMPORTANTE:
Colocación tradicional formato rectangular en vertical. Traditional rectangular format laying in vertical.
Colocación formato rectangular con junta corrida. Rectangular format laying with running joint.
Colocación dos a dos en formato rectangular. Two by two laying in rectangular format.
Para colocaciones modulares de colecciones multiformato, se exige una junta mínima de 5 mm. A continuación, se muestran algunas soluciones de colocación:
IMPORTANT NOTE: For modular placement of multi-format collections, a minimum joint of 5 mm is required. Here are some laying solutions:
Colocación trabada (hasta 12 cm.) Loocked laying (up to 12 cm.)
Colocación regular (separación máxima 12 cm.) Regular laying (maximum separation 12cm)
Colocación regular (secuencia: 1-3-4, 3-6-7, 3-9-12 cm.) Regular laying
I
I 27%
Colocación en espiga 45° 45º herringbone laying
Colocación en espiga 90° 90º herringbone laying
Colocación regular a media pieza (no aconsejable) Regular laying to half piece (not advisable)
FORMATO SIZE FORMATO RODAPIÉ SKIRTING SIZE
RODAPIÉ CORTADO RECTO STRAIGHT CUT SKIRTING
RODAPIÉ CORTADO ROMO ROUND CUT SKIRTING
RODAPIÉ CORTADO ROMO PINTADO PAINTED ROUND CUT SKIRTING
RODAPIÉS · SKIRTING
PORCELÁNICO ESMALTADO PORCELAIN TILE
STARLIGHT PORCELÁNICO PULIDO STARLIGHT POLISHED PORCELAIN TILE
2,95"x24"
7,5x30cm 2,95"x12"
RC · 2,83"x47" RC • 7,2x60cm
60x120cm RC 24”x47” RC
RODAPIÉS · SKIRTING
GRES FLOOR TILE GRES ESPESORADO GLAZED THICK FLOOR TILE
TRIM · TRIM
FORMATO SIZE FORMATO RODAPIÉ SKIRTING SIZE
20,5x61,5cm 8,2"x24,6" 10x61,5cm 3,94"x24,6"
24x95cm 9,5”x 37,5” 7,5x45cm 2,95"x18"
7,5x95cm 2,95"x37,5"
33,3x33,3cm 13”x13” 7,5x33cm 2,95"x13"
45X45CM 18"x18" 8x45cm 3,15"x18" 7,5x45cm 2,95"x18"
33,3x33,3cm 13"x13" 7,5x33,3cm 2,95"x13"
RODAPIÉ CORTADO RECTO STRAIGHT CUT SKIRTING
RODAPIÉ CORTADO ROMO ROUND CUT SKIRTING
RODAPIÉ CORTADO ROMO PINTADO PAINTED ROUND CUT SKIRTING
REVESTIMIENTO PASTA BLANCA WHITE BODY WALL TILE
REVESTIMIENTO PASTA ROJA RED BODY WALL TILE FORMATO SIZE FORMATO TRIM TRIM SIZE TRIM CORTADO ROMO PINTADO PAINTED ROUND CUT TRIM
40x120cm RC 16”x47” RC 7,5x60cm · 2,95”x24” 7,5x120cm 2,95”x47” •
33,3x90cm RC · 13”x36” RC 5x33,3cm 2”x13” 7x33,3cm 2,7”x13” • 20x60cm 8”x24” 5x20cm 2”x8” 5x60cm 2”x24” •
25x50cm 10”x20” 5x50cm · 2”x20”
VARIOS SEVERAL 5x25cm 2”x10”
PELDAÑOS STEPS
IMAGEN IMAGE NOMBRE NAME ACABADO FINISH FORMATO DE PIEZA PIECE SIZE POSICIÓN POSITION
PELDAÑO TECNICO SIMPLE SINGLE TECHNICAL STEP Liso Plain Todos All Si es rectangular, especificar el lado. If rectangular, specify the side.
PELDAÑO TECNICO DOBLE DOUBLE TECHNICAL STEP Liso Plain Todos All
Si es rectangular, especificar los dos lados (izquierda o derecha). If rectangular, specify the both sides (left or right).
PELDAÑO TECNICO SIMPLE SINGLE TECHNICAL STEP Estrías Scored Todos All Si es rectangular, especificar el lado. If rectangular, specify the side.
PELDAÑO TECNICO DOBLE DOUBLE TECHNICAL STEP Estrías Scored Todos All Si es rectangular, especificar los dos lados (izquierda o derecha). If rectangular, specify the both sides (left or right).
PELDAÑO ROMO SIMPLE SINGLE ROUND STEP Liso Plain Todos All Si es rectangular, especificar el lado. If rectangular, specify the side.
PELDAÑO ROMO DOBLE DOUBLE ROUND STEP Liso Plain Todos All
Si es rectangular, especificar los dos lados (izquierda o derecha). If rectangular, specify the both sides (left or right).
PELDAÑO ROMO SIMPLE SINGLE ROUND STEP Estrías Scored Todos All Si es rectangular, especificar el lado. If rectangular, specify the side.
PELDAÑO ROMO DOBLE DOUBLE ROUND STEP Estrías Scored Todos All
Si es rectangular, especificar los dos lados (izquierda o derecha). If rectangular, specify the both sides (left or right).
MOLDURA SIMPLE SINGLE STEP BULLNOSE Liso Plain 33x33cm 13”x13” -
MOLDURA DOBLE DOUBLE STEP BULLNOSE Liso Plain 33x33cm 13”x13” -
MALLAS · MOSAICS
IMAGEN IMAGE NOMBRE NAME COLECCIONES COLLECTIONS FORMATO DE PIEZA PIECE SIZE
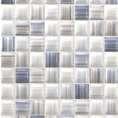
Mosaico Cuadros Todas All 30x30cm 12”x12”
Mosaico Tesela Todas All 29,8x28,6cm 11,3”x11,7”
Mosaico Rectángulo Todas All 30x30cm 12”x12”
Mosaico Exa Todas All 21x26cm · 8”x10”
Mosaico Espiga Todas All 31.5x35cm · 12”x14”
La nueva tecnología de inyección digital de última generación para superficies cerámicas STRUCTECH de Alaplana permite crear diferentes texturas y encajarlas perfectamente con los diversos diseños, generando infinitas tramas matéricas que aportan una espectacular apariencia a las piezas cerámicas.
STRUCTECH abre un abanico ilimitado de nuevas posibilidades en la impresión cerámica logrando efectos y texturas exclusivas, altamente realistas.
STRUCTECH, the new cutting-edge digital injection technology for ceramic surfaces by Alaplana, can create various textures that adapt perfectly to the range of designs, generating myriad material patterns that add a fabulous wow factor to the ceramic tiles.
STRUCTECH opens up countless options for ceramic tile printing, creating exclusive and incredibly realistic effects and textures.
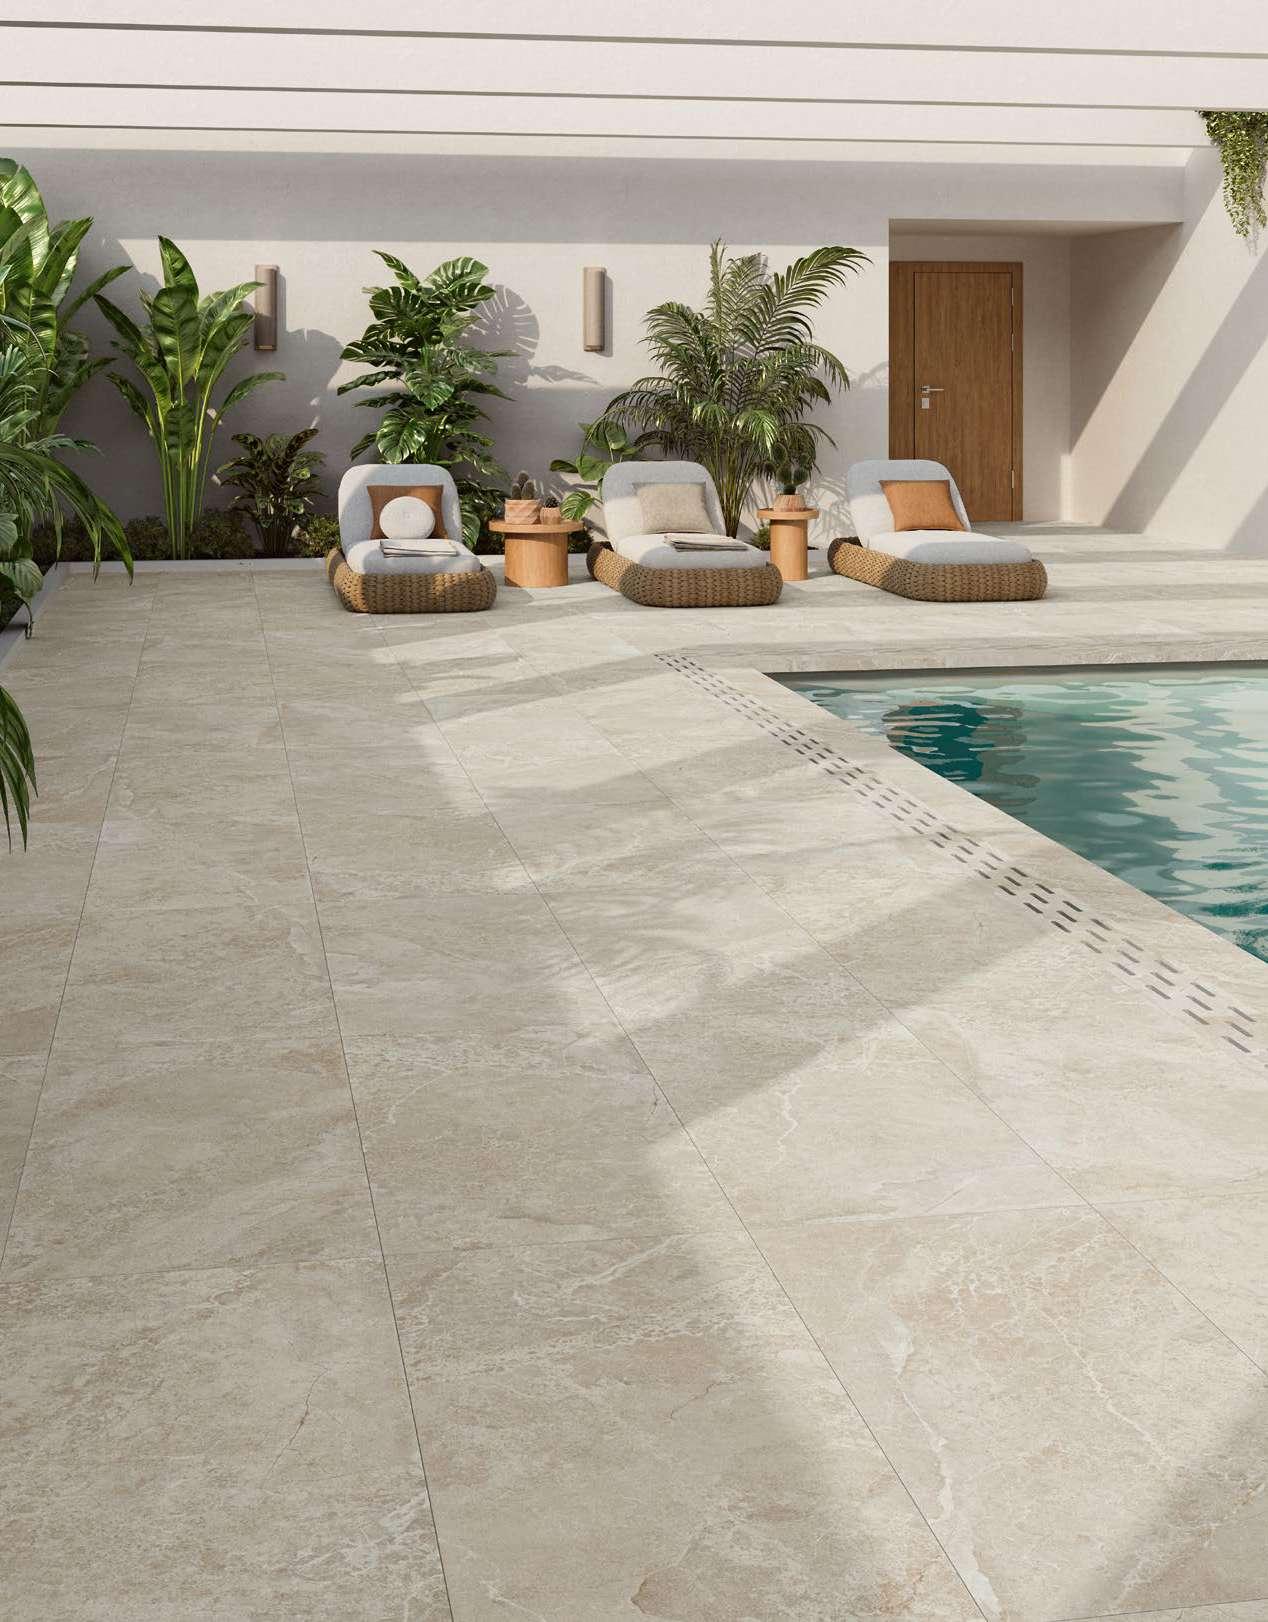
UN PAVIMENTO, MULTIPLES APLICACIONES
Slip-stop, el porcelánico antideslizante de Alaplana, combina de manera perfecta, rendimiento estética y versatilidad. Una única textura, suave y fácil de limpiar, perfecta para cualquier pavimento, y con altas prestaciones antideslizantes.
• Antideslizante con una suave y agradable textura
• Fácil limpieza y sin ningún mantenimiento adicional
• Sin cambios entre diferentes espacios de interior, exterior, o zonas húmedas
• Multitud de formatos y acabados estéticos, para todos los gustos
• No necesita colocaciones especiales
• Resistente al hielo, a los ataques químicos y a los agentes atmosféricos
• Mantiene inalteradas en el tiempo sus excepcionales calidades técnicas
ONE FLOOR, MULTIPLE APPLICATIONS
Slip-stop, the new Alaplana anti-slip porcelain tile, combines, in the best possible xture, soft, smooth and easy to clean, perfect for any floor tile, with high anti-slip performances.
• Anti slip with a soft and pleasant texture
• Fast and easy cleaning, with no additional maintenance
• No changes from indoor to outdoor or to wet and humid areas
• Various sizes and aesthetic finishes for infinite types of preferences
• No special laying
• Frost proof and chemical products resistance
• Characteristics remain unchanged in time
Deslizamiento (Rampa)
Ángulo Crítico Deslizamiento. Zonas Húmedas De Andar Descalzo
RESISTENCIA AL DESLIZAMIENTO SLIP RESISTANCE
Resistencia Al Deslizamiento (Péndulo):Metodo Operativo (PTV)
Resistance (Pendulum):Pendulum Test Value (PTV)
La colección STARLIGHT de Alaplana está trabajada con granillas pulidas. Se trata de un compuesto vítreo puro que se aplica sobre la superficie cerámica en forma de gel. Este vehículo húmedo facilita el fundido del vidrio convirtiéndolo en una capa continua y compacta.
El pulido de nuestro material se realiza mediante un mecanizado a partir de abrasivos diamantados de diferentes granulometrías.
Tras el proceso de pulido la estructura físico-química de la granilla permanece compacta. Presenta altos niveles de impermeabilidad. No necesita tratamiento de sellado posterior.
No obstante, Alaplana aplica tras el pulido un tratamiento especial para terminar de sellar la superficie, asegurando la limpieza y durabilidad de nuestra cerámica pulida. Este tratamiento no pierde su efectividad con el paso del tiempo.
Además de valores estéticos, tales como la calidad del brillo, la transparencia de los colores y la definición gráfica, la gran diferencia entre la granilla pulida de la serie Starlight y el esmalte pulido, es la bajísima porosidad que impide la penetrabilidad de partículas en la superficie, por lo que su grado de limpieza y mantenimiento está garantizado.
Alaplana’s STARLIGHT collection is worked with polished grits. It is a pure vitreous compound that is applied to the ceramic surface in the form of a gel. This wet vehicle facilitates the melting of the glass, turning it into a continuous and compact layer.
The polishing of our material is carried out by machining from diamond abrasives of different granulometries.
After the polishing process, the physical-chemical structure of the grit remains compact. It presents high levels of impermeability. No need for post-sealing treatment.
However, Alaplana applies a special treatment after polishing to finish sealing the surface, ensuring the cleanliness and durability of our polished ceramic. This treatment does not lose its effectiveness over time.
In addition to aesthetic values, such as the quality of the gloss, the transparency of the colors and the graphic definition, the great difference between the polished grit of the Starlight series and the polished enamel, is the very low porosity that prevents the penetrability of particles in the surface, so its degree of cleanliness and maintenance is guaranteed.
CARACTERÍSTICA TÉCNICA TECHNICAL SPECIFICATION NORMA REGULATION
SUPERFICIAL SURFACE QUALITY UNE-EN-ISO 10545-2
CARACTERISTICAS DIMENSIONALES DIMENSIONS UNE-EN-ISO 10545-2
ABSORCIÓN DE AGUA WATER ABSORTION
10545 - 3
FUERZA DE ROTURA BREAKING STRENGTH UNE-EN-ISO 10545 - 4 ≥ 1300 N
RESISTENCIA A LA FLEXIÓN RESISTANCE OF FLEXION UNE-EN-ISO 10545 - 4 ≥ 35N/mm
ABRASIÓN SUPERFICIAL SURFACE ABRASION
RESISTENCIA AL CUARTEO CRACKING RESISTANCE UNE-EN-ISO 10545 - 11 Requerido Requested Cumple Complies
RESISTENCIA A LA HELADA FROST RESISTANCE UNE-EN-ISO 10545 - 12 Requerido · Requested Cumple Complies
PRODUCTOS DOMÉSTICOS Y DE PISCINA HOUSEHOLD CHEMICALS AND SWIMMING POOLS SALTS UNE-EN-ISO 10545 - 13 Mínimo
RESISTENCIA A ÁCIDOS ACID RESISTANCE UNE-EN-ISO 10545 - 13 Valor
RESISTENCIA A BASES ALKALINE RESISTANCE UNE-EN-ISO 10545 - 13
RESISTENCIA A MANCHAS STAIN RESISTANCE UNE-EN-ISO 10545 - 14 Mínimo 3 ·
ESPESORADO · THICKENED PORCELAIN
CARACTERÍSTICAS ESPECÍFICAS · SPECIFIC FEATURES
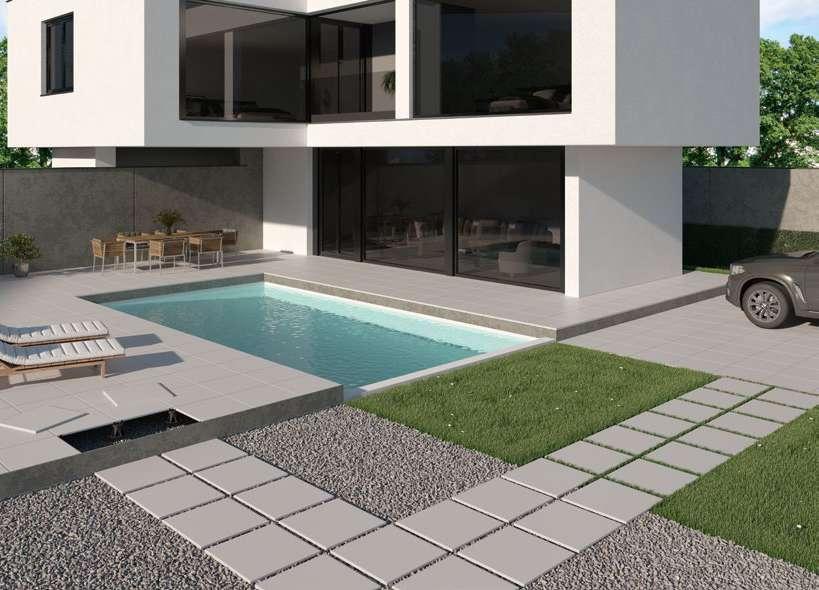
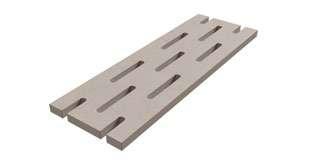
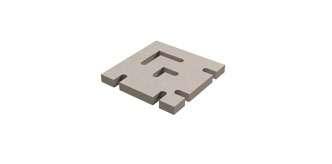
Colocación sobreelevada con uso de plots* Elevated placement with plots*. 1
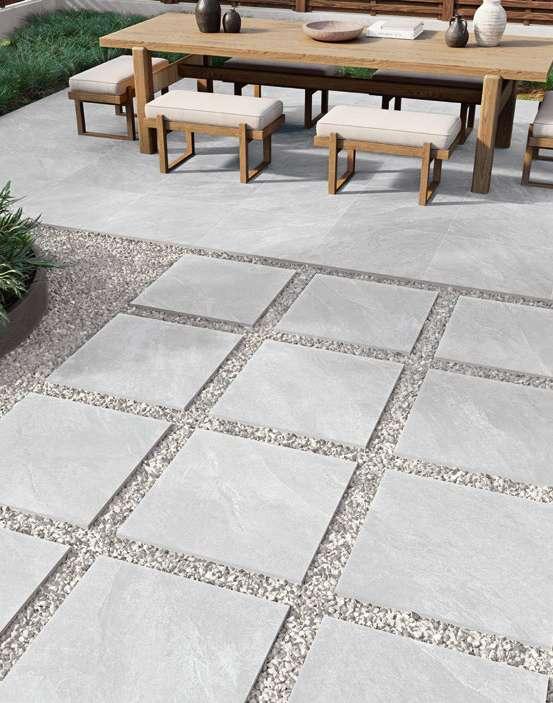
Colocación sobre grava / arena. Placement on gravel or sand. 2
Colocación sobre césped. Placement on grass. 3
Colocación tradicional. Traditional placement. 4
PORCELÁNICO GLAZED PORCELAIN TILES EN 14411 2016
CARACTERÍSTICA TÉCNICA TECHNICAL SPECIFICATION
DE ROTURA BREAKING STRENGTH
RESISTENCIA A LA FLEXIÓN FLEXION RESISTANCE
RESISTENCIA AL CHOQUE TÉRMICO RESISTANCE TO THERMAL SHOCK
ABRASIÓN SUPERFICIAL SURFACE ABRASION
RESISTENCIA AL CUARTEO CRACKING RESISTANCE UNE-EN-ISO
RESISTENCIA A LA HELADA FROST RESISTANCE
RESISTENCIA QUIMICA CHEMICAL RESISTANCE
RESISTENCIA AL DESLIZAMIENTO SLIP RESISTANCE
Alaplana recommends the use of 8 plots for pieces of 24”x36”.
Alaplana recomienda el uso de 8 plots para piezas de 60x120cm
Alaplana recommends the use of 8 plots for pieces of 24”x48”.
PRODUCTOS DOMÉSTICOS Y DE PISCINA HOUSEHOLD CHEMICALS AND SWIMMING POOLS SALTS
ÁCIDOS Y BASES A ALTA CONCENTRACIÓN HIGH CONCENTRATION OF ACIDS AND ALKALIS UNE-EN-ISO
ÁCIDOS Y BASES A BAJA CONCENTRACIÓN LOW CONCENTRATION OF ACIDS AND ALKALIS UNE-EN-ISO
RESISTENCIA A MANCHAS STAIN RESISTANCE UNE-EN-ISO 10545 - 14 Mínimo 3 Minimum 3 Cumple Complies
al deslizamiento (Péndulo) Slip Resistance (Pendulum)
Resistencia al deslizamiento (Péndulo) · Slip resistance (Pendulum) Método operativo (PTV) Pendulum test value (PTV)
Coeficiente de fricción dinámico (D.C.O.F.) Dynamic
Ángulo crítico deslizamiento (Rampa) Critical angle of slip (Inclined platform)
Ángulo crítico deslizamiento zonas húmedas de andar descalzo Critical angle of slip wet-loaded barefood
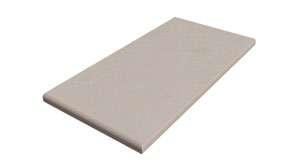
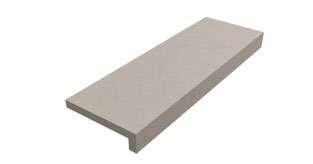
PELDAÑO TÉCNICO SIMPLE SINGLE TECHNICAL STEP
PELDAÑO TÉCNICO DOBLE DOUBLE TECHNICAL STEP
60x60cm · 24”x24” 30x60cm 12”x24” 60x60cm 24”x24” 60x90cm 24”x36” 30x90cm · 12”x36” 60x90cm · 24”x36” 60x120cm · 24”x47” 30x120cm 12”x47” 40x120cm 16”x47”
60x60cm · 24”x24” 30x60cm 12”x24” 60x60cm 24”x24”
60x90cm 24”x36” 30x90cm · 12”x36” 60x90cm · 24”x36”
60x120cm · 24”x47” 30x120cm 12”x47” 40x120cm 16”x47”
60x60cm · 24”x24” 30x60cm 12”x24” 60x60cm 24”x24”
PELDAÑO ROMO SIMPLE SINGLE ROUND STEP
PELDAÑO DOBLE ROMO ANGULAR DOUBLE ROUND STEP ANGLE
60x90cm 24”x36” 30x90cm · 12”x36” 60x90cm · 24”x36”
60x120cm · 24”x47” 30x120cm 12”x47” 40x120cm 16”x47”
60x60cm · 24”x24” 30x60cm 12”x24” 60x60cm 24”x24”
60x90cm 24”x36” 30x90cm · 12”x36” 60x90cm · 24”x36”
60x120cm · 24”x47” 30x120cm 12”x47” 40x120cm 16”x47”
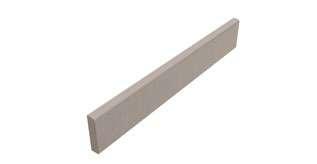
60x60cm · 24”x24” 8x60cm 3”x24”
RODAPIÉ ROMO PINTADO PAINTED ROUND CUT SKIRTING
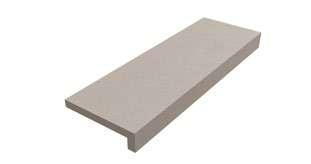
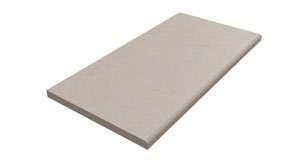
BORDE TÉCNICO TECHNICAL EDGE
BORDE HUELLA TABICA TÉCNICO LARGE RISER TECHNICAL EDGE
60x90cm 24”x36” 8x90cm 3”x36”
60x120cm · 24”x47” 8x120cm 3”x47”
60x60cm · 24”x24” 20x60cm · 8”x24”
60x90cm 24”x36” 20x90cm 8”x36”
60x120cm 24”x47” 20x120cm · 8”x47”
60x60cm· 24”x24” 20x60cm · 8”x24”
60x90cm 24”x36” 20x90cm 8”x36”
60x120cm 24”x47” 20x120cm 8”x47”
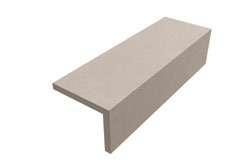
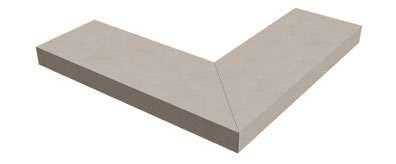
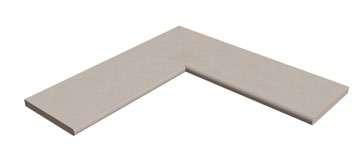
BORDE ÁNGULO EXTERIOR TÉCNICO (2 PIEZAS) EXTERIOR ANGLE TECHNICAL EDGE (2 PIECES)
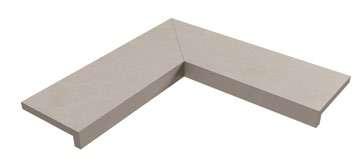
BORDE ÁNGULO INTERIOR TÉCNICO (2 PIEZAS) INTERIOR ANGLE TECHNICAL EDGE (2 PIECES)
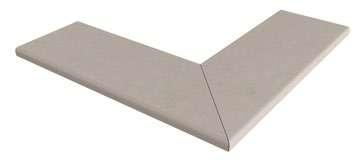
BORDE ÁNGULO EXTERIOR ROMO (2 PIEZAS) EXTERIOR ANGLE ROUND EDGE (2 PIECES)
BORDE ÁNGULO INTERIOR ROMO (2 PIEZAS) INTERIOR ANGLE ROUND EDGE (2 PIECES)
CARACTERÍSTICAS ESPECÍFICAS SPECIFIC FEATURES
Bla MATE MATT / PULIDO POLISHED / SATINADO · SATIN
RECOMENDACIONES EN LA INSTALACIÓN INSTALLATION RECOMMENDATIONS
Alaplana Cerámica ha elaborado una serie de recomendaciones, que se detallan a continuación, ofreciendo una guía para una correcta colocación de la placa porcelánica de gran formato.
La primera consideración que se debe de tener en cuenta a la hora de presentarlo en proyecto o prescripción es su destino y uso. A partir de ahí, la correcta colocación de la placa asegurará su durabilidad evitando roturas o posibles problemas futuros.
Para ello, será de vital importancia el uso de materiales de agarre adecuados dependiendo del tipo de producto, asegurando así su durabilidad y resaltando la belleza del ambiente. En todos los casos es necesario que la ejecución del trabajo la hagan alicatadores profesionales optimizando las prestaciones tanto técnicas como estéticas para obtener un resultado inmejorable.
Alaplana Ceramica has developed a series of recommendations, which are detailed below, offering a guide for the correct placement of big size porcelain.
The first consideration that must be taken into account when presenting it in a project or prescription is its destination and use. From there, the correct placement of the slab will ensure their durability avoiding breakages or possible future problems.
For this, the use of suitable grip materials will be of vital importance depending on the type of product, while ensuring its durability and highlighting the beauty of the environment. In all cases, it is necessary that the execution of the work is carried out by professional tilers, optimizing both technical and aesthetic performance to obtain an unbeatable result.
RECOMENDACIONES DE MANIPULACIÓN
5% / ± 0,5 mm Cumple Complies
/ ± 2 mm Cumple Complies GROSOR THICKNESS
RECTITUD DE LOS LADOS WARPAGES OF EDGES ± 5% / ± 1,5 mm Cumple Complies ORTOGONALIDAD WEDGING
Debido a su tamaño y grosor, es necesario manipular las láminas MAXITECH con especial cuidado.
HANDLING RECOMMENDATIONS
Due to their size and thickness, MAXITECH sheets must be handled with special care. Given their dimensions, it is essential that two operators participate in the handling of the sheets.
5% / ± 2 mm Cumple Complies PLANARIDAD FLATNESS
ABSORCIÓN DE AGUA WATER ABSORPTION
FUERZA DE ROTURA BREAKING STRENGTH
RESISTENCIA A LA FLEXIÓN MODULUS OF RUPTURE
ABRASIÓN SUPERFICIAL SURFACE ABRASION
RESISTENCIA AL CUARTEO CRAZING RESISTANCE
RESISTENCIA A LA HELADA FROST RESISTANCE
RESISTENCIA QUÍMICA CHEMICAL RESISTANCE PRODUCTOS DOMÉSTICOS Y ADITIVOS PISCINAS HOUSEHOLD CHEMICALS AND SWIMMING POOL SALTS
ÁCIDOS A BAJA CONCENTRACIÓN LOW CONCENTRATION OF ACIDS
5% / ± 2 mm Cumple Complies
UNE-EN-ISO 10545-3 Ev≤ 0,5% Cumple Complies
UNE-EN-ISO 10545-4 ≥ 700 N Cumple Complies
UNE-EN-ISO 10545-4 ≥ 35 N/mm2 Cumple Complies
UNE-EN-ISO 10545-7
Valor declarado Declared value Según modelo According to model
UNE-EN-ISO 10545-11 Requerido Requested Cumple Complies
UNE-EN-ISO 10545-12 Requerido Requested Cumple Complies
UNE-EN-ISO 10545-13 Mínimo clase B Minimum class B Cumple Complies
10545-13
RESISTENCIA A LAS MANCHAS RESISTANCE TO STAINS UNE-EN-ISO 10545-14
RESISTENCIA AL RAYADO HARDNESS (MOHS)
clase 3 Minimum class 3 Cumple Complies
Dadas sus dimensiones, es imprescindible que dos operarios participen en la manipulación de las hojas.
La extracción de la pieza debe realizarse por su lado más ancho. Se recomienda el uso de guantes y botas de seguridad durante todo el proceso de manipulación.
Cuando se manipulen los cajones por el lado ancho, hay que asegurarse de usar una carretilla elevadora que pese al menos 2.000 kg, manteniendo una distancia mínima de 80 cm entre las palas. Las palas deben de ser de al menos 130 cm de longitud. Por otro lado, si optas por manipularlos por el lado estrecho, necesitarás palas de al menos 240 cm y, nuevamente, una carretilla elevadora que pese al menos 2.000 kg
COLOCACIÓN
Antes de comenzar, es esencial limpiar el reverso de las piezas para eliminar cualquier residuo de fabricación o rectificado. En el caso de piezas de gran formato MAXITECH, es crucial que el contacto entre la pieza y el soporte sea total (al 100%).
Antes de iniciar la colocación, comprobar que el soporte sobre el que se colocará el material esté preparado, ejecutado de acuerdo con el uso previsto y que esté correctamente preparado para el uso del adhesivo.
En el caso de los solados de cemento, para la colocación en suelos y paredes, comprobar que el soporte no presente grietas, que esté perfectamente seco y que haya finalizado la retracción higrométrica.
Comprobar también que no haya humedades ni filtraciones de agua que puedan provocar el desprendimiento de las losas. Limpiar la superficie para eliminar el polvo, la suciedad, el aceite y la grasa.
Antes de la colocación, comprobar la planitud del soporte y compensar las posibles oquedades con productos niveladores adecuados.
The piece should be extracted from its widest side. It is recommended to use gloves throughout the handling process and safety boots.
It is advisable to use rigid frames with suction cups, as they facilitate the handling of the sheets by two operators and also prevent any possi-ble deformation of the sheet.
If you decide to handle the drawers on the wide side, make sure to use shovels that are at least 130 cm long and a forklift that weighs at least 2,000 kg, maintaining a minimum distance of 80 cm between the shovels. On the other hand, if you choose to handle them on the narrow side, you will need shovels of at least 240 cm and, again, a forklift of at least 2,000 kg, with the same distance between the shovels.
INSTALLATION
Before starting, it is essential to clean the back of the tiles to remove any manufacturing or rectification residues. For large format MAXITECH pieces, it is crucial that the contact between the piece and the substrate is total (100%). To avoid air gaps, it is recommended to use the double gluing method.
Before beginning installation, check that the substrate for installation has been prepared and built in compliance with the intended use and has been correctly prepared for the use of adhesive.
If the crate of cement-based screeds, for floor and wall installation, check that the substrate features no cracks, that it is perfectly dry and that hygrometric shrinkage has ended. Also make sure that there is no damp or water seepage that could cause the slabs to dislodge.
Clean the surface to remove dust, dirt, oil and grease.
Before installation, check the flatness of the substrate and compensate for any hollows with suitable levelling products.
Utilizar adhesivos de categoría “C2 E” o superiores, tal y como prevé la norma EN 12004; para revestimientos de paredes utilizar productos con deslizamiento vertical limitado (identificados con la letra T o conformes a la norma EN 12004).
APLICACIÓN DEL ADHESIVO
La aplicación del adhesivo se debe realizar con la técnica de doble encolado, con el fin de garantizar una correcta distribución del mismo, garantizar una excelente adherencia y evitar espacios de aire que puedan provocar roturas.
El adhesivo se debe extender en toda su extensión sobre la superficie de apoyo, utilizando una llana dentada (distancia entre las muescas de 10 mm). Es necesario asegurarse de que las franjas de la última capa de adhesivo tengan una única dirección, paralela al lado corto de la placa.
El espesor máximo del adhesivo no debe superar los 10 mm.La aplicación del adhesivo en la parte posterior de la placa se debe realizar utilizando una llana con muescas de 3 mm. La alta adherencia de la cola permite un tiempo de trabajo prolongado de aproximadamente 30 minutos como máximo. Limpiar todas las juntas de colocación.
POSICIÓN DE LA PLACA
La placa debe fijarse en posición vertical al bastidor de manipulación. Con la ayuda del bastidor, podrá colocar la losa correctamente e instalarla. Para eliminar el aire y garantizar una mejor adherencia, al instalar la losa, realice un movimiento circular.
GOLPES EN LA PLACA
Tras la instalación, se recomienda golpear la superficie con un mazo especial. Proceder desde el centro hacia los lados, en paralelo al lado corto, para garantizar una eliminación eficaz del aire. Considerar el uso de sistemas de nivelación para mejorar la planitud de las superficies.
Use category “C2 E” or superior adhesives, as envisaged by the EN 12004 standards; for wall tiling, use products with limited vertical slippage (identified by the letter T or in compliance with the EN 12004 standard).
SPREADING THE ADHESIVE
Adhesive must be applied with the double gluing technique, in order to ensure correct distribution of the adhesive itself, guarantee excellent adhesion and avoid air gaps that can lead to breakage.
The adhesive must be spread full-bed on the supporting surface, using a notched trowel (10 mm gap between notches). Make sure that the stripes of the last layer of adhesive have a single direction, parallel to the short side of the slab.
The maximum adhesive thickness should not exceed 10 mm. The application of adhesive on the rear side of the slab must be performed using a notch with 3 mm notches. The high adhesion of the adhesive allows for a prolonged working time of approximately 30 minutes maximum. Clean all installation joints
POSITION OF THE SLAB
The slab must be secured in upright position to the handling frame. Using the frame, you can thus correctly position the slab and install it accordingly. To eliminate any air and guarantee better adhesion, when installing make the slab performs a circular movement After installation, it is recommended to tap the surface with a special mallet. Proceed from the centre to the sides, parallel to the short side, to ensure effective elimination of air. Consider the use of levelling systems to improve flatness of the surfaces.
TAPPING THE SLAB IN POSITION
CORTE Y PERFORADO CUTTING AND DRILLING
Se sugiere el uso de un banco de trabajo de aluminio de dimensiones adecuadas. Antes de apoyar la lámina en la mesa de trabajo, asegúrate de que la superficie esté limpia y perfectamente plana. Es recomendable usar coronas de perforación con diamante montadas en una radial, no en un taladro. Los discos de corte deben ser especí-ficos para porcelánico, ya que son más finos y generan menos calor. Las operaciones de corte también se pueden realizar con herramientas de corte para vidrio.
Debido a su menor espesor, estas láminas son fáciles de cortar, perforar y acabar, sin necesidad de equipos o maquinaria de gran tamaño o costoso. Existen herramientas de corte diseñadas específicamente para este tipo de láminas, utilizando la tecnología de corte en seco de baldosas cerámicas.
Due to their reduced thickness, these sheets are easy to cut, drill, and finish without the need for large or expensive equipment.
It is recommended to use diamond drilling crowns mounted on a radial saw, not on a drill. Cutting discs should be specific for porcelain, as they are thinner and generate less heat. Cutting operations can also be performed with glass cutting tools.
There are cutting tools specifically designed for this type of sheet, using the dry cutting technology for ceramic tiles.
It is suggested to use an aluminum workbench of appropriate dimensions. Before placing the sheet on the workbench, ensure that the surface is clean and perfectly flat.
Se debe esperar al menos 48 horas después de pegar las piezas para proceder al rejuntado en pavimentos, y 24 horas en el caso de revestimientos. Para mejorar el rendimiento estético y la practicidad,
Alaplana recomienda una junta de relleno de al menos 2 mm y el uso de crucetas espaciadoras. El tamaño de grano del material de relleno debe ser adecuado para el ancho de la junta. Las juntas deben rellenarse hasta el nivel superficial (de pisada) para crear una superficie continua.
Coloque las juntas de expansión a una distancia regular y deje un espacio de al menos 5 mm entre la superficie alicatada y las paredes (o pilares).
En cualquier caso, la provisión de juntas de expansión debe ser calculada por la persona a cargo de la obra. Todas las notas anteriores son un complemento necesario al criterio del instalador profesional.
EN INSTALACIONES COMO PAVIMENTO
Las placas de 6 mm de espesor es adecuada para su instalación sobre suelos ya existentes: las placas se pueden instalar sobre suelos antiguos o revestimientos de mármol, piedra natural y cerámica, sin necesidad de demoler el suelo subyacente existente. Alaplana recomienda la instalación de placas de 6 mm de espesor solo en las siguientes condiciones: entornos residenciales, entornos comerciales sujetos a tráfico ligero y en cualquier caso en contextos donde no hay un paso regular de cargas pesadas o circulación de carros con ruedas duras.
ATENCIÓN:
No se recomienda colocar las placas directamente sobre la solera. Esto se debe a que la colocación sobre solera está fuertemente condicionada desde la ejecución óptima del instalador profesional, desde su integridad curado (secado), respetando las juntas de dilatación adecuadas, así como por la instalación realizada de forma profesional. Por lo tanto, en los casos de instalación directa sobre el solado, Alaplana sugiere el uso de gres porcelánico de espesor tradicional.
Wait at least 48 hours after gluing the pieces before grouting for floors, and 24 hours for wall installations. In order to improve aesthetic performance and practicality, Alaplana recommends a grouting joint of at least 2 mm and use of spacer crosses.
The grain size of the jointing material must be suitable for the width of the joint. Joints must be filled up to treading level in order to create a continuous surface. Position expansion joints at a regular distance and leave a gap of at least 5 mm between tiled surface and walls (or pillars).
In any crate, provision of expansion joints must be calculated by the person in charge of the building site. All notes above are a necessary addition to the professional instalaltion process.
ON FLOOR INSTALLATIONS
The range of 6 mm thick extra large slabs is suitable for installation on existing floors: the slabs can be installed on old floors or marble, natural stone and ceramic claddings, without the need to demolish the existing underlying floor. Alaplana recommends the installation of 6 mm thick extra large slabs only in the following conditions: residential environments, commercial environments that are subject to light traffic and in any crate in contexts where there is no regular passage of heavy loads or circulation of trolleys with hard wheels.
WARNING:
On floor, it is not recommended to lay the slabs directly on the screed.
This is because laying on a screed is strongly conditioned by the optimal execution of the screed itself, by its complete seasoning, by the respect of the appropriate expansion joints as well as for the professionally carried out installation. Therefore, in the cases of installation directly on the screed, Alaplana suggests the use of ceramic porcelain in traditional thickness.
Se utilizarán materiales tipo CG2. En condiciones que requieran estanqueidad al agua y vapor o para usos sanitarios y alimentarios, se seleccionarán materiales del tipo RG.
La operación de rejuntado es muy importante para el resultado final. El rejuntado debe realizarse con materiales desarrollados para esta finalidad, definidos y clasificados en la norma UNE EN 13888.
Después de colocar todas las piezas en la superficie y tras esperar el tiempo de secado del adhesivo recomendado por el fabricante, se deben retirar las crucetas y las cuñas.
Use CG2 type materials. In conditions that require water and vapor tightness or for sanitary and food uses, RG type materials should be selected.
The grouting operation is very important for the final result. Grouting should be done with materials developed for this purpose, as defi-ned and classified in the UNE EN 13888 standard.
After placing all the pieces on the surface and waiting for the adhesive to dry as recommended by the manufacturer, the spacers and wedges should be removed.
Tras la colocación, es de suma importancia limpiar oportuna y correctamente los restos de juntas y adhesivos: estos residuos, incluso cuando no son visibles, pueden comprometer el aspecto y el brillo de la superficie del gres porcelánico y retener la suciedad. Una perfecta desincrustación y eliminación de los residuos facilita y agiliza la limpieza diaria y realza la belleza y la luminosidad del producto.
En las 48 horas siguientes a la aplicación del mortero y antes de que éste se endurezca definitivamente, humedezca el suelo con una solución ácida tamponada. La dilución depende del tipo de superficie (lisa o con textura).
La solución que contiene un ácido especial para gres porcelánico se debe distribuir de manera uniforme. Si es necesario, frote con una fregona y deje actuar la solución durante unos 20 minutos.
Para superficies especialmente grandes, es posible utilizar un cepillo motorizado rotativo equipado con discos adecuados. Enjuague con agua y paños limpios. Repita esta operación varias veces hasta eliminar todas las manchas y los residuos. Asegúrese de cambiar el agua de enjuague con frecuencia. Termine secando.
Preste la máxima atención después de utilizar mortero de base epoxi: una vez endurecido, este tipo de mortero solo se puede eliminar con medios mecánicos, que son bastante agresivos y pueden dañar la superficie de las baldosas. En la limpieza de superficies grabadas o estructuradas, preste especial atención a asegurarse de eliminar todos los residuos en profundidad. Consulte las instrucciones del fabricante del mortero y sígalas escrupulosamente.
Si la limpieza posterior a la instalación se ha realizado correctamente, el cuidado diario, para eliminar la suciedad que surge al caminar o al uso general de la superficie alicatada, es fácil y rápida.
After installation, it is of essential importance to clean residues of grout and adhesive in a timely and correct manner: these residues - even when they are not visible - may compromise the appearance and brilliance of the porcelain stoneware surface, and withhold dirt. Perfect descaling and removal of residues makes daily cleaning easy and quick and enhances the beauty and luminosity of the product.
Within 48 hours from grouting and before the grout hardens definitively, wet the floor with an acid and buffered solution. Dilution depends on the type of surface (smooth or textured).
The solution containing a special acid for porcelain stoneware must be spread evenly. If necessary, rub with a mop and let the solution work for about 20 minutes.
For particularly large surfaces, it is possible to use a rotary motorised brush fitted with suitable discs. Rinse with water and clean cloths. Repeat this operation several times until all stains and residues have been eliminated. Make sure to change rinsing water often. Complete by drying.
Pay the utmost attention after using epoxy-based grout: once hardened, this type of grout can only be removed using mechanical means, which are rather aggressive and may cause damage to the surface of tiles. When cleaning engraved or structured surfaces, pay particular attention to make sure that all residues are removed deep down. Refer to the instructions of the grout manufacturer and strictly follow them.
If cleaning after installation has been performed correctly, daily care, for removal of dirt arising out of walking or general use of the tiled surface, is easy and quick.
LIMPIEZA Y MANTENIMIENTO
En Alaplana trabajamos continuamente con el objetivo de garantizar la máxima calidad y eficacia en todas las fases de diseño y producción mediante procesos de fabricación que permiten la utilización responsable de los recursos naturales, respetando el medio ambiente.
Disponemos de un sistema de gestión conforme a la norma ISO 9001 basado en la mejora continua y nuestro afán por fabricar materiales que ofrezcan las más elevadas prestaciones técnicas.
At Alaplana we work continuously with the aim of guaranteeing maximum quality and efficiency in all phases of design and production through manufacturing processes that allow the responsible use of natural resources, respecting the environment.
We have a management system in accordance with the ISO 9001 standard based on continuous improvement and our eagerness to manufacture materials that offer the highest technical performance.
Declaración Ambiental de Producto, DAP. Excelencia ambiental conforme a la Norma Internacional ISO 14025.
El perfil ambiental es un criterio cada vez más importante para la venta y para la elección de los consumidores. En Alaplana, estamos encantados de presentar nuestra última innovación en sostenibilidad: nuestras baldosas cerámicas ahora disponen de declaración ambiental de producto que además incluyen una referencia verificada del porcentaje de material reciclado, en conformidad con la norma ISO 17889-1:2021 Ceramic Tiling Systems. ¡Es hora de elevar nuestros proyectos al siguiente nivel con nuestra Declaración Ambiental de Producto!
Environmental Product Declaration, EPD. Environmental excellence according to the International Standard ISO 14025.
The environmental profile is an increasingly important criterion for sales and for consumer choice. At Alaplana, we are delighted to present our latest innovation in sustainability: our ceramic tiles now have an environmental product declaration that also includes a verified reference of the percentage of recycled material, in accordance with the ISO 17889-1:2021 Ceramic Tiling Systems. It’s time to elevate our projects to the next level with our Environmental Product Declaration!
Packing
Revestimiento Pasta Blanca White Body Wall Tile Gres Gres Floor Tile
Revestimiento Pasta Roja Red Body Wall Tile
Porcelánico
Porcelain Tile
PORCELÁNICO DE GRAN FORMATO 6MM BIG SIZE PORCELAIN 6MM (INFORMACIÓN POR PIEZA · INFORMATION PER PIECE)
www.nuevaalaplana.es