6 minute read
Special How do I assess the base and which product should I use ?
Next Article

HASTE MAKES WASTE
SOME RULES OF THUMB FOR A PERFECT END RESULT
Photo – Thomsit
All substrates are different. It’s sounds like breaking down a door which is wide open. How do you assess the various substrates and what can you use to repair them? We explain various steps to help you achieve a perfect floor.
Some things are absolutely essential. For example, first of all, you must make sure that the substrate is hard, stable, and strong enough. Moreover, amongst other things, you need to check the flatness and angle and adhesion of the existing floor. You also test the stability and cleanliness of the substrate and, for cement-bound screeds, the porosity. Obviously, the substrate has to be sufficiently dry and (rising) damp must be avoided (we’ve covered dryness and damp at length in the past, so we won’t do so again here). To give just a few examples, an old tile floor may show rising damp, an old parquet or wooden floor may start to sag, or a glued covering floor or old floor coating no longer adheres very well. An epoxy or PU cast floor may be incompatible with new products to be used.
Hardness, stability, and bearing strength
It’s important to check for hardness, stability, and bearing strength in order to prevent possible crack formation or loosening of the end finish when the job is done. You can easily check the hardness by making scratches in several places with a hard object. If the scratches do not go beneath the surface, you know that the substrate is probably fine. Furthermore, you should check the thickness and cohesion of the existing substrate.
Flatness and angle
Further to what is mentioned above, you should also make sure that both the flatness and the angle of the substrate do not deviate too much. If there are any splits, cracks, or uneven patches, the substrate can get distorted in the finish. Therefore, always remember to repair any unevenness in a substrate before you apply a levelling agent.
If there are any static micro-cracks of less than 1mm, the application of a suitable primer will suffice. If the cracks are bigger, you should fill them with resin developed specifically for that purpose. Cracks are poured over with an epoxy resin or silicate resin with two components. What you must avoid at all costs is filling cracks with a fast-drying repair mortar.
Adhesion and stability
You also have to check the adhesion and that means looking at floors which are glued or fitted using mortar. For instance, if you tap on tiles with a hammer, you will need to remove all hollow-sounding and loose sections. If the surface is painted, it’s best to do a scratch test. You
scratch small sections away with a Stanley Knife and the paint is only considered to be adhesive if four fifths of the squares remain in place. If that is not the case, the only solution is to remove the paint.
Before you apply a floor mortar, you need to check whether or not the substrate is stable enough since you don’t want any cracks. This step is particularly important for plank floors and wooden panels on floor beams. If they sag when you walk on them, you need to reinforce the substrate. To do that you apply several screws, if necessary in combination with fitted waterproof wooden panels.
Cleaning and preparation
Obviously, you need to clean and prepare the substrate. Indeed, floor mortar won’t adhere properly unless the substrate is clean. During this step, you remove all gypsum, adhesive, and mortar residue. After that, you remove or clean thoroughly any paint residue to leave a greasefree substrate. Once you’ve done all this, the sanding starts and you pay the necessary attention to the vacuum cleaning.
Don’t forget that a subfloor with ceramic tiles has to be cleaned thoroughly and that the difference in height between the tiles and the joints needs to be eliminated using a special filler primer. If you are going to fit parquet, LVT, or a thin tile floor, it will be necessary to degrease, remove polish, and remove adhesive residue.
Check the porosity
If the subfloor is a cement-bound subfloor, you mustn’t forget to check its porosity. This prevents air bubble formation later and excessive drying in the floor mortar. You can deploy a drip test, whereby you allow a drop of water to drip onto the substrate. If the drop disappears in under 5 seconds, the floor is highly absorbent. If it takes between 5 and 30 seconds, the floor has normal absorption. If it takes longer than 30 seconds, the floor has poor to non-existent absorption. You treat it with the correct hardening primer applied once or several times, depending on the absorption.
Sources: Bona, Stauf, ceramico.be, Floor Tech, and weber.nl
What’s on the market ?
Bona
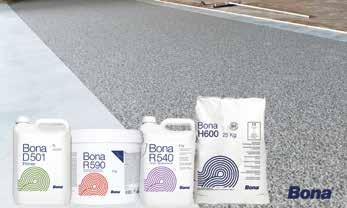
Regardless of the subfloor, the damp, or the unevenness, Bona has the products which you need, from primers and levelling agents to high-quality adhesives. Primers (all suitable for floor heating): Bona D500 – A dispersion primer for Parquet Glue Bona D720. Solventless - Permeable – Easy to use – Universal. Bona D501 - A 1-component primer for preparing substrates prior to using silane Bona adhesives such as Bona Quantum and Bona Titan. Solventless - Permeable – Dust-binding. Bona D510 (for use before levelling) – A dispersion primer for the Bona levelling agents. Universal – Good adhesion on several substrates. Bona D520 (for use before levelling) – Based on an acrylate dispersion. Specially developed for use on substrates such as ceramic tiles before a levelling agent is applied. It yields very strong adhesion. Bona R590 – silane damp screen – for priming and/or blocking residual damp in cement and concrete covering floors. It blocks damp up to and including 5 CM% or 90% relative damp. Levelling agents (all suitable for floor heating) Bona H600 – cement-bound, acrylic polymer reinforced levelling agent. Self-levelling. Bona H605 calcium sulphate levelling agent – yields flat and absorbent substrates – Self-levelling.
Chimiver
PRYMER SF 1105 is a two-component water-based epoxy primer developed for dusty subfloor, with a multi-layer application, it works as a moisture barrier. It is resistant to the inverse hydrostatic pressure according to the law UNI 8298 part 8. PRYMER SF 1105 is suitable for consolidation of subfloors on radiant heating. It is also recommend as a promoter of adhesion for anhydrite subfloors.
Thomsit
Thomsit has solutions for various problems like damp, frailty, cracks and splits, dirt, oil, or old glue residue. These products are usually compatible to those of other brands, yet Thomsit prefers works from a one-brand system. According to Thomsit, there are certainly universal primers to solve many of the aforementioned problems, but none to cover all problems in one product. The Thomsit best-sellers are Thomsit R 729 Silicate Cast Resin for filling cracks, Thomsit R 766 Multiprimer for priming, Thomsit R 755 Damp Screen for keeping out damp, Thomsit R 790 Filler and Primer for filling joints and priming in one operation, TF 201 Thomsit Floor membrane for covering a bad floor without dismantling it, and Thomsit RS Fix for removing unevenness and differences in height.
