13 minute read
Security Settings


About the Security System
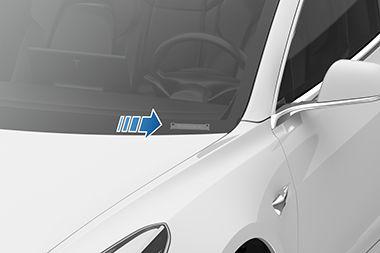
If Model 3 does not detect an authenticated phone, key fob, or key card and a locked door or trunk is opened, an alarm sounds and the headlights and turn signals flash. To deactivate the alarm, press any button on the mobile app or tap your key card or key fob against the card reader located just below the Autopilot camera on the driver's side door pillar.
Advertisement
To manually enable or disable the alarm system, touch Controls > Safety & Security > Security Alarm. When enabled, Model 3 activates its alarm one minute after you exit, the doors lock, and a recognized key is no longer detected.
A battery-backed siren sounds in situations where a locked door or trunk is opened and Model 3 does not detect a key nearby (if equipped). If you also want this siren to sound in situations where Model 3 detects motion inside the cabin, or is moved or tilted (for example, with a tow truck or jack), turn on the Tilt/ Intrusion setting (touch Controls > Safety & Security > Tilt/Intrusion) (if equipped).
NOTE: If you plan to leave something that moves inside your locked Model 3, remember to turn off Tilt/Intrusion. If this setting is on, any motion detected inside Model 3 activates the intrusion alarm. NOTE: If Model 3 is in Sentry Mode (see Sentry Mode on page 149), you must disable Sentry Mode before you can disable the Security alarm or the Tilt/Intrusion alarm. NOTE: The Security Alarm must be on to enable Tilt/ Intrusion. NOTE: The Intrusion Sensor automatically disables in situations where the climate control system is operating when you have left your vehicle (see Keep Climate On, Dog Mode, and Camp Mode on page 134). To override, you can manually turn the Intrusion Sensor on again after choosing Keep Climate On, Dog, or Camp Mode (touch Controls > Safety & Security > Tilt/Intrusion).
PIN to Drive
To increase security, you can prevent Model 3 from being driven until a 4-digit PIN (Personal Identification Number) is entered. To enable this setting, touch Controls > Safety & Security > PIN to Drive and follow the on-screen prompts to create a driving PIN.
NOTE: When enabled, in addition to entering the 4-digit driving PIN to drive, you must also use it to enter Valet mode for the first time and create the 4-digit valet PIN that you can use to enter and exit Valet mode. When in Valet mode, Model 3 can be driven without the need for the valet to enter a driving PIN. In addition, the PIN to Drive setting is disabled whenever Valet mode is active. If you forget your driving PIN, or to disable PIN to Drive, return to this setting, touch the link to enter your Tesla login credentials, then follow the on-screen prompts.
NOTE: In the unlikely event that your touchscreen is unresponsive, you may be unable to enter the PIN. In this case, first try to restart the touchscreen (see Restarting the Touchscreen on page 51). If the touchscreen is still unresponsive, you can still bypass PIN to Drive by turning on Keyless Driving in the Tesla mobile app.
Glovebox PIN
For additional security, you can protect the contents in your glovebox with a 4-digit PIN. To enable this setting, touch Controls > Safety & Security > Glovebox PIN and follow the on-screen prompts. When enabled, you are prompted to enter the PIN to open the glovebox. To disable this setting, select the toggle to disable and then enter the PIN.
If you forget your glovebox PIN, reset it by entering your Tesla login credentials, then follow the on-screen prompts.
NOTE: When you open the glovebox with both Glovebox PIN and Valet mode enabled, you are prompted for the glovebox PIN and taken out of Valet mode after the glovebox opens.
Sentry Mode
NOTE: Depending on market region, vehicle configuration, options purchased, and software version, your vehicle may not be equipped with Sentry Mode, or the feature may not operate exactly as described.
In Sentry Mode, cameras and sensors remain powered on and ready to record suspicious activity whenever Model 3 is locked and in Park.
To turn Sentry Mode on or off, touch the Sentry Mode icon at the top of your touchscreen. Alternatively, you can use voice commands, the mobile app, or you can touch Controls > Safety & Security > Sentry Mode. To activate Sentry Mode using voice commands, say "Keep Tesla safe", "Keep my car safe", "Sentry on", or "Enable Sentry" (for details using voice commands, see Using Voice Commands on page 148).
NOTE: Sentry Mode requires the Battery to be at least 20% charged. If the Battery falls below 20%, Sentry Mode turns off and the mobile app sends you a notification. NOTE: Power consumption may increase when Sentry Mode is active. NOTE: Software updates cannot be installed when Sentry Mode is activated.
CAUTION: Do not rely on Sentry Mode to protect Model 3 from all possible security threats. While it may help deter some threats, no security system can prevent all attacks. CAUTION: Sentry Mode may not trigger the security alarm in all situations involving damage to the vehicle. The security alarm depends upon multiple factors to be triggered and may not detect all impacts to the vehicle or may not trigger the alarm in all cases.
Standby, Alert, and Alarm States
When in Sentry Mode, Model 3 may go through three states depending on its surroundings—Standby, Alert, and Alarm. For vehicles manufactured after approximately April 2018, Sentry Mode events can be saved to a properly configured USB flash drive inserted into one of the USB ports. For increased secruity and minimal power consumption, Model 3 is equipped with a pre-configured flash drive in the rear of the glove box that is ready to be used by Sentry Mode (see USB Ports on page 19). For details on how to configure a flash drive, see USB Flash Drive Requirements for Videos and Recording on page 151. NOTE: Sentry Mode footage is viewable when the vehicle is in Park with the Dashcam Viewer, see Retrieving Footage on page 150.
• Standby: Your vehicle automatically enters the
Standby state when you activate Sentry Mode. In the
Standby state, the cameras constantly monitor the area surrounding Model 3 for possible security threats. • Alert : If Sentry Mode detects a threat, such as someone leaning on, or very close to, Model 3, Sentry
Mode switches to the Alert state. In the Alert state,
Sentry Mode: ◦ turns the headlights briefly on and back off again. ◦ displays a message on the touchscreen indicating that cameras are recording the event. ◦ saves the most recent ten minutes of footage prior of the triggered event to the USB drive (if installed and available).
• Alarm: For major threats, Sentry Mode triggers the
Alarm state. In the Alarm state, Sentry Mode: ◦ activates the security alarm and the audio system generates a loud and unexpected sound. ◦ sends an alert to the mobile app on phones that are paired to Model 3 to inform you that the alarm state is triggered. ◦ returns to the Standby state after 30 seconds. ◦ saves the most recent ten minutes of footage prior to the triggered event to the USB drive (if installed and available). ◦ for vehicles manufactured after approximately
April 2018, saves up to two minutes of event footage to the vehicle's internal storage for safekeeping which can be saved manually to the
USB drive (if installed and available) with the
DashCam Viewer.
NOTE: New Alarm state footage writes over older recordings when the internal storage reaches its limit.
Location-Based Settings
You can customize Sentry Mode to automatically activate at specific locations where you park Model 3:
• Exclude Home: When on, Sentry Mode does not automatically activate at the location you set as
Home in your Favorites list (see Recent, Favorite,
Home and Work Destinations on page 140), but activates at any other parking location.
NOTE: To set up your Home location, touch Navigate and hold down Home, then enter your address. Touch
Save as Home.
• Exclude Work: When on, Sentry Mode does not automatically activate at the location you set as Work in your Favorites list, but activates at any other parking location. Set your Work location the same way you set up your Home location, as previously described. • Exclude Favorites: When on, Sentry Mode does not automatically activate at any location in your
Favorites list, but activates at any other parking location.
To recognize a location listed as Home, Work, or a Favorite, Sentry Mode requires that Model 3 is parked within 10 meters of the location listed as a Home, Work, or Favorite.
NOTE: Manually enabling or disabling Sentry Mode using the icon on the touchscreen or controls in the mobile app overrides your home, work, and favorite exclusion preferences until the next time you drive your vehicle.
Retrieving Footage
If equipped, you can review Dashcam and Sentry Mode video recordings on your vehicle's touchscreen when Model 3 is in Park. Touch the Dashcam icon on the touchscreen's status bar and select Launch Viewer. Each video, organized by location and timestamp, provides a thumbnail of all video clips. For additional filtering, touch the Dashcam or Sentry tabs. Touch a thumbnail to view the corresponding video footage from each camera. Pause, rewind, fast forward, and delete video footage as needed.
You can retrieve video footage from the USB flash drive by removing the flash drive from the USB port and using a personal computer or other device to access the files. Navigate to the TeslaCam folder.
The TeslaCam folder contains three sub-folders:
• Recent Clips: The footage in Recent Clips continuously loops in 60-minute cycles whenever the cameras are activated. Therefore, footage is overwritten every hour unless you save it. When an event is recorded, one video is recorded for each of the front, rear, left, and right cameras. • Saved Clips: Contains all recordings that you have manually saved using Dashcam. • Sentry Clips: Contains the last 10 minutes of footage from all Sentry Mode events that have triggered an
Alert or Alarm state. The footage from each event is labelled with a unique timestamp.
NOTE: As the USB flash drive runs out of available space, the oldest footage in Sentry Clips is deleted to make room for new footage. Once deleted, you are unable to retrieve them. When the flash drive is full,
Sentry Mode and Dashcam can no longer save video footage. To prevent the flash drive from getting full, you must regularly move saved videos to another device, and delete them from the flash drive.
NOTE: Dashcam recording is paused when the viewer is open. NOTE: You are responsible for complying with all local laws, regulations, and property restrictions regarding video recordings. NOTE: The cameras do not record audio.
NOTE: The USB-A port located at the rear of the glovebox is equipped with a pre-formatted flash drive, ready to save videos when using features such as Sentry Mode and Dashcam.
In some market regions you can purchase recommended USB drives on http://www.tesla.com to store video from your vehicle's cameras.
Minimum USB flash drive requirements:
• A sustained write speed of at least 4 MB/s. A sustained write speed is different from the peak write speed. • USB 2.0 compatible. If using a USB 3.0 flash drive, it must be able to support USB 2.0. • 64 GB of storage or more. Use a flash drive with as much available storage as possible. Video footage can occupy a large amount of space. • Properly formatted (described below). • A dedicated flash drive exclusively for saving Sentry
Mode recordings.
Although not a comprehensive list, Tesla has tested the following flash drives and confirmed that they meet the requirements for using Dashcam and Sentry Mode:
• Samsung MUF-64AB/AM FIT Plus – 200MB/s USB 3.1
Flash Drive • Samsung MUF-64AB/AM BAR Plus • SanDisk Ultra Fit USB 3.1 Flash Drive • SanDisk MobileMate USB 3.0 microSD Card Reader (also recommended: Samsung PRO Endurance 100MB/s (U1) MicroSDXC Memory Card)
Formatting a USB Flash Drive
To correctly save and retrieve video footage, Model 3 requires the USB flash drive to be formatted as exFAT, FAT 32 (for Windows), MS-DOS FAT (for Mac), ext3, or ext4. NTFS is currently not supported. In addition, the USB flash drive must contain a base-level folder called “TeslaCam” (without quotation marks).
You can format a USB flash drive from inside Model 3 or from a personal computer.
To format a flash drive from inside Model 3, simply insert a USB flash drive into a front USB port, and touch Safety & Security > Format USB Device. Doing so formats the drive as exFAT and automatically creates a TeslaCam folder. The USB flash drive is now ready to record and save video footage. CAUTION: The Format USB Device button is available whenever a USB Flash Drive (with one or fewer partitions) is plugged into a front USB port. Choosing Format USB Device formats the drive, erasing all existing content. If you have content on a drive that you want to keep, you must move it to a different device before using this feature.
To format a USB flash drive from a personal computer, follow the steps below for your operating system.
For MacOS:
1. Insert the USB flash drive into your personal computer. 2. Navigate to Utilities > Disk Utility (or conduct a
Spotlight Search). 3. Select your flash drive in the left menu. 4. Navigate to Erase in the top menu ribbon. 5. In the pop-up menu, select the correct format (MS-
DOS FAT) and click Erase.
NOTE: Selecting Erase removes all existing content from your flash drive. If you have content that you want to keep, you must move it to a different device before erasing.
6. Once the flash drive is successfully erased, navigate to Finder and select your USB flash drive from the left menu. The flash drive should not contain any files. 7. Right-click in the empty space of the flash drive and select New Folder. A folder appears in your flash drive space. 8. Right-click on the folder, select Rename, and name the folder to “TeslaCam” (without quotation marks).
Click "Save". This folder contains all recent and saved clips from Sentry Mode and Dashcam. 9. Properly eject the USB flash drive.
For Windows:
1. Insert the USB flash drive into your personal computer. 2. Navigate to File Explorer. 3. Right-click on your USB flash drive and select "Format...". 4. In the pop-up menu, under the File System section, select a support format (such as exFAT, FAT 32, etc.).
NOTE: You can also name your USB flash drive (under Volume Label).
5. Check the Quick format box and click Start. 6. Go back to File Explorer, click on your flash drive, and right-click to create a folder, or select New Folder in the top menu. 7. Name the folder “TeslaCam” (without quotation marks) and click Save. This folder contains all recent and saved clips from Sentry Mode and Dashcam. 8. Properly eject the USB flash drive.
Once you have formatted the USB flash drive and created the TeslaCam folder, insert it into a USB port in Model 3. Do not use the rear USB ports—they are for charging only. It may take Model 3 up to 15 seconds to recognize the flash drive. When recognized, icons for Dashcam and Sentry Mode appear at the top of your touchscreen (note that you may need to enable Sentry Mode by touching Controls > Safety & Security > Sentry Mode). Model 3 is ready to record video.
NOTE: For saving Sentry Mode and Dashcam video footage, Tesla recommends using the USB port located in the glove box. Doing so increases security and minimizes power consumption.