


Readytogetstartedonyourproject? Soarewe! JennyMichels NMLS#418444 JacobTesch NMLS#2161915 BobSouthworth NMLS#417545 GetyourHELOCatHomeTownBanktoday! CallToday! (507)934-2823 VisitUs! 102SThirdStreet StPeter,MN56082 oject? 2024 Southern Minnesota's go to section for Spring Home & Garden tips and information. HOME Spring GARDEN & localmatters

(Submitted photo)
Not as much to do as you’d think during warm winter
By MARY LAHR SCHIER northerngardener.com
With the winter of 2023-24 on track to be one of the warmest, if not the warmest winter ever recorded in Minnesota, what’s a gardener to do?
The short, frustrating answer is: not much.
Yes, you can add more mulch to plants that seem to be greening up too fast. This will

protect them during potential cold snaps in February, March or April. You can also take comfort in the knowledge that soil and air temperatures are not the only factors driving when plants break dormancy in spring. The length of the day is what tells many plants that it is spring, according to the University of Minnesota Extension service. This is particularly important for deciduous trees and shrubs.
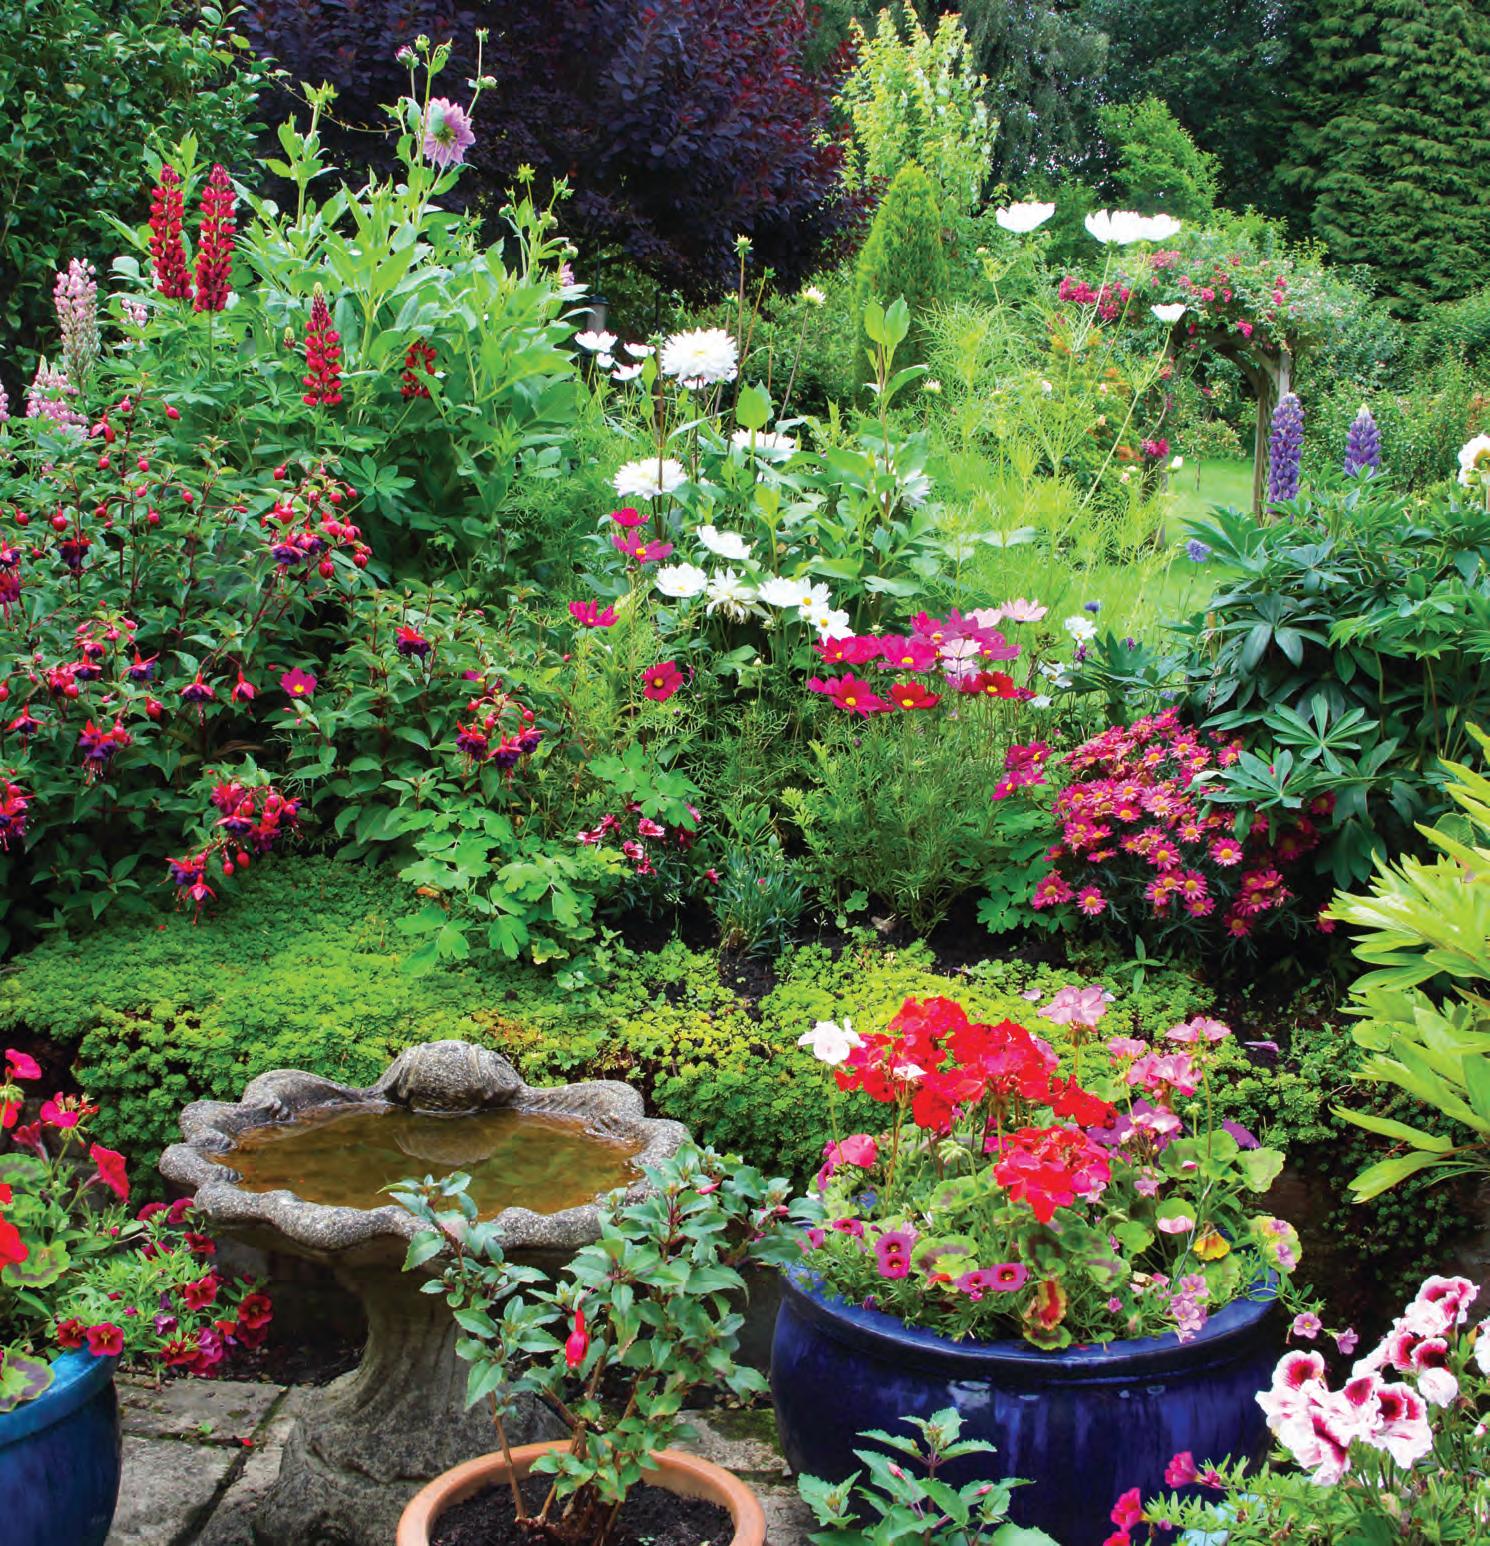
Signs of spring?
Signs of the extra warm winter are everywhere. Bulbs pushing up foliage.

Tree buds are getting plumper. Some rhododendrons are popping a bloom and opportunistic weeds, such as garlic mustard, are spreading. Most of these can just be admired and ignored unless you want to put down that extra mulch or pull those garlic mustard plants.
Winter sowing
If you are a winter sower, Northern Gardener contributor and winter sowing pro Michelle Mero Riedel recommends moving your mini greenhouses into the shade during
CONTINUED NEXT PAGE


SoMinn SPRING HOME & GARDEN | Wednesday, March 13, 2024 | PAGE 2 DarianHunt InsuranceCoverage toprotectyourhomeandsomuchmore! RandyHunt 22SouthLexington•LeCenter,MN|507-357-2221 103OakAveSE•Montgomery,MN|507-364-5511 701AshSt.NE•LonsdaleMN|507-744-4090 www.houseofinsuranceagency.com 1082SE38thSt.,Owatonna 507-451-0987 www.getwencl.com •PlumbingNewConstruction&Remodels •WaterHeaters&WaterSofteners •HotWaterHeat&Boilers•DrainCleaning&Repairs •Furnaces&AirConditioning•MiniSplitsandDuctlessSystems Licensed•Bonded•Insured Installation,Service&Repair RESIDENTIAL&COMMERCIAL
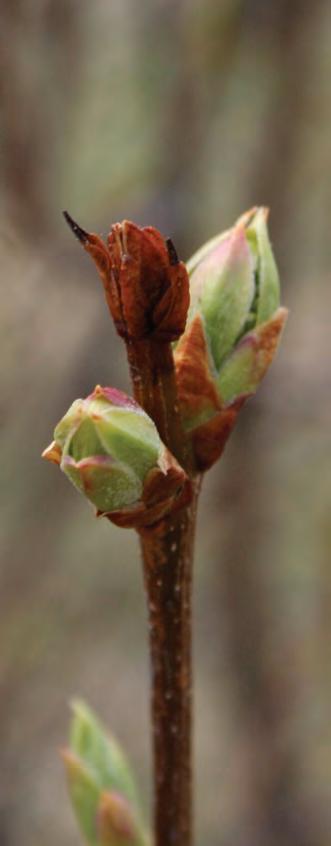
Big, juicy tree buds are bursting out across Minnesota during this unseasonably warm February. (Photo by Mary Lahr Schier)
these warm stretches to prevent too-early germination. You could also put wintersowing containers on the north side of the house to delay germination. If seeds do germinate in the containers, you will need to water them. If you have not set out containers yet, Michelle recommends holding o until the weather turns cooler or even waiting until March.
Tapping maples
Several gardeners we know are tapping their maple trees to make syrup already. Northern Gardener contributor Michelle Bruhn began tapping her maple trees by Feb. 1, because the temperatures had been in that perfect maple-tapping zone. She’s hopeful there will be a longer than average maple season, but says that tapping this early is new territory. Most of the time, trees are tapped in March.
Pruning
Perhaps the biggest concern for gardeners with a warm winter is that fruit trees will bloom and then have their blossoms nipped in a cold spell. is happened in 2012. While gardeners can’t control that, the warm winter and lack of snow present the perfect opportunity to prune fruit trees, hydrangeas and other plants that are best pruned in the dormant season.
Seed starting
Do you like pansies in spring? Why not start some seeds now indoors and see how early you can get them out on your porch.
One of our favorite Instagrammers tipped us o to this idea. You may be able to put them out in early April.
What’s going on with the weather?
Two climate phenomena are colliding in this warm winter. e immediate issue is a strong El Nino weather pattern. Caused by warmer than normal air coming o the surface of the Paci c Ocean, El Nino a ects weather patterns across the North American continent. It usually produces warmer and drier winters in the North and colder, wetter and stormier winters in the South. Most of Minnesota’s 10 warmest winters occurred during El Nino incidents, including the 1997-98 winter which rivals 1877-78 for the warmest.
El Nino is taking place on top of ongoing climate change. According to the state Department of Natural Resources, “In Minnesota, a typical winter day is now several degrees warmer than in the middle of the 20th century, and average low temperatures during January, our coldest month, have increased by over 10 degrees F in some areas.” ese higher lows have been most noticeable in northern parts of the state.
Will this winter continue its warm trend?
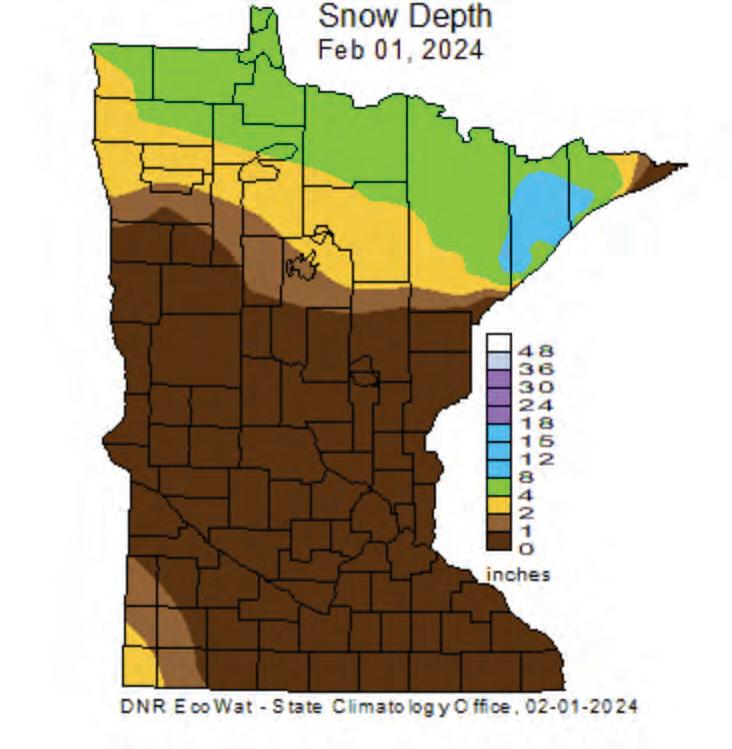
Most El Ninos last up to nine months— but winter can return. e last El Nino in Minnesota was 2018-19. is was a weak El Nino winter and a er a warm start to the season, weather turned nasty producing a bomb cyclone blizzard in late February and 8-plus inches of snow on April 10. ese maps show every El Nino winter since 1950. While the most recent El Ninos have been warm in the North, some in the past have produced cold winters.


How this will a ect late winter and spring is uncertain. e long-range forecast calls for a return to more seasonable temperatures in the second half of February.
Observe the garden
is warm winter presents a chance to
see how resilient your garden is. Which plants won’t survive and which seem to keep on going no matter what the weather? Are there warmer zone plants you want to add or is now the time to plant more native shrubs and perennials? ere’s a lot of “winter” ahead to observe and ponder.


SoMinn SPRING HOME & GARDEN | Wednesday, March 13, 2024 | Page 3 Servingallof Southern Minnesota Weprideourselvesonhavingthe bestvalueinthemidwest, withaqualitythatisguaranteed toshinethrough. endreswc.com 507-WE-CLEAN•507-932-5326 Bring youroldpaintandhousehold chemicalstothe BlueEarthCountyHHW facility, located at 651Summit Ave.inMankato. This facilityisopento residentsof LeSueur & NicolletCounties. Tuesdays12noon-6p.m. · Wednesdays& Thursdays12noonto4p.m. 2ndSaturdays8a.m.-12:30p.m. OpenApril2ndthroughOctober31st WeabsolutelyCANNOTaccept: Businessoragriculturalchemicalsorwaste,motoroilsoroilfilters,explosives,orammunition. Paints & Stains GardenChemicals RechargeableBatteries Solvents Cleaners OldGasoline Adhesives Aerosols MercuryContainingDevices (Thermometers,etc.) FluorescentBulbs (Fromhouseholdsonly) Formoreinformation,contacttheTri-County SolidWasteOfficeat507-381-9196 www.tricountyrecycling.org al.christensen@co.nicollet.mn.us
CONTINUED FROM PREVIOUS PAGE
(Map credit: Minnesota DNR)
 By ERIC JOHNSON northerngardener.com
Seed bombs is a bit of a buzzword right now in the gardening world. Also known as seed balls or flower bombs, the idea is golden.
Almost anyone can make these little balls of seeds, dirt and clay and toss them — possibly renegade style — into nooks, crannies and barren areas in need of flowers.
Skeptics question how well they work, but many more consider them a fun, timetested practice. Some say they harken back
to the ancient Egyptians, who used them to plant the banks of the Nile. Ancient Japanese gardeners coined them Tsuchi Dango (earth dumpling) and they were reintroduced as a practice in the early 20th century. They were a part of the community gardening movement in New York City in the 1970s.
Regardless of their effectiveness, we gardeners have been trying for a long time. Sometimes it’s good to remember, we are only responsible for the effort; Mother Nature will take care of the rest. Maybe their best feature is the natural gardening optimism they bring. And the connection to nature and general cool factor makes

Learn about spring seed bombs
them worth trying. They are also a great way to introduce fledgling gardeners to the concept of growing things.
Coneflowers are easy to start from seed and
CONTINUED NEXT PAGE
Coneflowers are easy to start from seed and bring bright blooms to a sunny garden. (Photo by Eric Johnson)


SoMinn SPRING HOME & GARDEN | Wednesday, March 13, 2024 | PAGE 4 Dealer&Se507-931-9669Dealer&Service 507-931-9669

CONTINUED FROM PREVIOUS PAGE
bring bright blooms to a sunny garden.
The process is simple. There are numerous “recipes” out there, but they all include three general ingredients: the seeds, dirt or compost and a binding agent, such as flour, clay powder or air-dry clay (my choice).
How to make your own seed bomb
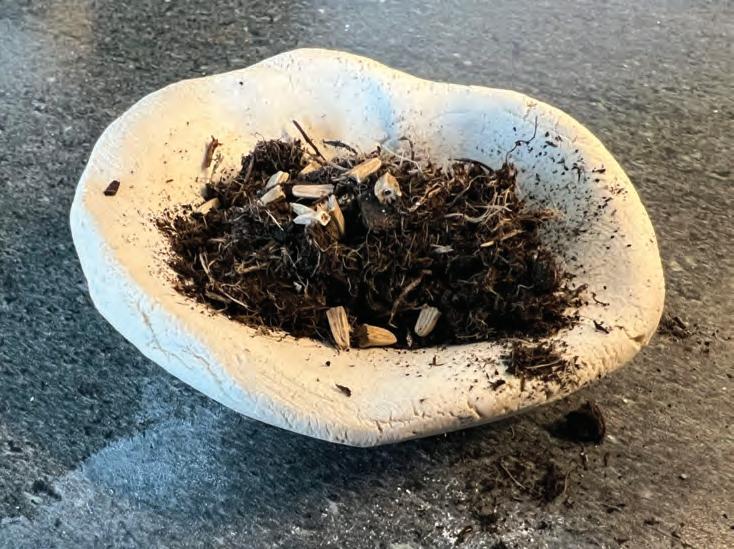
Scoop a ball of air-dry clay about the size of a golf ball from the container and flatten to a disc that is about a quarter-inch thick. You may need to work it with your hands to soften.
Take about a tablespoon of dirt and place on the disc.
Add a sprinkling of seeds (5-6). I used purple coneflower.
Wrap the clay around the dirt and gently form it into a ball, being mindful not to overwork it and force the dirt out.
Allow the clay to dry for a few days.
Toss the seeds onto anywhere in need of some native flora. The air-dry clay will disintegrate under the elements and the rest is garden magic.
Before you go bombing your neighborhood with seeds, remember to toss these balls only on your own property. You
Air-dry clay is readily available wherever kids’ craft supplies are sold. Any type of potting soil or compost (purchased or your own) will work. As far as seeds go, our friends at Prairie Moon Nursery have curated a list of native plants that germinate with no pre-treatment (so you can make your seed balls without overwintering) and may work better where they need to compete with weeds. You can also use annual flower seeds.
might ask, who will mind native species popping up in public places? You just never know—stick to areas you have permission to bomb.
The bombs will need to compete with weeds and other plants when they land, and also will rely on rain, but the science is pretty simple: seeds + soil + water equals plants. Regardless of what grows, fun and satisfaction are guaranteed.


SoMinn SPRING HOME & GARDEN | Wednesday, March 13, 2024 | Page 5 AsphaltPaving/Concrete •Residential •Commercial •Industrial •Municipal Ifyouneedconcretedrivewayaprons,curbsorsidewalksinaddition toyourasphaltdrivewayorparkinglotwe’vegotyoucovered. Weareafullserviceconcreteandasphaltpavingcompany. Before After 507.931.6115l507.345.1449 info@nielsenblacktopping.comlnielsenblacktopping.com HOME GARDEN REGIONAL MANAGING EDITOR: PHILIP WEYHE SALES DIRECTOR: TOM KELLING ADVERTISING: DEANNA BOLAND, AMBER CASTERTON, KATHLEEN DAVIES, CRYSTAL HOBART, TIM MART, TONI SCHMIDT, VICTORIA RUD
& LAYOUT: KATE TOWNSEND-NOET SoMinn Home & Garden is distributed to subscribers and readers of the Owatonna People’s Press, Faribault Daily News, Northfield News, Kenyon Leader, Waseca County News, St. Peter Herald, Le Sueur County News ©2024 This publication is copyrighted by the APG Southern Minnesota and no content can be reproduced without permission.
DESIGN
Seed bombs. (Photo by Eric Johnson)
Clay disc with soil and seeds. (Photo by Eric Johnson)
Quick pruning tips
By DANIEL JOHNSON northerngardener.com
Many of the plants in your garden will never need pruning. An entire summer of vegetable gardening can go by without any thought of pruning, save the occasional removal of diseased leaves.
But the woody perennials that make up so much of your property’s décor, all of your ornamental shrubs and trees, do need pruning to help shape them into ideal specimens and keep them healthy. Proper pruning helps trees and shrubs grow strong and helps minimize disease by allowing light and air to easily reach the interior. While pruning can a complex subject, here are a few points to consider as you get started.
1. Prune for problems anytime
First, dead branches on trees or shrubs
can—and should—be pruned at any time of the year. It’s not doing the appearance of your landscaping any good to have broken and dead branches around, and they can pose a safety hazard. So don’t wait for a specific time to trim these, just do
it as needed. The same goes for diseased branches—you should prune the minute it becomes an issue so that the plant doesn’t keep putting energy into a diseased section and can use that energy for productivity elsewhere. Pruning diseased sections also
help keep the disease from spreading to neighboring trees and shrubs.
CONTINUED NEXT PAGE


SoMinn SPRING HOME & GARDEN | Wednesday, March 13, 2024 | PAGE 6 685-4155 NordmeierBros. Since1926 Morristown Sales, Service &Parts forLawn,Garden & SnowEquipment www.nordmeierbros.com Dealer www.premierbanks.com NMLS#403214 BankLocal.BankPremier. Business BankingCommercialLendingMortgagesPersonal Banking
(Submitted photo)
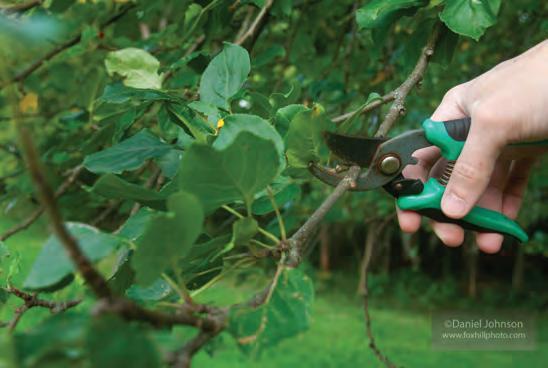
Using bypass pruning shears to make a heading cut back to a lateral bud on an apple tree branch. (Photo by Daniel Johnson)
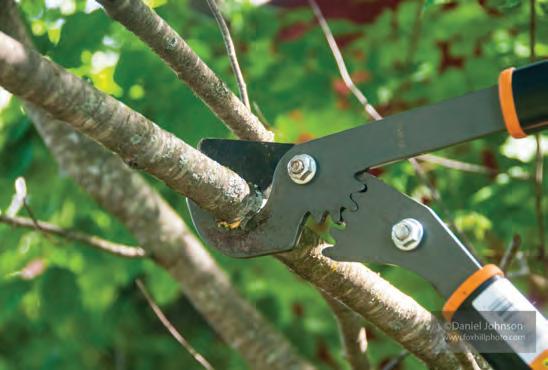
Pruning a cherry tree branch with bypass pruning loppers. (Photo by Daniel Johnson)
CONTINUED FROM PREVIOUS PAGE
2. Prune for maintenance at the right time
When pruning live branches, the time of year becomes important. Some plants prepare the year’s blossom on old growth, some on new, and you don’t want your pruning job to diminish the blossoming. Shrubs and trees that flower early in the spring should generally be pruned once the blossom show is completed. Likewise, shrubs and trees that flower later in the year should be pruned late the next winter. But that’s broad advice—the ideal month for pruning varies by species, so definitely do your research for your specific plant before getting out the shears.
If blossoms aren’t the main goal—say you’re pruning a shrub that is grown for ornamental foliage—then late winter or very early spring prior to growth is frequently a good time for pruning. Pruning at this time helps ensure that the plant will be able to immediately heal over the cut and seal the wound from disease as soon as the growing season starts. But again, research your individual situation first.
3. Prune with the right tools
Pruning shears. You’ll want a good pair of hand pruners—specifically, bypass shears. These will be sufficient to handle
a good deal of the work you need to do. It goes without saying that your pruners should be sharp—but we’ll say it anyway because it’s easy to think your shears are sharp when they’re actually not, and you can end up working harder and straining your hands a lot more than necessary.
Lopping shears. This tool has essentially the same blade style as your bypass pruners, but it’s larger, with long handles that provide you the leverage needed to cut through thick branches. Some loppers can handle branches 2 or 3 inches in diameter.
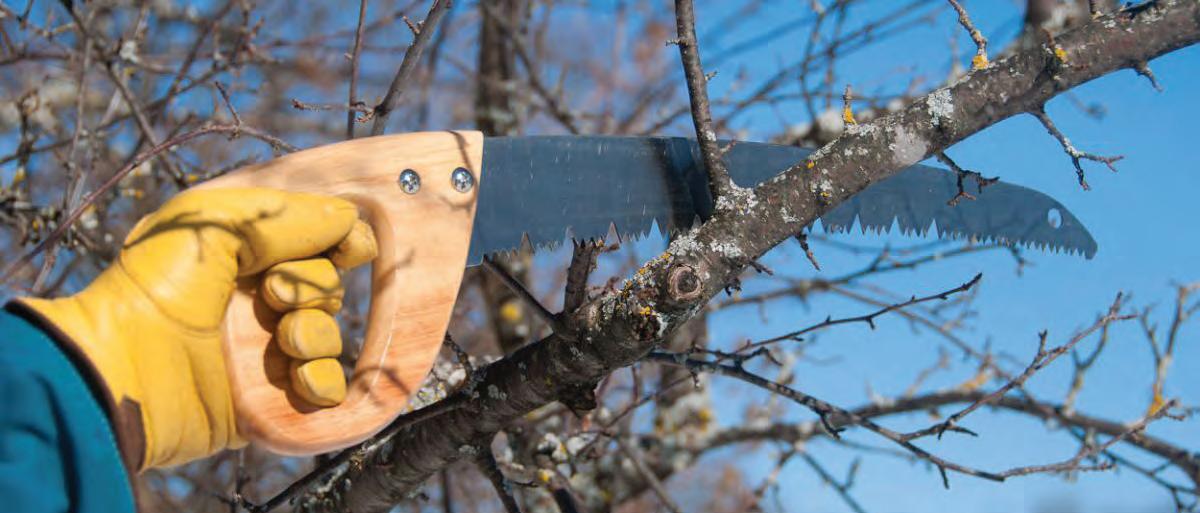
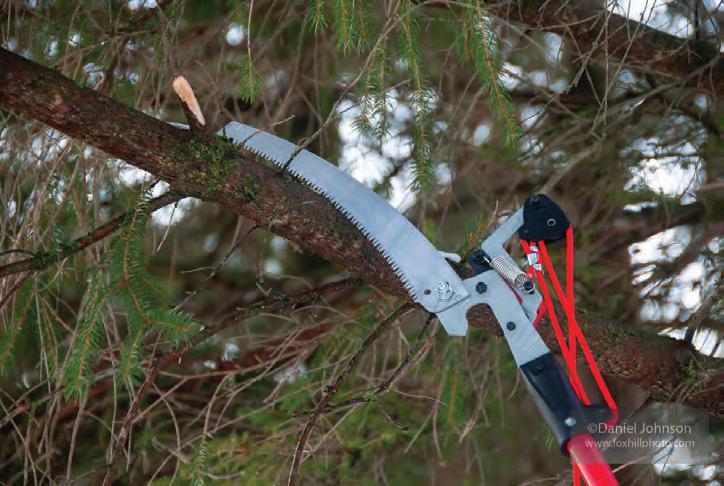
Pruning saw. For any branch thicker than about 2 inches, you’ll need a saw; dedicated pruning saws are often curved to help you maintain contact with the branch even if you’re reaching above your head.
Minimize disease. If you’re going to be pruning live branches, it doesn’t hurt to clean your cutting tools prior to use. A 70% alcohol solution will help prevent bacteria and disease from entering your plant’s living tissue.
4. Prune the right way
Choosing the correct branches to prune takes practice! Young trees and shrubs should be pruned for an ideal shape—something that strengthens the plant’s structure, permits good airflow, but prevents the plant from “looking” like it was pruned. It can help to remove:
- Suckers growing up from the base
Power Washing 101
Build-up throughout the winter can leave our windows, doors and home exteriors covered in unsightly muck.
Power washing can leave it all looking as good as new. But don’t stop there: This powerful tool is also great at bringing a host of other things to life in your home and garden, including driveways, grills, outdoor furniture, decks, fences and walkways. Just keep important safety guidelines in mind:
How they work
Power washers may be powered by electricity or gas. Gas-powered units are usually more powerful than the electric versions. They typically deliver up to 3,000 pounds of pressure per square inch, which may be too much for certain materials. That’s why it’s important to match the power of your equipment with the job: Vinyl siding can withstand that level of pressure, but aluminum, soft-grain woods
and stucco are only rated to 1,500 PSI.
Preparing to work
Cover items like air conditioner compressors and light fixtures around the home’s exterior. Protect nearby plants, too. Note the location of outlets and windows, covering sockets with tape and then avoiding those areas. Put on safety gear before engaging the power washer, including work gloves and safety goggles. Pre-wash the exterior with a brush or spray in order to remove loose debris, dirt and mildew. Keep the wand at least six feet away from electric wiring, and stay away from cracks and holes in the exterior.
Getting underway
Mix water and detergent, following manufacturer directions, then attach the power washer to a garden hose. Next, attach the preferred wand or extension to the sprayer. Test the power washer from a distance of three feet back, making slight adjustments

- Branches that grow back in towards the trunk
- Vertically growing branches
Typically, you’ll want to prune a stem or branch close to its collar, where it attaches to the trunk or larger branch. For heavy branches, make your first cut about 6 inches away from the trunk in case any peeling occurs when it falls. Then, you can then remove the remaining stub closer in.
Pruning is a big job, and can be challenging if you’re new to it. If you’re unsure, consult a video or in-depth guide, or perhaps a more advanced gardener can show you hands-on how best to prune your property’s landscape. With time you can keep your trees and shrubs healthy and attractive.

until you can clean without creating surface damage. Once you’ve completed the job, turn off the washer and disconnect it from your garden hose. Rinse off any excess soap before storing.
Renting or buying?
Power washing equipment can be rented
through many home improvement and hardware stores. That’s a smart choice when doing annual cleaning of a home exterior, deck or driveway, since you’re saving the cost of buying an expensive piece of equipment that you won’t otherwise use. It may make sense to purchase if you have more regular jobs.

SoMinn SPRING HOME & GARDEN | Wednesday, March 13, 2024 | Page 7 FullDraweleCtriC, in C ForallElectricalConstruction Owner:ChrisGappa 507-317-7289 •gappachris@gmail.com CheckusoutonFacebook@FullDrawElectric,Inc.
Using a pruning saw. (Photo by Daniel Johnson)
ADOBE STOCK
©
Is Your HVAC Ready?
Your air conditioning unit has been sitting unused for months, while winter held sway.
Spring’s return is the perfect time to pop the hood and make sure your HVAC is ready to roll for summer. Checks will need to be made inside and out. You don’t want to find out that it’s not working when you need air conditioning the most.
Spring checklist
Check outdoor components, cleaning out any branches and leaves that have accumulated over the winter period. Sometimes small creatures may have even made a home inside the unit, and they’ll need to be removed. Be careful when clearing the area so that critical metal pieces aren’t bent or broken. Corrosion is also a concern, particularly with older units or with homes in coastal or very humid areas. Inside, make sure all of your registers are opened and unobstructed. Examine the inside unit and duct work, keeping a sharp eye out for cracks or leaks. If you find anything concerning, call an HVAC technician to have a look before re-engaging the system.
Turning it on
After your unit has passed all its checks, turn down the thermostat and make sure air is arriving through every air duct and at the set temperature. If your HVAC struggles to reach the desired setting, it’s time to call an expert. The same is true for anyone who doesn’t feel confident in diagnosing some or all of these pre-summer diagnostic issues. Some companies offer contract service plans, making the whole process less stressful. They can also be more cost-effective, since potential problems will be identified before they become a bigger concern.
Duct system
Consider having your air ducts cleaned by a professional. Ducts that are free of dust and debris will move cool air around the house more freely, without spreading allergy-causing particulates like dust, mold, dander or fungi. Changing your air filters every month will also help achieve cleaner air while saving money. Dirty filters cause the system to become overworked, shortening your system’s lifespan.
It also increases your immediate costs in the form of higher utility bills. Check your owner’s manual or the instructions on the filter to find out more.


SoMinn SPRING HOME & GARDEN | Wednesday, March 13, 2024 | PAGE 8 Thereʼsneverbeenabettertimetoupgrade toCarriercomfort.Foralimited time,youcanclaimupto $2,100inCoolCashrebates onanewsystem*. Donʼtwait. CoolCash isonly availablefor alimited time. RESIDENTIAL•COMMERCIAL•INDUSTRIAL 408N.CedarAve.,Owatonna,MN 507-451-2051 EnjoyCoolCashRebatesupto$2,100on qualifiedCarrier® homecomfortsystems. YOUCREATE THECOMFY. WE’LL PROVIDE THE COOLING OWATONNA HEATING & COOLING,Inc. YOUR ONE STOP GUTTER SHOP SEAMLESSGUTTER •Residential5InchGutter •Commercial6InchGutter •ManyColors•LeafProtection JERRYROSS MANAGER 507-345-5050 or 844-408-5050 SERVINGSOUTHERNMN FOROVER20YEARS WWW.KOpiSCHKEGUTTER.COM
