4 minute read
Tacked up: Lunging equipment


TACKED UP
Lunging equipment
If done correctly, lunging can build muscle, suppleness, balance and trust. SUZY JARRATT explores the equipment and its uses.
Riding requires skill and patience – and so does lunging. It isn’t something you do just because you’re in a hurry or too tired to saddle up. Hanging on to a rope attached to a circling horse while you chat on your mobile is not what lunging is about.
Done correctly it can benefit your training program. It can help start a young horse, assist in retraining, provide exercise when riding isn’t an option and build trust between handler and horse. Good lunging practices can also build muscle, balance, suppleness and rhythm. And if you have any doubts about how to go about it, seek advice from an instructor.
Some basic items are required when lunging, and also on the market are several styles of equipment to help solve specific problems: front of the noseband for the lunge line to clip onto, so you don’t have to unfasten and reattach the line when changing direction.
Lunging from a bridle offers a more direct contact and attaching the line directly to the bit gives you greater control. It’s also a good way to help generate lateral neck bend. But this can give conflicting messages so try both set-ups to see what works best.
LUNGE LINE: Made of 100 per cent cotton webbing, nylon or a blend of the two fibres, with a swivel clip at the end. Cotton is the friendliest material for novices as it is the least likely to kink, twist or slip. And never wrap the line around your hand!
WHIP: Used primarily to move the horse forward or outward on the circle. Needs to be long enough to be effective, but also well weighted so it’s easy for you to carry. If possible test the feel of a few before you buy. Some are designed to collapse for easy storage or travel.

Aintree Chambon from Zilco
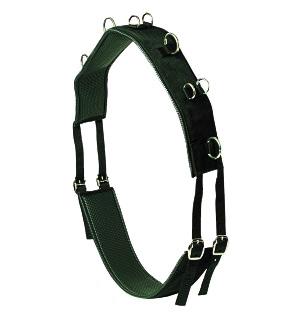
ROLLER: Also known as a training surcingle, this is a wide band of leather or webbing, fitted like a girth and equipped with D-rings placed at various intervals on either side to attach side reins or long lines.
SIDE REINS: These run from the surcingle to the rings of the bit. Many people favour a thick snaffle with fixed rings for stability during lunging, especially when working with young horses. Available in leather or webbing, some side reins have rubber ‘doughnuts’, others an elastic insert making them easily adjustable. They can help a horse learn contact with the bit, gain balance and suppleness or find self-carriage. However, used incorrectly, they can cause over-flexion. A horse has to become accustomed to the feel of them so initially, adjust them so they are loose and over the coming weeks shorten them to where they need to be. Any doubts ask your instructor.

Horze Lunge Cavesson from Ashbree Saddlery Webbing Side Reins with Rokko Fittings from Zilco

CHAMBON: This comprises a cord which clips to each bit ring and then passes upwards and through a loop on each side of a poll strap. The cords drop downwards and are attached to a single strap that passes between the forelegs and loops onto the girth or roller.
Its aim is to encourage a longer, lower frame where the horse will learn to use back muscles and engage their quarters. To achieve the best results the horse must go forward into the contact. Introduce slowly and with care.
PESSOA: This can help create greater engagement and connection. Designed by Brazilian Olympic showjumper Nelson Pessoa, this lunging system, which can be purchased in kit form from saddleries, is made up of ropes and pulleys which run along your horse’s sides, attaching to the bit, with an elastic tensioner positioned around their hindquarters. The tensioner and its supporting lines put gentle pressure on the quarters, encouraging your horse to step under their body with their hindlegs so they stretch and lift their back.
At first you might be overwhelmed when trying to correctly fit the ropes and pulleys, so seek assistance from an instructor experienced in what goes where and why, or have a look at one of the YouTube clips in which the fitting process is demonstrated.
Ask first
Before investing in any of the above, speak to your instructor to help you decide what might work best for your horse. Then try to borrow the gear from a friend to check its suitability before making a purchase. And for some general pointers: Prior to working on the lunge ensure the horse is wearing protective boots or leg wraps.
Always put a pad or numnah under the surcingle.
When lunging, you’re at close quarters to a horse who’s moving, potentially at some speed. Therefore, standard safety equipment is important – gloves, helmet and sturdy footwear.
Generally, the wider the circle the better it is for the horse as circling is stressful to tendons, ligaments and joints. The smaller or tighter the circle, the harder it is on their body.
For more about lunging you might like to look at the FEI’s article.