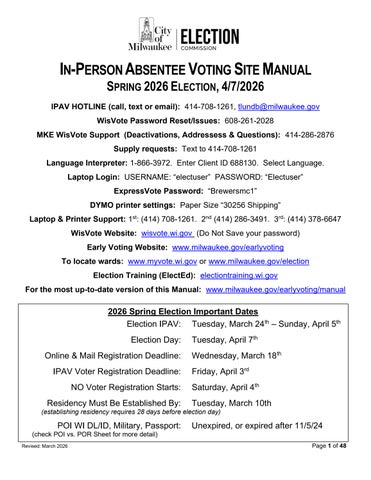
IN-PERSON ABSENTEE VOTING SITE MANUAL SPRING 2026 ELECTION, 4/7/2026 IPAV HOTLINE (call, text or email): 414-708-1261, tlundb@milwaukee.gov WisVote Password Reset/Issues: 608-261-2028 MKE WisVote Support (Deactivations, Addressess & Questions): 414-286-2876 Supply requests: Text to 414-708-1261 Language Interpreter: 1-866-3972. Enter Client ID 688130. Select Language. Laptop Login: USERNAME: “electuser” PASSWORD: “Electuser” ExpressVote Password: “Brewersmc1” DYMO printer settings: Paper Size “30256 Shipping” Laptop & Printer Support: 1st: (414) 708-1261. 2nd (414) 286-3491. 3rd: (414) 378-6647 WisVote Website: wisvote.wi.gov (Do Not Save your password) Early Voting Website: www.milwaukee.gov/earlyvoting To locate wards: www.myvote.wi.gov or www.milwaukee.gov/election Election Training (ElectEd): electiontraining.wi.gov For the most up-to-date version of this Manual: www.milwaukee.gov/earlyvoting/manual
2026 Spring Election Important Dates Election IPAV: Tuesday, March 24th – Sunday, April 5th Election Day: Online & Mail Registration Deadline: IPAV Voter Registration Deadline: NO Voter Registration Starts: Residency Must Be Established By:
Tuesday, April 7th Wednesday, March 18th Friday, April 3rd Saturday, April 4th Tuesday, March 10th
(establishing residency requires 28 days before election day)
POI WI DL/ID, Military, Passport:
Unexpired, or expired after 11/5/24
(check POI vs. POR Sheet for more detail) Revised: March 2026
Page 1 of 48
Table of Contents Initial Setup Instructions ........................................................................................................ 3 IPAV Supply List ......................................................................................................................................................... 3 IPAV Site ...................................................................................................................................................................... 3 Laptop .......................................................................................................................................................................... 3 Dymo Label Printer ..................................................................................................................................................... 4 ExpressVote Set Up .................................................................................................................................................... 4 Placing Signage at your IPAV Site ............................................................................................................................ 5 Daily Chain-of-Custody (CoC) & the EL-104 ............................................................................................................ 6
Providing Voter Accessibility and Assistance ..................................................................... 7 Greeter/Check-In | Duties & Instructions .............................................................................. 8 Check-In | Receiving Table Instructions ............................................................................. 11 Setting Up WisVote to Process Voters ................................................................................................................... 11 Creating an Absentee Application, Issuing a Ballot and Printing an Envelope Label ...................................... 12 Completing the Envelope and Issuing a Ballot ..................................................................................................... 14 Troubleshooting at Check-in: Voter Corrections .................................................................................................. 15 Troubleshooting at Check-in: Label Reprints........................................................................................................ 16 Troubleshooting at Check-in: Error! The voter has an existing Ballot on file ................................................... 17
The Voting Area: ExpressVotes ........................................................................................... 18 Preparing Voters to use an ExpressVote ............................................................................................................... 18
The Signature Table .............................................................................................................. 19 Signing and Witnessing of the Envelope ............................................................................................................... 19 Checking a Drop-Off Certificate Envelope for Compliance .................................................................................. 20 *IMPORTANT NOTICE* ............................................................................................................................................. 21 A Voter Returns a Ballot They Received Through the Mail with No Witness Signature ................................... 22 A Voter Returns a Ballot For Someone Else .......................................................................................................... 22 A Voter Needs Assistance Signing Their Name on the Certificate Envelope .................................................... 23
Registration ........................................................................................................................... 24 Curbside Voting Procedures ................................................................................................ 33 Curbside Troubleshooting – missing paper ballot for ward ................................................................................ 36
End of the Day Instructions .................................................................................................. 37 Collecting, Reviewing, and Securing IPAV Certificate Envelopes ...................................................................... 37 Closing and securing Express Vote Machines ...................................................................................................... 38 Turning off the Laptops ........................................................................................................................................... 38 Audit Supplies ........................................................................................................................................................... 38
Last Day of IPAV Instructions .............................................................................................. 39 Steps to Cancel Ballot and Deactivate Absentee Application ............................................................................. 43
Revised: March 2026
Page 2 of 48
Initial Setup Instructions IPAV Supply List Review your supply list when you first arrive for setup to ensure you have the items noted on the list. Below is a list of major items you should receive for your site. Please refer to the site supply list for a more detailed breakdown of items: 1. Document File Box – necessary guides, paperwork, forms, folders, and keys 2. Express Vote Machines & Tables, and Privacy Screens 3. Computer Equipment – Laptops, Dymo Printers, Mouse. 4. Blue Metal Ballot Bin – inside the bin will be important election material supplies. Please check the inside carefully to ensure you’ve taken everything out. 5. Curbside Paper Ballots Box – will include all ballots for every ward. 6. Black & Yellow Tubs – will contain the majority of your office supplies for IPAV. 7. Signage Cart– depending on your site, you will receive several different types of signage to help Voters locate your site. IPAV Site Supplies are delivered by our couriers about a week in advance. Site Supervisors typically have the Monday before IPAV to review supplies and set up their site. IT will typically deliver laptops on the Monday before IPAV. You need to log in to computers, and confirm logins are working and Dymo settings are correct before the polls open. Be sure to review the Voter Accessibility Section as part of your IPAV setup, and ensure your site setup complies with ADA accessibility. Laptop A. Windows Login password is: “Electuser” B. Ignore any Global Protect pop-ups. C. You need to connect to your site’s WI-FI. Libraries: select MPL Wireless. There is no password D. Using Chrome, log into WisVote right away to ensure you don’t have any issues getting into the system. If a tab in Chrome does not automatically go to WisVote, type in: https://wisvote.wi.gov (no www.) If your chief decides to have you practice skills during the day for training, you must log out of wisvote and log into https://wisvotesandbox.wi.gov. You can only be logged into either WisVote or the WisVote Sandbox at a time. E. You must change your password after your first login. It is important to remember your password. Do not allow Chrome to store or save your password. The MKE Election Commission cannot reset or change your WisVote password. Call the Wisconsin Election Commission directly if you have password issues: 608-261-2028 Revised: March 2026
Page 3 of 48
A USB dongle, a “FIDO Key”, is now required as part of two-factor authentican for WisVote users. If a user does not yet have this and requires one, first check your document box for extras, and second call the hotline to get one. The two-factor authentication will require users to enter a key and touch the dongle. When you insert, ensure the touch logo is facing toward you. F. When you login, allow WisVote to access your location. You can Click on remember this browser or you’ll get that message every time you login. Dymo Label Printer 1. The Dymo Label Printer will come in a box with two cords, a power cord and USB cord to connect to the laptop. 2. Connect the Dymo to power and to the laptop. 3. On the first day of IPAV, when you use the DYMO Printer for the first time through WisVote, double check the printer settings, please refer to page 22 for details. 4. When you have issues with the DYMO, in selecting your printer, always select the DYMO with the higest number (Windows will install any newly connected dymo with the next number). a. Next, double check the settings. If it doesn’t look right, ask for help! Printing with the wrong settings will require 3x the time to fix than asking for help will! b. The only settings you should need to adjust, and will happen if you disconnect and reconnect a dymo, are the print settings. You want “”30256 Shipping” ExpressVote Set Up The ExpressVote ballot marking devices need time to load in order to be ready to accept ballots. Turn the machines on at least 15 minutes before the IPAV site opens. 1. Position the ExpressVote for maximum privacy. a. You can put two ExpressVotes on one table. They should face opposite each other. b. Position at least one Express Vote to be ADA accessible with a chair. c. If there are windows from which the screen can be viewed, ensure the blinds are closed or reposition. d. Avoid positioning screens which can be viewed from areas in the room where lines will build. 2. Place a privacy hood around every ExpressVote. Voting is private. 3. Ensure instructions in both English and Spanish are posted on the interior of the privacy hoods. 4. Plug the ExpressVote into a power source. 5. Open the side panel using the silver key and turn ExpressVote to the “on” position. It should be on “Voter” mode. Revised: March 2026
Page 4 of 48
6. A USB drive will have been installed and a protective hood engaged with a green chain-of-custody seal protecting the USB from removal or manipulation. This seal was installed after Logic & Accuracy testing (L&A) was completed. a. These seals should not need to be removed anytime during IPAV. b. The EL-104 will list your ExpressVote seal numbers. Verify that the seals are accurate daily to ensure there there was no tampering. 7. When the machine is ready enter the election code: Brewersmc1. a. If you mistype the code 3 times, the machine will lock. b. If this occurs, turn Express Vote off, wait ten seconds and turn it back on. This should reset and allow you to once again enter the election code. Important ExpressVote Notes: Keep Express Vote machines plugged in during voting hours. While it does have a backup battery, to ensure it does not turn off during voting, it needs to stay plugged in. At least one designated machine should fully ADA ready. That includes having the headphones visable next to the machine so any voter that needs to use them can without asking. Also the touchpad that is stored on the side of this machine should be visable and ready to use as well. o Reserve the most accessible ExpressVote to be ADA ready and encourage those working in the voting area to reserve that one for ADA need so that is free when needed without a wait. Placing Signage at your IPAV Site Each IPAV location is assigned signage to be placed in and around your IPAV Site to help voters locate your site. Some sites will have specific signs for specific areas. Here are some examples:
Signs will arrive in a large, heavy-duty cardboard box (speedpack) on a roller. Curbside voting signs should be placed in front of a parking spot near the entrance of your site alongside the Handicap placard. The curbside number will be posted onto your sign. Please also post the secondary sign on visable window or wall if available. Note: Test the cell phone number at the start of each day!
Revised: March 2026
Page 5 of 48
DPW will place 6’ signs around the area on medians and other city owned areas to assist voters finding your location. These signs have directions on only one side. o Call the IPAV hotline if you see signs that need repair/replacement, or if you believe it is incorrectly placed. The large, heavy-duty cardboard box (speedpack) on a roller can be flattened and stored with other supplies and will stay with you during IPAV. When IPAV is done, be sure to reassemble the box and placed on the dolly-cart/rollers and then place all of your signs back into the box. o The couriers will pick up signs during the end of IPAV supply pick up. o DPW will pick up the 6’ larger street signs and 15 min voter parking signs. Ensure no signs obstruct the sidewalk/walk way. A wheelchair should have room to pass without excessive maneuvering. Signage and posters placed inside of your voting area should be placed only with permission of the site host and that permission needs to include the type of tape used. o Kits include painters tape to cause the least damage and/or remaining adhesive residue. Signage and posters placed outside of your voting area but still within the host site must first have permission from your site host. This includes arrow signs or signage on windows. c. Kits include painters tape to cause the least damage and/or remaining adhesive residue. Daily Chain-of-Custody (CoC) & the EL-104 At the top of the EL-104 you will find a section identifying various Chain-of-Custody documentation. 1.
The first CoC section asks you to verify that seals within each ExpresVote match the seal installed after L&A testing. These seals are located inside the compartment on the left side of the ExpressVote. They lock in the USB stick ensuring that no tampering has occurred since testing was completed. Initial that each machine matches each seal
2.
The second CoC section asks you to place a red seal at the start of each IPAV session on the openings to both the In-Person and Drop-Off compartments of the Blue Ballot Box. These seals should not be removed during the day. If there is a need to remove the seals/open the ballot box during an IPAV session, the reason must be notated on the EL-104 as an incident.
3.
Red zip ties on the curbside ballot bin.
Revised: March 2026
Page 6 of 48
Providing Voter Accessibility and Assistance IPAV sites should offer accessibility and assistance for Voters that may need it, and below is a list of actions that can be taken to help a Voter in need. Put at least one of the white Express Vote tables at the lower height to ensure it is accessible. Include a chair nearby for those that may want to sit. The Voter may use headphones to have the ballot read to them. They can use our headphones (sanitize after each use) or they can use their own. There is braille on the Express Vote controller. The headphones and controller should be out and visible for anyone who needs to use them. A Voter can make the screen easier to read by using the zoom option and also set the contrast to black and white. o Be sure to try this option out before you recommend it to a voter. It often requires multiple screens in order to review all options. Language Line is available to assist with translations.
If a Voter asks for assistance in reading the selections or selecting candidates, their chosen assistant must sign anywhere on the bottom half of the ballot as noted below. o Note that the envelope “Assisted By” is only for assistance with the voter signature. If you or another person gives asstance with the ballot, the signature must be on the ballot. o If you have any question if your or another person assisted, sign. A printed name is not required.
Revised: March 2026
Page 7 of 48
Greeter/Check-In | Duties & Instructions As Voters enter an IPAV site, the Greeter should be the first person to engage with them. If an IPAV site does not have a greeter, staff working at the Check-In / Receiving Table will take on the Greeter role. Following the flowchart diagrams, greeters should warmly greet voters with the following questions:
Revised: March 2026
Page 8 of 48
11
Revised: March 2026
Page 9 of 48
42
Revised: March 2026
Page 10 of 48
Check-In | Receiving Table Instructions Setting Up WisVote to Process Voters Before you open your site for the day, and anytime you switch users or reset your browser: At anytime while navigating WisVote, you can always click on the WISVOTE logo in the upper-left corner to bring you back to the home screen. If you ever get lost in windows, start over with a return to the home screen by selecting the WisVote icon. 1. Open your chrome browser, it is setup to open Wisvote automatically. If you aren’t getting this to work, shut all browsers and start chrome again. If still isn’t working, logout & log-in from the computer. 2. Log into WisVote using your credentials and insert your FIDO key for two-factor authentication. 3. Click the Elections Tile 4. Click on the name of the current election, “2026 Spring Election 5. Click on Vote-In-Person near the top of the screen. 6. After completing these 5 steps, a new window will open allowing you to check in a voter, process their absentee application request, create a ballot and print a label! WisVote does all these tasks in just one click. Revised: March 2026
Page 11 of 48
Creating an Absentee Application, Issuing a Ballot and Printing an Envelope Label Follow these instructions if the Voter is already registered at their current address with their current name. If they are not, direct them to registration.
“Welcome to early voting! Could you please state your name, address and present photo identification?” “Thank you, I’ll be pulling up your information in our statewide voter database to issue you a ballot.” After confirming the Photo ID is acceptable, initial the envelope with “PG”. We start at the New Absentee Application screen below, with our cusor in the Voter name box. If your cursor is not in the Voter Name box, left-click once inside. 1. Type in the voters name, this can be done last name first or first name first. A comma is not necessary. a. To quickly and effectively find a voter’s record try using different combinations of the person’s name such as the first initial of the last name and full first. b. Once you’ve type in your search either hit enter or left-click on the search icon. 2. After finding the correct voter, by verifying the address and the birth date, left-click the “CREATE BALLOT AND PRINT BALLOT” button at the top of the page. 3. Note that the photo ID does not need to match the address in WisVote. 4. After clicking the CREATE button, be very paitent for WisVote to process. Clicking again can cause you to be locked out with an error saying a ballot is already on file. Revised: March 2026
Page 12 of 48
5. After processing, you will be given the option to print a label for your IPAV envelope. Be sure that Dymo Printer is selected and leftclick “OK”. 6. A new window will pop-up showing the content of the newly created label. Locate the printer icon in the upper right of this new window and leftclick on that icon. 7. Another new window will pop-up citing the page size and page orientation. These settings should default. Left-click on the Print button. 8. Lastly, you have reached the print screen referencing the Destination (i.e the printer), the Paper size and the Scale. These settings should default, but if they do not: a. Select the Dymo printer with the highest number. When connecting additional devices with the same name, the system adds the new printer with a higher number. b. Select Paper size of “30256 Shipping” c. Select Scale of “Fit to printable area” 9. After verifying the settings are correct, left-click the print button at the bottom of the window. The Dymo printer connected to your computer will now print out one copy of the voter’s envelope label. After checking that the print out is accurate, you can close the print windows and return to the New Absentee Application screen to process the next voter. Revised: March 2026
Page 13 of 48
Completing the Envelope and Issuing a Ballot Now that you’ve successfully logged the voter participation in WisVote and printed a label you need to issue the completed envelope and an authorized ballot to the voter. 1.
Adhere the printed label over the voter information section near the top of the envelope, below the “PG” initial you made earlier.
PG
a. If for whatever reason you are unable to print a label, it is permissible to handwrite the voter information. 2.
Hand the envelope to the voter and ask them to verify that the name and address printed on the label are accurate. This is the most common moment in which errors are noticed. If an error is found, request support from your Chief or a WisVote troubleshooter to resolve.
3.
Either at the same time as you hand them the envelope or separately at an additional station, issue the voter an ExpressVote ballot. a. First, stamp the bottom right corner with “PG”. This officially activates the ballot for use. b. Second, hand-write in black pen the ward number of the voter. This information is found on their printed label. Double check that the ward number hand-written onto the ballot exactly matches the ward number printed on the label.
4.
After equipping the voter with both a completed envelope AND an authorized ballot, direct them to the voting area where the ExpressVotes are setup.
Revised: March 2026
Page 14 of 48
Troubleshooting at Check-in: Voter Corrections Sometimes when you pull up a Voter’s information in WisVote, you may find Clerical Errors (i.e. wrong spelling, transposed numbers, incorrect DOB, default DOB [01/01/1900], multiple records, etc.) on a Voter’s record. It’s important to ask the Voter questions to determine if this is a typo on our end or if the information was previously correct. For example, “Have you ever lived in apartment 101?”; “Have you ever had a double last name?”, etc. What is NOT a correction? Subtracting or adding a name. Registration status, (e.g. military or overseas Voter). Changing apartment numbers (or upper and lowers) when a Voter did in fact move. When you find a clerical error: 1. If you can pro-actively correct the error before the label is printed and it is a correction to the voter name or birthdate: make the change in WisVote and record the change on the greenvoter correction form. a. Best practice is to exactly match WisVote records to the voter’s photo ID. 2. If the error is noticed after the label is printed direct them to your site chief. We still want to address the correction on-site and in this case, re-print the label for accuracy and voter confidence a. Site Chiefs: Correct the error and re-print the label. In most cases you can simply re-print after making the corrections, instead of doing a full ballot cancellation. Best practice is to void the envelope with the wrong label and start with a new envelope. 3. If the error involves the address, direct the issue to your site chief. a. Site Chiefs: Correct the error and re-print the label. In some cases this will require a ballot cancellation prior to correction. Call MKE WisVote for support.
Revised: March 2026
Page 15 of 48
Troubleshooting at Check-in: Label Reprints If a label gets damaged, or you printed a wrong label, let your site supervisor know right away. You can reprint a label without impacting a voter’s application and ballot. **Only site chiefs have the authority to reprint a label.** 1. From the WisVote home page, click the voter search tile. 2. Type in the voter’s first and last name. When it appears below, double click on their name to bring up their voter record. 3. Scroll to the bottom of the Voter Record page to “Absentee Applications”. Double click in the white space in between to open the absentee application. 4. Scroll to the “Absentee Ballot” section at the bottom of the “Absentee Application” page. Double click in the white space in between to open the absentee ballot record.
Revised: March 2026
Page 16 of 48
5. Click “Reprint Label”. Depending on your laptop screen size, you may have to click the 3 dots to see the other menu selections.
6. At this stage follow the printing steps outlined earlier. Troubleshooting at Check-in: Error! The voter has an existing Ballot on file There are two scenarios in which your attempts to process a voter and create a label will fail due to there being an existing ballot already on file. The first and most common scenario is when a voter is signed up for absentee ballots by mail, but has decided to vote at an IPAV site instead. This scenario comes in two difficulties, (1) an absentee application and ballot for just the current election or (2) an absentee application and ballot for the current election PLUS a repetative absentee application. Repetitive absentee applcations can be for a “Calendar-Year”, which ends at the end of that year or for “Indefinitely Confined” which repeat continuously into the future. When either of these situations are encountered, it is best to direct the voter to your chief or to the designated WisVote specialist. The issued ballot will need to be deactivated along with all repetitive absentee applications. The second scenario is when due to slow WisVote server response, a user checking in a voter clicks the “Create Ballot” button but then clicks the button again before WisVote has finished processing. This results in WisVote creating the IPAV application and ballot in the system, but then on the second left-click presenting an error because it found an existing ballot on file (the one you created moments earlier!). When encountering this situation, request support from your chief or WisVote specialist to reprint the label. You do not need to cancel out the ballot! Avoid this situation by giving WisVote plenty of time to complete the “Create Ballot” process and resist the impulse to click again.
Revised: March 2026
Page 17 of 48
The Voting Area: ExpressVotes Preparing Voters to use an ExpressVote The voter is now equipped with their Labeled Envelope and an Activated Ballot. Your next task is to guide them through use of the ExpressVote, a ballot marking device. 1. Ask the Voter if they have used an Express Vote Machine before. If yes, ask the Voter if they would like any reminders on how to use the Express Vote and point out the printed instructions on the privacy hood. If no, explain how to use the Express Vote. It is important to read the Voter. Some Voters want many instructions, some do not. It is okay to make the instructions your own! Some examples of things to mention: It’s a touchscreen. Navigate the screen with arrows on the bottom of the screen. Let the Voter know they can go back and correct their vote, by using the PREVIOUS tab if they make a mistake. 2. Tell the Voter they must select “print card” on the last screen for the ballot to print. The candidates they voted for must appear on the ballot. No ballot should be blank! You can point to the warning sign regarding this. Some Voters press EXIT on the Express Vote instead of going to the end and pressing PRINT CARD. Pressing EXIT cancels voting and ejects the ballot. If a Voter truly intends to vote a blank ballot (or did not select a candidate in a race), the ballot will read “NO SELECTION MADE”. This is perfectly fine and is not an error. Again, no ballot should ever be blank. 3. Explain to the voter that once they print their voted ballot, they should fold the ballot in half, place it in the envelope, and proceed to the Signature Table. 4. Also, let the Voter know that staff at that table will seal the envelope and witness their signature. They do not need to lick the envelope. 5. When you are done giving instructions, step away and let the Voter know you are there to assist if they need help. Always remain nearby in case the Voter has questions. Revised: March 2026
Page 18 of 48
The Signature Table Signing and Witnessing of the Envelope The signature table is the last station a voter will visit at IPAV. Although it may seem like the most simple and easy of all the roles, Signature Table staff have the very important job of carefully reviewing all documents for compliance. This is the highest risk role within IPAV because if either the voter signature or the witness signature is missed, the vote will be completely rejected at central count! PG
1. Once the voter confirms with you that their selections on their ballot were printed correctly (you should not be reviewing their ballot), ask them to fold the ballot and place it in the certificate envelope. Seal the envelope with the glue stick. 2. Ask the Voter to sign the certificate envelope where is says “Voter Signature”. A voter can sign x for their name. 3. After the Voter signs their name, you must then sign and print your name as the witness. 4. Do a final review of the envelope for both signatures before handing them back the sealed envelope.
1. VOTER
Paulina Gutierrez
5. Thank them for voting and invite them to place their ballot into the slot designated for in person voting. 6. Give them an “I Voted Early” sticker reminding them to come back for the next election. 3. STAFF PRINTED NAME
Revised: March 2026
Jane Witness Jane Witness
Page 19 of 48
Checking a Drop-Off Certificate Envelope for Compliance When a person comes in to drop off their ballot, and after the Greeter asks the required questions, the next step is to check the certificate envelope for compliance. 1. Check to confirm it is from the City of Milwaukee. o You can confirm a City of Milwaukee envelope with the business reply bar on the other side of the envelope and by the delivery address.
Paulina Gutierrez
2. Check and to make sure the certificate envelope is completed, by having the following: Voter signature Witness signature and printed witness name A Witness address with at least a street number, street name, & city. 3. If you’ve confirmed that it’s from the City of Milwaukee and the certificate envelope contains all the appropriate signatures, printed name and address, you can accept the ballot.
John Witness Doe John Witness Doe 123 Anystreet Rd, Milwaukee
Revised: March 2026
4. Stamp the front of the envelope with the IPAV site stamp and place it inside the secure blue ballot bin. We only require stamps on drop-off ballots because inperson ballots already have tracking within WisVote timestamps. 5. Offer the Voter an, “I Voted Early” sticker to the voter. Thank them for voting.
Page 20 of 48
*IMPORTANT NOTICE* Sadly, every election we have to reject ballots from IPAV because a staff member did not sign AND PRINT as the witness.
1. VOTER
4. SITE STAMP
Revised: March 2026
Page 21 of 48
A Voter Returns a Ballot They Received Through the Mail with No Witness Signature 1. If a Voter comes in with a ballot they received through the mail, state law dictates that you CANNOT sign as a witness unless you see the Voter's ballot before they mark their ballot. Wis. Stat. Statute §6.87(4)(1). If the Voter has already marked the ballot, let the Voter know we cannot be their witness. Offer the option for them to vote in person (and discard mail-in ballot) or they can return home and ask the person who witnessed them voting to sign. If you are signing as the witness, you may put the address of City Hall as your address: 200 E Wells St, Milwaukee, WI 53202. Don’t forget to stamp your IPAV site on the envelope. A Voter Returns a Ballot For Someone Else 1. Ask “Does the Voter need your assistance returning their ballot due to a disability?” If YES: Make sure the ballot is from the City of Milwaukee (check the label) Ensure the ballot envelop has all the required information (voter signature, witness signature and/or witness printed name, witness address). Witness address must be complete – Street address, city, state, zip code. If all required details are present, accept the ballot and place it in the designated slot in the blue ballot bin. Provid an “I voted” sticker for the voter If NO, you cannot accept the ballot: It is important to respectfully explain to the person that the voter must return their own ballot unless they have a disability that prevents them from doing so themselves. Let them know that this is a state law. Do Not Accept the ballot. Let them know that the voter whose ballot is currently in their possession, can return their absentee ballot at any Early Voting location while it is open, on election day at central count by 8pm, at a drop box before 6 pm on election day, or though the mail.
Revised: March 2026
Page 22 of 48
A Voter Needs Assistance Signing Their Name on the Certificate Envelope 1. A Voter’s signature can be whatever mark they choose, even simply an “X”. 2. If the Voter needs assistance with signing their name, they can ask anyone to sign their name for them (including you!). 3. The assistant signs the Voter’s name in the “Voter Signature” line and their name on the “Assistant Signature” line. The assistant does not sign their name on both lines. In the example to the below, Maria is the Voter and John is the assistant, who signed for Maria. NOTE: The assistant line is NOT for assisting the Voter with the Express Vote Machines. Signing the assistant line applies only when someone signs the Voter’s Name on the Voter Signature line.
John Helper
Revised: March 2026
Page 23 of 48
Registration Follow these steps if a Voter needs to change their address and/or name, or is a new Wisconsin Voter. All voters who need to register need to complete a paper registration form. *Troubleshooting: If an absentee application exists in the voter’s old record, it needs to be canceled. If you already printed their IPAV label and the voter needs to update their registration, a site supervisor will call to cancel the existing absentee ballot and application so you can enter their new registration and process a new label. Unless otherwise noted, you will use WisVote if a Voter is completing a voter registration form. The last day to register is the Friday before Election Day. This is state law and there are no exceptions!
Revised: March 2026
Page 24 of 48
1. Qualifications a. Ask Voter to verify qualifications on top of form are true. We do not question the Voter’s response, ask for proof, doubt their response, etc. You may read the qualifications aloud or ask the Voter to read and acknowledge. Check the boxes if they are true. 2. Your Name
a. Make sure the name is legible (would you be able to read it if not also looking at the Voter’s proof of address document?). Clarify any hard to read handwriting with a red pen. Do not cross off what the Voter’s wrote. Write alongside of it. b. Write Voter’s first, middle (if applicable) and last name exactly how it appears on their identification.
3. About You a. Make sure the date of birth is correct (sometimes Voters accidently write the current year instead of birth year). b. Phone number and email are optional.
4. The Address Where You Live a. Make sure the address is also legible. Clarify any hard to read handwriting. b. Use street suffixes! (St, Ave, Rd, Ln etc.). Voting addresses are exact. (For example, there is a N 91st Street and a N 91st Place) c. The Voter’s address is where they live 28 days before the election. d. A PO Box cannot be the address where the Voter lives.
Revised: March 2026
Page 25 of 48
5. Your Mailing Address a. This is where a Voter can enter a PO Box. b. A mailing address does not have to be in the City of Milwaukee.
6. Previous Registration Information a. This section is mandatory if the Voter is changing their name. b. If they are updating their address, any information on their previous address is helpful.
7. Identification a. Errors in the box are common so please review carefully. b. If the Voter has a valid Wisconsin driver’s license/ID, the ID number must be written on the line. Some Voters will simply check the box and think they don’t have to write the actual number. c. Confirm the expiration date. Some Voters will write their DOB instead of the expiration date. If the ID is non-expiring, write non-expiring. d. If the Voter does not have a valid Wisconsin driver’s license or ID, they must provide the last four number of their social security number. Do NOT write the entire number. e. It is not an option to provide the last four of social security number instead of the Wisconsin driver’s license/ID.
8. Proof of Residence a. Every Voter needs to provide a proof of residence document, but this box applies to Voters who are mailing in their registration form.
Revised: March 2026
Page 26 of 48
9. Signature and Certification a. The Voter must sign the registration form for it to be valid. Check every form for a signature.
10.
11.
Assistant a. If a Voter needs a person to sign their name for them, the assistant needs to sign here. b. This is does not apply to filling out the form for the Voter. It only applies to the Voter’s signature. Recording Proof of Residence
**Registration has nothing to do with Photo ID. Do NOT record Photo ID in this section. ** a. Every Voter must provide a document that contains both their current name and current address. It must be the same document. The Voter cannot show one document with name and another document with their address. b. Voters who are changing their name only still must show a document with current name and current address. c. Review the pink WEC Reference Guide POR vs. POI to help you. Proof of Residence Type a. This answers the question, “What kind of document is it?” b. Common error: TAX is for property tax bill only. A W-2 falls under “PYCK”. c. GOV ID and EMPL ID are rarely used. d. If the document doesn’t fall into one of the categories, it probably isn’t an acceptable document. Proof of Residence Issuing Entity a. This answers the question, “Who gave the document to the Voter?”. b. This needs to be specific. “Bank” and “landlord” are not acceptable answers. Which bank? What’s the landlord’s name? Checking the letterhead can be a good indication of who.
Revised: March 2026
Page 27 of 48
Proof of Residence # a. Record only the last 4 numbers of the account or document number, or last 2 digits if the account number is less than 7 digits. b. Don’t overthink this. The last four are the last four. Ignore dashes, hyphens, periods. c. Some POR documents don’t have documents numbers, but don’t leave this section blank. Write “none” or a put a line through the box. d. Print and sign your name.
12.
Enter the Voter Registration into WisVote. a. Home Page on a new tab, click Voter Registration tile
Revised: March 2026
Page 28 of 48
b. Enter voter's LAST NAME, FIRST NAME, Date of Birth i. ENTER FIRST AND LAST NAME IN ALL CAPITAL LETTERS ii. Name change? Enter previous name in Previous Name fields c. Type accurately! Data in Voter Registration search box will overwrite info in any voter record you update! d. Do not include in your initial search: i. DL/State ID # or SSN# e. If no match is found, click “Create a New Voter Record” i. Every effort should be made to find the voter before creating a new record, for example if the voter has voted in a previous Wisconsin Election it is highly unlikely that they will need a New Voter Record
Revised: March 2026
Page 29 of 48
f. “Update” button will appear if the voter is already in WisVote. Click the “Update” button if it is the same voter and they’re changing their name or address.
g. “Activate” button may appear if voter started the registration process in MyVote. i. Be careful & check the name, address, and date of birth exactly match the information on the paper registration form. ii. Verify the address is the correct new address on the registration form before clicking “Activate”.
h. Enter or verify the Driver License or state ID number in the DL/ID field i. Enter the last 4 digits of the Social Security number in the SSN field (if they don’t have a WI DL or WI ID). j. Enter street number and street name in Home Address field. Press enter or click the magnifying glass to display search results.
Revised: March 2026
Page 30 of 48
i. Select address from drop-down list of address search results
k. If address not found in the dropdown list, click “Look Up More Records”. i. If matching address still not found, call so we can add the address. ii. Double check by looking address up in the address tab. l. Registration Period: Late i. Registration Date: Today ii. Registration Source: Alternative Absentee Location
Revised: March 2026
Page 31 of 48
m. Proof of Residence data entry
13.
Write the voter registration number and ward number in the appropriate spaces on the paper voter registration form.
Revised: March 2026
Page 32 of 48
14.
Click Save & Close to save registration and return to the home page
15.
If a voter wants to register and vote later. a. Complete the voter registration data entry in WisVote b. If voter does not want to vote that day, complete green certificate of late registration, and document voter on the green late voter registration list with voter registration # and ward #. Stamp the IPAV location on the sheet. c. You can also find the ward number on myvote.wi.gov by using the “Find My Polling Place” tile. Use with caution because MyVote will give you the ward number even if the address you enter is not a City of Milwaukee address.
16.
Once the voter registration is entered into WisVote, follow procedures from earlier in this guide to have them vote in person.
17.
Give the registration form to the chief to be added to the documents sleeve at the end of the night.
Curbside Voting Procedures Sites will be issued supplies specific for Curbside Voting, and they include: 1. 2. 3. 4. 5. 6.
Curbside Accessible Parking Sign (with cellphone number) to place in one parking spot near their facility An extra-long clipboard, pens, and glue sticks, Two blaze orange vests for staff to wear when facilitating curbside voting. A cellphone for curbside requests. The phone number will be on the Parking Sign. A box of paper ballots that has multiple copies of blank paper ballots for every single ward. This box should be kept in a secure area of the site. Registration form, if needed.
One staff member should be assigned as part of their duties to monitor the curbside cellphone, watch for curbside voters, and administer curbside voting. Revised: March 2026
Page 33 of 48
Every morning or at the end of the day, staff should review the paper ballot box to ensure that there are enough paper ballots for the next voting day. If supplies are running low, let the Site Supervisor know right away and have them call the IPAV hotline to place an order. Step 1: IPAV staff member will put on the safety blaze vest. Take the curbside clipboard (recommend that they take a registration form just in case) and head outside to the curbside voter. Following the role of the greeter, ask the following questions: 1) Are you here to vote? 2) Are you a City of Milwaukee resident? 3) Are you registered to vote? If all three answers are YES, then request to see their acceptable photo ID. If they need to register to vote, then you should also request to see their proof or residence. Hand the voter the clipboard and ask them to fill out the Voter Registartion Form (see pg 39). Verify the registration form is correct, signed, and matches the POI/POR documents. Take the registration form and register the voter. Note that a single staff member can administer the processes of collecting and processing information. It is only when a ballot is involved, during the final step of curbside voting, that two staff members are required. Step 2: If the Voter is registered (or following step 1), collect the name, date of birth and current address of the voter and proceed to table 1 to complete all necessary steps and prepare the certificate envelope. The Ballot Table staff completes the certificate envelope as they normally would with one additional step: Mark the Voter as CURBSIDE VOTED on WisVote. Don’t forget to initial “PG” at the top of the envelope acknowledging POI. Revised: March 2026
Page 34 of 48
Step 3: Retrieve the appropriate ward ballot from the curbside ballot supply box. The Site Supervisor will have that stored in a secure location. Step 4: Stamp the blank paper ballot with the executive director’s initials, “PG” on the line directly under where is says “Absentee ballot issued by”.
PG
Step 5: Gather all of the required materials: 1) The labeled certificate envelope. 2) The blank paper ballot from the correct ward. 3) Pens, a glue stick, and the curbside clipboard. 4) An “I Voted Early” sticker. You will now work with a partner to facilitate curbside voting. Step 6: TWO election staff members take all the gathered materials and return to the curbside Voter. Step 7: Hand the curbside Voter a pen and the clipboard with the blank ballot and certificate envelope. It is helpful to describe what you are handing them and let them know they can vote on the ballot. Step away from the vehicle to give the Voter privacy to vote. Once they are done voting, ask the Voter to fold the ballot and place it inside the certification envelope. Retrieve the closed envelope. Step 8: Using the glue stick seal the envelope and ask the Voter to sign the envelope. Retrieve the now sealed and signed envelope and clipboard. Step 9: Next, sign, and print your name as the witness. Show the Voter that the envelope is now sealed and signed. Explain that you will be submitting that envelope into the secured blue bin. Offer the Voter an, “I Voted Early” sticker. Step 10: As a pair, bring the envelope to the ballot bin and place it into the In Person Voting slot. As you do so, one of you will announce that, “I am delivering a curbside ballot for <Voter NAME> at <Voter ADDRESS>. This is done to match a legally requied process on election day and to ensure there are no questions around where this new ballot originatd from.
Revised: March 2026
Page 35 of 48
Curbside Troubleshooting – missing paper ballot for ward 1. If during the administration of a curbside Voter, you discover that you don’t have a ballot for the Voter’s ward, you can locate another ward’s ballot that is the same as the missing paper ballot by using the X-Chart Guide. 2. If you need a ballot immediately, check the X-Chart (located in the document/file box) for sister ward ballots. Sister ward ballots have the exact same races. You can use any of the wards that are in the same group. For example, if you run out of ward 122 ballots, you can use any of the other wards in the box, such as a ballot from ward 123, 124, 125, etc.
3. On the sister ward ballot that you are giving the Voter, use a red pen to cross off the incorrect ward number. Write the curbside Voter’s ward number next to the crossed off ward. Make sure “PG” is stamped on the paper ballot.
Example: You have a curbside Voter who lives in ward 122, but you ran out of ward 122 ballots. You look at the X-Chart and see you can give the Voter ward 123 instead. You cross off 123 with a red pen and write 122.
Do NOT write anything on the certificate envelope. Only mark the ballot with the correct ward so Central Count staff will know to reconstruct the ballot to the correct ward on Election Day.
Revised: March 2026
122
PG
Page 36 of 48
End of the Day Instructions Once the site is officially closed for the day, your team should complete the following tasks before leaving for the day. Collecting, Reviewing, and Securing IPAV Certificate Envelopes 1. Using the ballot bin key, remove all certificate envelopes from the blue bin. 2. Review each early voting certificate envelope for completion and ensure the following: Voter signature, Witness Signature and Printed Name, and the muni clerk’s initials “PG” at the top confirming photo ID. Missing the Voter’s signature? Keep the envelope so we can call Voter to come back to site to sign. No witness signature or printed name? The staff member at the Signature Table needs to sign and print their name on the certificate envelope. No photo ID initials? The staff member at the Station 1 | Receiving Table needs to initial with the Muni Clerk’s Initials, “PG” 3. Count all the IPAV certificate envelopes. Record this number on the EL-104. 4. Count all dropped off, by-mail envelopes. Record this number on the EL-104. 5. Count all registration forms. Record this number on the EL-104. 6. Place all documents, registrations, absentee applications, later voter registrations, etc, into the colored document protector. Place this into the blue bag at the end of the night. Separate the by-mail envelopes and rubber band them together. Bundle remaining envelopes in stacks of 25 and rubber band. 7. Get a red ballot bag lock located in your document box and record the ballot bag lock number on the EL-104. Do this before locking so that you can place the EL-104 into the protective plastic envelope. 8. If you opened the curbside ballot box, ensure that box has been scured with 2 red ballot bag locks and record the new lock numbers on the back of the EL-104. 9.
Sign the completed EL-104 for the day.
10. Place the following inside the blue canvas ballot bag: Colored, plastic envelope with all forms including the El-104 By-mail envelopes (bundled together) All other envelopes (bundles of 25) Revised: March 2026
Page 37 of 48
11. Weave the red ballot bag lock through both zipper holes to secure the blue canvas ballot bag. Please leave enough space to allow room to cut the bag during processing. 12. Blue ballot bags will be dropped off at the Election Operations Center at the end of each day unless an alternative drop-off or courier service has been arranged. Closing and securing Express Vote Machines 1. Using the key, open the side panel with silver key and turn the Express Vote to the OFF position. 2. Unplug the Express Vote machine from outlet. It may stay on for a while longer since the battery is charged. Turning off the Laptops 1. Sign out of all applications, including WisVote. Audit Supplies 1. After polls have closed, you should conduct cursory review of supplies and paperwork and make note of supplies that are running low or need to be replaced. 2. Follow the supply order procedure and communicate your supply requests as applicable. 3. Our couriers play a critical role during IPAV; however, they are not responsible for communicating information, make contact with the IPAV hotline for items needing replacement.
Revised: March 2026
Page 38 of 48
Last Day of IPAV Instructions Use the following list of actions and checklist as a guide to ensure you’ve correctly packed all supplies and equipment and have placed all required paperwork in the appropriate sections. Do your best to pack items in the original boxes that they were shipped in. Final Day Ballot Bag – Following the normal procedure for securing and storing the ballot bag, place everything listed below inside the Ziploc bag before placing in the blue canvas ballot bag: NOTE: PLEASE DOUBLE CHECK ALL 3 BALLOT COMPARTMENTS TO ENSURE THERE ARE NO REMAINING BALLOTS o All Absentee Ballot Envelopes returned by Voters to the IPAV site. o Final Day’s EL-104 (make sure all workers signed). o Inspector’s Oath signed by all workers. o Any remaining including the one used for the last day Voter Correction Envelopes with Voter Corrections Sheet and envelopes with green dots inside. o Timesheet Envelope with all IPAV employees time cards, with hours totaled and signed off by supervisor. The Inspector’s Oath form should be put in this envelope on the last day of IPAV Any remaining There should be no registrations submitted on the last day as registration is closed. Document/File Box – Along with any remaining unused forms, place the following into the clear document/file box: o Curbside cellphones and chargers. o Place keys back into the small manila envelope. o Place any remaining unused large colored envelopes. PLEASE USE CAUTION AND CARE WHEN HANDLING ALL EQUIPMENT. ENSURE ALL CORDS AND CHARGERS ARE PACKED WITH ITS RESPECTIVE EQUIPMENT AND INTO ITS PROPER CASE/BOX. Election Equipment o Express Vote Machine Shut down machine DO NOT Remove Flash Drive With care, make sure the following are packed into the black Express Vote carrying case Express Vote Machine 1 set of headphones (on top or next to the machine) o Be careful not to place machine on top of headphones. Revised: March 2026
Page 39 of 48
Power Block and Power Cord (two parts). Place in outer square pocket. Blue Metal Ballot Bin o Remaining unused IPAV Absentee Envelopes. o Unused, blank EV cards o Computer Equipment Laptop Bag Laptop Mouse, mousepad Power cord (will be two pieces, make sure both are packed in the bag) Dymo Label Printer Box Printer (should match the name on the box) Power Cord (that goes from printer to outlet) Data Cord (that goes from computer to printer) Make sure devices go into the boxes/bags with the same name. Ex: laptop that says “Zablocki #1” should go into the laptop bag labeled “Zablocki #1” Dymo printer “Tippe #1” goes into the box that says “Tippe #1” o Neatly wrap extension cords and surge protector strips. Office Supplies & PPE Remove any tape on tables, floors, and walls. Pack any unused PPE. Use the Blue metal ballot bin to pack election equipment and materials. Remove any tape from library tables. Take down and collect any signage. Place pile of items, in corner designated by the IPAV site.
Revised: March 2026
Page 40 of 48
Troubleshooting Guide: Cancel an absentee ballot and deactivate application If a voter already has an absentee application on file, you will get an error message when you go to issue a ballot. WisVote allows each voter to have only one active application and ballot at a time. We need to deactivate both the existing application and ballot before we can proceed. You may encounter several scenarios. Scenario Voter wants to vote with you today instead of returning the ballot mailed to them.
What to do Cancel the ballot and deactivate the parent application. Follow steps on the next page.
WisVote has a Parent Application for this voter for the calendar year. Or WisVote has a Parent Application for this indefinitely confined voter.
If voter is indefinitely confined due to age or disability and wants keep receiving absentees via mail, they will need to submit a new request after this election. Please tell the voter how to do this. You may be able to answer the question in the error message prompt and continue without having to deactivate any existing application. Sometimes WisVote is smart and deactivates the current election application for you.
Voter wants to vote with you today instead of returning the ballot mailed to them. WisVote has a Current Election Application for this voter.
If the error message continues, cancel the ballot and deactivate the application. Follow the steps on the next page.
Revised: March 2026
Page 41 of 48
Voter has decided not to vote today after you already issued them a ballot in WisVote.
Cancel the ballot and deactivate the parent application. Follow steps on the next page.
Voter brought the absentee ballot that they received in the mail to your IPAV site.
Have voter show you that the ballot is blank. They should mark their ballot near you, but in a way that you cannot tell how they voted. You may sign as their witness. Make sure you also print your name and the address of the IPAV site. If the voter needs a replacement ballot (they made a mistake or it was damaged), you can issue an Express Vote ballot. Place their original ballot in the Discarded Ballot envelope.
Revised: March 2026
Page 42 of 48
Steps to Cancel Ballot and Deactivate Absentee Application
1. From the WisVote Home Page, click the Voter Search tile.
2. Type in the voter’s first and last name. Double click on the voter’s name when it appears below. This will open the voter’s record.
Revised: March 2026
Page 43 of 48
3. Scroll down to the voter’s Absentee Applications. Both parent applications and current election application records are listed in this section. You may need to navigate to Page 2 to see the Parent application. Find the current election application first. Double click to open the application. Make sure you are not clicking directly on the blue text, as that is a link to a different place in WisVote.
Revised: March 2026
Page 44 of 48
4. Once you are in the Absentee record, scroll down to the Absentee Ballot section at the bottom of the page.
5. Double click to open the ballot record. Do not click on any blue text, as that will link to a different place in WisVote. You can tell if you are in the Absentee Application or Absentee Ballot record by looking just above the voter’s name in the upper left:
6. Click “Cancel Ballot.” If it does not show as an option, click on the 3 dots (…) to expand the menu.
7. Select the reason for deactivating the absentee ballot (Voter Request) in the popup menu. WisVote will say that the absentee ballot was deactivated. Click Next. Click Finish on the next screen. Revised: March 2026
Page 45 of 48
8. Click Save. 9. Next, navigate to the Absentee Application by following the links embedded in the ballot record (Voter’s Name in upper left).
10. Deactivate the Absentee Application. Deactivating a parent application also deactivates the current election application. If there is a parent application, there will be a link for it at the bottom of the Voter Information section of the current election application.
Revised: March 2026
Page 46 of 48
11. The steps to deactivate either the current election or parent application are the same. From within the Absentee Application record, choose “Deactivate” in the upper right. If Deactivate does not show up as an option, click on the three dots to expand the menu.
12. In the popup window, click blue “Deactivate” button.
Revised: March 2026
Page 47 of 48
13. If you deactivate the current election application and voter still has a parent application, you must deactivate the parent before you can issue an in-person ballot. 14. You are done! If the voter wishes to continue their parent application (calendar or indefinitely confined), tell them that they need to submit an application again after this election. If you ever get lost and don’t know whether you are in the Ballot Record or Absentee Application Record, you can always navigate back to the Home Page. Select Voter Search, and find the voter’s record again.
Revised: March 2026
Page 48 of 48