MIT App Inventor for AI and IoT
Build Smart Applications with Raspberry Pi, Arduino, and ESP32

Dogan Ibrahim
Build Smart Applications with Raspberry Pi, Arduino, and ESP32
Dogan Ibrahim
Build Smart Applications with Raspberry PI, Arduino and ESP32
● Dogan Ibrahim
● This is an Elektor Publication. Elektor is the media brand of Elektor International Media B.V.
PO Box 11, NL-6114-ZG Susteren, The Netherlands
Phone: +31 46 4389444
● All rights reserved. No part of this book may be reproduced in any material form, including photocopying, or storing in any medium by electronic means and whether or not transiently or incidentally to some other use of this publication, without the written permission of the copyright holder except in accordance with the provisions of the Copyright Designs and Patents Act 1988 or under the terms of a licence issued by the Copyright Licencing Agency Ltd., 90 Tottenham Court Road, London, England W1P 9HE. Applications for the copyright holder's permission to reproduce any part of the publication should be addressed to the publishers.
● Declaration
The authors and publisher have used their best efforts in ensuring the correctness of the information contained in this book. They do not assume, or hereby disclaim, any liability to any party for any loss or damage caused by errors or omissions in this book, whether such errors or omissions result from negligence, accident or any other cause.
● British Library Cataloguing in Publication Data
A catalogue record for this book is available from the British Library
● ISBN 978-3-89576-739-5 Print
ISBN 978-3-89576-740-1 eBook
● © Copyright 2026 Elektor International Media www.elektor.com
Editor: Clemens Valens
Prepress Production: D-Vision, Julian van den Berg
Printers: Ipskamp, Enschede, The Netherlands
Elektor is the world's leading source of essential technical information and electronics products for pro engineers, electronics designers, and the companies seeking to engage them. Each day, our international team develops and delivers high-quality content - via a variety of media channels (including magazines, video, digital media, and social media) in several languages - relating to electronics design and DIY electronics. www.elektormagazine.com
6.5.4
Smartphones and smart devices have become an essential part of everyday life. From communication and entertainment to automation and artificial intelligence, mobile applications play a central role in how people interact with technology. At the same time, there has been a growing interest in learning how these applications are created and how they can interact with external hardware devices such as sensors, microcontrollers, and Internet of Things (IoT) systems. However, traditional mobile application development often requires knowledge of complex programming languages such as Java, Kotlin, or Swift, which can be challenging for beginners and those who are new to programming.
To address this challenge, the MIT App Inventor platform was developed by the Massachusetts Institute of Technology as a powerful yet simple tool for creating Android applications. MIT App Inventor allows users to build fully functional mobile apps using a visual block-based programming environment. Instead of writing lines of code, users create programs by dragging and connecting blocks that represent programming logic. This approach makes it easier for beginners, students, educators, hobbyists, and even professional developers to quickly build mobile applications while focusing on creativity and functionality rather than syntax.
MIT App Inventor provides a rich set of built-in components that enable developers to design interactive user interfaces and implement complex functionalities with minimal effort. Applications can include buttons, text boxes, labels, images, and multimedia elements. In addition, App Inventor supports advanced features such as text-to-speech, speech recognition, camera integration, messaging services, and internet connectivity. These features allow developers to create applications that are not only educational but also practical and useful in real-world scenarios.
One of the most exciting aspects of MIT App Inventor is its ability to interact with the physical world. Modern smartphones contain a wide range of sensors including accelerometers, gyroscopes, light sensors, GPS modules, and cameras. App Inventor provides simple interfaces to access these sensors, allowing developers to create applications that respond to movement, location, environmental conditions, and user input. This capability opens the door to many innovative applications in education, health monitoring, environmental sensing, and smart device control.
In addition to smartphone features, MIT App Inventor can also communicate with external hardware devices using wireless technologies such as Wi-Fi and Bluetooth. This capability makes it an ideal platform for developing Internet of Things (IoT) applications. Microcontrollers and embedded systems such as the Raspberry Pi Pico (2)W, Raspberry Pi 5, Arduino UNO R4 WiFi, and ESP32 can be connected to mobile apps to build intelligent systems capable of monitoring and controlling real-world devices. Examples include smart home automation, environmental monitoring systems, voice-controlled devices, and remote-control systems.
This book has been written with the goal of guiding readers through the process of developing practical applications using MIT App Inventor. Rather than focusing only on theory, the book emphasizes hands-on learning through projects. Each chapter introduces new concepts and demonstrates them through step-by-step examples that gradually increase in complexity. By working through these projects, readers will gain both the conceptual understanding and practical skills needed to design and implement their own mobile applications.
The book begins with an introduction to programming concepts and the basic structure of the MIT App Inventor environment. Readers will learn the difference between traditional text-based programming languages and visual block-based programming, and how App Inventor simplifies the process of creating applications. The early chapters guide readers through the installation and setup of the App Inventor environment and demonstrate how to create simple applications using basic user interface components.
Once the fundamentals have been established, the book introduces a series of small projects designed to familiarize readers with the essential features of App Inventor. These projects include applications that generate sounds, perform language translation, convert text to speech, display images, and perform mathematical calculations. Additional examples demonstrate how mobile devices can send and receive SMS messages, make phone calls, capture images using the camera, and implement simple games and educational tools.
Following the introductory projects, the book explores the use of smartphone sensors. Readers will learn how to access and interpret data from sensors such as accelerometers, gyroscopes, light sensors, and GPS modules. Practical projects demonstrate how these sensors can be used to measure movement, detect environmental conditions, and determine geographic location. These examples highlight how mobile applications can interact with the physical environment in meaningful ways.
The book also includes a section dedicated to artificial intelligence (AI) based applications. With the rapid development of AI technologies, mobile applications can now incorporate features such as speech recognition, voice interaction, and image generation. The projects in this section demonstrate how App Inventor can be used to create intelligent applications that respond to voice commands, generate images using AI services, and provide interactive user experiences.
In addition to mobile-only applications, a significant portion of the book focuses on integrating MIT App Inventor with embedded hardware platforms. Modern IoT development often requires communication between mobile applications and microcontroller-based systems. The book provides several practical examples demonstrating how App Inventor can be used to control hardware devices through Wi-Fi and Bluetooth communication.
Readers will learn how to build applications that interact with the Raspberry Pi Pico W/ Pico 2W, enabling remote control of LEDs, motors, and environmental sensors. Additional chapters explore communication with the Raspberry Pi 5, allowing users to develop webbased control systems and monitor sensor data from mobile devices. The integration of
Arduino UNO R4 WiFi and ESP32 platforms further expands the possibilities by providing flexible microcontroller solutions for wireless communication, sensor interfacing, and device control.
These hardware-based projects demonstrate how mobile applications can serve as powerful control interfaces for real-world systems. By combining the intuitive interface design capabilities of MIT App Inventor with the processing power of microcontrollers and singleboard computers, readers will be able to develop complete IoT solutions for automation, monitoring, and control.
Finally, the book concludes with guidance on improving the visual appearance of mobile applications by creating and integrating custom app icons. Although functionality is essential, good design also plays an important role in the usability and professionalism of an application. Readers will learn how to obtain free icons, create custom graphics, and incorporate them into their applications.
This book is intended for a wide audience including students, educators, electronics hobbyists, and engineers who wish to explore mobile application development and IoT systems without the steep learning curve associated with traditional programming languages. Basic familiarity with computers is helpful, but no prior experience with mobile development is required.
By the end of this book, readers will have learned how to design, develop, and deploy a variety of Android applications using MIT App Inventor. More importantly, they will have gained the knowledge and confidence to create their own innovative projects that combine mobile computing, artificial intelligence, and connected hardware devices.
MIT App Inventor demonstrates that creating powerful mobile applications does not have to be complicated. With creativity, experimentation, and the practical guidance provided in this book, anyone can begin building applications that interact with the digital and physical worlds.
Dr Dogan Ibrahim April, London 2026
MIT App Inventor is an innovative, beginner-friendly platform that empowers anyone— students, educators, hobbyists, and aspiring entrepreneurs—to create fully functional mobile applications without prior programming experience. Developed by the Massachusetts Institute of Technology, App Inventor transforms the often-intimidating world of coding into an accessible, visual, and creative experience through its intuitive drag-and-drop interface and block-based programming environment. Instead of memorizing complex syntax, users build apps by assembling logical blocks that represent code, allowing them to focus on problem-solving, design thinking, and computational concepts rather than technical barriers. With the ability to design user interfaces visually and instantly test applications on a smartphone or emulator, learners receive immediate feedback that reinforces experimentation and innovation. From simple quiz apps and interactive games to data-driven tools and sensor-based projects that use GPS, camera, accelerometer, Bluetooth, and web connectivity features, MIT App Inventor opens the door to real-world app development while fostering critical skills in logic, creativity, and digital literacy.
MIT App Inventor is widely used in classrooms, coding clubs, universities, and selflearning environments around the world as an introduction to computer science and mobile development. Teachers use it to explain programming concepts such as variables, loops, conditionals, procedures, lists, and events in a visual and engaging way. It is also a powerful tool for rapid prototyping, allowing entrepreneurs and developers to quickly test ideas before investing in more complex development platforms. In community projects, it has been used to build health awareness apps, local business tools, educational games, environmental monitoring systems, and IoT-based applications that connect to external devices like Arduino and microcontrollers. Its cloud-based nature means that projects can be accessed from anywhere, making collaboration and remote learning convenient and efficient.
One of the major advantages of MIT App Inventor is its simplicity and accessibility. Because it eliminates syntax errors through block-based coding, beginners can concentrate on understanding logic rather than debugging typing mistakes. It is free to use, requires only a web browser, and provides instant testing on Android devices. The visual design interface makes app creation engaging and intuitive, while built-in components allow integration with databases, web APIs, sensors, and multimedia elements. Additionally, it promotes computational thinking skills and builds a strong foundation for transitioning to more advanced programming languages like Java, Kotlin, or Python.
However, like any platform, MIT App Inventor has its limitations. While it is excellent for learning and creating moderately complex applications, it may not be suitable for building highly sophisticated, large-scale, or performance-intensive commercial apps. The blockbased interface, though beginner-friendly, can become crowded and harder to manage as projects grow in complexity. Customization options and advanced UI design capabilities are more limited compared to professional development environments like Android Studio.
Furthermore, most development is centered around Android, which may restrict crossplatform deployment options.
Despite these limitations, MIT App Inventor remains a powerful gateway into the world of mobile app development. It lowers barriers to entry, encourages innovation, and empowers users to transform ideas into practical digital solutions. As a starting point for learning programming and understanding how mobile applications function, it offers an inspiring and hands-on experience that nurtures creativity and technical confidence. This book will explore its tools, features, and possibilities in depth, guiding you step by step from foundational concepts to building meaningful, real-world applications.
Additionally, this book demonstrates how MIT App Inventor can be interfaced with widely used microcontroller and embedded platforms, including the Arduino Uno (R3 and R4), ESP32, Raspberry Pi, and Raspberry Pi Pico. It provides detailed guidance on establishing communication between mobile applications developed for Android and iOS devices and these hardware systems, enabling users to monitor sensors, exchange data, and control external devices connected to the processors. Through practical examples and step-by-step projects, readers will learn how to design smartphone-based control systems for real-world hardware applications.
1.2 Programming languages
Programming languages generally fall into two broad categories: Text-based programming and Block-based Visual programming, each offering distinct advantages depending on the learner's experience and project requirements.
1.2.1 Text-based programming
Text-based programming relies on writing code using specific syntax and structured commands in languages such as Python, Java, C++, or JavaScript. This traditional approach provides developers with high levels of flexibility, precision, and control over software behaviour. It is widely used in professional software development because it supports complex algorithms, advanced data structures, large-scale systems, and performance optimization. However, text-based programming requires careful attention to syntax rules, punctuation, and formatting. Even small typographical errors can result in compilation or runtime errors, which may be discouraging for beginners. Mastering text-based coding therefore demands patience, practice, and a solid understanding of programming logic and language structure.
1.2.2 Block-based visual programming
In contrast, block-based visual programming simplifies the development process by replacing typed code with graphical blocks that represent programming constructs such as variables, loops, conditionals, and functions. These blocks are designed to fit together logically, preventing syntax errors and allowing users to focus on computational thinking rather than memorizing commands. Platforms such as MIT App Inventor, Scratch, and Blockly use this approach to make programming more accessible, especially for beginners and young learners. Visual programming environments emphasize drag-and-drop interaction, immediate feedback, and an intuitive understanding of program flow. While block-based
programming may have limitations when building highly complex or performance-intensive applications, it serves as an effective foundation for learning core programming concepts. By reducing cognitive load and eliminating syntax-related frustration, visual programming helps learners build confidence before transitioning to more advanced text-based languages.
Both approaches play important roles in computer science education and software development. Block-based visual programming is particularly effective for introducing fundamental concepts and encouraging experimentation, whereas text-based programming provides the depth, scalability, and professional capabilities required for advanced applications. Together, they represent complementary pathways in the journey toward mastering programming and developing innovative technological solutions.
In recent years, there has been an increase in the development and use of block-based visual programming tools as the solution to many problems. Block-based programming has been introduced to children event at the primary education level and recent surveys show that children at early ages develop interesting applications. Block-based programming is currently used all over the world and it is estimated that over 80 million users actively use block coding. Currently, two popular block-based visual programming languages are the: Scratch and MIT App Inventor.
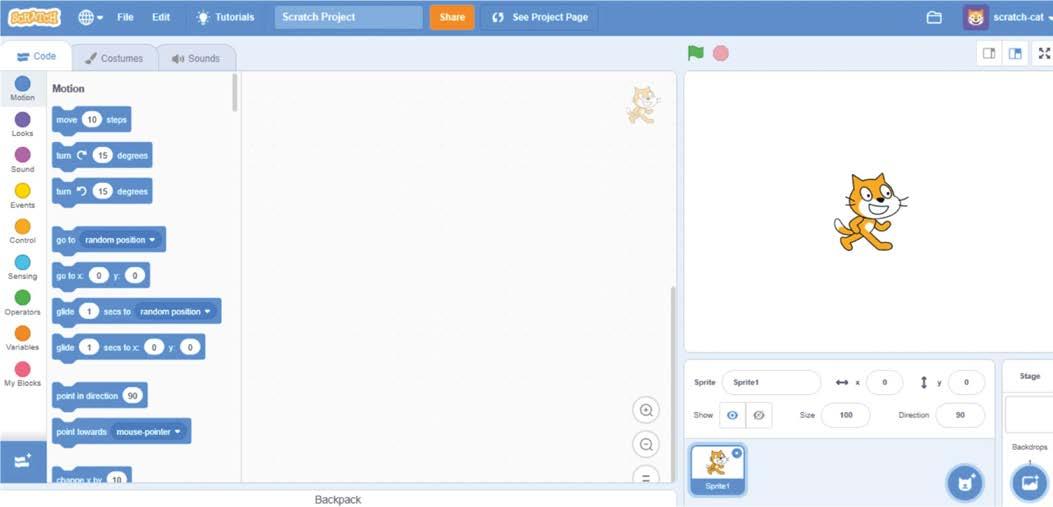
Scratch: This was one of the early block-based programming languages which is currently used by children of all ages. It is an online tool where children can create projects by joining blocks. Figure 1.1 shows the online screen of the Scratch. Using the Scratch, children can mix various tools in their programs, such as music, sound effects, graphics etc. Scratch programming environment consists of three main sections: a stage area, blocks of palettes, and a coding area. Users bring the required palettes into the coding area and join them to make the final code. The stage area shows the results, such as the animation. Scratch is very popular in the United Kingdom and United States and there are several coding clubs that children join to share their projects with others. Many children create interesting applications including simple but interesting games as well. Scratch is used as the introductory computer programming language in many primary and secondary schools. After gaining experience with the Scratch, children are then introduced Python (and Java) as the second language. Scratch is also used in some higher education institutes, such as it is used in the first week of Harvard University introductory computer science course.
Many people claim that block-based visual programming tool does not teach the principles of programming. This is not true since children at early stages understand the principles of programming and it becomes easier for them to develop complex text-based programs in later life. When people hear of block-based programming, they tend to associate it with teaching children or the beginners to programming languages. Although the block-based programming is popular among children, it can also be used by adults and professional programmers to develop projects quickly and with little effort.
Block-based programming has the advantage that it is easy to modify a program because all that is required is to manipulate the blocks. Another very important advantage of blockbased programming is that complex programs can be developed in a few seconds instead of hours required with text-based languages. For example, consider the project where it may be required to read the ambient temperature and send it to someone mobile phone as an SMS message. This project will probably take less than 30 minutes to develop using a blockbased programming language, assuming that there is a block to handle SMS messages. The same program when written using a text-based programming can easily take several days to develop and test. This is because the SMS block hides away all of the complexities of establishing communication with the receiver and sending packets of data. Another advantage of the block-based programming is that the users do not have to memorize the syntax of the language. For example, in a text-based programming language missing a semicolon in a program can result in errors which sometimes can take some time to find out the cause of the error.
MIT App Inventor: This is a block-based programming language which is currently very popular all over the world. MIT App Inventor is an online tool, and it is free of charge (there is also an offline version). It was developed originally by Google, but now it is maintained by the Massachusetts Institute of technology (MIT). App Inventor allows people of all ages to use to develop programs for the mobile phones. It supports both the Android and the
iOS operating systems. The final program is compatible with both operating systems and can be installed and used on both Android and iOS compatible mobile phones and tablets.
MIT App Inventor is GUI based and is similar to Scratch and StarLogo, where developers drag and drop and join visual blocks to create an application. Many blocks are offered in the MIT App Inventor that enable users to create projects using components such as textboxes, labels, buttons, slides, checkboxes, switches, notifiers, camcorders, cameras, text to speech components, speech recognizer, drawing and animation components, web tools, sensors, maps, storage components, Bluetooth connectivity and so on. A very simple example of MIT App Inventor block-design visual program is shown in Figure 1.2

When a new application is started, a mobile phone image is shown in the middle part of the screen. The development of a project is in two stages: Designer, and Blocks. A project starts in the Designer stage where the user places the required components onto the mobile phone image to build the view of the final application. Some components are hidden and are only shown outside at the bottom of the phone image. After designing the screen layout, the user clicks the Blocks menu where the second stage of the development starts. Here, the block program is constructed by clicking, dragging, dropping and joining the required blocks on the mobile phone image.
When the design is complete it is required to test the project. Here, the user has the option of either using a built-in Emulator, to connect to the mobile phone using a USB cable, or to upload the developed application to the mobile phone using wireless Wi-Fi link. Emulator option is useful if the user has no mobile phone at the time of the development, or if an Android or iOS compatible mobile phone is not available. The second option is useful if there is no Wi-Fi connection where the developed application is uploaded to the mobile phone via a USB cable. The third option is the preferred option where the developed block program is uploaded to the mobile phone using the Wi-Fi link. In this book we will be using this third option to upload the developed programs.
2.1 Overview
In this Chapter we shall be looking at the various ways that MIT App Inventor can be used to create projects. The nice thing about MIT App Inventor (called App Inventor in this book for short) is that the software on the PC is cloud based and there is no need to install it before it can be used.
Note that in this and future Chapters, all the references to the Android operating system are also valid for the iOS operating system.
The following is required to create applications using App Inventor.
A computer and operating system:
• Macintosh (with Intel processor): Mac OS X 10.5 or higher
• Windows: Windows 10 or higher
• GNU/Linux: Ubuntu 8 or higher, Debian 5 or higher (Note: GNU/Linux live development is only supported for Wi-Fi connections between computer and Android device.)
Internet access and internet browser:
• Mozilla Firefox 3.6 or higher
• Apple Safari 5.0 or higher
• Google Chrome 4.0 or higher
• Microsoft Internet Explorer is not supported
Android or iOS compatible phone or tablet:
• Latest Android Operating System at the time of writing this book
iOS compatible phone or tablet
• Latest iOS Operating System at the time of writing this book
Optionally:
• You can use the Emulator if you do not have an Android compatible phone or tablet
• You will need to connect the Android device to the PC using a USB cable if you do not have Wi-Fi link.
2.2 Starting App Inventor on your PC
The steps are:
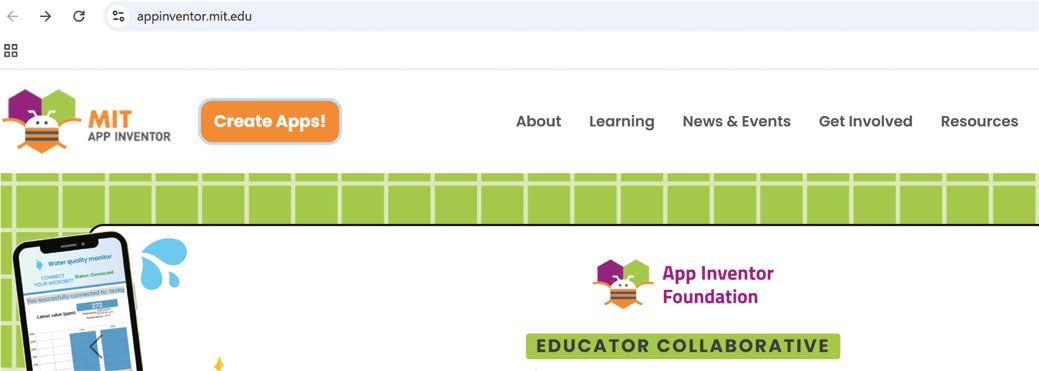
• Enter: www.appinventor.mit.edu on your browser
• Click Create Apps (Figure 2.1)
• If this is the first time you are using the program, you have to create an account.
• Click to accept the Terms of Service
• Click Continue and you will be presented with the startup screen (Figure 2.2)
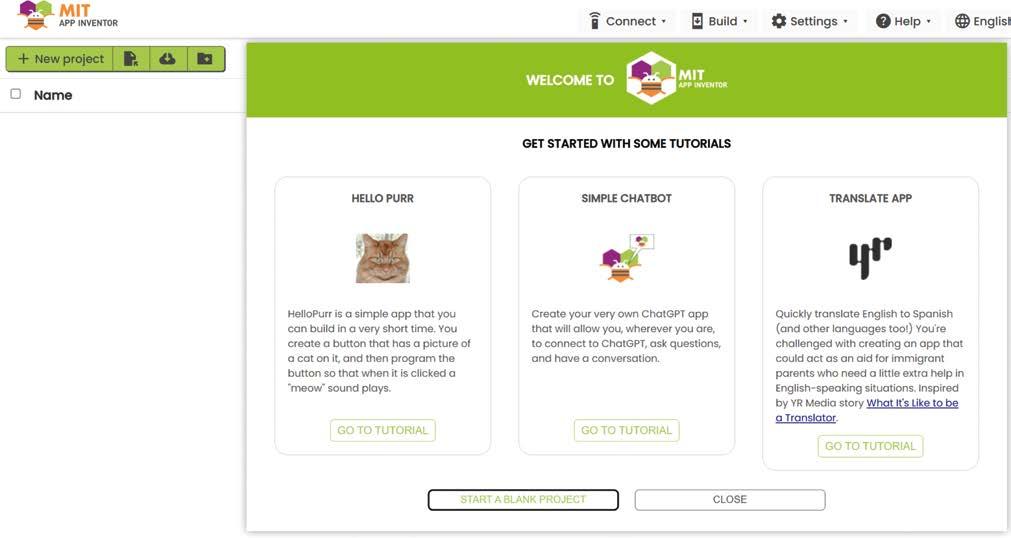
• Click START A BLANK PROJECT located at the bottom of the window to start developing a new project
There are 3 options for setting up and using App Inventor. These are described in the next section briefly.
2.3 Setting up App Inventor for Android smart phone or tablet
Option 1 - Using an Android device with Wi-Fi
This is the recommended option where the software is developed on the PC and then uploaded (installed) to the Android device using the Wi-Fi link for testing (see Figure 2.3).
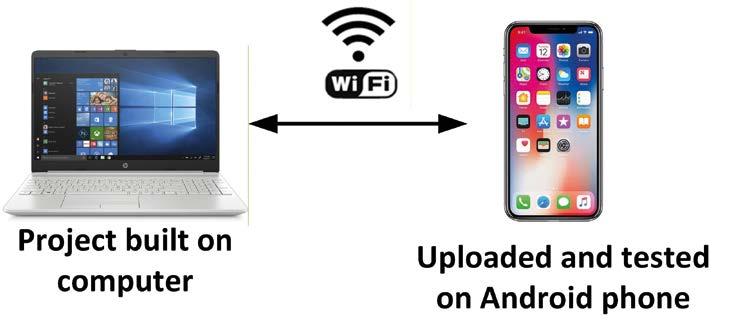
Figure 2.3 Option 1 – Using the Android device with Wi-Fi link
This option requires the apps MIT AI2 Companion to be installed from the Play Store to your Android device as shown in Figure 2.4.
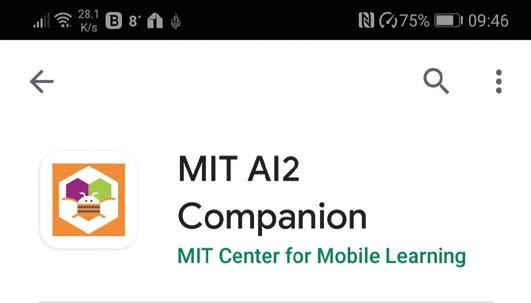
Figure 2.4 Install the MIT AI2 Companion to your Android device
After you create your project, the next step is to upload (install) it to your Android device for testing. The steps to upload your project to the Android device are as follows (these steps will become clearer when we look at the steps to create a simple project later on):
• After the project is complete, click Build and then Android App (.apk) to install the project permanently on your Android device.
• Wait until the project is compiled.
• A dialog with a QR code will be displayed on your PC screen as sown in Figure 2.5
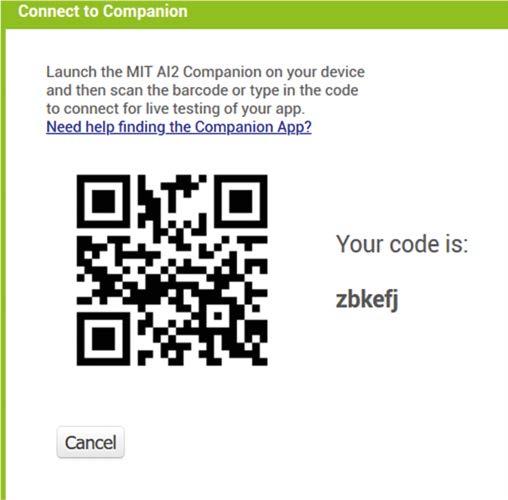
• Start the app MIT AI2 Companion on your Android device and click the scan QR code and hold your device to scan the displayed QR code
• After a few seconds the project will be uploaded to your device. Follow the instructions to install the project.
• You can now test your project on the Android device
Alternatively, you can enter the 6-character code displayed next to the QR code to your Android device to upload the project.
Option 2 - Using an Android device with direct connection to the PC In this option it is assumed that there is no Wi-Fi link. The Android device is connected to the PC using a suitable USB cable as shown in Figure 2.6.
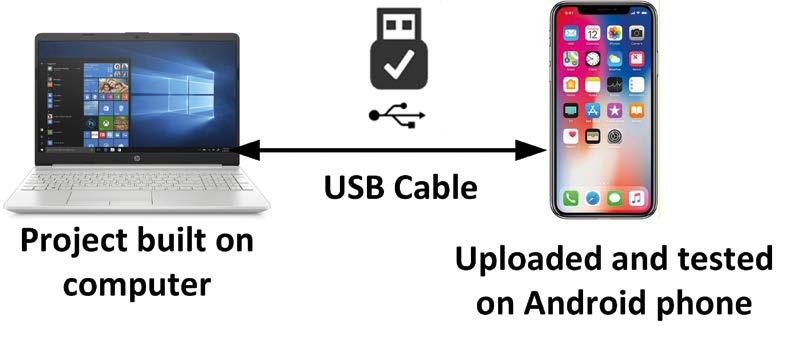
Here, the application is built on the computer and is uploaded to the Android device through a USB cable. This option requires a driver to be loaded to Windows-based PCs (there is no need to load a driver for the Mac or Linux machines). The steps are as follows (you must perform the installation from an account that has administrator privileges). See also the link: https://appinventor.mit.edu/explore/ai2/setup-device-usb
• Go to web site: http://www.appinventor.mit.edu/explore/ai2/windows.html
• Download the setup tools installer: MIT_App_Inventor_Tools_30.265.0_win_setup64.exe
• Click to Download the file and click through the steps to install the file (Figure 2.7)
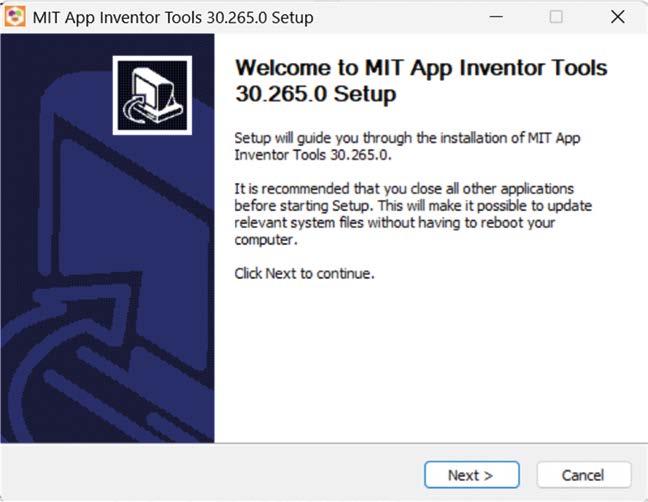
Figure 2.7 Download the file
It is recommended not to change the installation directory. You will find that the path to the file is: C:\Program Files\Appinventor\commands-forAppinventor
• Download and install the apps MIT AI2 Companion from the Play Store to your Android device (see Figure 2.4)
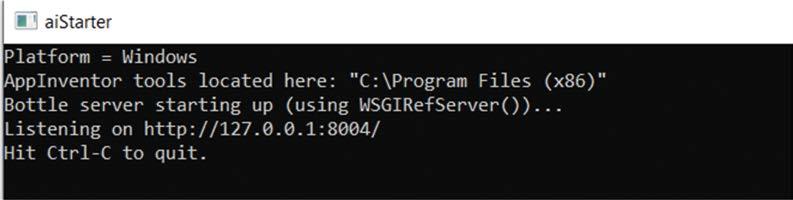
• Using the USB cable (also the emulator) requires the use of the program named aiStarter. There should be a shortcut on Windows-based computers to this program (On a Mac, aiStarter runs automatically when you log in), or you should be able to locate it in the Start menu. Start the aiStarter, you should see the aiStarter icon in your task bar. You should see a window as shown in Figure
2.8 (On GNU/Linux, aiStarter will be in the folder /usr/google/commands-forAppinventor and you'll need to launch it manually. You can launch it from the command line with /usr/google/appinventor/commands-for-Appinventor/ aiStarter)
• We now have to enable USB Debugging on our Android device. Go to Settings, then select the Developer options and enable USB debugging (see Figure 2.9). You may find that the Developer Options is hidden (especially on Android 4.2 and newer) by default. If this is the case, go to Settings and then About phone, and tap Build number 7 (seven) times. Then return to the previous screen to find and enable the Developer options, including USB Debugging.
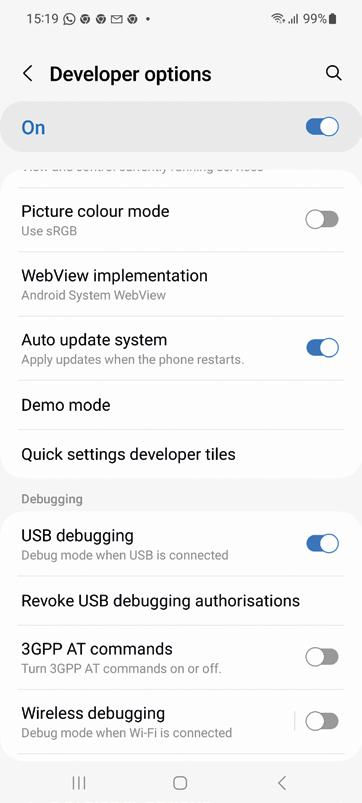
2.9 Enable USB debugging
• Connect your Android device to your computer using a USB cable and make sure that it is not mounted as a drive on your computer. You may have to go to My Computer (on Windows) and right click to disconnect any drives (e.g. eject) that were mounted when you connected your Android device. The device should be connected as mass storage device (not as media device, i.e. for file transfer, not for sending pictures). You may get the message saying Allow USB Debugging? Press OK.
• Go to the Connection Test Page (appinventor.mit.edu/test.html) to make sure that the connection is okay. You should see the window as shown in Figure 2.10 after a successful connection.
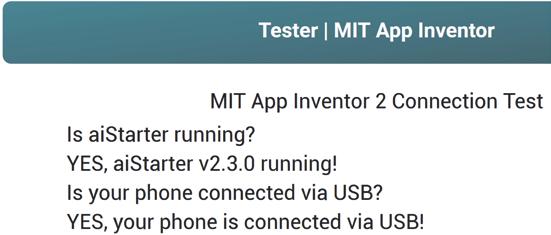
Figure 2.10 Successful connection between Android and the PC
• Once you complete your project and there is successful USB connection between the computer and the Android device, click Connect and then USB to upload your project to the Android device.
Option 3 - Using the emulator without an Android device
In this option it is assumed that the user has no Android devices. The application is built on the computer and is then emulated using a virtual Android mobile phone which is displayed on the screen, as shown in Figure 2.11 (see link: https://appinventor.mit.edu/explore/ai2/ setup-emulator)
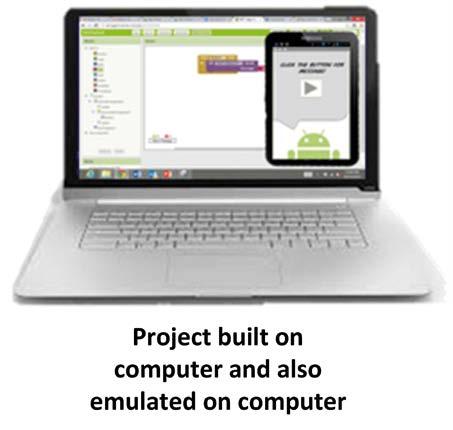
Figure 2.11 Using the Emulator without an Android device
You will have to install some software on your computer before the emulator can be used. The steps are:
• Go to web site:
http://www.appinventor.mit.edu/explore/ai2/windows.html
• Download the setup tools installer:
MIT_App_Inventor_Tools_30.265.0_win_setup64.exe
• Click to install the file and go through the options, accepting the default folders.
• You might get some errors from HAXM during the installation if your PC does not support the following:
Intel Virtualization Tech
Intel VT-d Extended Page Tables
VMX (Virtual Machine Extension)
The above options can be enabled from BIOS if your CPU supports them (not all CPUs do). Even if the above options are enabled in BIOS, you may still get errors during the installation of the setup tools because the HAXM (Intel hardware Accelerated Execution Manger) may not be supported by your CPU. In any case, a program called aiStarter will be downloaded and you should see its icon on your Windows desktop. If you get errors with the HAXM, you have two options:
• Use a real device and instead of the emulator
• Use Android Studio which supports modern virtualization through Windows Hyper-V instead of HAXM.
Using the Android Studio emulator
As mentioned above, if you have problems with the HAXM, you can install the Android Studio and use its emulator. The steps are:
• Download Android Studio from the following site. At the time of writing this book, the installation file had the name: android-studio-panda2-windows. exe: https://developer.android.com/studio
• Run the installer and choose Standard Installation
• Make sure these components are selected:
Android SDK
Android Virtual Device (AVD)
Android Emulator
Then:
• Open Android Studio
• Click More Actions Virtual Device Manager
• Click to Create Device
• Choose a phone (e.g. Pixel 6, Medium Phone etc)
• Download a system image (e.g. Android 13 or Android 12)
• Click Finish
We are now ready to use the Android Studio emulator:
• Create your application using MIT App Inventor
• Start the Android Studio and click More Actions
• Click to select Virtual Device Manager
• Click on selected phone (e.g. Medium Phone)
• A phone image will be shown on your PC screen
• Click to start the aiStarter program on your PC screen
• Click Connect, followed by Emulator on your MIT App Inventor screen (Figure 2.12)
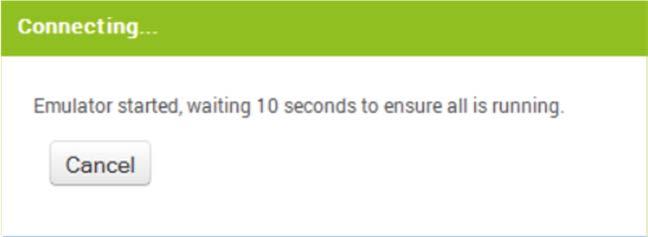
• Wait a while (Figure 2.13) and you should see your application running on the created window on your PC screen.

Note: if you get aiStarter not available messages even though the software has already been started, you should click to run the program adbrestart in directory C:\Program Files (x86)\AppInventor\commands-for-appinventor\adbrestart.
2.4 Setting up App Inventor for iOS iPhone or iPad tablet
This is the recommended option when the software is developed on the PC and then uploaded (installed) to the iOS device using the Wi-Fi link for testing. You can also use the Android Emulator if you wish.
The steps to develop and upload an MIT App Inventor application to your iOS device and test it are as follows:
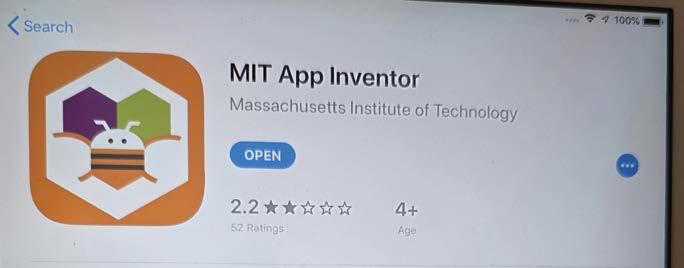
• Install MIT App Inventor app on your iOS device from the App Store (Figure 2.14)
• Develop your App Inventor application on your PC
• Start the App Inventor app on your iOS device (Figure 2.15)
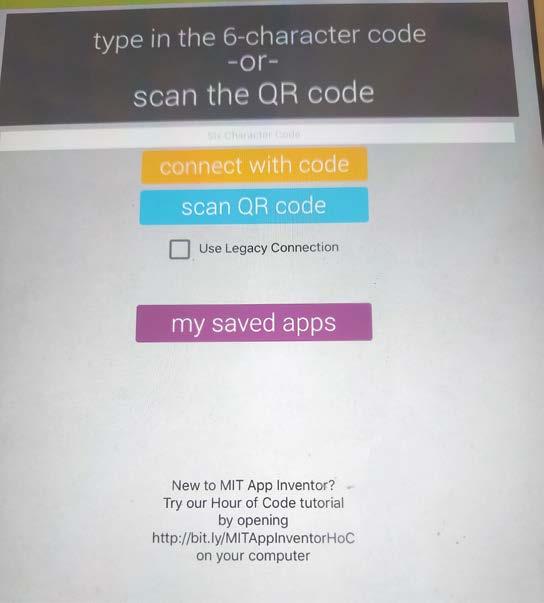
Figure 2.15 Start MIT App Inventor app
• Click Connect followed by AI Companion on your App Inventor screen on the PC where you will be presented with a 6-digit code.
• Enter this 6-digit code on your MIT App Inventor App on the iOS device where specified and click connect with code.
• Your application should be installed and be available on your iOS device.
2.4.1 Restrictions on iOS
MIT App Inventor was originally designed for Android. Later support for iOS was added, but the iOS version has some differences and limitations compared to Android. In general, MIT App Inventor can be used for iOS app development, but it's more limited than Android due to hardware restrictions, component availability, and App Store requirements. Supported components, limitations, and performance issues when using the iOS with MIT App Inventor are given in the next sections.
2.4.2 Supported components and APIs on iOS
At the time of writing this book, the following components and APIs were supported by the iOS systems (not verified by the author):
• UI components: Button, Label, TextBox, ListView, Image, WebViewer, Canvas, Slider.
• Sensors: Accelerometer, LocationSensor, OrientationSensor (limited).
• Connectivity: Web, TinyDB, FirebaseDB, Notifier.
• Media: Player, Sound, VideoPlayer, ImagePicker (with iOS limitations).
Limited or unsupported components:
• Bluetooth (classic): iOS restricts classic Bluetooth; BLE is partially supported.
• Extensions: Most third-party extensions built for Android do not run on iOS.
• File-related components: File access is sandboxed; apps can only write to their app directory.
File handling:
• TinyDB: Works the same on iOS and Android; stores data locally.
• File component: Limited to app sandbox; no access to arbitrary device files.
• Cloud storage: Firebase and other online storage options work cross-platform.
2.4.3 iOS programming considerations
Some iOS programming considerations are (not verified by the author):
• Blocks programming: Behaves the same for logic and events.
• Platform-specific conditions: Use If Device = iOS checks to handle iOS-only behavior.
• Screen orientation: iOS may handle rotation differently, requiring extra testing.
• Permissions: iOS permissions (camera, microphone, location) are stricter and must be declared in the app manifest automatically by MIT App Inventor.
1. Using iOS companion
- Ideal for testing during development.
- No need to compile .ipa; changes are reflected instantly.
2. Building .ipa
- Requires a paid Apple Developer account.
- MIT App Inventor generates a build file via cloud service.
- You can then upload to TestFlight for beta testing or directly to the App Store.
3. Signing & Certificates
- Mandatory for iOS apps.
- MIT App Inventor's build service uses certificates from your Apple account.
2.4.4. iOS performance considerations
• Some complex apps may run slower because:
- Components are emulated on iOS rather than natively implemented.
- Certain animations and canvas operations are CPU-intensive.
• Testing is crucial on actual devices, not just with the Companion app.
2.4.5. Extensions
Most MIT App Inventor extensions are not supported by iOS (not verified by the author):
• iOS-compatible extensions: Very few exist; mostly UI enhancements or web connectivity.
• Custom APIs: Use Web component to call REST APIs or cloud functions for features unavailable natively.
• Native features: If a feature isn't supported, consider developing a hybrid approach (e.g., using Swift/Xcode for native code and integrating it).
While using MIT App Inventor with iOS, you should:
• Test frequently using the iOS Companion app to catch compatibility issues early.
• Keep your app simple and avoid Android-specific components.
• Check each extension or component for iOS compatibility before use.
• Prepare for Apple's app review process if planning to publish.
See the links below for building Apps for iOS with MIT App Inventor:
https://appinventor.mit.edu/ios_tips
https://iosbuildservertest.appinventor.mit.edu/reference/other/build-ios-apps.html
Note: All the projects in this book were developed for an Android smart phone with the following specifications:
Phone: Samsung A71
Model: SM-A715F
OS version: 13
Cores: 8
CPU: Octa Core 2.21 GHz Qualcomm
GPU: Adreno 618
API level: 33
RAM: 6 GB
2.5 Summary
In this chapter, you have learned how to set up the MIT App Inventor software. There are three different methods for testing a project, depending on whether you have an Android device and Wi-Fi access.
Method 1 is the most commonly used. It assumes that the user has an Android device connected to the same Wi-Fi network as the computer on which the software is being developed.
Method 2 assumes that an Android device is available, but there is no Wi-Fi connection. In this case, the Android device is connected to the computer using a USB cable.
Method 3 assumes that the user does not have an Android device. Instead, the developed program is run on a virtual Android phone (emulator) on the computer screen.
The use of iOS devices such as the iPhone and iPad with MIT App Inventor is also discussed in this chapter.
In the next chapter, we will develop some simple projects using MIT App Inventor and then load them onto an Android device for testing.
Discover how easy and exciting mobile app development can be with MIT App Inventor. This hands-on guide takes you from basic concepts to building real-world mobile applications using a simple visual programming approach—no prior coding experience required. You will create IoT and AI-powered apps for Android devices and explore how App Inventor can also be used with iPhones and iPads.
Connect your applications to platforms such as Arduino UNO R4 WiFi, ESP32, Raspberry Pi Pico (2)W and Raspberry Pi 5, enabling you to build smart, connected systems.
Inside the book, you will learn how to:
> Build interactive apps using buttons, images, sound, and multimedia
> Create text-to-speech and speech-recognition applications
> Develop camera-based and location-aware (GPS) apps
> Design useful tools such as calculators and educational apps
> Work with smartphone sensors like accelerometers and light sensors
> Build AI-powered applications, including voice assistants and image-generation features
> Send and receive messages, and create communication-based apps
> Connect mobile apps to hardware using Wi-Fi and Bluetooth
> Control real devices such as LEDs, motors, and sensors

Prof. Dr. Dogan Ibrahim holds a BSc in Electronic Engineering, an MSc in Automatic Control Engineering, and a PhD in Digital Signal Processing. He worked in many industrial organizations before he returned to academic life. Prof. Dr. Ibrahim is the author of over 120 technical books and published over 200 technical articles on microcontrollers, microprocessors, and related fields. He is a chartered electrical engineer and a Fellow of the Institution of the Engineering Technology. He is a certified Arduino professional.
Designed for beginners, students, and hobbyists, this book focuses on learning by doing. By the end, you will have the skills and confidence to create your own innovative applications that interact with both the digital and physical worlds.
Start building and turning your ideas into reality. Elektor International Media www.elektor.com