3 minute read
Chapter 1 • Installation (Windows 10 or 11

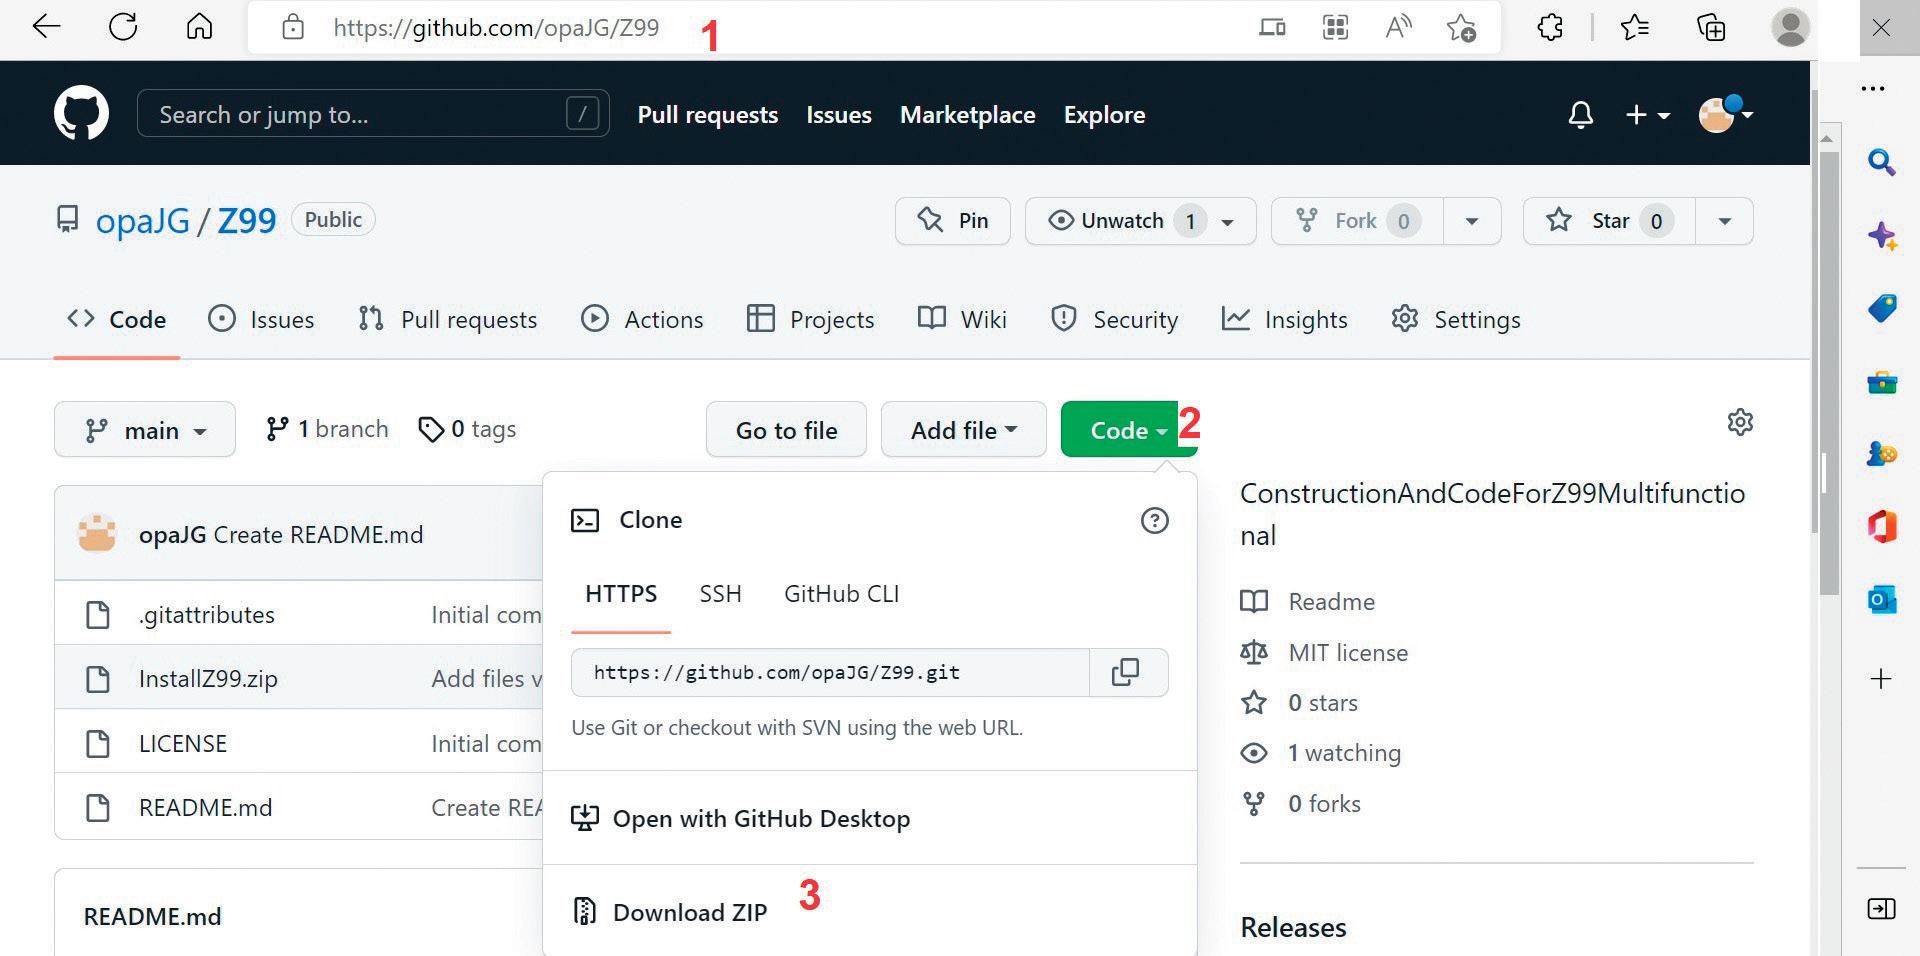
All code is provided as a zip file, InstallZ99.zip. The download file is available on the Elektor website https://www.elektor.com. An alternative download is available at GitHub https://github.com/opaJG/Z99. Click on the green button 'Code' and download the file InstallZ99.zip.
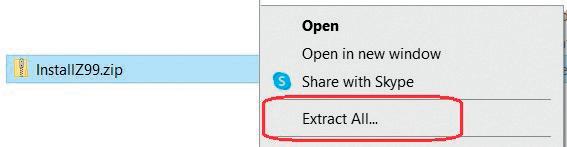
Save the zip (InstallZ99.zip) to any directory on your hard disk. Right-click on it and select extract all.
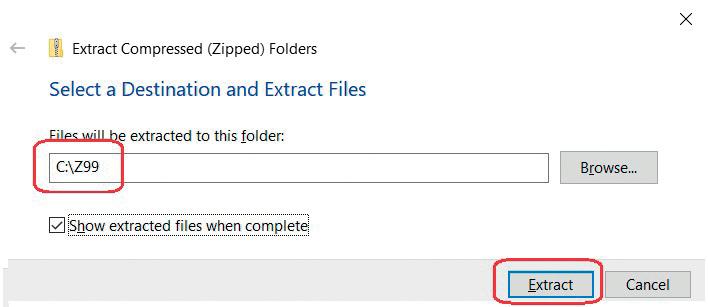
Select as extraction directory C:\Z99.
There is only one file extracted with name C\Z99\InstallZ99.exe. Right-click on it. Select properties and verify the digital certificate.

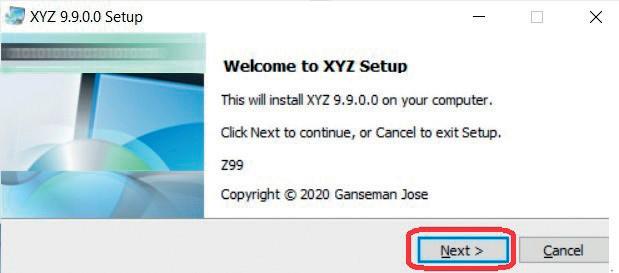
The installation is straight forward. Double click on C\Z99\InstallZ99.exe. Select ‘Next’
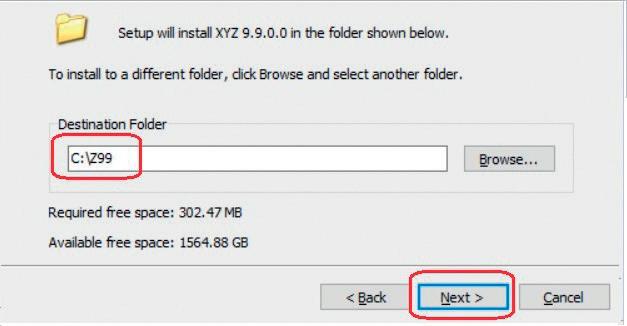
Install in directory C:\Z99.
Installation to any other directory is possible.
Select “create a shortcut” in Start Menu and Desktop.
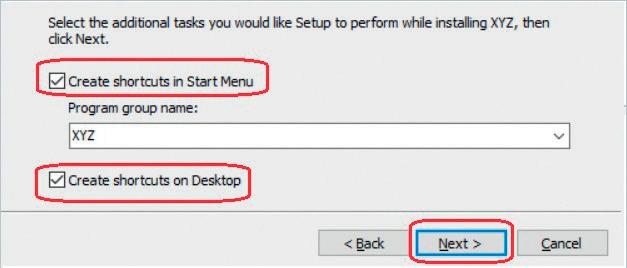
By creating a Desktop shortcut, the Z99 icon is placed on your desktop. When the installation is finished, you may launch XYZ.exe but it is probably better to wait until your Z99 is built and you have learned to work with the software.
Open ‘Windows Explorer’ and have a look in the C:\Z99 directory.
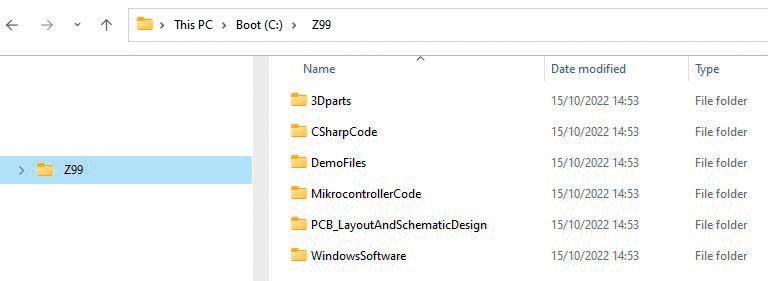
There are seven subdirectories
• 3Dparts: Contains all the 3D parts: See chapter 3. • CSharpCode: The C# source code for Visual Studio. See chapter 7. • DemoFiles: HPGL, Gerber, Drill, Gerber, and G-code files.
See chapter 8. • MikrocontrollerCode: PIC microcontroller code and Z99.hex file. See chapter 2. • PCB_LayoutAndSchematicDesign: Contains the drawing and PCB layout.
See chapter 2. • WindowsSoftware: XYZ.exe: Contains the PC software.
See chapter 8.
Some of the subdirectories contain subdirectories.
Subdirectories of C:\Z99\3DParts

A. ScadSourceCode: The *.scad source code for all 3D components. B. STL: The stereo lithographic files, made with A.
When you have no 3D printer and need to send the files to a 3D printing firm, these are the files they need so they can print the parts for you. C. G-code: This directory is empty. G-code files are printer dependent. We will explain later how to generate them from the *.stl files.
Subdirectories of C:\Z99\DemoFiles
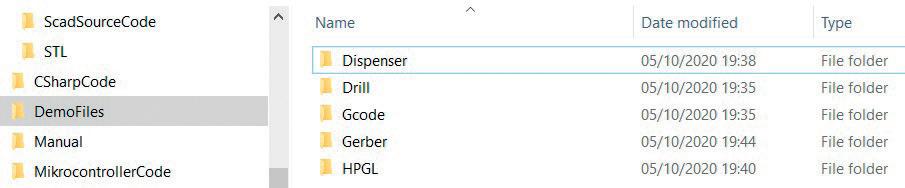
• Dispenser: *.disp files for solder paste dispensing. • Drill: *.drl files to drill. • G-code: *.gcode files to mill text or PCB. G-code files are made from Gerber files by means of FlatCAM. This is explained in chapter 9. • Gerber: *.gbr files made with a PCB design program. • HPGL: *.hpgl or *.plt files for plotter or cutter.
Subdirectory C:\Z99\CSharpCode
After registration, Visual Studio is free and available from the Microsoft website:
https://visualstudio.microsoft.com/downloads/
The software was created with Visual Studio 2015, later tested also with
Visual Studio 2019 and Visual Studio 2022.
If you are not familiar with C# or Visual Studio there is an informative book that will set you on track in no time:
C# Programming for Windows and Android from John Allwork
The E-Book is available in the Elektor shop.
Open C:\Z99\CSharpCode\XYZ.sln with Visual Studio to see all the files.
Structure of the software
The structure of the software is quite simple. No files are installed in a Windows directory.
Installation without the installation program is possible. Moving the software to another PC just requires you to copy the C:\Z99 directory and all its contents to the other PC. If you move Z99 in this manner, without using the installation program, you will get no shortcut on Windows desktop. In Windows explorer, right-click on C:\Z99\WindowsSoftware\XYZ.exe and select ‘Send to desktop’ to create a Desktop icon.

