11 minute read
STRAWBALE WORKSHOP


Words and photos by Fraser and Faith Gould
We voyaged from Fiordland in the South, from Puhoi in the North and everywhere in between to converge in the beautiful Hawkes Bay for an autumn barn raising. Well, bale raising; in eight days we built a 10m2 straw bale room with joinery installed, base plaster applied and an earthen floor laid. We attended several lectures, visited local straw bale houses and learnt pretty much everything we needed to know to embark upon our own straw bale building projects. We were a diverse group: ambitious owner builders, high-end architects, existing earth and conventional builders, with an age range of three months to 70 years! We had come from all over the world, and as we found, the course had something to offer all of us. The course was organised by Sol Design. Sven Johnston travelled from Geraldine to run the workshop. Pat Mawson hosted us all on site, taught, and most importantly provided the experimental buildings on which we could learn which were two 10m2 rooms of the same design, one for each of his boys. We were building a new 10m2 room for his youngest son (first cottage) but a workshop had been hosted here previously so there was already a second building on which we could practice finishing plaster coats. Luckily for us the heavy and dirty work of foundations was completed before we arrived. The stem walls were experimental and constructed of earthbags, secured to each other with
Advertisement

barbed wire, and the ground with piles and waratahs. A baseplate (horizontal ladder frame) was then affixed to the foundations, waterproofed and filled with scoria for insulation. No concrete was used in the making of these fine, cunningly crafted foundations. Day one began with lectures on natural building and straw bale construction - what is natural building? It is a very good question and there were as many answers as people which included some lively debate! We were using the buck and beam/straw bale (aka Hybrid Load Bearing) infill method. With so many handy people attending by the end of the day the bucks and beams were constructed and in place, and the rafters were up. It felt like quick progress! The Hybrid Load Bearing system incorporates vertical ladder frames primarily around openings in the building (doors, windows etc.), but also at crucial junctions such as corners. This transfers the load of the roof evenly to the bottom plate, mitigating the uneven compression of the bales around openings in the walls which occurs with pure load-bearing straw bale construction. This method is also far more frugal with materials than traditional post and beam construction. On our second day we were onsite learning about straw bales; I was astounded we could spend so much time talking about and analysing the qualities of various bales of straw and still feel riveted! Shape, size, and density of bales, baling machines (and their drivers), and pros and cons of different types of stalks were all discussed. While the denser the better, one can make do with pretty much any available bale. However, organic straws are apparently notorious for prickly stowaways, and chaff bales more difficult to manage than traditional small bales. Car jacks were used to compress the bales, then finally the last one was jostled into position. Approximately 100mm of compression per bale can be expected, but I believe that we were testing that knowledge to its limits in some places. The walls were then laced to the frame to prevent high winds blowing them out and hammered home with Pat’s homemade hammers. Angled bales for below the roof were cut with a long-barred chainsaw, a simple jig and plenty of enthusiasm. Final trimming and shaping of the walls was managed with a line strimmer, though some of the neo luddites on the team crafted other ways to achieve the same result - though none seemed quite as efficient as the weedwacker. By the end of the day all the bales were in the walls and it certainly looked as if the bulk of the labour was done. It seemed to me pretty much good enough to move in (certainly better than some flats I’ve lived in!). On day three we learned about the ‘earth’ portion of straw bale construction. We were to apply 50mm of cob plaster to each side


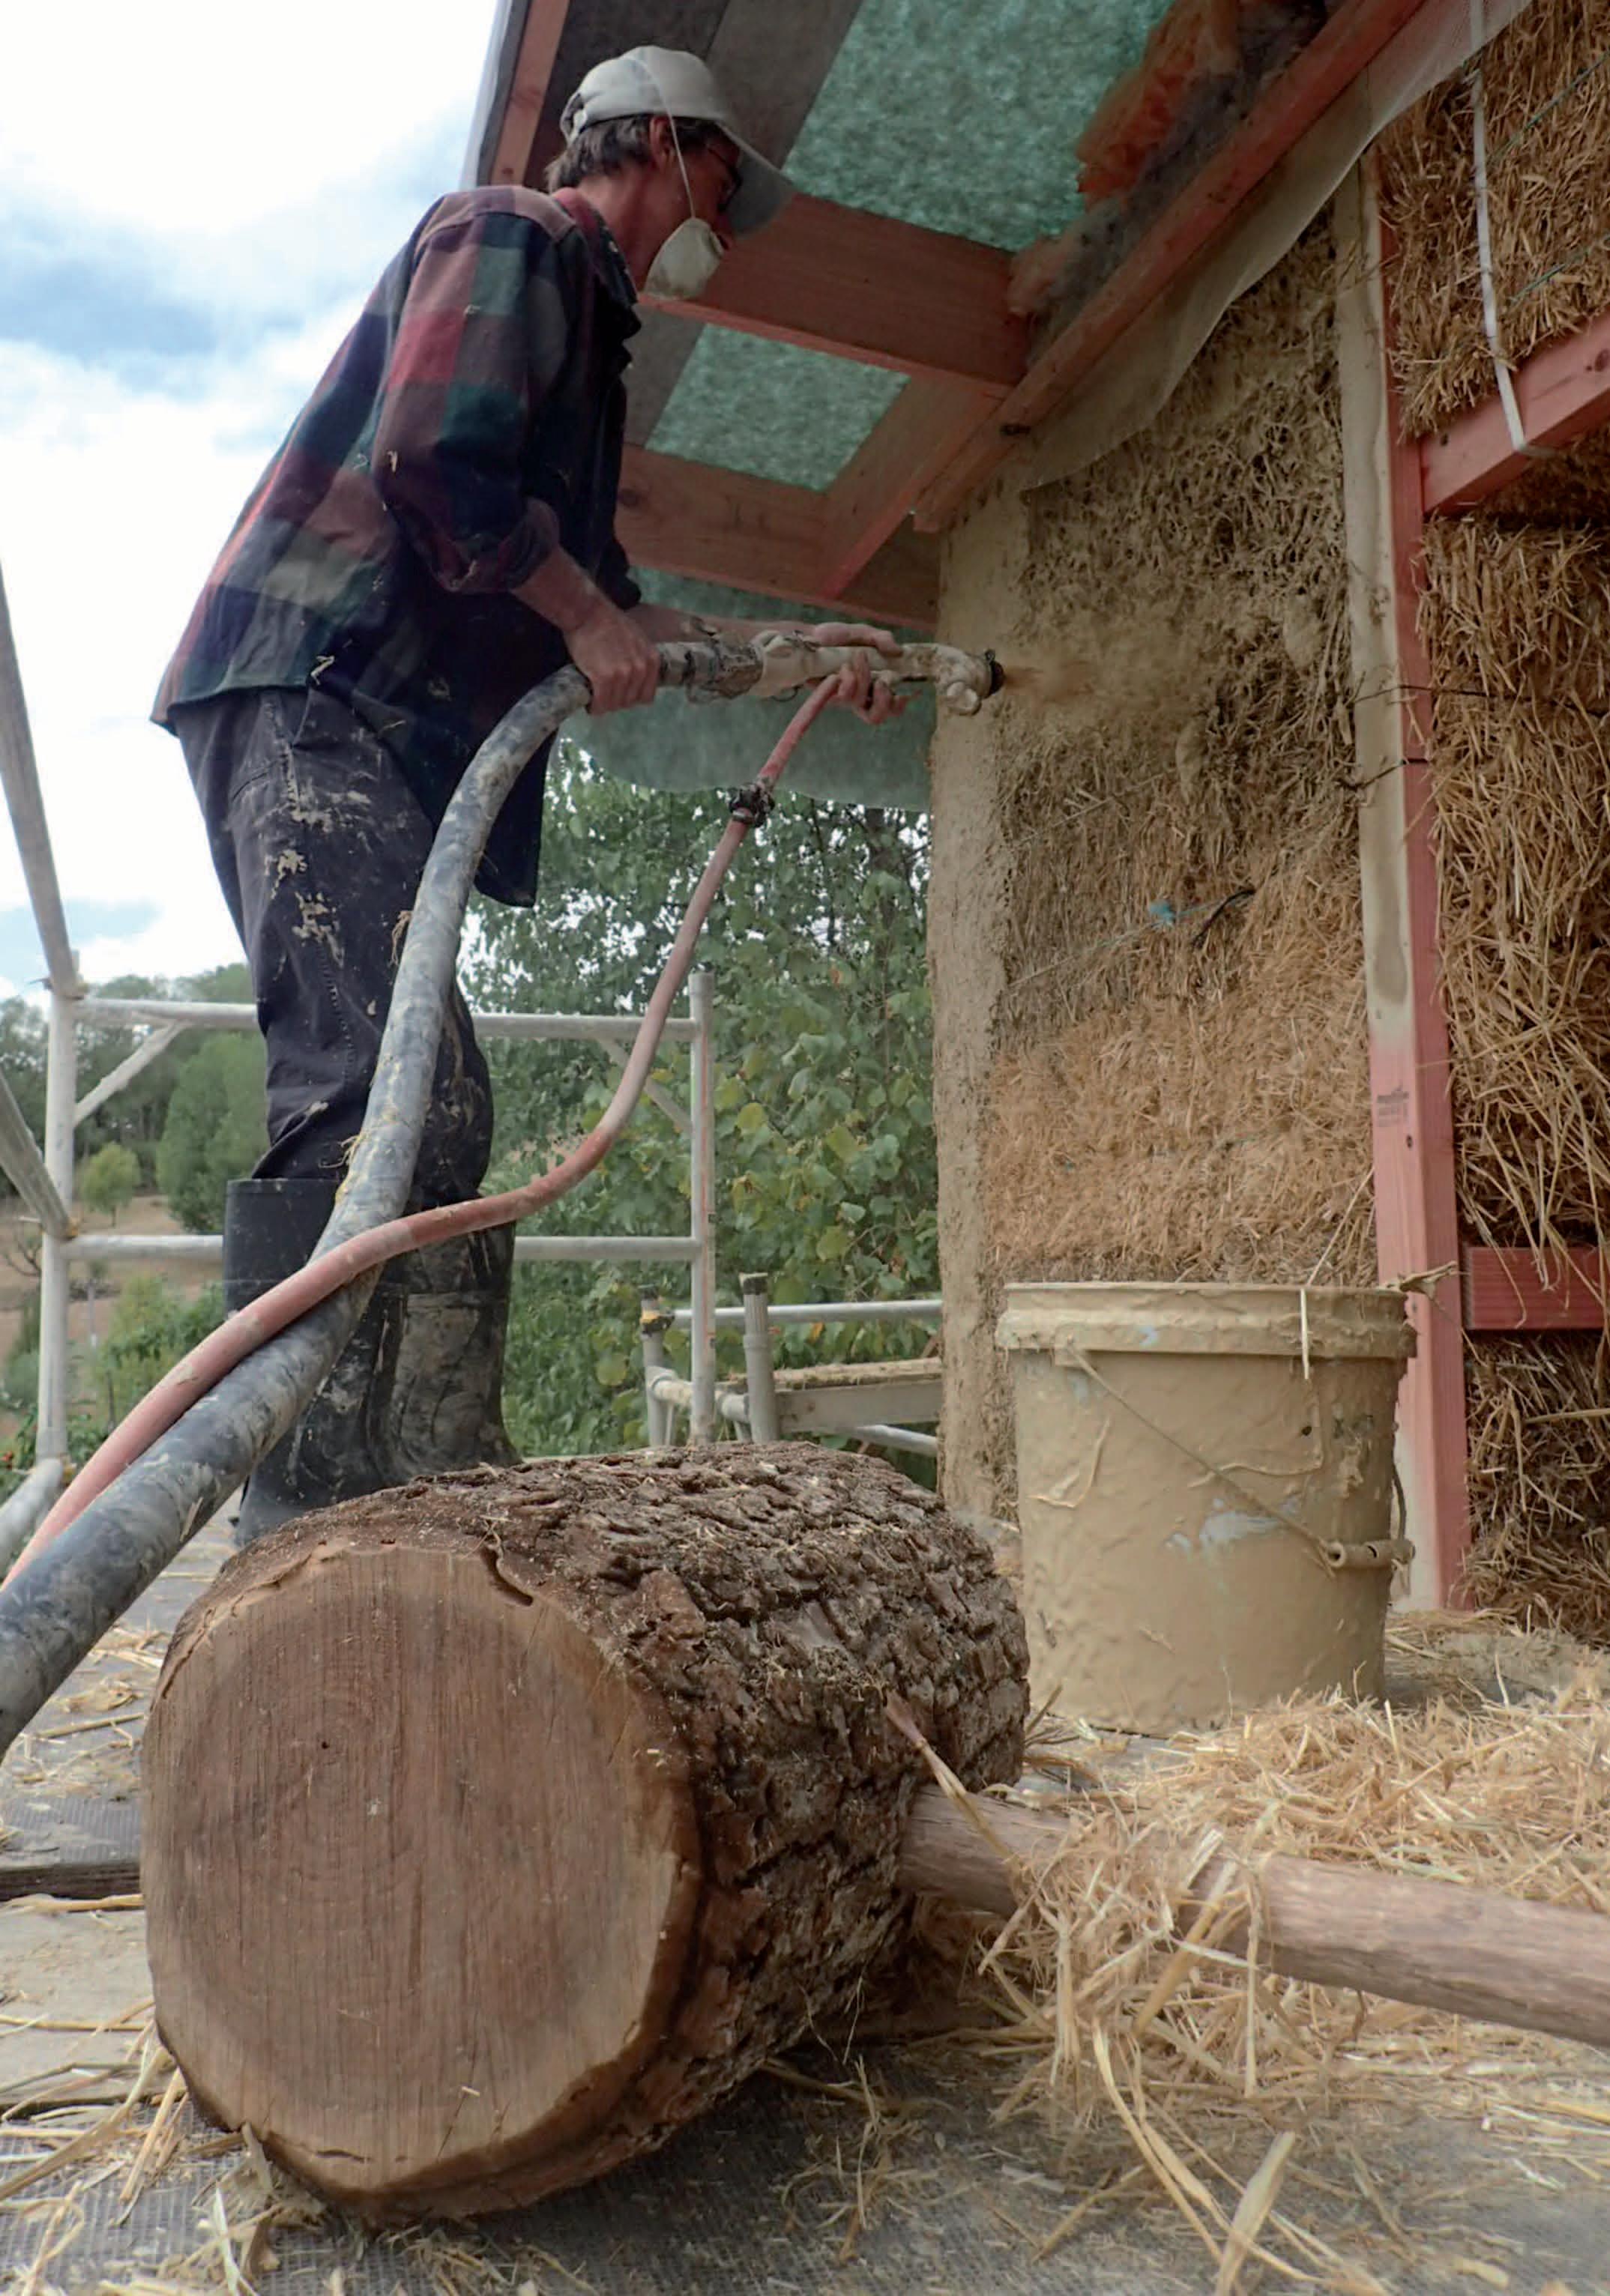
This page - top and bottom left: Squeezing final bale above compressed bales - this is how the professionals do it! Right: Clay slip being applied with render gun.
of the walls. This was a revelation to me - although I attended the 2016 International Straw Bale Conference in Methven apparently I missed this part - a straw bale house is in large part cob. In this case at least 100mm in total plus finish plasters. In addition to an earth floor this provides an amazing amount of thermal mass, which coupled with the thermal insulation properties makes for a very comfortable living environment. Then we got muddy - the clay slip was whipped in large drums, sieved, and then mixed with sand and straw in a large drum mixer. The walls were first coated with a clay slip applied by hand or with a compressed air texture gun, which was to help key the plaster into the bales. Pat owns and operates “Matilda,” or Pat’s Amazing Plaster Machine which he uses on his professional builds. He quipped that it can take a day to get it running, but can do a day’s work in half an hour - thanks be to the machine gods! Pat has also been able to source dried paper pulp from a local paper mill, the fine fibres of which create a very strong bracing in the plaster, which provides tensile strength and prevents cracking. We applied the mixture by hand, by small render gun and with Pat’s Amazing Plaster Machine (Matilda.) Sven and Pat stressed the importance of good detailing (aka where things meet) which apparently is where one can tell the master from the novice. Pat showed us how to install joinery and flashings, and most importantly, how to ensure worry free water tightness. The details are especially important in straw building as it is here that the potential for moisture to accumulate in the walls and against the plaster is mitigated. Ever resourceful, River Rat Pat had salvaged trimmings of ultra-high-tech German building paper from previous building sites and affixed it throughout the building. The building does NOT breathe, but the building IS vapour permeable. Moisture is moderated by the earthen components of the system and moves through the walls ensuring condensation does not build up within the structure. The result is a warm and dry environment. We spent the remainder of the week testing and applying finish plasters, and applying a final plaster to the existing cottage. We mixed test samples of clay plasters with various ratios of clay to sand. We played with pigments, tested different types of Japanese trowels, practiced some detailing, and used various creative techniques including Sgraffito - the plastering method where different coloured layers of plaster are applied to a wall, then cut away to create a pattern or image. The final exterior coat on the cottage was applied using a gentle sponging action to create the effect of a masterful application
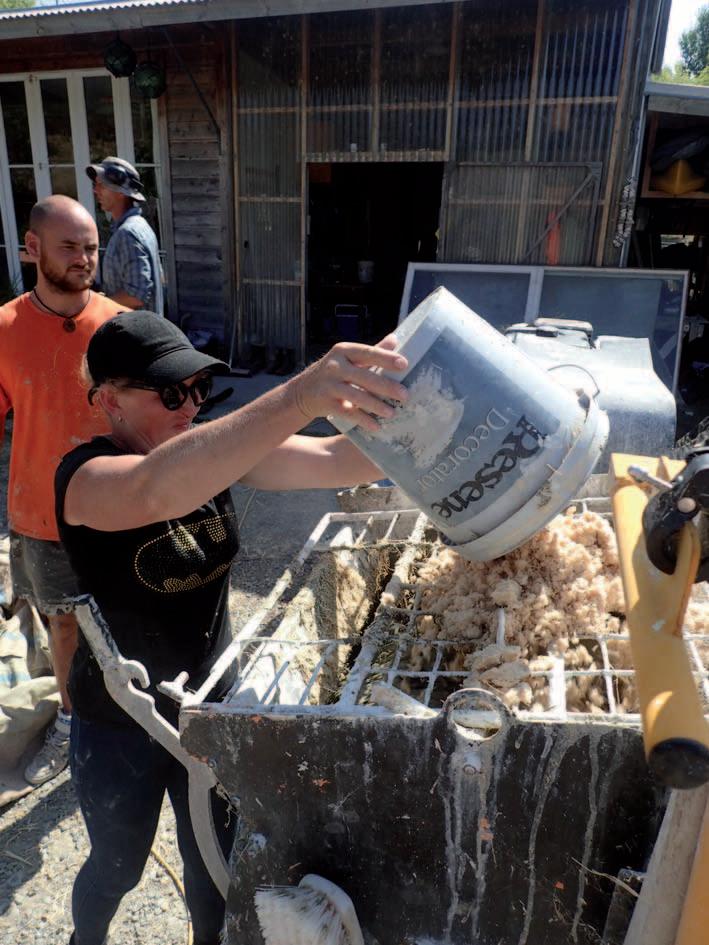

Photos - top left: The amazing machine - paper pulp goes in. Middle : Quick slip - plaster mixer suspended above large barrel - bucket to keep dust out of the motor and bearings. Bottom: Lime plaster served on a hawk. Right: Hand applying earth mixture on the south side of 1st cottage.

of the plaster (which was certainly more enthusiastic than masterly!) The final afternoon was spent with us all obsessing over Tadelakt - the soaping and polishing of lime plaster which originated in Morocco, to achieve a beautiful and waterproof finish. The week ended with a stand-alone workshop on earth floors. During the week we had made sample mixes, seven in total, each with different ratios of clay to aggregate. We waited for these to dry, then scientifically tested each one by stabbing them with a long, hard, spiky tool to establish their hardness and durability. As it happened the sample with the most aggregate was the hardest, so this was the recipe we used to pour the earth floor in the first cottage. Due to the limited space we poured another floor in Pat’s lean-to/shed so we could all get a feel for it. It was far simpler than I had expected, and having Sven and Pat walk us through testing was invaluable. Despite every natural builder I meet telling me not to skimp on testing, I’m somewhat inclined to fudge over that part, but it really was quite quick and easy. For finishing the floor, we waited until it was ‘leather hard’ then Pat would polish with a trowel, while Sven was more inclined to apply thin slip and then wipe it off. As always personal preference, experience and the terroir are all incorporated into the Natural Builders’ intuition. A final coat of ‘boiled’ linseed oil further hardens and somewhat waterproofs the surface. The days were steady, split into lectures, onsite learning and building. The evenings were filled with additional presentations, house tours and invaluable conversations with experienced builders and aspiring owner builders. We discussed our personal projects and shared reflections on insights into what will likely work well and where issues may arise. The conversation was stimulating and thought provoking and the lectures were well structured and professional. I found it very valuable that we spent as much time ‘off curriculum’ whilst Sven and Pat shared their experiences of trouble shooting, making the most of limited resources and developing an essential feel for the medium over long careers, together

with accumulating a knowledge for the potential. It really would have been worth going for the hours of consultation alone. Prior to attending the course, Fraser and I were not sure with what system we would be building our small, natural house. After this workshop we’ve decided to build with straw bales; the insulative value is wonderful, the speed with which walls go up is very alluring, learning how much earth is used in straw bale construction was the last straw (sic) and won us over. The weighty feeling of adobe and cob has always appealed to me, but with a chronic back injury moving all the mass is rather intimidating. Now we can experience the monolithic snugness of the massive walls without another slipped disc. We highly recommend this course; it is a very well-rounded natural building seminar as all the elements in straw bale construction are readily applied to any natural building method. The knowledge, experience, resourcefulness and cunning of the hosts was extraordinary. We walked away feeling empowered, as though no problem could arise we couldn’t figure out (even if we have to make a few phone calls), and the materials really are so forgiving. If you are thinking of embarking on any natural building project, invest the time to take this course, it was one of the greatest steps toward building our dream home. On a personal note I’d like to share my appreciation to hosts Sven, Pat, and Rochelle, and participants alike; I attended this workshop with a three-month-old baby. For the most part I sat on the sidelines listening and asking questions, but there were plenty of offers of baby holding so I could participate, along with cups of tea, offers of the best chair, shady spots and other such pampering. I think it says a lot about the natural building community that a new mum and baby can be incorporated into such a project and I am so grateful. This course gave us both the confidence we needed to pull the trigger and embark on our own build.


This page - left: Applying the coat of lime plaster. Top right: The cob plaster goes on the 1st cottage; Middle right: Applying first coat of clay plaster. Bottom right: Willow switch is a creative horizon between the finish coats of earth and clay plaster.