2 minute read
Let vibrant color lead your creativity


Even with the kids getting older, I am only now cautiously willing to take down the box of permanent markers that has been intentionally stored in a hard-to-reach location — safe from budding artists who would view our walls as a blank canvas. In my defense, you and I have both heard about and seen the photos that would make any parent cry. There is definitely something to fear when it comes to the permanency of permanent markers on walls, furniture and carpet.
Realizing that my kids are far old enough to know better, I was able to let go and let their creativity take over. Vibrant color became the theme of our next two projects.
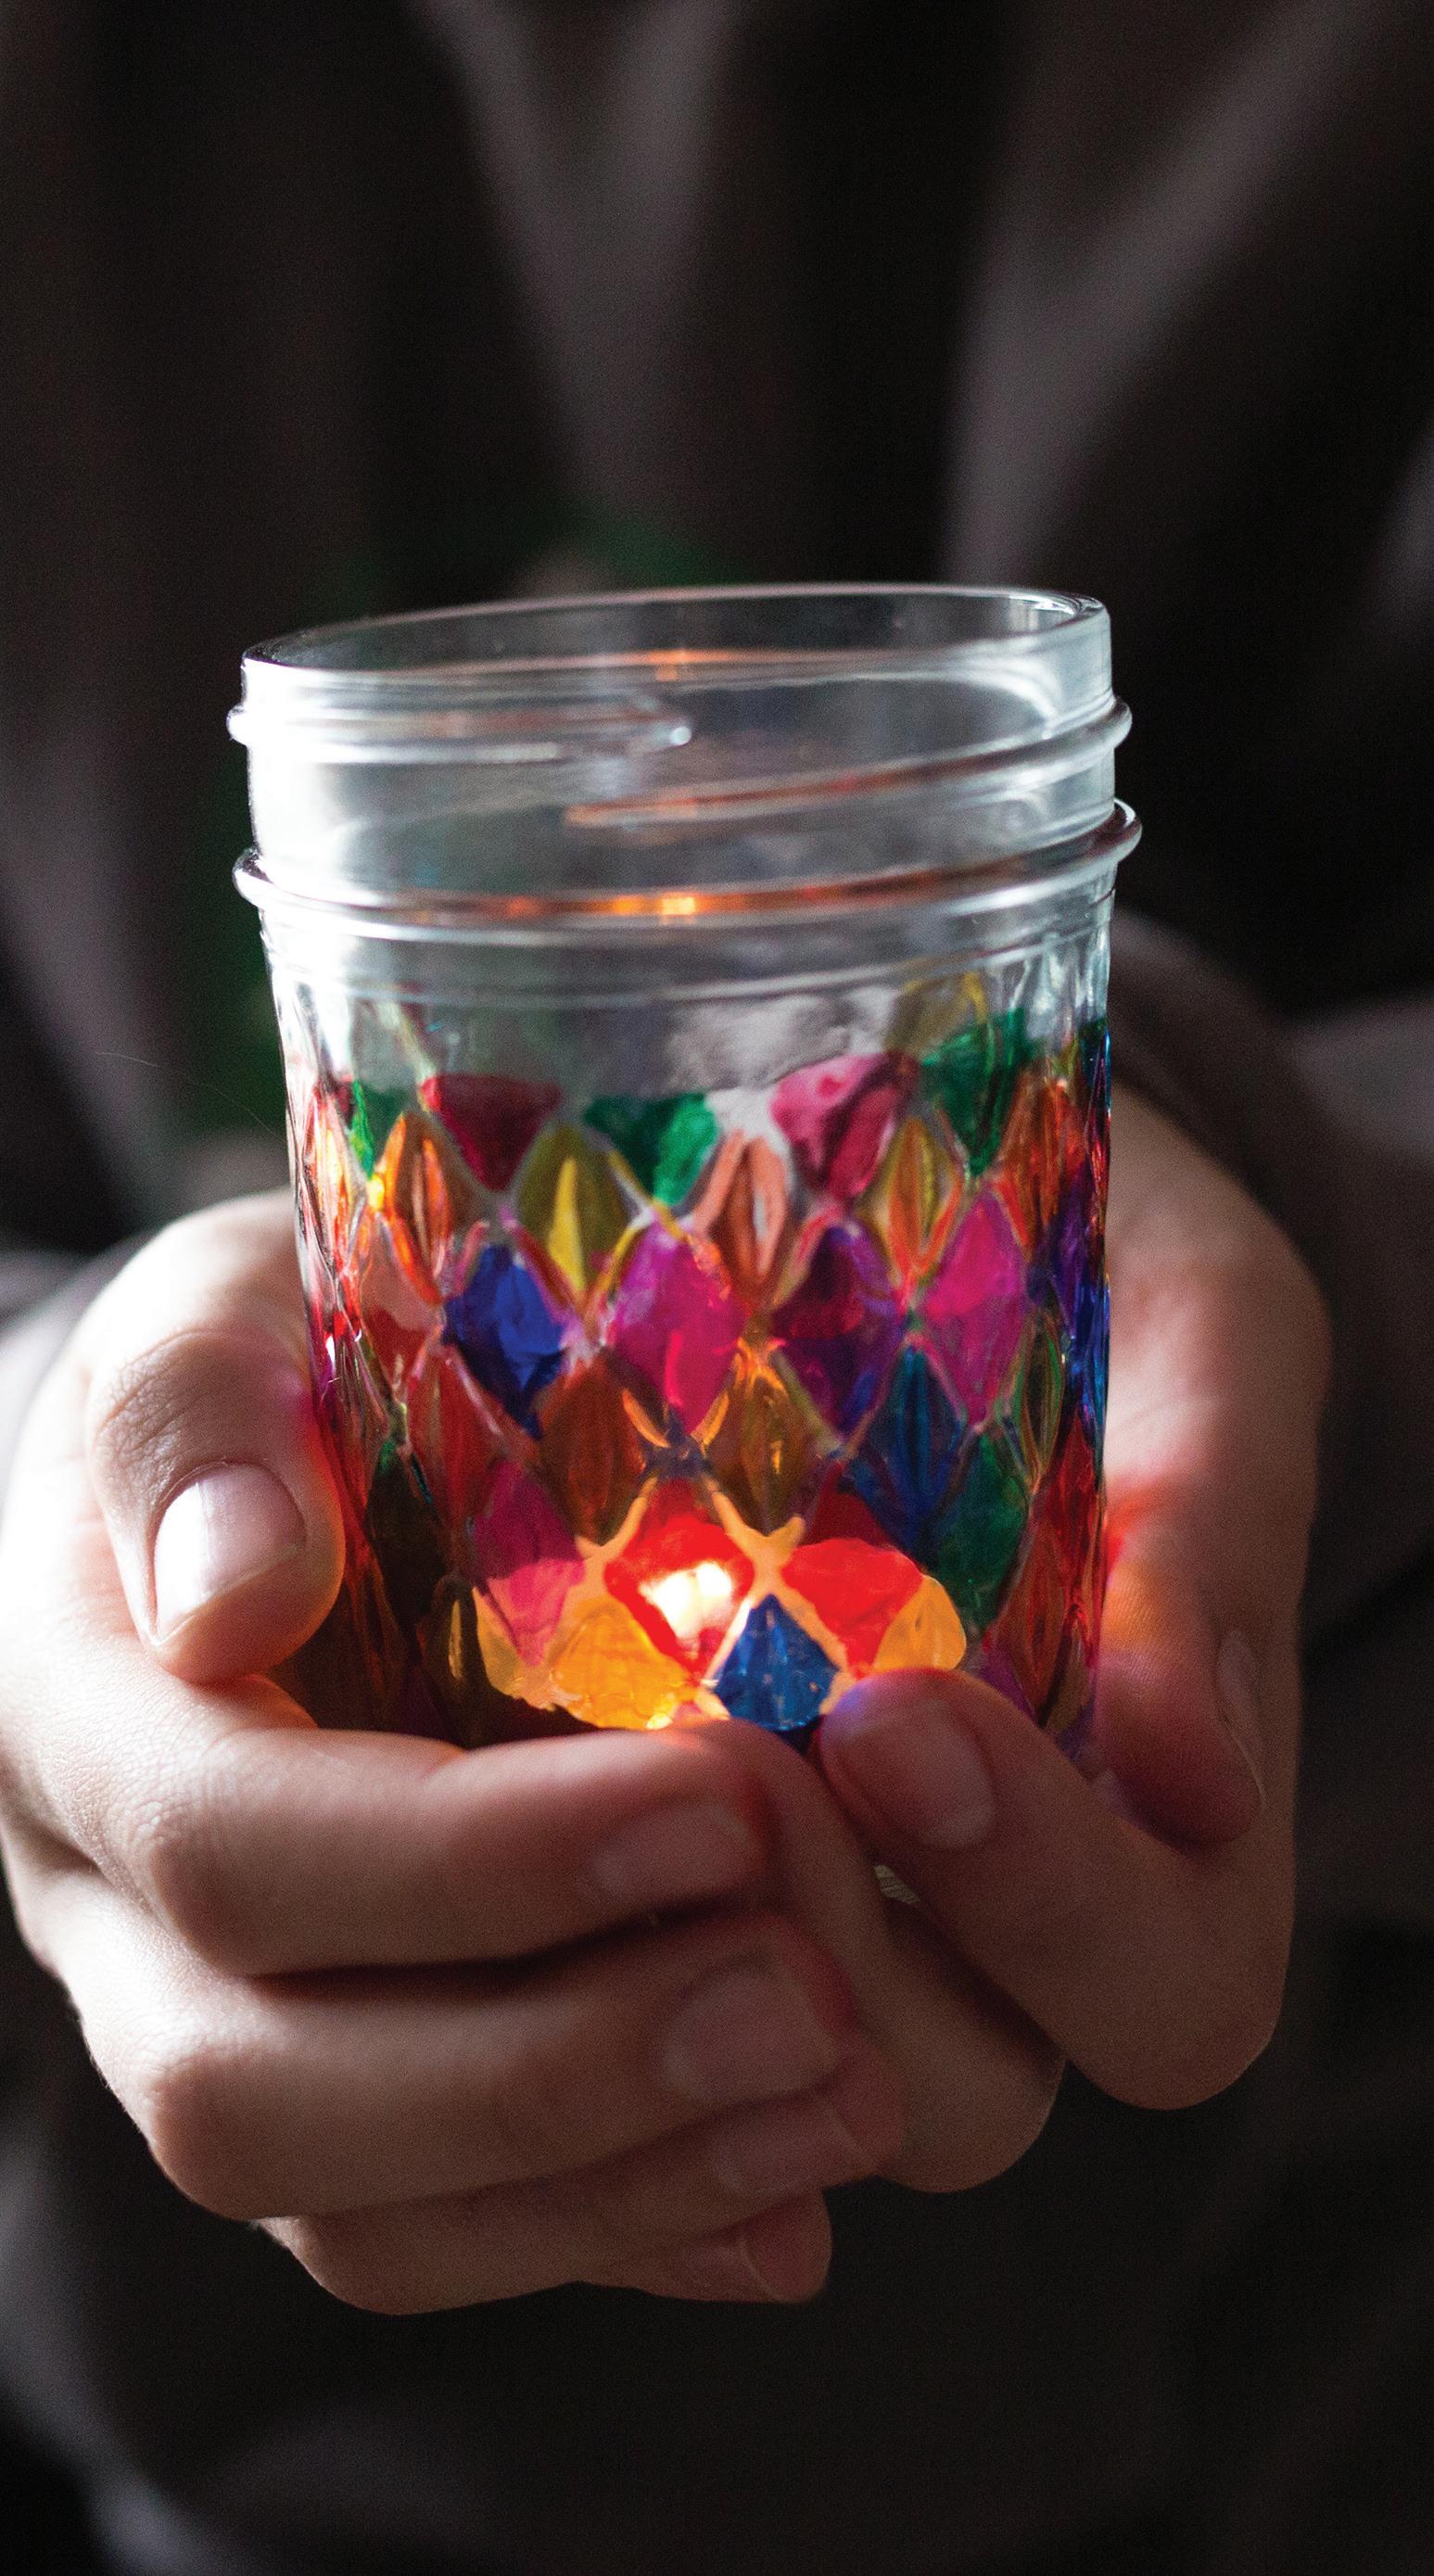
Stained Glass Votive
Materials:
Permanent markers of many colors
Canning jars or glass motives
Directions:
If you have some jars sitting around, or even an old vase or glass, have your kids color them with Sharpie markers to make a beautiful stainedglass votive holder. This project, which we found on happyhooligans.ca, is so simple and turns out gorgeously. Here are a couple of suggestions:
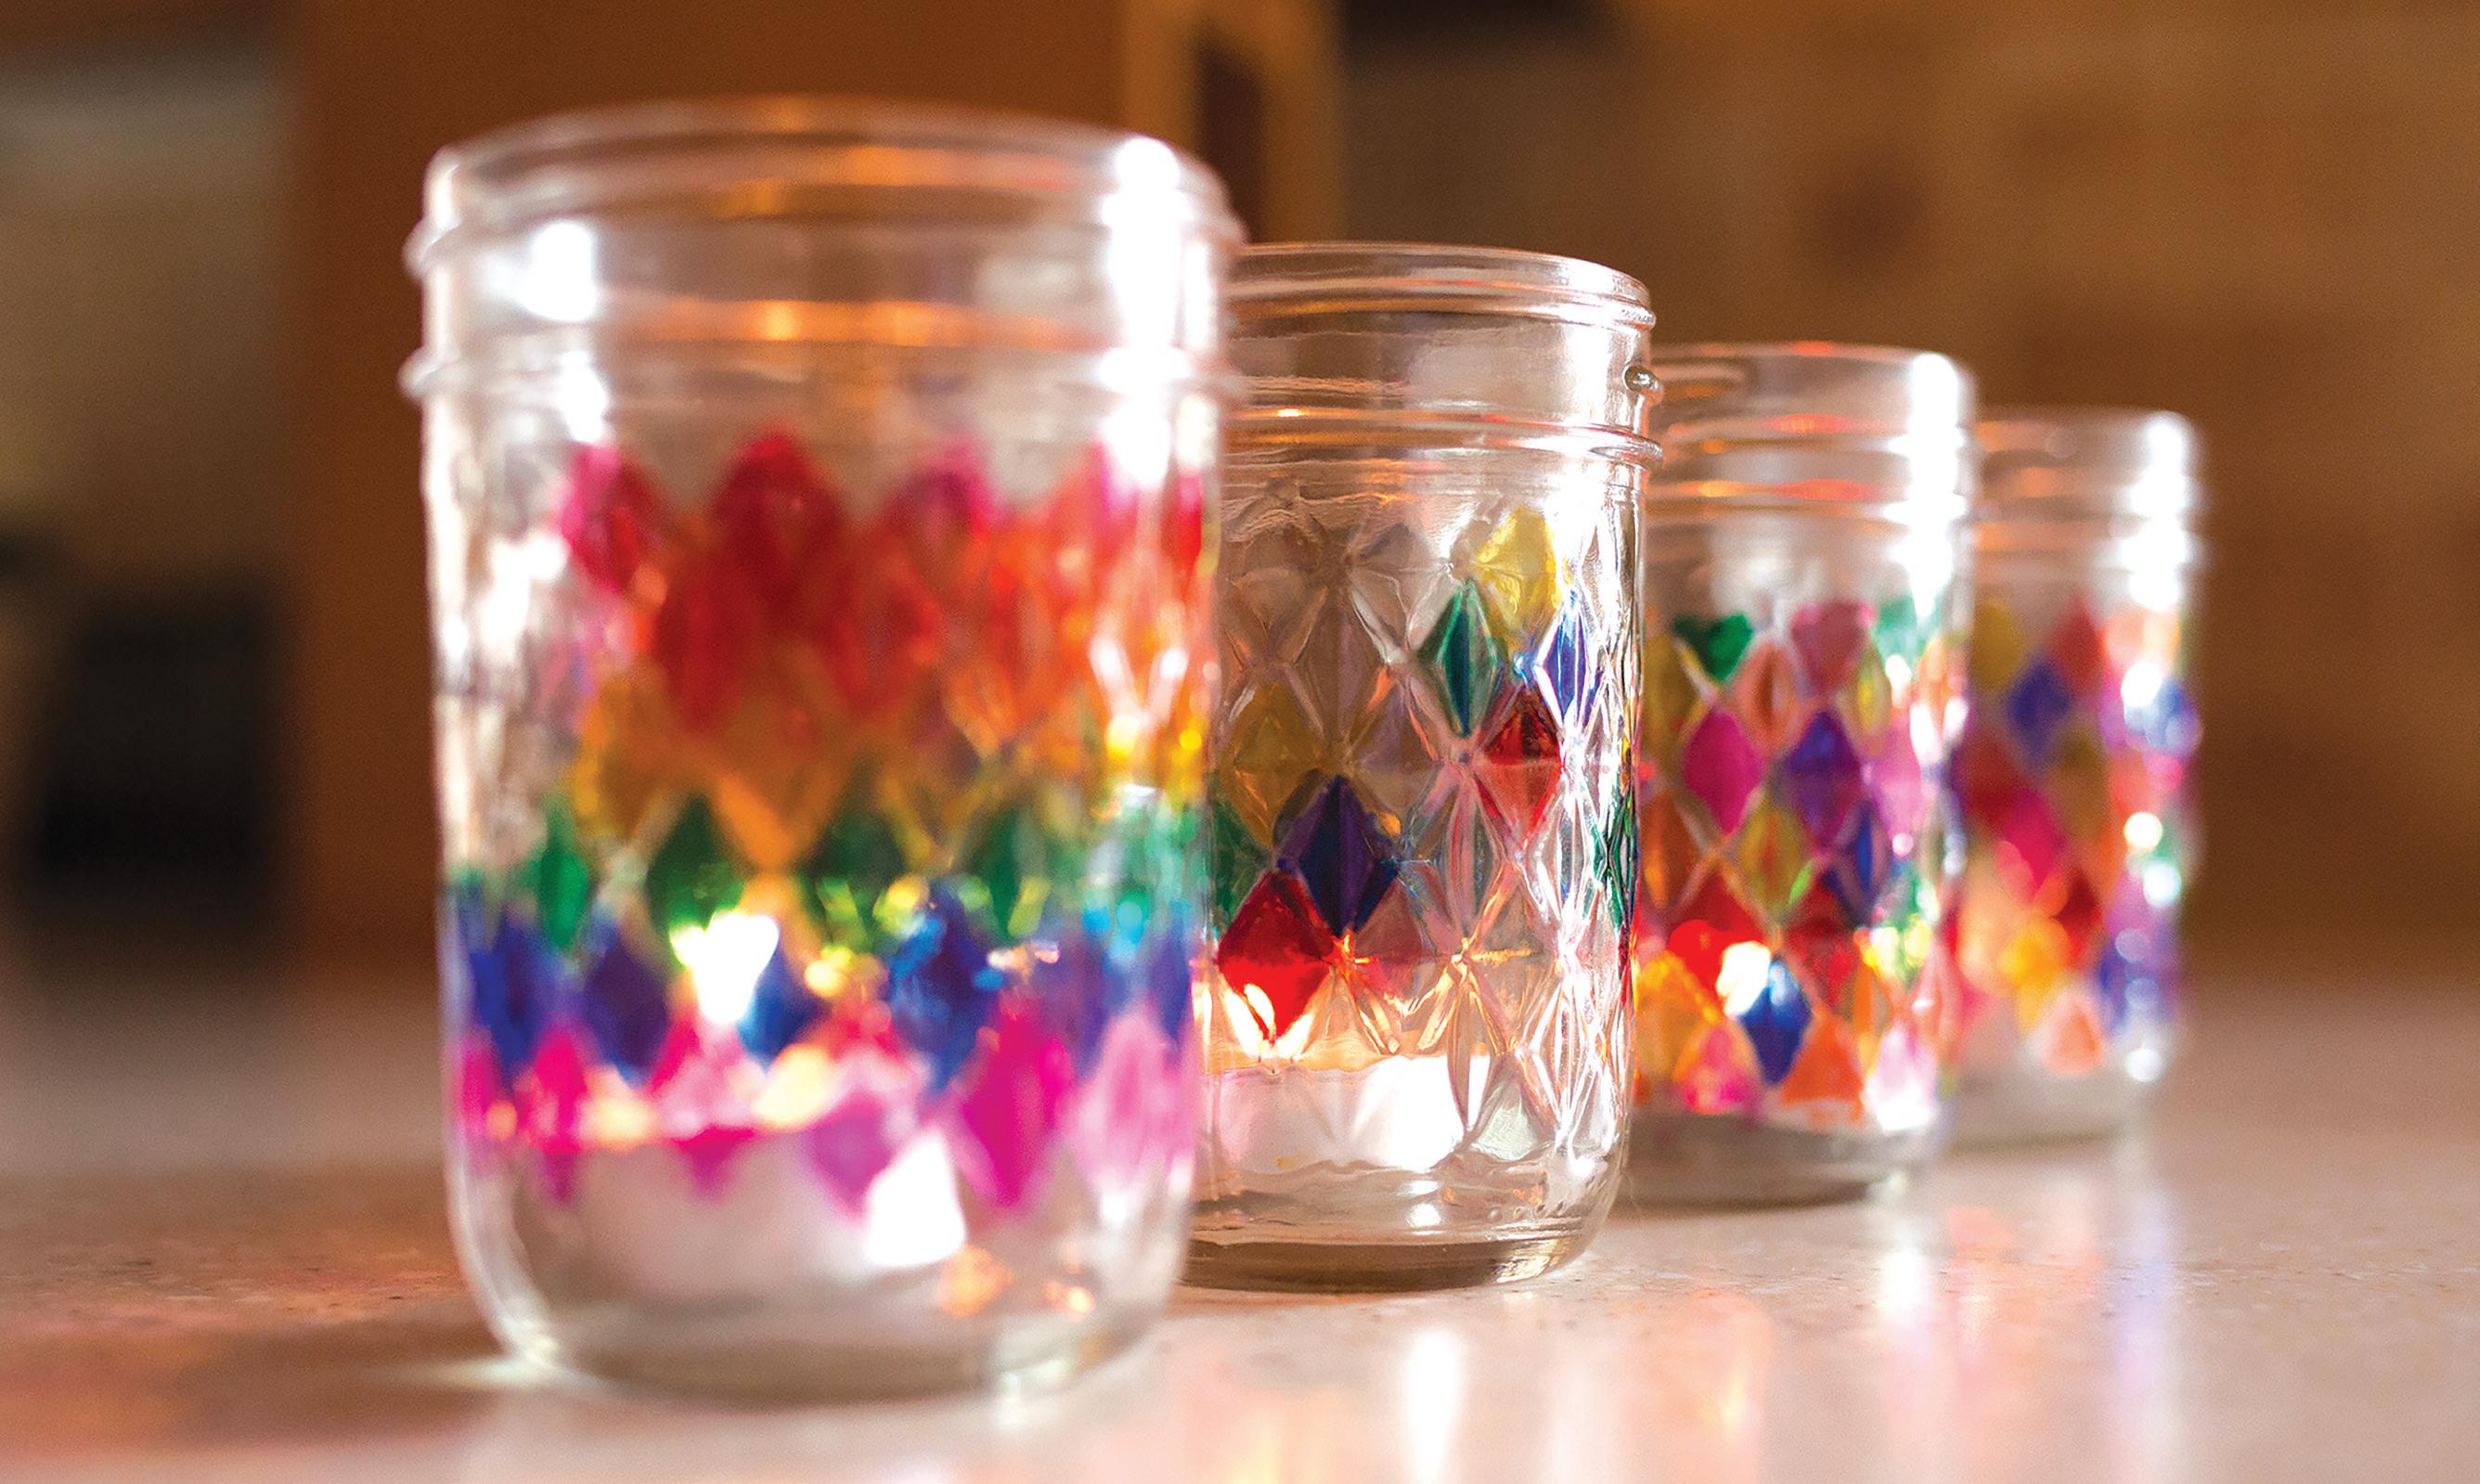
• Wash your jar or glass vessel in warm, soapy water prior to the project to remove all glue and label residue. Make sure the jar is completely dry before adding color.
• Make sure the kids are wearing play clothes. The surface they are working on should be covered with newspaper or another protective covering in case some color strays from the project.
After the marker has dried, add a votive candle (to be lit and enjoyed under the supervision of an adult) or a flameless votive, which can be enjoyed by anyone.
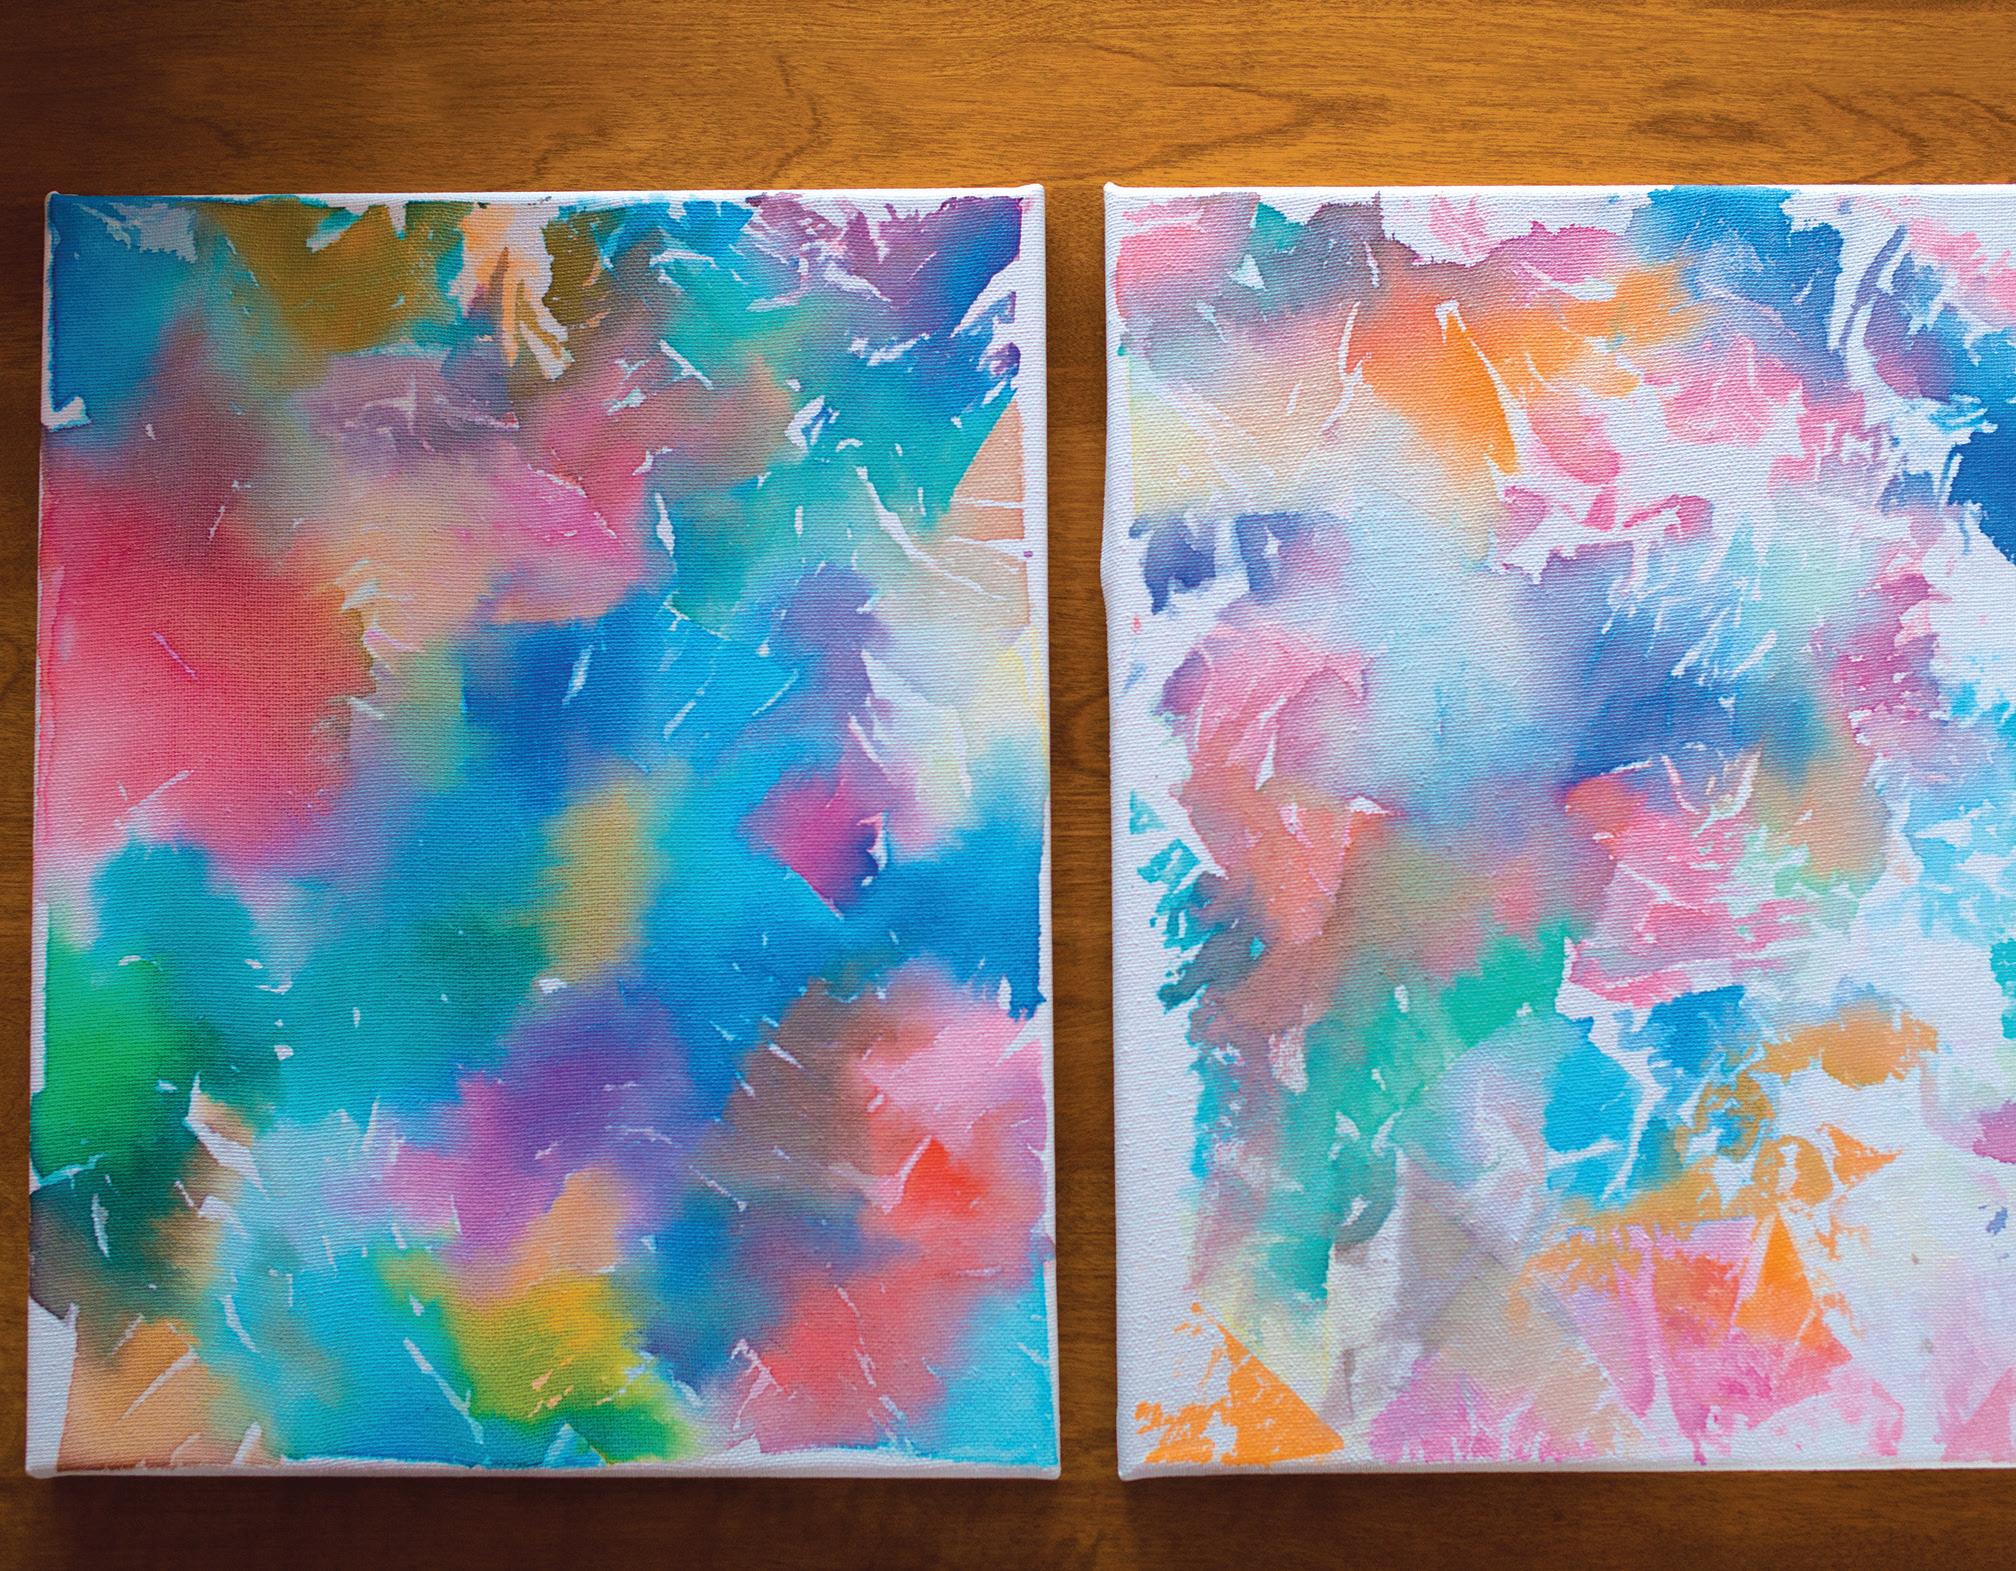
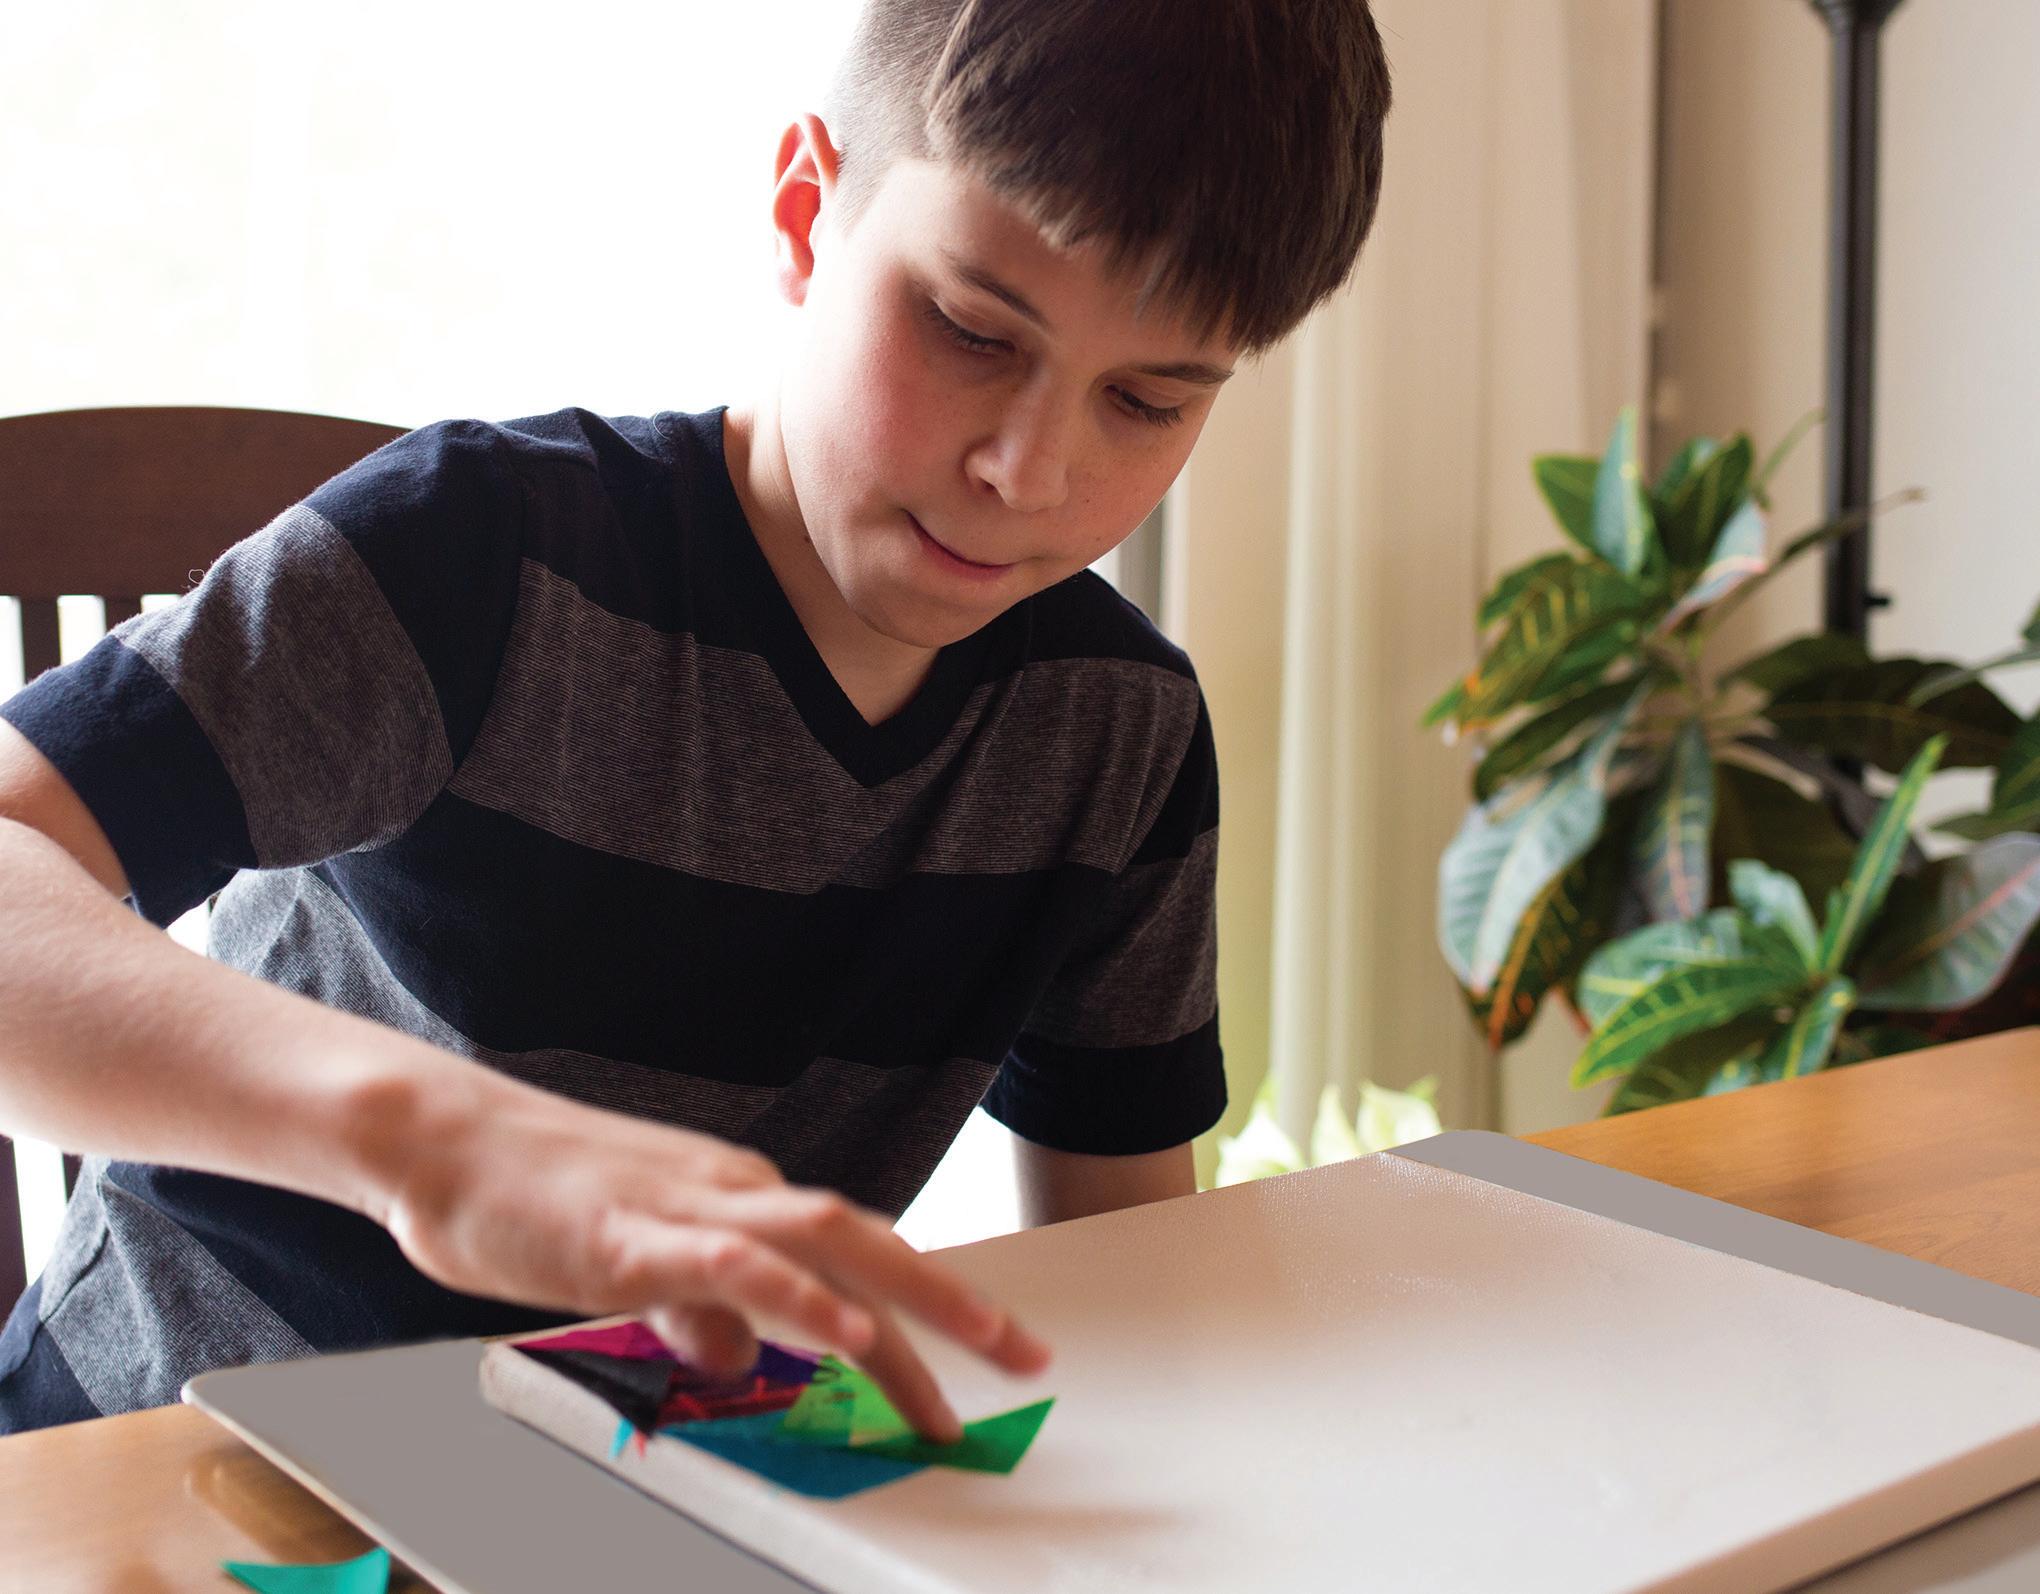
Color That Canvas
Another project that got two thumbs up is this colorful canvas craft found on itsalwaysautumn. com. It’s an easy project for all ages — as long as you are prepared for a little mess with the color transfer. Again, if you are able to let go of the cleanliness for a bit, your child will see amazing results that are totally worth it. You’ll have a frameable piece of art!
Materials:
Canvas of any size
Bleeding tissue paper
Scissor
Water bottle and water
Directions:
It dawned on me that tissue paper that you would buy for giftwrapping would not work for this project, as the colors have to bleed onto the canvas. Our usual tissue paper doesn’t, as gifts would be ruined if partygoers were caught in the rain while traveling with the present.
You may be able to find bleeding tissue paper at a local art store as well as online. Once you are ready to begin the project, cut the tissue into pieces. We went with triangles. Spray your canvas with water and begin placing each tissue piece, covering the whole surface. Feel free to overlap the colors. After the canvas is completely covered, spray the whole surface once again for a final transfer of pigment.
Let the project sit for 20 minutes and begin removing pieces from the canvas. You’ll notice the canvas is not the only thing taking on color — your fingers are, too.
Let the canvas dry completely and enjoy the beautiful masterpiece you and your child have created! — MDT