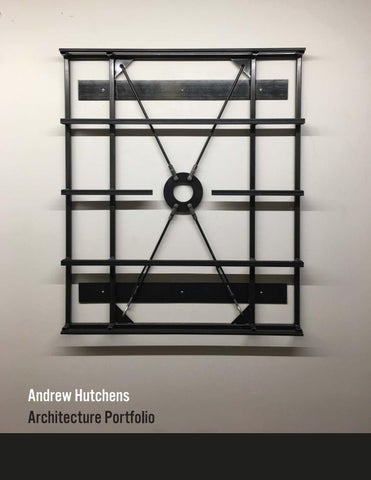
Andrew Hutchens Architecture Portfolio
Andrew Hutchens 8700 West Kingsbury Avenue, Saint Louis, MO 63124 Phone: 314-598-7333 email: djhutchens2@gmail.com
Arch candidate Education M.University of Kansas August 2014 - present Photoshop, Illustrator, and Indesign Skills Adobe Rhinoceros Sketchup 3ds max Microsoft OďŹƒce Revit Grasshopper Digital Fabrication: Laser cutting, 3d printing, CNC milling Leading and working as a team
Job History
Lifeguarding public pools For the cities of Richmond Heights and Lawrence, KS Summer 2014 - Winter 2016
Proficient Proficient Proficient Proficient Proficient Good Good Good Good
Architecture Courses Taken Year 1 Architectural Foundations I Architectural Foundations II Introduction to Architecture Principles of Modern Architecture Year 2 Architectural Design I Architectural Design II Structures I Structures II Visualizing Natural Forces Site Design Global history of Architecture I Global history of Architecture II Year 3 Architectural Design III Architectural Design IV Environmental Systems I Environmental Systems II Building Technology I Current and Historical Directions in Arch
Tone Fall 2014 Until now in studio we have seen objects and buildings as a series of edges which we have represented by contour lines. In reality, the basis for our perception of form is a change in tonal value is so maybe this is how we should draw. A contrast in value will occur in your reality and in your drawing at every place there is an edge or a line, because contour represents a change in plane, therefore a change in light.
Translating to 3 dimensions Fall 2014 We started with a at image with varied shading and we were told to model it in 3 dimensions while following a rule. This is where we were given the opportunity to make this design our own. I explored dierent ways of making the structure look interesting by sketching along with some computer modelling on sketchup. I chose to give it contrasting features heaviness and lightness by changing the structure of some of the pieces. I made the surfaces into loops branching from solid in order to make an interesting volume.
Folding Transformation Fall 2014 The prompt was to extrude this image into a 3 dimensional shape, using only cutting and folding while leaving the paper intact. This left us with deciding how to attribute activation lines to our image, which ones we are going to activate, and how we activate them. I did this in a way which kept the language of the original image intact, while adding a new dimension; volume. THe language s deďŹ ned by strong, sharp edges, from ever view.
Wall System Fall 2014 To create the wall system, we had to take a piece from our folding transformation. I chose a straight section of the activation lines which woiuld be able to bend and fold a certain way. I wanted to keep the angular, clean cut language from the original image and ďŹ rst model so I kept all of the lines straight. I also wanted a movable factor that would cup the sunlight so it would pass into the structure, or protect the structure from the sunlight. I was successful in allowing every cell of the wall to move by pulling a single handle. I believe the wall system is successful in its design and application execution.
Comparing Spaces Spring 2015 Picking up on the character of a space and recognizing what creates that feel by the user is very important in building our own spaces. The goal of this project was to explore two dierent spaces and caompare the feelings they give the occupants and how they might inuence their behavior.I was assigned the Sabatini Multicultural center, a resource for students at KU studying away from their home country and chose to contrast with the recently renovated recetion space for The Forum within Marvin Hall. I chose to make a stark contrast between the safe and welcoming features of the Multicultural Center with the tall, bright and formal feel of the Forum space.To illustrate the dierences in space, I populated the spaces with the kinds of actions they encourage.
Murphy Hall Addition Spring 2015 Our ďŹ nal project was to design and realize an addition to KU’s music department, Murphy Hall. The site was the courtyard and I chose the NorthEast corner because of the available circulation within the build-ing and the under-utilized space against the building. The program was to incorporate 3 new practice rooms into the build-ing and an ensemble practice space that an ope to a performance space. The geometry of the building is to blend and give the jagged geometry of the east wall a starting point. The idea was to represent either some principles of nature or instruments as it is a music build-ing. I chose nature and achieved it with the growth of the geometry from beneath the north wall.
Geometry taken neighboring buildings
Crossraods District, KC Spring 2016
New geometry intersects the old
This area was the focus of an entire semester studio, so we got familiar with the feel of the Burgeoning area of Kansas City. There is a predominantly young and progressive demographic bringing life back into the old industrial district. Though there are many dilapidated warehouses still the interesting areas are the buildings that local artists have taken up residence in. We visited and talked to artists who allowed us to explore their creative spaces, many took residence above their gallery’s which were open to the public showing their works for sale. This district is very deserving of an arts center, where they could show their works and bring the area together. So this was our task, to design an arts center that works for the people and reects the Crossrads district past and progressive future,
The progressive geometry builds o the existing
These sketches show the interior spaces in progress, where the new geometry meets the old
Main oor
Isometric section and site diagram
Upper Gallery
Craft in the Digital Age Fall 2016 Our question at the beginning of this semester was whether we can replicate the kind of craft that Louis Kahn employed in his buildings today, or has that knowledge and skillset been lost? We don’t see buildings built with this kind of ornate ceramic detailing and consequently there aren’t many people who could create it in the historic way. Through this student lead exercise to recreate the ornate detail on the Wainwright building we discovered what it takes to make a bespoke facade. Our team of 4 was tasked with creating the frieze detail of the waiwright building from the traditional terra cotta ceramic material. The multi-step process needed began with approximately modeling the frieze of the Wainwright building through photos we could find.
After learning as much as we could about the building and details as we could, we began doing studies of the intricate leafy frieze detail. Sketching and recreating the detail gave us some insight on the underlying geometries. From there we spent a long time on the 3 dimensional model which was done in rhino. We also began mocking up different schemes for the frame. The frame had tofunction well to hold the tiles in place while also being discrete. Our group took it a step further made an element of the frame the centerpiece of the entire recreation. The circular cross brace hich meets in the center of the detail had to b thought out and meticulously finished to make it worth the effort. There were a lot of new fields we had to dive into to make this concept a reality, and this is what made the project so valuable to us .
Once the model was done we couldn’t help but render it in the materials to see how it would look. This turned out to be crucial in deciding whether to pursue the traditional terra cotta clay or try a cleaner white glazed look. We also experimented with rendering in virtual reality through 3dsmax and google cardboard. This was successful though this tech would be much more useful in a larger scale project. Another member of our group meticulously made vector drawings for the detail sitting on the buildings, and on the frame with the frame assembly.
Redndering of frame and frame with the tiles
Frieze detail on the building and on the frame
Color study rendering in the desired location
Once the digital work had been done, the next step was to mill the tiles to scale out of foam. While doing that we made negative molds of each of these from plaster. Once done we employed the help of other people in the studio class and members of the ceramics department of KU to help us press the terra cotta clay into the molds and pop them out. Since the clay didn’t always pop out perfectly we touched up nearly all of the tiles after they had been pressed. We went through dozens of iterations and took the best for the final. After they dried for at least a week the lat step for the tiles was firing them. The second firing yielded the best results. During all this time we parallel-tracked the steel frame aspect of the project. New to metal working there was much trial and error, but the final product is something that matches the ceramic tiles in refinement and beauty.
At the end of the semester we transformed the common space of Marvin Hall with our exhibition. After bolting the frame to the wall and sliding the ďŹ nished tiles on we arranged the materials of our assignment alongside it so passersby could see exactly how they were made. A movie was made from video we had taken through the whole process and takes a very good look back at the trials and problems that came along the way. The exhibition has drawn much attention and praise from the faculty. It was a great experience having our successful project ďŹ nally put up with all the people who helped us get there coming to the review. Since then we have had articles from the KU news and the STL Post-Dispatch comment on this project with praise for botht eh students and the professor who was a great asset during the assignment. Thi was a great exercise in long-term teamwork, working towards an ambitious goal that ended up being highly successful.
Precedent Study Breuer’s Whitney Spring 2016 We were assigned a partner and our choice of historic or modern buildings to study as a precedent. Marcel Breuer’s Whitney museum was our choice and I’m glad we chose to study it. It’s very unique in its form, especially during the time of its design within modernism. Being said, I like how it has aged and how it has kept its composure through several changing of hands. Digging through scholarly archives is the only plae we could find the original plans. With these plans we dissected the layout and studied every move he made with the form ad circulation. We also needed the plans to construct cross section model. After modeling it to the right scale in rhino, we laser cut the wood to the correct lengths and etched the pattern of the stone on the side. This made cutting very easy and we could focus our time on getting the unique windows, which give it so much character, just right.
Material Research Fall 2016 An architectural elective gave me time to experience and experiment with dierent materials. I chose to explore the qualities of concrete by testing the ways to make it into forms. I combined digital fabrication to create an intricate 3 dimensional mold of a geometric pattern. I see it as a unit for a wall covering or facade by The mold was made just how I wanted but the wood material made it impossible to get out without shattering the whole thing. I moved on to another idea Iwanted to test, fabric form concrete. Which means to make a mold from stretched fabric to achieve curves and geometry unlike most traditional concrete objects. I intended to make a shelf supported by a catenary curve spanning the bottom of the shelf for rigidity. While I eded up with something similar to what I intended, the reproduceability of this technique is diďŹƒcult.