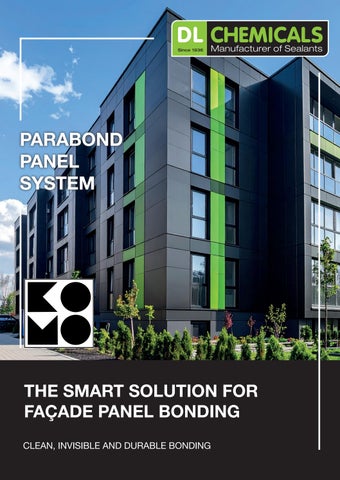
PARABOND PANEL SYSTEM
THE SMART SOLUTION FOR FAÇADE PANEL BONDING CLEAN, INVISIBLE AND DURABLE BONDING |1
CONTENTS
I. I.1 I.2 I.3 I.4
SYSTEM COMPONENTS PARABOND PANEL PARASILICO CLEANER HYBRID & PU PRIMER BLACK DL PANELFIX TAPE
3 3 4 4 4
II. II.1 II.2 II.3 II.4 II.5 II.6
INSTALLATION INSTRUCTIONS REQUIRED TOOLS & MATERIALS PREPARATION OF SUPPORTING STRUCTURE PREPARATION OF FAÇADE PANELS APPLYING DL PANELFIX TAPE APPLYING PARABOND PANEL INSTALLING THE FAÇADE PANEL
5 5 6 7 7 8 8
III. III.1 III.2 III.3 III.4 III.5 III.6
TECHNICAL CONSIDERATIONS REQUIREMENTS FOR SUBSTRUCTURE REQUIREMENTS FOR FAÇADE PANELS STORAGE & SHELF LIFE OF MATERIALS TEMPERATURE REQUIREMENTS RELATED TO DEW POINT INDICATIVE CONSUMPTION TABLE TECHNICAL PERFORMANCE ACCORDING TO KOMO TESTS
9 9 10 10 10 11 11
CLEAN, INVISIBLE AND DURABLE BONDING? With the Parabond Panel System, DL Chemicals offers a high-quality and user-friendly bonding solution for façade panels. Our innovative hybrid adhesive technology ensures an aesthetic finish without visible fixings, while providing durable adhesion even in the most demanding façade projects.
WHY BOND? BONDING IS GAINING GROUND AS THE PREFERRED METHOD FOR FAÇADE PANEL INSTALLATION. AND FOR GOOD REASON: • • • • •
2|
Aesthetic: no screws, no drill holes, no compromises on design. Flexible and safe: Parabond Panel absorbs stresses from expansion and contraction, preventing cracks and fractures. Suitable for thinner panels: lighter construction and reduced costs. No thermal bridges: improved energy performance. Reduced stress concentrations: thanks to linear adhesion across the entire surface.
I. SYSTEM COMPONENTS For reliable long-term adhesion, the Parabond Panel System consists of four perfectly coordinated products:
I.1
PARABOND PANEL
A flexible, one-component hybrid adhesive that provides structural bonding between the façade panel and the supporting structure. • • •
Flexible yet strong Resistant to weather, moisture and UV Suitable for, among others, Trespa Meteon and Equitone Tectiva.
Where to apply? On the vertical substructure (wood or aluminium), in a vertical, uninterrupted V-shaped bead of 9×9×9 mm, approximately 1 cm from the tape.
When to use? After pretreating the substructure and applying the tape. The façade panel must be positioned on the adhesive within 10 minutes.
No.
Packaging
Colour
108362 108246
Cartridge 290 ml Black Foil bag 600 ml Black
#/box
#/pallet
Shelf life (months)
12 20
1200 900
12 12
QR website
System Components | 3
I.2
PARASILICO CLEANER
A powerful, fast-drying cleaner/degreaser that ensures a grease- and dust-free surface, essential for proper adhesion.
Where to apply? • •
On aluminium substructures (vertical battens) where tape and adhesive will be applied. On HPL façade panels (such as Trespa Meteon) in the adhesive zones.
How to use? Apply with paper or a cloth, scrub thoroughly, and allow to evaporate before further processing. Then immediately apply the adhesive/tape so that dirt does not have time to settle.
No.
Packaging
101320 Spray 400 ml 101300 Canister 5 l 101301 Canister 25 l
I.3
#/box
#/pallet
Shelf life (months)
12 / /
720 120 26
24 24 24
QR website
HYBRID & PU PRIMER BLACK
A black primer that improves adhesive bonding on porous materials such as wood and fibre cement.
Where to apply? • •
On wooden substructures (softwood, untreated) at the locations where adhesive and tape will be applied. On fibre cement façade panels (such as Equitone Tectiva) only at the bonding zones.
When to use? After cleaning (if necessary), before applying tape and adhesive. Allow the primer to dry for 10–15 minutes, and apply adhesive/tape within one hour of priming.
No.
Colour Packaging #/box
#/pallet
Shelf life (months)
101328 101329
Black Black
1080 288
12 12
I.4
DL PANELFIX TAPE
250 ml 1l
12 8
QR website
A 3.2 mm thick double-sided adhesive tape that: • •
Provides initial fixation of the façade panel. Acts as a spacer to ensure the correct adhesive thickness.
Where to apply? Vertically and continuously on the pretreated vertical substructure, directly next to the adhesive application area.
When to use? Before applying the adhesive. The protective liner should only be removed immediately prior to mounting the façade panel.
4 | System Components
No.
Colour Thickness
Width
Meters/roll #/box
Shelf life (months)
104844
Black
12 mm
25
24
3 mm
26
QR website
II. INSTALLATION INSTRUCTIONS
II.1 • • • • • • • • •
REQUIRED TOOLS & MATERIALS Parabond Panel DL Panelfix Tape: double-sided tape (3.2 mm) Parasilico Cleaner Hybrid & PU Primer Black DL Chemicals Battery Gun 18V Alu Combi 300/400/600 ml or Manual Gun Universal 310 ml V-nozzle DL Chemicals single-ply wiping paper 1000 m x 24 cm or double-ply wiping paper 300 m x 24 cm Roller or brush (for primer) Optional: spacer blocks or leveling bars |5
UNDERLYING BUILDING STRUCTURE SUPPORTING STRUCTURE (wood or aluminium) PARASILICO CLEANER OR HYBRID & PU PRIMER* PARABOND PANEL
DL PANELFIX TAPE 3 MM PARABOND PANEL
FAÇADE PANEL PARASILICO CLEANER OR HYBRID & PU PRIMER*
FAÇADE PANEL
* See installation instructions
1
II.2
PREPARATION OF SUPPORTING STRUCTURE
ALUMINIUM BATTENS: Use anodised aluminium or plain galvanized steel that is corrosionresistant. Avoid painted or coated metal, as such coatings can negatively affect the adhesion of the tape and adhesive.
CLEAN THE SURFACE THOROUGHLY WITH PARASILICO CLEANER: •
Aerosol 400 ml: 1. 2. 3. 4. 5.
•
Shake before use. Spray onto the surface from a distance. Wipe the surface clean. Always use a clean cloth (replace regularly). Allow to evaporate before applying tape and adhesive.
Canister 5 l & 25 l: 1. 2. 3. 4. 5.
Shake before use. Moisten a paper wad or clean cloth with Parasilico Cleaner. Wipe the surface clean. Always use a clean cloth (replace regularly). Allow to evaporate before applying tape and adhesive.
WOODEN BATTENS: Use only dry wood (<18% moisture content), planed on all sides, greasefree, and treated for durability. Avoid resinous woods and sheet materials.
PRIME THE SURFACE WITH HYBRID & PU PRIMER BLACK:
6 | Installation Instructions
•
Ensure the wood is dry, clean, and dust-free.
•
Shake the Hybrid & PU Primer well.
•
Apply at temperatures between +5°C & +35°C.
•
Apply a thin, even layer to the adhesive zones using a brush or roller. Avoid thick layers, as they reduce primer adhesion to the substrate.
•
Allow to dry for 10–15 minutes (longer in cold temperatures).
•
Apply adhesive and tape within one hour, otherwise re-prime.
•
The primer can be used up to one month after opening, provided the container is properly sealed.
2
II.3
PREPARATION OF FAÇADE PANELS
TRESPA METEON (HPL): Clean the back of the panel (adhesive zone) with Parasilico Cleaner, as described in Step 1.
EQUITONE TECTIVA (FIBRE CEMENT): Prime the surface with Hybrid & PU Primer Black: • •
3
II.4
Brush the back of the panel to remove dust. Apply Hybrid & PU Primer Black to the bonding zone, as described in Step 1.
APPLYING DL PANELFIX TAPE
•
Ensure the surface is completely dry (cleaner evaporated / primer dry).
•
Apply the tape continuously along the substructure.
•
Leave sufficient space (2 cm) next to the tape for the adhesive.
•
Press the tape firmly along the entire length using a roller.
•
Remove the protective liner only after applying the adhesive.
IMPORTANT GUIDELINES •
Do not work in fog, mist, rain, strong wind, or at temperatures below +5 °C or above +30 °C (ambient and surface temperature), and with relative humidity above 90%.
•
The surface temperature of the façade panel and substructure must be at least 3 °C above the dew point to prevent condensation (see table on page 10). Condensation can negatively affect the adhesion of the adhesive, tape, and primer.
•
Before starting, check that all surfaces are flat, dry, undamaged, and still within their shelf life. Record ambient temperature, surface temperature, relative humidity, and dew point.
•
Wood moisture content must be below 18%.
•
Verify in advance that the façade panel system complies with applicable national or local regulations.
•
Always follow the manufacturer’s guidelines for the façade panels.
•
Fibre cement panels may be bonded up to a maximum building height of ground floor plus one storey. For higher façades, mechanical fastening is preferred.
•
Bonded installation of fibre cement panels is preferably carried out on an aluminium supporting structure.
Installation Instructions | 7
4
II.5
APPLYING PARABOND PANEL
•
Apply the adhesive using the supplied V-notched nozzle.
•
Hold the gun at a 90° angle to the substructure.
•
Apply a straight, continuous triangular bead (9×9×9 mm), approximately 1 cm from the tape.
•
Work systematically and avoid interruptions.
•
After applying the Parabond Panel, you have a maximum of 10 minutes to position the façade panel.
Avoid exposing the adhesive to direct UV light after the panel has been placed.
5
II.6
INSTALLING THE FAÇADE PANEL
•
Only now remove the protective liner from the tape.
•
Carefully position the façade panel against the adhesive, without pressing directly onto the tape.
•
Align the panel accurately, using leveling bars or spacer blocks if necessary.
•
Once correctly positioned, press the panel firmly against the tape.
•
Adhesive on the visible side? Remove immediately with Parasilico Cleaner. (Once cured, it can only be removed mechanically.)
W OOD
substru ctu re
VS
H yb r id & P U P rimer Black
SUBSTRUCTURE PRETREATMENT
ALUMINIUM s u bs t ru c t u re
P a ra s ilic o Cle a n e r
Trespa Meteon (HPL)
Equitone Tectiva (fibre cement)
FAÇADE PANEL
Trespa Meteon (HPL)
Equitone Tectiva (fibre cement)
Parasilico cleaner
Hybrid & PU Primer Black
FAÇADE PANEL PRETREATMENT
Parasilico Cleaner
Hybrid & PU Primer Black
DL Pa nelfix Tape 3 mm
TAPE
DL P a n e lf ix Ta pe 3 m m
Pa rabond P an el
ADHESIVE
P a ra bon d P a n e l
8 | Installation Instructions
III. TECHNICAL CONSIDERATIONS
III.1
REQUIREMENTS FOR SUBSTRUCTURE
MATERIAL SELECTION FOR VERTICAL BATTENS • •
Wood: planed on all sides, grease-free, and treated for durability; maximum moisture content 18%. Avoid OSB, MDF, plywood, and resinous wood. Metal: anodised aluminium or plain galvanized steel. Avoid painted or coated metal (as it can impair the adhesion of the adhesive and tape).
MINIMUM BATTEN DIMENSIONS
Wooden Battens
Aluminium Battens
Min. width of intermediate and end battens
45 mm
40 mm
Min. width of joint battens
95 mm
100 mm
Min. batten thickness
28 mm
2 mm
MAXIMUM FASTENING DISTANCES (CENTRE-TO-CENTRE) FOR VERTICAL BATTENS The spacing between vertical battens depends on three factors: 1.
Building height and location The higher the building, the greater the wind load shorter c/c spacing required. Stricter requirements apply in coastal areas.
2.
Placement on the façade In edge zones of tall buildings (>6 m), wind pressure is higher shorter spacing needed than in central zones.
3.
Thickness and stiffness of the façade panel Thinner panels bend more easily or may break shorter spacing required for thinner panels.
For wind load calculations, refer to Eurocode 1, Part 1-4 (NEN-EN / NBN-EN). Always consult the façade panel manufacturer for project-specific values. SOME GUIDELINES FAÇADE PANEL
2 Battens per Panel
> 2 Battens per Panel
HPL 6 mm
450 mm (*)
550 mm (*)
HPL 8 mm
600 mm (*)
750 mm (*)
HPL 10 mm
750 mm (*)
900 mm (*)
400–500 mm (**)
400–600 mm (**)
Fibre Cement 8 mm
(*) Based on a maximum wind load of 600 N/m² and a maximum deflection of L/200. For horizontal applications (e.g., canopies), adjust the spacing using a factor of 0.75. (**) For fibre cement panels, spacing depends on building height, terrain category, and position on the façade (central or edge zone).
FLATNESS OF THE SUBSTRUCTURE For uniform adhesive application and stress-free installation, the substructure must be flat. •
Always check the flatness of the substructure.
•
Large irregularities can lead to varying adhesive thicknesses and uneven stress distribution, potentially causing damage to the panels.
•
Maximum allowable deviation: 2 mm relative to the façade line.
VENTILATION BEHIND FAÇADE PANELS Proper ventilation is essential for durable bonding and to prevent damage (such as wood rot or metal corrosion). REQUIREMENTS: •
The substructure must be installed vertically. Horizontal placement obstructs moisture drainage and is not permitted.
•
The air cavity between the façade panel and the supporting structure must be at least 20 mm wide.
•
Ventilation openings at the top and bottom of the façade: minimum 50 cm² per running metre.
•
Direct bonding to masonry, concrete, or wood is not allowed.
Adequate ventilation prevents moisture accumulation and overheating behind the façade panels.
Technical Considerations | 9
III.2
REQUIREMENTS FOR FAÇADE PANELS
JOINTS BETWEEN FAÇADE PANELS To accommodate expansion due to temperature or moisture variations, a minimum joint of 10 mm must be provided between panels. MAXIMUM PANEL DIMENSIONS TRESPA METEON •
Thermal expansion: 2.5 mm/m in length & width (source: Trespa)
•
Permissible deformation: max. 4.9 mm (according to KOMO certificate no. 21184/25)
•
Maximum panel diagonal: 3.92 m (theoretical
The adhesive system is therefore suitable for the standard size 3050 × 1530 mm (diagonal 3412 mm) EQUITONE TECTIVA •
Thermal expansion: 1 mm/m for a 100 °C temperature difference (source: Equitone)
•
Permissible deformation: max. 4.9 mm (according to KOMO certificate no. 21184/25)
•
Maximum panel diagonal: 9.8 m (theoretical)
The adhesive system is therefore suitable for the standard size 3050 × 1220 mm (diagonal 3284 mm)
III.3
STORAGE & SHELF LIFE OF MATERIALS
SUBSTRUCTURE AND FAÇADE PANELS •
Store in a dry, well-ventilated area.
•
Follow the storage instructions provided by the façade panel manufacturer.
•
Avoid warping due to moisture or temperature fluctuations. Do not install panels if they are deformed.
PARABOND PANEL SYSTEM •
Store between +5 °C and +25 °C, protected from moisture and sunlight.
•
Use products only within their shelf life (see “EXP” + batch number on the packaging).
•
Always record the batch numbers used for traceability.
III.4 TEMPERATURE REQUIREMENTS RELATED TO DEW POINT
Temperature (°C)
Dew Point (°C) at a relative humidity of: 35%
40%
45%
50%
55%
60%
65%
70%
75%
80%
85%
90%
95%
100%
6
-8
-7
-5
-3
-2
-1
0
1
2
3
4
5
5
6
8
-7
-5
-3
-2
0
1
2
3
4
5
6
7
7
8
10
-4
-3
-1
0
1
3
4
5
6
7
8
8
9
10
12
-3
-1
0
2
3
5
6
7
8
9
10
11
11
12
14
-1
1
2
4
5
6
8
9
10
11
12
13
13
14
15
0
2
3
5
6
7
9
10
11
12
13
14
14
15
16
1
2
4
6
7
8
10
11
12
13
14
15
16
16
17
1
3
5
7
8
9
10
12
13
14
15
15
16
17
18
2
4
6
7
9
10
11
12
14
15
15
16
17
18
19
3
5
7
8
10
11
12
13
15
16
16
17
18
19
20
4
6
8
9
11
12
13
14
16
17
17
18
19
20
21
5
7
9
10
12
13
14
15
16
17
18
19
20
21
22
6
8
10
11
13
14
15
16
17
18
19
20
21
22
23
7
9
10
12
14
15
16
17
18
19
20
21
22
23
24
8
10
11
13
14
16
17
18
19
20
21
22
23
24
25
9
11
12
14
15
17
18
19
20
21
22
23
24
25
26
9
11
13
15
16
18
19
20
21
22
23
24
25
26
27
10
12
14
16
17
19
20
21
22
23
24
25
26
27
28
11
13
15
17
18
19
21
22
23
24
25
26
27
28
29
12
14
16
18
19
21
22
23
24
25
26
27
28
29
30
13
15
17
18
20
21
24
24
25
26
27
28
29
30
10 | Technical Considerations
When bonding façade panels, the substrates (the back of the panel and the front of the supporting structure) must not be damp due to condensation. Therefore, bonding must not be carried out under excessively high humidity. The relative humidity must remain below 90%, and the outdoor temperature should be between +5 °C and +30 °C. The table on the left shows the dew point as a function of ambient temperature and relative humidity. The dew point is the temperature at which air becomes saturated with water vapour; further cooling will result in condensation. This can occur, for example, when the surface temperature in the morning is lower than the ambient temperature due to overnight cooling. To prevent condensation, the substrate must be at least 3 °C above the dew point. If the dew point falls within the red zone, bonding is not permitted. Example: At an ambient temperature of 20 °C and a relative humidity of 65%, the surface temperature of the substructure and façade panel must be at least 16 °C.
III.5
INDICATIVE CONSUMPTION TABLE
Product
Packaging
Theoretical Consumption in Linear Metres / Packaging(1)
Theoretical Consumption in m² Façade Panel / Packaging(2) 2,3
290 ml
7
600 ml
15
5
400 ml aerosol(3)
28
9,3
Parabond Panel
5 L canister(3)
350
117
25 L canister(3)
1750
583
Hybrid & PU Primer Black
250 ml(3)
27,5
9,2
1 L(3)
110
37
DL Panelfix Tape
25 m/rol
25
8
Parasilico Cleaner
In practice, actual consumption is often slightly higher. We recommend allowing a margin of ±10%. (2) Theoretically calculated on the basis of 3 linear meters of framework per m² of façade panel. (3) Double this quantity if both the framework and the façade panel need to be treated. (1)
III.6
TECHNICAL PERFORMANCE ACCORDING TO KOMO TESTS (ATTEST 21184/25)
Our system complies with the guidelines for façade panel bonding and is tested according to KOMO certification requirements. DL Chemicals provides installers with a robust system, complete with clear instructions and support.
Parabond Panel has been tested according to BRL 4101-7 and meets the requirements for façade panel bonding. To determine the amount of adhesive per m² of façade panel surface, the calculation values in the table should be used: PARABOND PANEL
Measured Value
Tensile Strength Trespa Meteon
1,06 N/mm²
Tensile Strength Equitone Tectiva
1,17 N/mm²
Shear Strength Trespa Meteon
1,31 N/mm²
Shear Strength Equitone Tectiva
1,15 N/mm²
Maximum Elongation
12,3 mm
Safety Factor 4
10 2,5
Design Value 0,27 N/mm² 0,29 N/mm² 0,13 N/mm² 0,12 N/mm² 4,9 mm *
* Maximum movement of the façade panel
•
Wind loads must be calculated according to Eurocode 1 (EN 1991-1-4). Note: requirements may vary by region and project. Wind loads should always be calculated by a structural engineer.
DL PANELFIX TAPE
Measured Value
DL PANELFIX TAPE
Thickness
The tensile and shear strength of the installation tape are the values shown in the table and are relevant during the first 24 hours after the façade panel is installed.
Tensile Strength
0,29 N/mm²
Shear Strength
0,40 N/mm²
Compressibility
0,022 N/mm²
3 mm
Rely on the Parabond Panel System for aesthetics, durability, and reliability. Technical Considerations | 11
DL Chemicals offers you a comprehensive range of high-quality products. Professional products guarantee excellent quality
while
also
enhancing
your
professional image. Each product is the result of our technical know-how and high level of service, built over more than 85 years as a Belgian family business. Choose expertise. Choose DL Chemicals.
Discover all products and accessories online!
www.dl-chem.com
Find all technical datasheets at www.dl-chem.com Follow us on Facebook, Instagram and LinkedIn Watch our product videos on Vimeo & YouTube Mailing address & production: Roterijstraat 201–203, B-8793 Waregem Head office & warehouse: Splenterbeekstraat 4, B-8710 Wielsbeke BELGIAN MANUFACTURER SINCE 1936
T: +32 (0)56 62 70 51 info@dl-chem.com
Revision 1, 26/08/25. This information brochure has been developed to guide you in selecting products, based on our experience at the date of publication and on average application standards. The guidelines should be observed, but they do not replace prior testing, especially in the case of specific implementation constraints. This document is subject to possible omissions, errors or printing mistakes. The information has been compiled with the greatest possible care; however, it may be subject to change. Always consult the most recent technical datasheet on our website before using a product.
12 |