9 minute read
Modernising Drag and Drops in Articulate Storyline


Remember the console wars of the 90s? Everyone wanted in on Sonic the Hedgehog but if you had a Super Nintendo, you were out of luck because it wasn’t fast enough to run the Sega Mega Drive classic.
To ensure no acne-riddled teens tried to test this theory and shove Sonic in a SNES, Sega and Nintendo were careful to make their cartridges different shapes, making it impossible to confuse the two systems.
So in the spirit of this anecdotal tale, Articulate wizard, Sam Harold, shows us how to use Storyline to create a drag-and-drop activity that will only let you plug the correct cart into the retro console.
The carts facing up will fit, the sideways one won’t. You’ll be able to use TAB to cycle through the cartridges and ENTER to make them ‘active’ to complete the drag and drop without a mouse or touchscreen.

Storyline is an incredible tool, but one of its limitations when it comes to accessibility is drag-and-drop interactions. But with some ingenious use of custom triggers, you can improve on the inbuilt offering, with a full keyboard functioning drag-and-drop activity.
Setting the stage

Create a brand new Storyline - As before, I use a 1280px x 720px canvas, which you can do in Design > Slide Size

Before we add all the items to our screen, let’s get one ready first.
Insert your image through > Insert > Picture and select the image you wish to add.

Next, we need to add the object states. Click on your new image and select the ‘States’ panel at the bottom. Select the Edit States button in the bottom left and select the ‘new’ icon. (the blank paper icon).
This will open up the Add State panel. We want to add 3 different Inbuilt states to the objects. Select the dropdown and pick the States, ‘Drop Correct’, ‘Drop Incorrect’ and ‘Selected’.
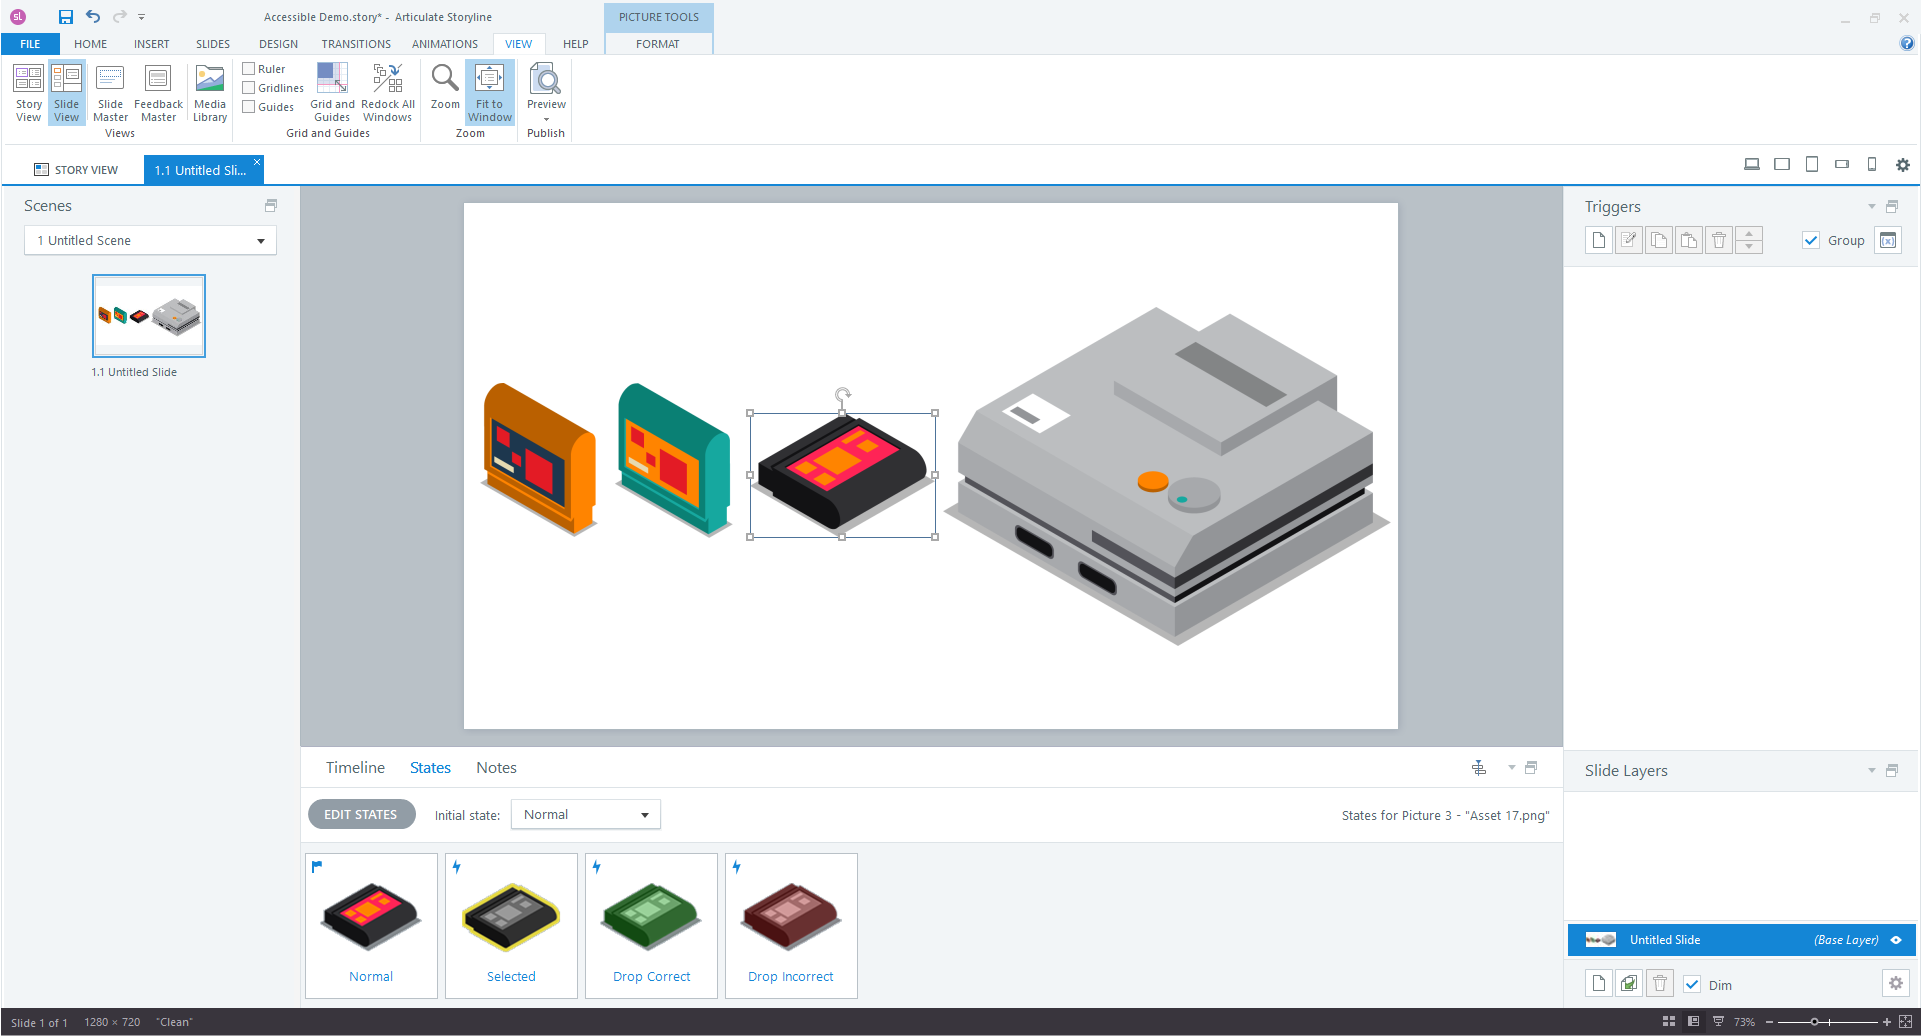
From the States panel, we can edit how they appear. Select them from the bottom menu (When Edit States is enabled) and modify the display on screen. Repeat these steps for all draggable items in your activity.
Don’t forget to hit Done when you are finished editing the states so you can return to the main view. You can edit your state however you want with your own tools of choice!
You should end up with something similar to my example. I have also added the object I want to use as the dropzone. You are free to have as many dropzones as you wish, but for this project, I will be asking users to add one of the suitable cartridges to the console.
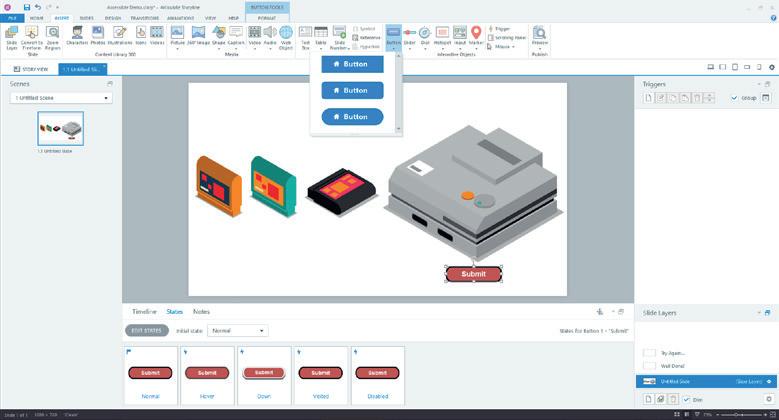
Now, add any Incorrect, Correct or Try again screens that you require. It is not mandatory for the core activity to work, but for my project, I will want users to submit the cartridge of their choice to complete the exercise.
You may want to include a button to submit the interaction, you can add one of Storylines inbuilt buttons by going to Insert > Button.
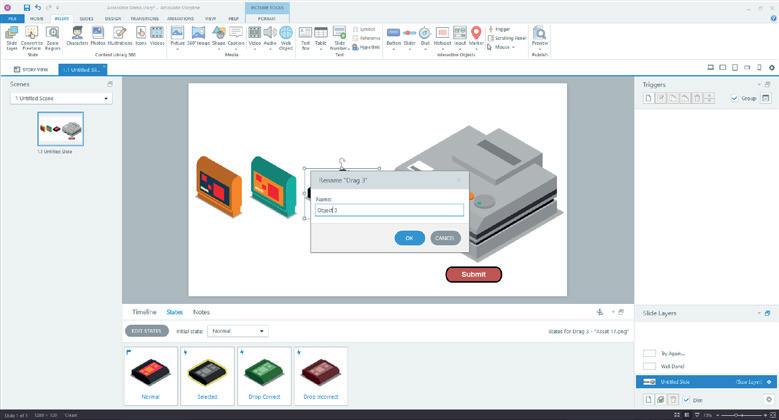
Now would be a good time to make sure our Objects have been given appropriate names. This can be very helpful when making triggers and other advanced components.
You can do this by right clicking the Object and selecting ‘Rename.’
Selecting objects
To make the activity keyboard-friendly, we will need to make the drag-and-drop interactions manually. So we will be avoiding the inbuilt Freeform page type.
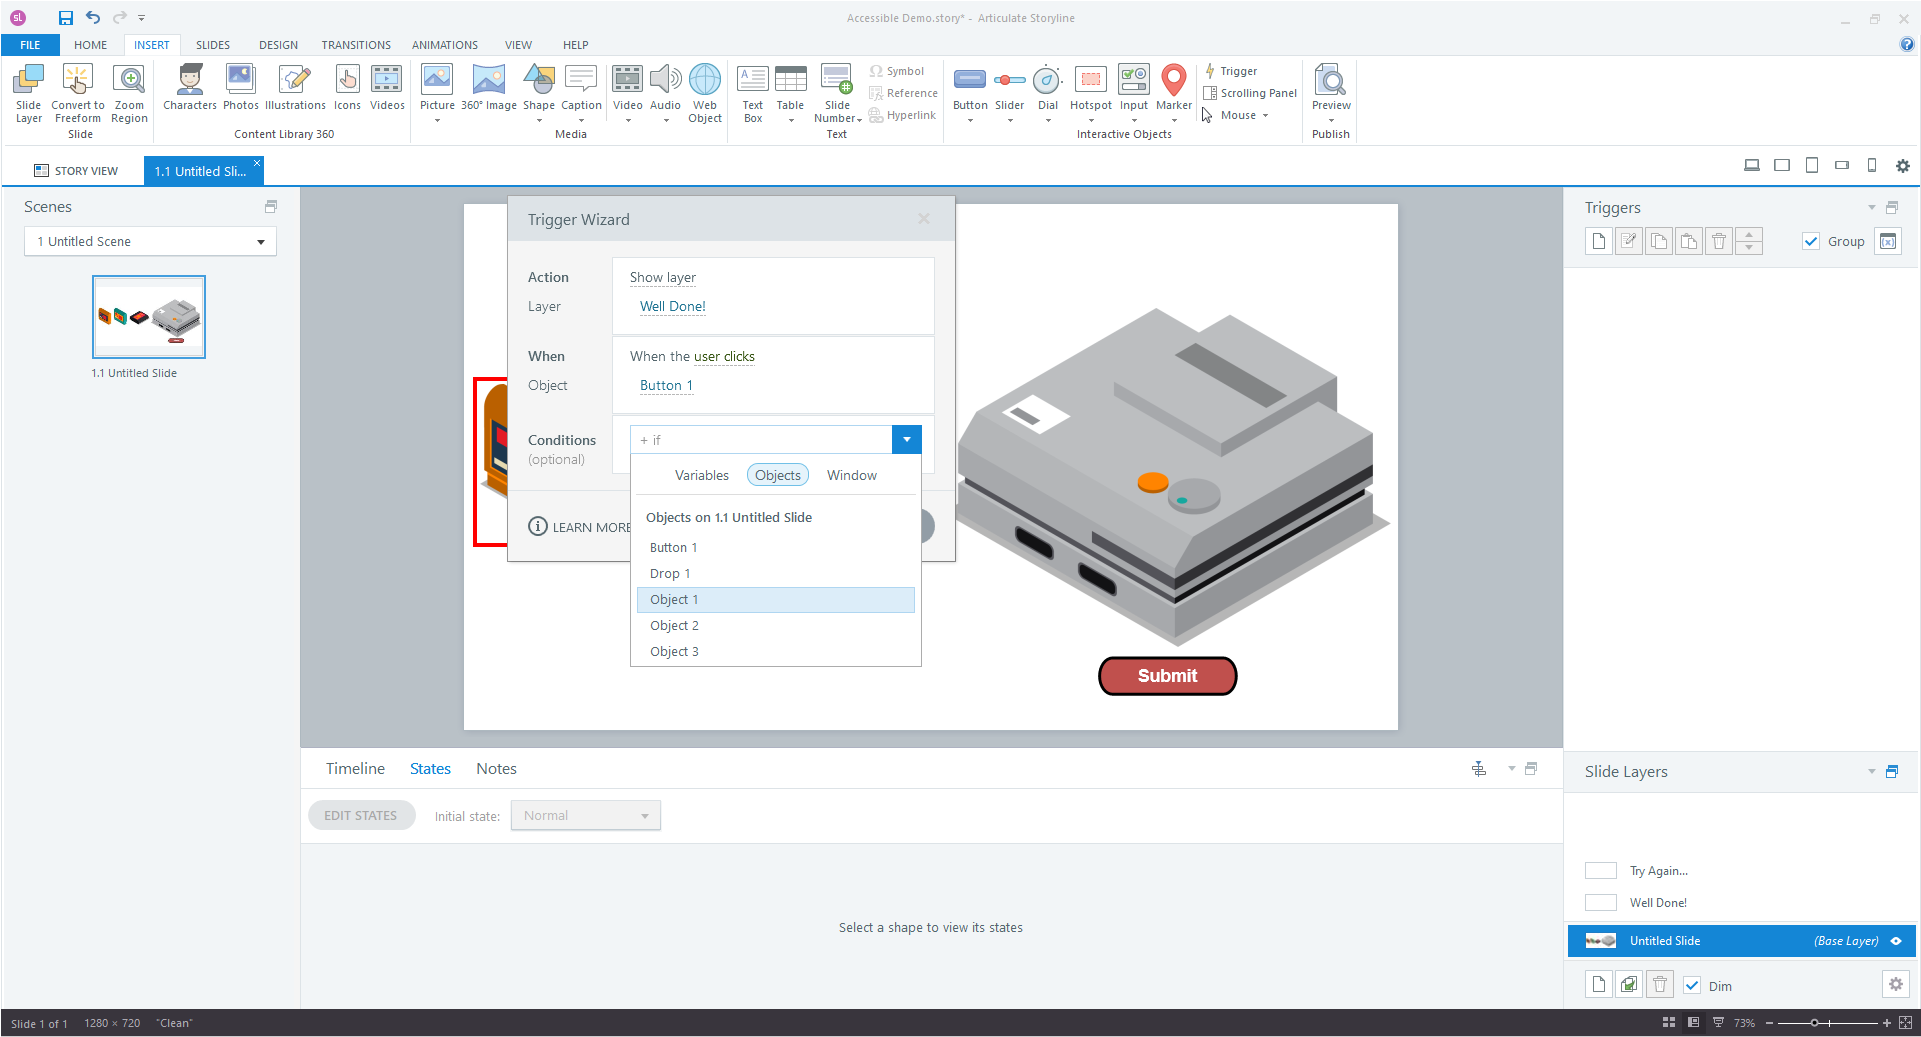
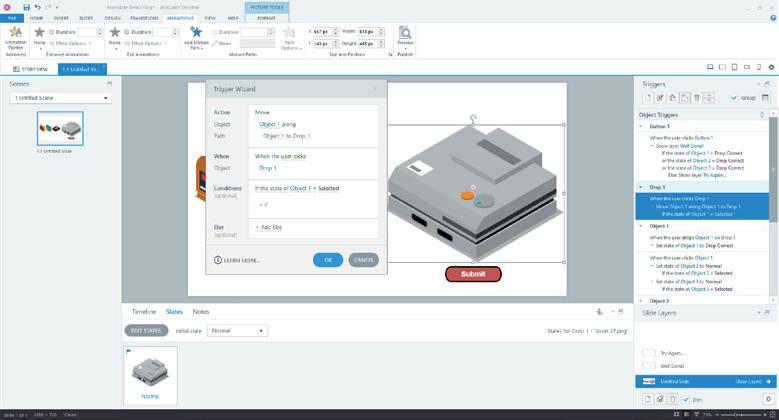
First, let’s make the Slide check to see if the correct object is placed on the dropzone.
This involves the Action ‘Show Layer’ and the When of ‘User clicks’. We want to do this when the user clicks the submit button.

Click on the ‘Create a new Trigger’ button on the right hand column.
We want to specify the Layer ‘Well Done!’ to be shown if at least one of the Objects is marked correct. We can do this by adding conditions to the ‘Show Layer’ Trigger. We can also use the Else setting, to specify if not showing Well Done!, to show ‘Try Again’, but if you are uncomfortable doing this, you can create a new Trigger to do that instead.
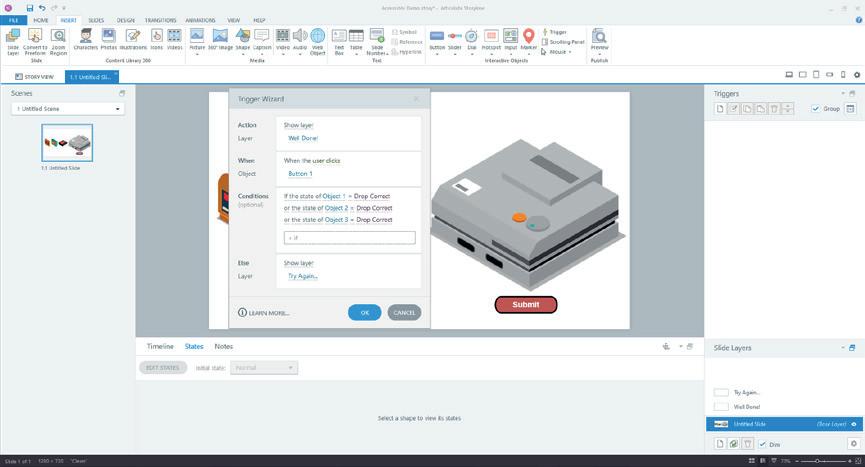
Make sure all the Objects are set to be the state you want them when a user submits the interaction, in the Conditions row.
If asking for multiple Objects to be dropped correctly click the ‘If’ keyword in the conditions row, to swap between And/Or and alter it to match your needs.
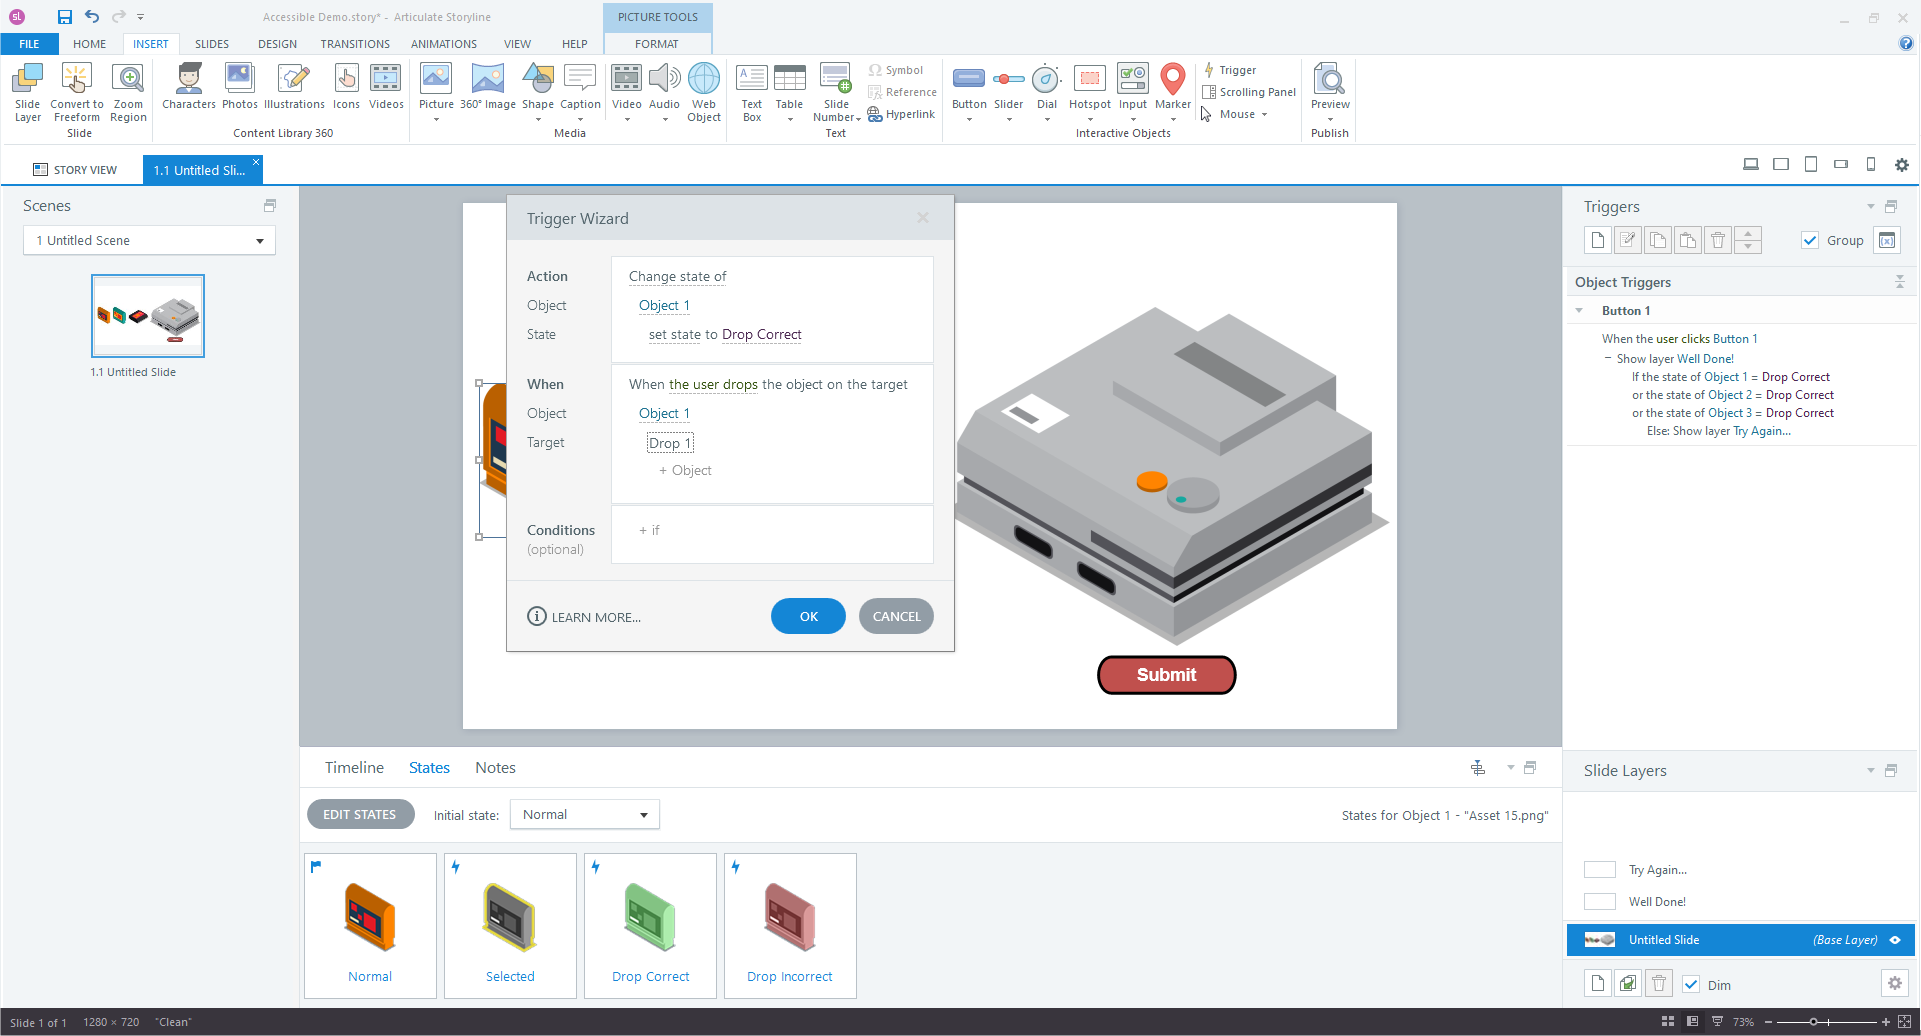
Now we are going to make the Objects change state if they are Dropped onto the Dropzone. This provides us the standard drag and drop functionality we require.
This involves the Action ‘Change state of’ and the When of ‘Object dropped on’.
We will want to specify this for each Object and dropzone. You can change the Object that shows in the list by selecting it like you do with Actions.

Now that the objects change state when dropped onto the dropzone, we need to focus on making the interaction work with a keyboard.
We will be allowing users to select objects using their Enter key, and cycle through them using the Tab key, but we will still need to make sure a user can not have multiple Objects selected at the same time.
Create a new Trigger with the action, ‘Change state’, and specify that when a user clicks one of the droppable objects, to change the state of all other objects to normal if their current state is selected. This ensures only one object can be selected at a time.
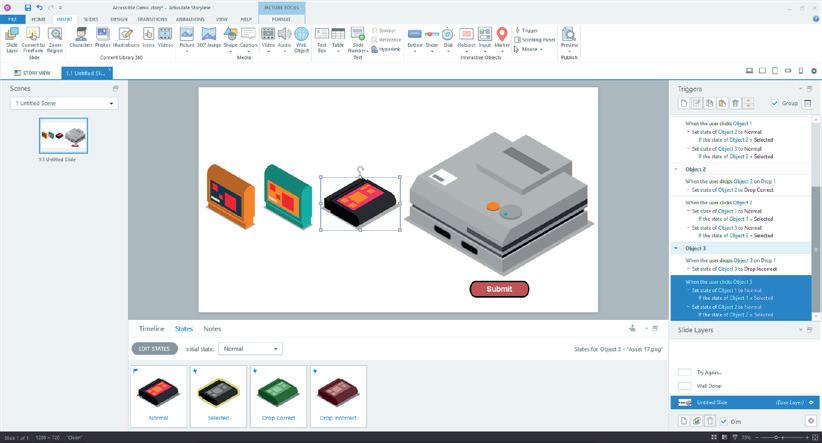
Repeat this for each object, ensuring that it changes the state of other objects to ‘Normal’ if they are currently ‘Selected’.
You can see how this should look in my example above.
Placing objects

Now we will want to use Motion Triggers, to position the objects on user inputs. This will combine with our selection toggle, to have an object move position if a user selects the dropzone while an item is selected.
To add an animation to an Object, select the Object, and go to Animations > Add Motion Path. We will want to add a line motion path.

For our line, we want to position its start and end point to the centre of the dropzone.
Under Path Options, make sure to specify Locked Origin. This will make sure the object moves to the exact placement we specified.
It would also be a good idea to rename the motion path to something like… ‘Object name to Drop Zone number’, so we can easily identify it later.
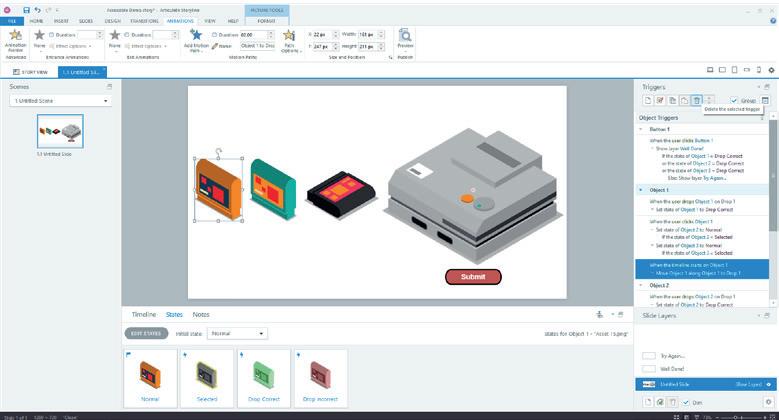
Adding a motion path to an object automatically creates a trigger to move it. We do not want this, so delete by selecting the Trigger and the ‘Trash’ icon.
Repeat this process for each Object, so all have an animation to the dropzone. Note that you will need to make a different motion path for each if you are using multiple dropzones.
Make sure your dropzone is arranged behind the draggable items or you won’t be able to see the animations! Do this by right clicking the dropzone and selecting ‘Send to Back’
Now we are ready to add our final commands. We need to create a Trigger, to move the object along the motion path, if the Object is selected, and a user clicks the dropzone.
This involves the Move Action, and When user selects dropzone. Remember to specify in conditions to only do this if the Object is currently selected.
Note: If using multiple dropzones, you can specify the motion path for the object to follow, this is why we want to rename them so we can identify which motion path goes to which dropzone.

Now, on top of moving the object, we will want to change its state. we need to do this when a user clicks the dropzone and the object is selected.
Use the action ‘Change state to’ when ‘User clicks’ dropzone, with the condition ‘If Object state =’.
Repeat this for each Object. Remember if you are using multiple dropzones, they will need to be set to change that Objects state too.
Make sure that the trigger to move the object, occurs before any actions to change state. You can use the arrows in the Trigger panel to move a selected Trigger higher up the list. The highest trigger will occur first for each set.

Congratulations! We have completed the bulk of the interaction and you should now be able to make your own Drag-and-Drop retro console in Storyline.
All that is left is to style it up with any instructions and extra media. Don’t forget to style up your Correct/Try again slides too!
So even though Storyline contains a Drag-and-Drop tool, it can be useful to know how to make your own, so you can include the accessibility keyboard functionality not yet a part of the Storyline authoring tool. As you now know, it is still possible to make these activities due to the power of the tool’s core components!
You have also learned more about motion paths, object states and a whole lot about triggers.
Now go forth and make some cool stuff!