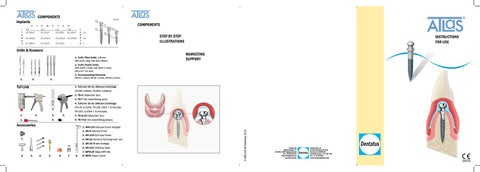
COMPONENTS
Implants I T E M N O
D I 1.8 AT-18L-R
A M 2.2 AT-22L-R
AT-18M-R AT-18S-R
E
(mm)
21
T E 2.4 AT-24L-R
R 2.8 AT-28L-R
AT-22M-R
AT-24M-R
AT-28M-R
AT-22S-R
AT-24S-R
-
17 L E 14 N G 10 T H 7
14
14 10
7
Drills & Reamers 1. CePo Pilot Drills 1.8 mm (MR-1041 Long, MR-1042 Short)
COMPONENTS STEP BY STEP ILLUSTRATIONS
INSTRUCTIONS FOR USE MARKETING SUPPORT
2. CePo Profile Drills
(MR-1045 2.2mm, MR-1046 2.4mm, MR-1147 2,8 mm)
3. Corresponding Reamers 1.
2.
(AR-91 1.8mm, AR-92 2.2mm, AR-93 2.4mm)
3.
Tuf-Link
1. Tuf-Link 50 ml, Silicone Cartridge (TK-50 1x50ml, TK-502 1x50ml) 2. TK-G Dispenser Gun 3. TK-T 10x Auto-Mixing (pink) 4. Tuf-Link 10 ml, Silicone Cartridge (TK-10 2x10ml, TK-10s 10ml + 3 mix.tips, TK-102 1x10ml + 3 mix.tips) 2.
4.
5.
5. TK-G-10 Dispenser Gun
6.
3.
6. TK-T-10 10x Auto-Mixing (brown)
Accessories
1. MR-120 Manual Driver Adaptor 2. AR-8 Manual Driver 3. AR-110 R/A Hpc Driver
1.
4. AR-10 Denture Forming Instr. set 5. AR-15 Brass Analogs 6. AR-151 Marking Caps 7. MPD-AT Atlas MPD Bit
2.
3.
4.
5.
6.
7.
8.
8. MPD Power Driver
n-k-IFU-05 © Dentatus 2012
1.
Dentatus AB Bromstensvägen 172 Box 8093, 163 08 Spånga, Sweden Tel: + 46 8 546 509 00 E-mail: info@dentatus.se www.dentatus.com
Dentatus USA, Ltd 54 West 39th Street, 5th Floor New York, NY 10018 USA Tel: 800-323-3136, +1-212-481-1010 Fax: +1-212-532-9026 E-mail: dentatus@dentatus.com
0470
Atlas Marketing Support Atlas Marketing Atlas Marketing Support Support MARKETING SUPPORT (various) Atlas Marketing Support dc_poster.qxd
FINALLY A REASON TO SMILE WITH CONFIDENCE!
• An economical alternative to other techniques • A quick minimally invasive procedure and your denture is in place after your first visit to the dentist
With Atlas Denture Comfort you will:
• You can eat almost anything you want in a couple of days
• feel safe with your dentures - mini-implants in the lower jaw and a soft silicon liner keep your dentures safely in place
• Be free from sore gums and messy adhesives • Swedish quality
1/29/09
5:07 PM
Page 1
• enjoy the possibility to eat almost anything and take part in social activities
Denture Comfort Literature Holder w/ 20 Brochures
- Finally I can feel safe and comfortable with my dentures
• be free from sore gums and messy adhesives
Ask your dentist for more information about Atlas Denture Comfort or read more at: www.dentatus.se/denture-comfort- ”will be adjusted for each country”
Denture DentureComfort ComfortLiterature LiteratureHolder Holderw/ w/20 20Brochures Brochures
DENTURE COMFORT
Denture Comfort Literature Holder w/ 20 Brochures If you, a family member, or a friend experience discomfort with dentures, inquire about Denture Comfort. To learn about the affordable, one-hour procedure that can put an end to denture problems call our office, or visit the Denture Comfort website at: www.denturecomfort.com.
AM-1
“I feel so wonderful and I am very happy with myself and the way others compliment the way I look”.
AM-1 AM-1 AM-1
DENTURE COMFORT
MADE IN SWEDEN
BL-6573
Postcard Clear and easy to understand patient information for dentists to send out to Who needs Atlas potential patients.Denture Comfort? 2:20 PM
Denture Comfort Patient Education Brochures 100 pcs. Poster
To raise awareness amongst key patients. To be put in a AM-3 visible place in a waiting room or reception. AM-3 AM-3
Page 1
Denture Get your self-confidence back with Comfort AtlAs denture comFort Atlas Denture Comfort, a reliable technique for everyone who - Do you or someone you know suffer “Finally a Reason to Smile” Poster needs secure dentures. Denture DentureComfort Comfortfrom poorly fitting dentures? • Mini-implants in Reason thefamily lower jaw to Smile” If placed you,ayour We would like to tell you more about a quick“Finally Poster Reason to Smile” Poster and a“Finally soft silicon linerakeep your er, less painful and more economical techniDenture members, or friends Comfort
Denture patients who…
• Are dissatisfied with their dentures • Have discomfort
denture in place
• Fear surgery • Want fast results
our office to see if you • A quick minimally invasive procedure and your denture is in place after your are a candidate for first visit to the dentist
• Don’t like the smell or taste of adhesives
• Are embarrassed speaking AM-2
What is Atlas Denture Comfort? • You can eat almost anything you want
PEOPLE MAY NOT BELIEVE IT…
• Have trouble chewing
With regards from your dentist:
within a couple days MILLIONS OF ADULTS WORLDWIDE WEARofDENTURES
• Be free from sore gums and My teeth are I have no more always loose. messy adhesives self-confidence. Finally, a reason
AM-2
• Swedish quality
- Finally I can feel safe and comfortable with my dentures
• A quick minimally invasive procedure
Just another gimmicky product.
Finally a reason to smile with My confidence! teeth are in
• Mini-implants in the lower jaw and a soft silicon liner
a glass at home.
This brochure has been proofread in 2011 by Dr. Mehrdad Falakeh, MSc, Tandhörnan AB i Söderhamn, Sweden
WASHINGTON, DC — 1996
44
3
4
5
AM-3 - Finally I can feel safe and comfortable with my dentures
1
2
11
22
1
2
3
4
AM-4 AM-4
33
44
AM-4
3
4
On Atlas Denture Comfort you can read A minimally invasive procedure more about thethat system and benefits: takes one hourits or less ”will be ad-
This brochure has been in 2011 A system to proofread firmly hold lowerbydentures in place Dr. Mehrdad Falakeh, MSc,provides Tandhörnan AB i Söderhamn, which cushiony comfort Sweden
Direct DirectMail MailDenture DentureComfort ComfortPostcards Postcards100 100pcs. pcs. I can still taste that messy adhesive.
A simply designed system which most people can afford
Direct Mail Denture Comfort Postcards 100 pcs.
problems presented in this paper may For more information about the Atlas Denture Comfort System be conservative.” Visit the Denture Comfort website: www.denturecomfort.com NATIONAL INSTITUTE FOR DENTAL RESEARCH DENTURE COMFORT
33
55
Four narrow body anchors that connect a lower denture to the gum
BL-6572x
BL-6571x
ATLAS
4
to smile!
“Of the 35.7 million American denture wearers 21.4 million of them have at least one problem with a denture...and severe or extensive denture
...Atlas Denture Comfort can help you, too
3
5
With regards from your dentist:
justed for each country”
I’m always • A denture system designed for existing dentures embarrassed. and new denture wearers
You are not alone!
On Atlas Denture Comfort you can read more about the system and its benefits for you: DENTURE COMFORTbeREALLY SIMPLE www.dentatus.se/”will adjustedIS forTHAT each country”
2
Please let us tell you more.
www.dentatus.se/denture-comfortDirect Mail Denture Comfort Postcards 100 pcs.
After how much suffering…and then will it really work?
1
anything you want in a couple of days
to smile!
• An economical alternative to other techniques
I think it’s a bunch of hogwash.
22
que. A quick minimally invasive procedure
• An implant system for dentures in the lower jaw
I wish keep the denture in place I could chew food again. Sure it will, and how much will it cost?
2
11
WHAT IS ATLAS DENTURE COMFORT?
• Will receive their first dentures AM-2 AM-2 I feel older than I really am.
The Atlas Denture Comfort procedure is going to renew your life Mr. Jones!
B B B B
1
and your denture is in place after your first “Finally a Reason to Smile” Poster visit at the dentist´s.a Youreason can eat almost Finally,
experience discomfort • An economical alternative to other techniques with dentures call
• Have a limited budget
We are sure...
If you, a family member, or a friend experience discomfort with dentures, inquire about Denture Comfort.
Denture DentureComfort ComfortPatient PatientEducation EducationBrochures Brochures100 100pcs. pcs.
©2007 Dentatus USA, Ltd.
3/19/09
SMILE!
D D D D
A A A A
Denture Comfort Patient Education Brochures 100 pcs.
— Janina, Denture Comfort patient
dc_brochure.qxd
A REASON TO
FINALLY
Get your self-confidence back with Atlas Denture Comfort, a reliable technique for everyone who needs secure dentures. • Mini-implants placed in the lower jaw and a soft silicon liner keep your denture in place
STEP-BY-STEP ILLUSTRATIONS
The simple Finally, asolution reason to for smilepeople with dentures.
To find out more:
www.DentureComfort.com
A system designed for people with existing dentures or needing new ones
Dentatus AB Bromstensvägen 172, Box 8093, SE-163 08 Spånga, Sverige Tel +46 8 - 546 509 00, e-mail: info@dentatus.se THE SIMPLE SOLUTION FOR PEOPLE WITH DENTURES www.dentatus.com
AM-4
C C C C
E EE E
DENTURE COMFORT
Brochure step 1 Brochure step 2 Contains easy to grasp information about the Contains more detailed information Denture Comfort Front Office Brochures 100 pcs. advantages and benefits of the Atlas techniabout how the clinical procedure AM-5 Denture Front pcs. Denture Comfort FrontOffice OfficeBrochures Brochures 100 pcs. que from a patient’s perspective. ToComfort be placed works100 and the advantages for the AM-5 AM-5 Denture Front Office Brochures 100 Used pcs. by the dentist during in the waiting room or accessible atComfort reception patient. in order to createAM-5 awareness amongst key a consultation with a patient II patients. IIII II
5 55
III III III III
5
IV IV IV IV
Dentatus denture instruments are designed for uniform depth reduction and for creating an inverted seam line encasement that holds the reline firmly in place without adhesives. The single short chairside procedure of installing the resilient liner prevents stress and tissue abrasions especially over uneven and bulbous ridges without follow-up tissue adjustment appointments. The Atlas Dome Keeper with Tuf-Link can provide comfort and retention for full dentures and partial removables without the need of clasp or bar-clip retentive devices. The Dentatus Narrow-Body Implant surgical restorative protocols were developed in conjunction with the Department of Implant Dentistry, New York University College of Dentistry. Bernard Weissman - President
1
ENGLISH
Dentatus AtlasÂŽ Implant System, approved for long-term use, provide stable anchor support and stabilization for problematic dentures. The Atlas Tuf-LinkÂŽ lined overdentures create cushioned chewing impact and firm retention without the need of the restrictive metal coping O-ring technologies.
CAUTIONS AND NOTES
Extreme care should be observed to prevent accidental swallowing or aspiration of implants or other related small accessory components used in these procedures. When possible, tools should be attached with a fine cord to the patient’s garment.
Atlas implants, attached with the manual carrier drivers, are delivered sterile are designed for direct, safe, initial implant placement. Accessories, including drills and reamers, are delivered factory clean and after removing their wrappings, they should be sterilized in compliance with surgical protocols before use.
Special consideration should be given for the use of Atlas Implants for upper dentures. The softer maxilla bone and anatomical restrictions must be carefully considered before their use.
The implants are intended for single use, thereby avoiding risk of infectious cross contamination if re-used. Do not use an implant if the packaging is damaged or opened.
Caution - The printed guidelines, including Cautions and Notes, are to be regarded as additions to accepted clinical procedures and surgical protocols. Federal law restricts the sale of this device to a licensed physician or dentist.
All devices used in the clinical procedures should be autoclaved with steam sterilization prior to use. The following parameters have been validated in accordance with FDA recognized standard ANSI/AAMI/ ISO 17665-1:2006, to provide a Sterility Assurance of 10-6. Temp: 132°C, Pressure: 30psi, Time: 8 minutes. However, the health facility should validate its own autoclave steam sterilization machine in accordance with a recognized standard (in the USA: FDA approved standard).
Dentatus Narrow Body Ti alloy implants are FDA designated for long-term use and for any length of time as decided by the healthcare provider. These instructions inform the user about the recommended procedures when using Dentatus implant systems. They are intended for use by clinicians with at least a basic level of surgical and in-clinic implant training. It is the responsibility of the clinician to stay informed, educated and trained about general dentistry implant treatment techniques.
The CePoÂŽ Drills and reamers should be used with copious amounts of biocompatible sterile water or saline solution spray to prevent overheating damage and possible bone necrosis. When preparing osteotomies in mandibular D-1 and D-2 hard bone, only sharp drills and reamers should be used. As a safety precaution, used dull drills should be discarded. 2
To determine the ideal position and angle for implant placement, appropriate CT (CAT) scans, X-rays and measurements should be reviewed. Right-angle calipers can be used to measure the width of bone with special attention to the irregularities in buccolingual jaw concavities.
The CePo Drill laser marks are designed for implant placement performed with surgical flap procedures of exposed bone. In flapless procedures, the osteotomies are made 4-5 mm deeper to compensate for the variable levels of mucosa and to prevent compression necrosis of the bone.
The level of bone may be estimated by using a ruler to establish the total ridge height by placing the ruler under the chin up to the crest of the ridge. An approximate volume of 6-8 mm soft tissue under the chin and over the ridge is deducted, and the remaining solid bone measurement is used as a guide to select an appropriate length implant.
B. Note: Local anesthetic infiltration is considered adequate for these procedures. All osteotomies are initiated with the 1.4 CePo Pilot Drill. For placing implants wider than 1.8mm diameter, the openings are enlarged with the correspondingly marked drills or reamers in a straight up and down motion to the pre-drilled depth.
A. The locations for the implants should be indicated with a sterile marking pen on the mucosa. 4 Atlas Implants should be placed anterior to the mental foramina and separated equidistantly for a balanced, cross-arch stabilization and retention.
Note: Aligning the drill position for the osteotomies, the thumb and index finger may be placed on either side of the ridge to facilitate tactile feedback when the drill is in motion in close proximity to the mucosa.
The Dentatus CePo Pilot 1.4 Drill is initially used to puncture the tissue (without rotation) indenting the bone for precise location of the osteotomies. The drills, operated at 1300-1500 RPM with copious amounts of
See next page for drill systems.
3
ENGLISH
biocompatible sterile water or saline solution spray, are angled for implant placement in bone. The osteotomies are prepared to the depth for the implant platform to seat in the mucosa.
ATLAS CLINICAL PROCEDURES
Dentatus CePo Surgical Drill systems Dentatus offers two different laser marking systems on the CePo Pilot and CePo drills. This information will guide you on how to use them. System 2 A user-friendly marking system, which refers to the actual placement depth through the gingiva, when performing flapless placement of the implants.
System 1 The laser markings refer to the threaded length of the implants. Markings are on 7, 10 and 14 mm from the tip of the implant, where the threads on the various implants end.
The markings correspond to the 3 different lengths of Dentatus implants: short (S), medium (M) and long (L). The upper border line of each marking is used as reference to the gingival surface and is placed 11, 14 and 18 mm from tip.
Marking width is approx 0.5 mm. The implant platforms on Anew implants shall always be flush with the gingival surface.
The width of each marking is 2 mm.
System 2
System 1
L M
L
S
M S
Cat. nr. Ă˜ mm MR - 1141 CePo Drill - pilot MR - 1142 CePo Drill - pilot MR - 1145 CePo Drill MR - 1146 CePo Drill
M
Cat. nr. Ă˜ mm MR - 1041 CePo Drill - pilot MR - 1042 CePo Drill - pilot MR - 1045 CePo Drill MR - 1046 CePo Drill
1.8, Long 1.8, Short 2.2 2.4
4
1.8, Long 1.8, Short 2.2 2.4
To obtain good initial stability, an installation torque of 40 Ncm is recommended.
The sterile manual carrier driver attached to the sterilized implant is used to safely place the implant by a few threads.
Important: make sure the implant is properly seated in the various drivers and that the driver is in a straight line with the implant; with the manual driver align the wings parallel to the slot in the implant head.
The carrier driver is removed and the placement may be continued with the R/A Hpc driver (at no more than 50 RPM) or with the Ratchet (short of the platform contacting the mucosal tissue). The placement is completed with the winged manual driver that provides tactile feedback of its proper complete seating.
1.
When excessive resistance is perceived, the implant is removed and the osteotomy is made slightly deeper. This will prevent high stress and possible damage to mandibular hard bone.
2.
3.
4.
Assembly of Manual Adaptor and R/A Driver 1. Locate the index dot on the adapter 2. Line up the flat side of the shaft on the R/A Driver with the dot on the adapter 3. Push the R/A Driver into the opening until stop 4. Make sure the shaft end of the R/A Driver is flush with the back side of the Manual adapter After use, remove the R/A Driver from the Adapter by pulling them apart for separate cleaning and disinfection. Clean the opening with a small interdental brush. Adapter is made in anodized aluminium and comes with an o-ring inside, to provide a better grip on the R/A Driver. When o-ring is damaged, the Adapter should be discarded. To facilitate assembly of Adapter - R/A Driver, a minute drop of dental handpiece lubricant oil can be applied in the opening before autoclaving. Wipe off any excess oil before packaging into sterilization bag.
5
ENGLISH
C. Implant Placement
painted with any safe vegetable-based colorant or marker and the denture is firmly pressed down to transfer the marked positions for the implant head.
D. Clinical Prosthetic Procedures Caution: When an existing denture cannot be located spatially on the ridge aligned with the opposing teeth, the denture should be first relined with quick auto-cure resin before initiating the retrofitting procedure.
5. The spherical cutting instrument is used to indent the marked spaces allowing the denture to seat passively in place. To prevent excessive denture reduction, the instrument should be sunk down 2/3 of its spherical depth.
A marking pen is used to mark the outline in the denture for a seam line position that should be located 2-3 mm below the flange extensions. The marking is extended up to the retromolar pads in a curved form for seamless liner adaptation.
Note: A confirming check can be performed by applying markings directly to the implant heads for a final touch up and rounding off all sharp projections to prevent incipient tears in the silicone liner.
1. The half-sphere cutting instrument is used to create an inverted seam line encasement for retention of the liner without adhesives. The instrument shank is leaned toward the opposing flange, angled at 45° to create a well delineated, continuous seam line.
E. Silicone Relining Procedures Note: The patient’s mouth, tongue and denture are thoroughly rinsed to remove fine particles that may become embedded in the liner. Preparing for the quick reline procedure, the patient should be cautioned that they will need to gently press the denture in place in contact with their opposing teeth and keep firmly in place for 4-6 minutes without tongue or jaw movements.
2. The grooved instrument is used to score depth tracks in the denture without causing damage to the prepared seam line. 3. The spherical cutting instrument is used to reduce the base to the depth marked levels and to create a smooth surface. 4. The marking caps, placed on the Atlas Implants are used to mark their position in the denture. The caps are 6
tissue abrasions, rarely requires follow-up tissue adjustment appointments. Depending on variable conditions, the liners should remain resilient for 12 - 18 months. Although they are quickly replaceable, a spare liner can be made for patients to keep it in a water filled container for emergency use.
2. The denture is inserted from the posterior direction and guided forward with pulsating side motions. The patient is guided to contact the opposing teeth and hold still in place. The procedure must be carried out expeditiously, as the silicone begins to set within minutes.
POST-OP CHECKLIST a. Muscle impinging areas, the frequent cause of denture dislocation in functional and parafunctional movements should be eliminated. b. Occlusal contacts and tripping interferences should be corrected.
3. When polymerized, the denture is removed and the liner is gently lifted out of the denture base with a pointed instrument at one of the distal extensions.
c. The patient should immediately report any irregularities or discomfort. PATIENT HOME-CARE INSTRUCTIONS
4. The excess liner is cut away along the well delineated seam line with long-nosed fine scissors.
Patients can immediately ingest food; however, they should observe a 48 hour soft diet regimen, without hard or chewy foods.
5. To reinsert the liner, it is first located at one extreme end of the denture and guided into place with light finger pressure. A smooth flat instrument may be used to guide the reline into the seam line which will prevent fine food particle accumulation.
a. Patient should not remove their denture during the first two days. b. Patient should not remove their denture at night for the first two weeks following Atlas placement. This will prevent any edema initiated by the surgical placement from forcing the soft tissue up, possibly interfering with the reseating of the denture on the
Atlas Tuf-Link self-aligning dentures tolerate substantial implant angulations. The denture, removed without implant stress or 7
ENGLISH
1. The Tuf-Link dispenser with an auto-mixing tip is bled before injecting the silicone into the denture base, the flow is guided into the seam line. Sufficient silicone should be used to create pressure required for a dense, nonporous liner.
implants. After the two week period patients may sleep with or without their Dentures.
RETROFITTING MAXILLA IMPLANTSUPPORTED OVERDENTURES AND REMOVABLE PARTIALS
c. Patient should remove denture briefly each day for oral hygiene. Instruct them to use a soft nylon bristle toothbrush with toothpaste or water to scrub the denture. Do not have patient attempt to remove the silicone liner for at least 3 days. After this initial period, patients with good dexterity may remove the liner (with a toothpick) and clean it gently in the same manner as the denture. After the initial healing period, dentures may be soaked for 30 minutes each day in a denture cleaning solution. (Note: instruct patients not to clean their dentures or silicone relines over an open sink drain). Instruct patients how to clean the head, collar and platform of the Atlas implants.
Retrofitting technical procedures for implant-supported dentures are substantially the same as described in the Atlas manual for mandible overdentures. The softer, porous maxillary bone may not be able to withstand the functional forces without a splinted bar interconnecting 6-8 implants. The Dentatus Anew Implants with components design for fixed restoration can be used to create a resin-metal splint. Retrofitting the denture with the Tuf-Link silicone liner provides cushioned, comfortable, and a secure retention with a modified palatal form. The Dentatus Anew Narrow Body Implant System, designed for reconstructive procedures are used for replacing single teeth, multi-unit restorations and full arch screw-retained fixed bridges. The minimally invasive less demanding surgical and clinical procedures are accessible and more affordable to the much larger range of patients’ needs.
d. Patient may use a pain-relieving medicament to alleviate any discomfort. e. Patient should be instructed to call the office if any serious pain or other symptoms arise.
8
Other applications are in surgical procedures where tissue sites need to be safely protected over lengthy periods of time. Tuf-Link silicone material is dense and nonporous, preventing food impaction and bacterial accumulation.
The Anew Implant illustrated technical manual for replacing missing single teeth, multi-unit and full-arch restorations are available upon request or online at www. dentatus.com.
ATLAS MARKETING PROGRAM The Atlas Denture Comfort program with print and media materials can help you jump-start your implant practice to the very large number of patients that suffer with inadequate restorations. The marketing program is based around the consumer website www.denturecomfort.com featuring a Dentist locator by zip code. The program includes marketing tools such as patient brochures, posters, post-cards, press releases and much more. Call Dentatus at +1 800-323-3136 to see how you can take advantage of these opportunities, many of them free of charge (US only. For other markets, please contact Dentatus AB, www.dentatus.com).
TUF-LINKÂŽ SILICONE MATERIAL FOR USE IN THE GENERAL PRACTICE The Dentatus Tuf-Link resilient liner that maintain stable forms over lengthy periods of time may be used to reline upper dentures, partial removables, & during sinus lift and hard and soft reconstructive procedures. The liner can also be used to line recording base forms to establish accurate occlusal, vertical and spatial relations preventing damage to master casts.
You can also reach us through e-mail at dentatus@dentatus.com or see the full line of Dentatus distinctive products on the web at www.dentatus.com.
The Tuf-Link 50 ml dispenser with auto mixing tips is convenient for large volume relines. The Tuf-Link small 10 ml dispenser, is designed for small relines and to quickly relieve tissue abrasions. Two small indents made with round burs spaced 3 - 4 mm apart will securely retain the patch in place. The space may be permanently re-filled with hard resin after healing.
9
ENGLISH
Careful consideration should be given to the maxilla and anatomical limitations and bone by using 6-8 implants with shallow osteotomies to half the depth made in hard bone. The self threading Anew Implants placed with the manual driver will create their own condensed thread form in the bone.
10
Atlas® implantatsystem från Dentatus AB erbjuder ett stabilt och säkert underlag för proteser med retentionsproblem. Tillsammans med rebaseringsmaterialet Tuf-Link skapar systemet samtidigt en stötdämpad bitning och en stadig retention utan o-ringar eller matriser. Systemet är godkänt för permanent bruk.
Atlas-implantaten erbjuder tillsammans med Tuf-Link-materialet hög komfort och säker retention av hela eller partiella, avtagbara, plattproteser utan behov av knäppen eller matriser för alveolarbarkonstruktioner och liknande. Dentatus minimal-invasiva implantat och metodik har utvecklats i samarbete med Department of Implant Dentistry, New York University College of Dentistry. Bernard Weissman – Dentatus
11
SVENSKA
Anpassningen av protesen görs med instrument formgivna för att skapa ett enhetligt djup vid reduktionen av protesbasen och för att skapa det korrekta underskär som krävs för att hålla rebaseringsmaterialet på plats i protesen. Inget adhesiv behövs. Det enkla förfarandet och snabba hanteringen vid rebaseringen förebygger stress samt minskar risken för skavsår på slemhinnan, fr.a. vid ojämna kristaförhållanden. Metoden minimerar eller eliminerar behovet av större slutjusteringar.
Upplysningar och varningar
Yttersta aktsamhet skall iakttagas för att undvika att de små komponenterna tappas i svalget och sväljs eller inhaleras. Där så är möjligt bör dessa säkras med tandtråd eller liknande vid patienten.
Atlas-implantaten levereras sterila. De är i förpackningen försedda med en överföringshylsa, med vars hjälp implantatet direkt och säkert installeras initialt. Tillbehör, inklusive borr och rymmare, levereras fabriksrena i icke sterilt skick. Tillbehören steriliseras före användning. Komponenterna avlägsnas då ur sina förpackningar och steriliseras enligt gällande steriliseringsrutiner.
Speciellt övervägande skall göras för Atlasimplantat i överkäken. Kvaliteten hos det mer porösa benet i maxillan och anatomiska begränsningar måste övervägas noga före installation. Varning – Dessa tryckta anvisningar, inkluderande upplysningar och varningar, är att betrakta som tillägg till accepterade och säkra kirurgiska och behandlande rutiner. I USA begränsar amerikansk federal lag försäljningen av denna produkt till licensierade läkare eller tandläkare.
Implantaten levereras sterila och är avsedda för engångsbruk. Använd inte implantatet om förpackningen är skadad eller om den öppnats vid ett annat tillfälle. Risk för kontamination och infektion vid återanvändning. Ej sterila produkter steriliseras i autoklav före användning. Följande parametrar har validerats i överensstämmelse med av FDA (USA) fastställda standarder ANSI/ AAMI/ISO 17665-1:2006 för att uppnå en sterilitetsgrad av 10-6: Temperatur 132°C, tryck: 30 psi, tid 8 min. Varje vårdinrättning skall validera sin egen sterilisationsutrustning. (I USA i överensstämmelse med av FDA fastställd standard.)
Dentatus minimal-invasiva (narrow-bodied) implantat i titan är avsedda för både långtidsbruk eller för tillfälligt bruk och även godkända för detta av FDA (USA). Dessa instruktioner upplyser användaren om de rekommenderade arbetsmetoderna vid användning av implantat från Dentatus. De vänder sig till kliniker med minst en grundläggande klinisk kunskapsnivå av kirurgi och implantatterapi. Det är tandläkarens ansvar att hålla sig informerad, uppdaterad och tränad i olika tekniker vid behandling med dentala implantat.
Dentatus CePo™ borr och rymmare skall användas under riklig spolning med biokompatibelt, sterilt vatten eller saltlösning för att undvika överhettning av den omgivande benvävnaden och möjlig bennekros. I hårt ben (D1 och D2) rekommenderas att endast skarpa borr och rymmare används. Som en säkerhetsåtgärd skall använda och oskarpa instrument kasseras. 12
För att säkerställa korrekt och optimal position och vinkel hos implantatet vid installationen, görs i samband med undersökningen en skanning och/eller tas ett OPG. Skjutmått kan användas för att kontrollera utsträckningen av benet, med speciellt iakttagande av oregelbundna konkaviteter i buccal-lingual aspekt.
Lasermarkeringarna på borren är anpassade för implantatinstallation vid lambåteknik och frilagt ben. Då lambå inte används, görs osteotomin 4-5 mm djupare för att kompensera för olika slemhinnetjocklek och för att minska risken att implantatet bottnar för tidigt.
Benhöjden kan kontrolleras med linjal eller skjutmått från undersidan av hakan till övre kristakanten. En approximerad mjukvävnadstjocklek av cirka 6-8 mm avräknas och det kvarvarande måttet används som riktlinje vid val av lämplig längd på implantatet.
B. Notera: Lokal infiltrationsanestesi anses tillräcklig för dessa ingrepp.
A. Alla osteotomier inleds med borret CePo Pilot Drill 1,4 mm. Om implantat med diameter större än 1,8 mm skall användas, vidgas osteotomin till rätt storlek med borr eller rymmare märkt med motsvarande implantatdiameter. Vidgningen utförs med en rak fram- och återgående rörelse.
Placeringen av Atlas-implantaten indikeras på lämpligt sätt på slemhinnan, t.ex. med en steril märkpenna. Rekommenderat är att 4 implantat placeras anteriort om foramen mentale, jämnt fördelade på var sida om käkens mittlinje, för att säkerställa en balanserad och jämn stabilisering och retention.
Notera: Taktiliteten vid osteotomi i tunna kristor kan förbättras genom att med ena handens tumme och pekfinger hålla runt kristan.
Dentatus CePo Pilot borr (diam. 1,4 mm) används initialt till att penetrera mukosan (utan rotation) och ge benytan en lämplig markering för exakt placering av osteoto-
Se nästa sida för borrsystem
13
SVENSKA
min. Borra med max 1300 - 1500 rpm, under riklig kylning med biokompatibelt sterilt vatten eller saltlösning, i önskad installationsvinkel av implantaten. Osteotomin görs så djup att plattformen på implantatet kommer i nivå med gingivan.
Kliniskt förfarande Atlas
Dentatus CePo Kirurgiska borrsystem Dentatus erbjuder två olika lasermärkningar på CePo Piliot och CePo-borren. Följande information beskriver skillnaden och hur de ska användas. System 2 Ett användarvänligt märkningssystem som refererar till aktuellt placeringsdjup när installationen sker genom gingivan (flap-less).
System 1 Lasermarkeringarna refererar till den gängade längden på implantaten. Markeringarna är på 7, 10 respektive 14 mm avstånd från spetsen på implantaten, där gängan på de olika implantaten slutar.
Markeringarna motsvarar de tre olika längderna på implantaten: kort (S), medium (M) respektive lång (L). Den övre kanten på varje markering används som referens mot gingivalytan och är placerad 11, 14 och 18 mm från spetsen.
Höjden på varje markering är ca 0,5 mm. Den övre plattformskanten på Anew-implantaten skall alltid vara i nivå med gingivalytan.
Höjden på varje markering är 2 mm.
System 2
System 1
L M
L
S
M S
M Cat. nr. Ø mm MR - 1141 CePo Drill - pilot MR - 1142 CePo Drill - pilot MR - 1145 CePo Drill MR - 1146 CePo Drill
Cat. nr. Ø mm MR - 1041 CePo Drill - pilot MR - 1042 CePo Drill - pilot MR - 1045 CePo Drill MR - 1046 CePo Drill
1.8, Long 1.8, Short 2.2 2.4
14
1.8, Long 1.8, Short 2.2 2.4
med gingivan. Implantatet installeras med ett rekommenderat vridmoment på ca 40 Ncm, för att erhålla en god primär stabilitet.
C.
Viktigt: kontrollera att implantatet bottnar helt i respektive nyckel och att nyckeln sitter rakt på implantatet.
Överföringshylsan avlägsnas och installationen fortsätter med nyckeln för vinkelstycket (ca 50 rpm) eller med det separata spärrhantaget med Atlas-insats tills gingivan befinner sig strax under implantatets plattform. Installationen avslutas med den manuella nyckeln till rätt djup, där implantatets plattform är i nivå
1.
Om ett hårt motstånd upplevs vid installationen, avlägsnas implantatet och osteotomin görs något djupare. Detta medför att alltför hård kontakt mellan implantatets spets och benet undviks och att eventuella skador på benet inte uppstår.
2.
3.
4.
Montering av den manuella adaptern på VST-drivern 1. Sök upp indexmärket på adaptern 2. Den flata ytan på vst-driverns skaft skall vara riktad mot indexmärket 3. Skjut in vst-drivern till stopp 4. Kontrollera att änden på vst-driverns skaft är jämns med baksidan på adaptern Efter användning dras vst-drivern ur adaptern för separat rengöring och desinfektion. Rengör öppningen i adaptern med en liten mellanrumsborste. Adaptern är tillverkad i anodiserad aluminium med en o-ring i hålet, för bättre retention av vstdrivern. När o-ringen är utsliten skall adaptern kastas. För att underlätta monteringen av adapter – vst-driver, kan en liten droppe olja för vinkelstycken läggas i öppningen på adaptern före autoklavering. Torka bort överskottsolja innan adaptern packas i sterilförpackning.
15
SVENSKA
Den sterila överföringshylsan, som implantatet är fastsatt i vid leverans, används att flytta implantatet från förpackningen till installationsområdet och till att initialt dra fast implantatet med ett par varv.
markera ut var implantaten hamnar i protesen. Hättorna täcks med lämplig färg, t.ex ocklusionsfärg varefter protesen sätts på plats i munnen. Färgen förs då över till protesen vid läget för varje implantat.
D. Kliniskt protetiskt förfarande Varning: Om en befintlig protes inte sitter stadigt på kristan vid hopbitning, skall protesen först rebaseras med konventionell metod.
5. Använd den helt runda fräsen till att göra försänkningar i protesbasen vid platserna för implantaten. Protesen skall ligga passivt på plats. För att förhindra överdriven reduktion av protesmaterial, bör fräsen inte gå djupare än ca. 2/3 av sin diameter.
En märkpenna används för att markera området för reduceringen i protesen. Skarven placeras 2-3 mm innaför protesbasens kant. Markeringen dras ut i en rundad linje bakom molarområdet för en så omärklig övergång som möjligt.
Notera: En slutkontroll kan göras genom att lägga färg direkt på implantathuvudet och sätta den preparerade protesen på plats i munnen. Eventuella kvarstående interferenser och skarpa hörn som kan orsaka att rebaseringsmaterialet senare rivs upp elimineras.
1. Den halvsfäriska fräsen används för att åstadkomma ett underskär för rebaseringsmaterialet. Underskäret eliminerar användning av adhesiv. Instrumentets hals lutas mot protesmaterialet så att ett jämnt och kontrollerat djup erhålls i reduceringen.
E. Rebaseringsförfarande med mjukblivande silikon
2. Den runda fräsen med spår används till att skapa djupmarkerande spår i protesbasen utan att skada den yttre begränsningen (underskäret).
Notera: Rengör först patientens mun, tunga och protes för att undvika matrester och andra partiklar från att fastna i rebaseringsmaterialet. Patienten informeras att försiktigt bita ihop under 4-6 minuter medan rebaseringsmaterialet polymeriserar, utan att röra tunga eller käke.
3. Den helt runda fräsen använd till avlägsnande av protesbasmaterial till det markerade djupet och för att erhålla en slät och jämn yta. 4. Markeringshättorna placeras på Atlasimplantaten och används till att
1. Tryck först ut en mindre mängd material som kastas innan appliceringen i protesen sker. Applicera därefter Tuf-Link-materialet ur 50-ml-sprutan 16
Atlas / Tuf-Link självjusterande retentionssystem av proteser tillåter avsevärda avvikelser i installationsvinklar av implantaten. Protesen, som avlägsnas utan påverkan på implantatens infästning eller på slemhinnan, behöver sällan korrigeras. Beroende på olika förutsättningar, bör silikonrebaseringen förbli mjuk i 12 – 18 månader. En extra rebasering kan tillverkas samtidigt, för patienten att ha i reserv. Den förvaras då fuktigt i en behållare med vatten.
2. Protesen sätts på plats posteriort ifrån och framåt, med små rörelser i sidled. Hjälp patienten att få kontakt med motstående käke och hålla stilla. Proceduren måste utföras skyndsamt, då silikonmaterialet börjar polymerisera omgående efter placeringen i protesen.
Post-operativ kontrollista a. Den viktigaste orsaken till illasittande proteser beror på funktionella och parafunktionella rörelser i muskulaturen. Eliminera områden på protesen som påverkas negativt av sådana muskelrörelser.
3. När materialet polymeriserat, avlägsnas protesen och rebaseringsmaterialet lyfts försiktigt ur protesen med ett spetsigt instrument, med början distalt.
b. Ocklusala kontakter och interferenser korrigeras.
4. Klipp bort överskottsmaterial längs skarvlinjen i silikonet med en spetsig, vass sax.
c. Be patienten omgående rapportera om eventuella obehag eller andra problem.
5. För att sätta tillbaka silikonrebaseringen i protesens uttag, börja distalt i den ena änden och tryck rebaseringen på plats med lätt fingertryck. Ett slätt instrument kan användas för att justera anslutningen längs kanterna så att skarven blir jämn. Detta minimerar risken för att matpartiklar kan fastna.
17
SVENSKA
med hjälp av blandningsspets och blandningspistol i den del av protesen som reducerats. Använd tillräckligt med material så att det trycks ut ordentligt i det urtagna området men utan att flöda ut för mycket över omgivande protesytor när protesen sätts på plats.
fyra Atlasimplantatens huvud, hals och plattform.
Patientinstruktioner Patienten kan genast inta föda, men rekommenderas mjuk eller flytande föda, utan tuggmotstånd, under de inledande 24 till 48 timmarna.
d. Patienten får använda smärtstillande medicinering vid behov. e. Patienten skall informeras om att kontakta kliniken om smärta eller andra symtom uppstår.
a. Patienten bör inte avlägsna protesen under de två första dagarna. b. Patienten bör inte avlägsna protesen nattetid de närmaste två veckorna efter att Atlasimplantaten installerats. Detta förebygger svullnad efter det kirurgiska ingreppet vilket kan påverka passningen av protesen mot implantaten. Efter denna tvåveckorsperiod kan patienten sova med eller utan protesen.
Rebasering av implantatretinerade hela eller partiella proteser (overdentures) i maxillan Den tekniska principen för implantatretinerad protetik i överkäken är i stort densamma som i underkäken. Den mjukare och porösare benkvaliteten i maxillan uppvisar inte säkert den erforderliga stabiliteten utan en sammanlänkande bar-konstruktion, som sammanbinder 6 – 8 implantat. Dentatus ANEW-system, som innehåller komponenter för fastsittande restaurationer, kan användas för att skapa en resin-metall-splint. Rebasering av överkäksproteser med Tuf-Link mjukblivande rebaseringsmaterial erbjuder en stötdämpad, bekväm och säkert retinerad protes med en modifierad palatinal utformning.
c. Patienten bör avlägsna och rengöra protesen dagligen av hygieniska skäl. Använd en mjuk borste med vatten och tandkräm för rengöring. Rebaseringssilikonet bör inte avlägsnas ur protesen under de första tre dagarna. Efter denna period kan patienter med god motorik avlägsna rebaseringen (med t.ex en tandsticka) och rengöra den försiktigt på samma sätt som protesen. Efter den initiala läkningsperioden kan protesen läggas i protesrengöringsmedel under 30 minuter varje dag. (Be patienten att vara försiktig vid rengöring av protes och rebasering i handfat med öppna avlopp. Hårda handfat kan spräcka protesen om den tappas.) Instruera patienten om lämplig rengöring av de
De anatomiska begränsningarna och benkvaliteten i maxillan måste noggrant övervägas. 6 – 8 ANEW-implantat installeras i grunda osteotomier gjorda till halva djupet, i hårt ben. De självgängande ANEWimplantaten installeras med den manuella nyckeln och skapar själva ett gängat säte i benet. 18
för att den säkert hålls på plats. Området kan efter läkning rebaseras konventionellt.
Information om ANEW-systemet och hur det används vid entands-, flertands- och helbroersättningar kan erhållas separat vid förfrågan.
Atlas marknadsföringsprogram
Andra applikationer är efter kirurgiska ingrepp, där slemhinnan måste skyddas över en längre tid. Tuf-Link-materialet är tätt och porfritt och förebygger ansamling av matrester och bakterier.
Kontakta Dentatus AB. Du kan nå oss genom info@dentatus.se eller www.dentatus.com.
Tuf-Link® silikonmaterial för användning i allmänt bruk
Se även: www.dentatus.se/denture-comfort-sweden
Dentatus elastiska och mjukblivande silikonmaterial Tuf-Link, behåller sin stabilitet över lång tid och kan användas till rebasering av hel eller partiell plattprotetik, vid sinuslyft och vid både hårda och mjuka rekonstruktioner. Materialet kan även användas vid kantanpassning av individuella bettschabloner för att fastställa korrekta ocklusala, vertikala och spatiala relationer utan att förstöra modellerna. Tuf-Link 50 ml dispenser med blandningsspetsar är praktisk vid större materialåtgång. Tuf-Link 10 ml-sprutan är avsedd för mindre rebaseringar och för att snabbt t.ex. avlasta skavsår. Protesbasen reduceras då lokalt med den halvsfäriska fräsen (för underskär) samt den sfäriska (för avlägsnande av protesbasmaterial) för att skapa nödvändigt utrymme för rebaseringen och
19
SVENSKA
ANEW-systemet, framtaget och formgivet för rekonstruktiv protetik, används till skruvförankrad kronprotetik på en eller flera tänder och till brokonstruktioner. Den minimal-invasiva och mindre krävande procedurerna för kirurgi och klinik är lätttillgängliga och mer ekonomiska för ett större patientbehov.
20
Das Dentatus Atlas®-Implantatsystem, zugelassen für die Langzeitversorgung, sichert eine feste Verankerung und Stabilisierung von Prothesen mit unzureichendem Halt. Die mit Tuf-Link®-Silikon unterfütterten Prothesen federn Kaudruck ab und bieten festen Halt, ohne die Notwendigkeit einer Verankerung mittels starren Metallkäppchen und O-Ringen.
Der retentive Atlas-Kugel-Kopf bietet zusammen mit Tuf-Link eine sichere Verankerung und Tragekomfort für Totalprothesen und herausnehmbare Teilprothesen, ohne die Notwendigkeit für Halteelemente wie Klammern oder Stegverbindungen. Die chirurgischen und prothetischen Behandlungsabläufe für die DentatusImplantate mit reduziertem Durchmesser wurden in Zusammenarbeit mit der Abteilung für Implantologie an der zahnmedizinischen Fakultät der Universität New York entwickelt. Bernard Weissman - Präsident Dentatus AB
21
DEUTSCH
Die Dentatus-Fräsen zur Prothesenvorbereitung tragen eine definierte Schichtdicke ab. Die erzeugte Retentionsrille fixiert das Unterfütterungsmaterial ohne Adhäsiv an Ort und Stelle. Das einzeitige Aufbringen des elastischen Unterfütterungsmaterials im direkten Verfahren beansprucht nur kurze Zeit. Es beugt Belastungsspitzen und Druckstellen insbesondere über unregelmäßigen Kieferkämmen mit Knochenvorsprüngen vor, so dass keine Folgesitzungen zur Unterfütterung erforderlich werden.
und D2 Knochen im Unterkiefer präpariert, sollten nur scharfe Profilbohrer und Erweiterer verwendet werden. Stumpfe Bohrer sollten zur Sicherheit unverzüglich ausgetauscht werden.
Sicherheitshinweise Die auf den sterilisierten Atlas-Implantaten angebrachten Einbringhilfen dienen dem sicheren, initialen Eindrehen der Implantate. Zubehörteile, einschließlich Vor- und Erweiterungsbohrern, werden fabrikneu geliefert und müssen nach Entnahme aus der Verpackung gemäß den chirurgischen Hygienevorschriften vor der Verwendung sterilisiert werden.
Es muss sehr sorgfältig darauf geachtet werden, dass Implantate oder andere Zubehörteile nicht verschluckt oder eingeatmet werden. Wenn möglich, sollten die Komponenten mit einem dünnen Faden an der Kleidung des Patienten befestigt werden.
Die Implantate werden steril geliefert und sind für den einmaligen Gebrauch bestimmt. Verwenden Sie ein Implantat nicht, wenn die Verpackung beschädigt ist oder bereits geöffnet wurde. Bei Wiederverwendung der Implantate besteht die Gefahr von Kontamination/Infektion.
Beim Einsatz von Atlas-Implantaten für Zahnersatz im Oberkiefer ist besondere Vorsicht geboten. Der weichere OberkieferKnochen und die umgebenden Strukturen sind vor dem Einsetzen in angemessener Weise zu berücksichtigen.
Alle Instrumente, die klinisch eingesetzt werden, sollten vor Gebrauch im Autoklaven sterilisiert werden. Folgende Parameter wurden im Einklang mit der von der FDA anerkannten ANSI/AAMI/ISO-Norm 17665-1:2006 validiert, um eine Sterilitätswahrscheinlichkeit von 10-6 sicher zu stellen: Temp.: 132°C, Druck: 2 bar, Zeit: 8 Minuten. Jede Praxis sollte ihren eigenen für die Sterilisation eingesetzten Autoklaven gemäß anerkannter Verfahren (in den USA: FDA-zugelassene Norm) validieren lassen.
Achtung - Die Anwendungshinweise, einschließlich der vorliegenden Sicherheitshinweisen sind als Ergänzung anerkannter klinischer Protokolle und chirurgischer Behandlungsrichtlinien zu betrachten. Amerikanische Bundesgesetze beschränken die Anwendung dieses Produktes auf zugelassenene Ärzte oder Zahnärzte. Dentatus Implantate mit reduziertem Durchmesser aus Titanlegierung sind von der FDA zur Langzeitversorgung und für jede nach Ermessen des Behandlers notwendige Zeitspanne zugelassen.
Die CePo™ Bohrer und Erweiterer sollten mit reichlich steriler biokompatibler steriler Wasser oder Kochsalzlösung verwendet werden, um Überhitzung und einer möglichen Knochen-nekrose vorzubeugen. Werden Knochenkavitäten in hartem D1
Diese Anweisungen dienen der Information des Anwenders über die empfohlenen Schritte bei der Verarbeitung der Dentatus 22
Implant-Systeme. Sie sind bestimmt für Praktiker, die bereits erste klinische Erfahrungen beim Implantieren gemacht haben konnten. Es liegt in der Verantwortung des Behandlers, sich ständig über die neuesten Erkenntnisse der Implantologie zu informieren, sich entsprechend weiterzubilden und das erworbene Wissen umzusetzen. Atlas – Klinische Vorgehensweise Um Position und Winkel der Implantatbohrungen zu bestimmen sind geeignete CT-/ Röntgenaufnahmen und Messungen durchzuführen. Auf diese Weise lässt sich eine optimale Plat-zierung der Implantate erreichen. Mit Messzirkeln kann die Kieferkammbreite unter besonderer Berücksichtigung der Unregelmäßigkeiten von oro-vestibulären Knochenvertiefungen im Unterkiefer bestimmt werden.
Die Lasermarkierungen an den CePoProfilbohrern sind vorgesehen für ein offenes chirurgisches Vorgehen mit Aufklappung und Insertion der Implantate am freigelegten Knochen. Bei geschlossener Implantation werden die Bohrungen dementsprechend vier bis fünf Millimeter länger bemessen, um die Schleimhautdicke zu kompensieren, und Druckspitzen an der Implantatbasis zu vermeiden, die zu Knochenschäden führen könnten.
Mit Hilfe eines Lineals kann die Gesamtdistanz von der Unterseite des Kinns bis zur Oberkante des Kieferkamms bestimmt werden. Von diesem Abstand werden etwa 6 bis 8 mm als geschätzte Dicke des Weichgewebes unter dem Kinn und auf dem Kieferkamm abgezogen. Die resultierende Länge entspricht der Höhe des Knochens und dient als Orientierung zur Auswahl eines Implantates in geeigneter Größe.
B. Anmerkung: Für diese Maßnahmen ist eine lokale Infiltrationsanästhesie indiziert.
A.
Die Aufbereitung der Knochenkavitäten beginnt stets mit einem 1,4 mm CePo-Profilbohrer. Für die Plazierung von Implantaten grösser als 1,8 mm Durch-
Die ermittelten Implantatpositionen sollten mit einem sterilen Markierstift auf der 23
DEUTSCH
Schleimhaut gekennzeichnet werden. Vier Atlas-Implantate werden mesial des Foramen mentalis in gleichem Abstand voneinander eingebracht, um eine gleichmäßige beidseitige Stabilisierung und Verankerung zu erreichen. Mit dem Dentatus CePo 1,4 mm Profilbohrer wird die Kieferschleimhaut zunächst ohne Rotation perforiert und der Knochen zur präzisen Platzierung der Bohrung angekörnt. Die Bohrer werden bei 1.300 bis 1.500 U/min unter ausreichender Kühlung mit biokompatibler steriler Flüssigkeit oder Kochsalzlösung benutzt. Die Bohrung wird so angelegt, dass die Endposition der Implantatplattform auf Schleimhautniveau liegt.
messer werden die Osteotomien mit den entsprechend gekennzeichneten Vorbohrern oder Erweiterern durch axiale Auf- und Abwärtsbewegungen bis in die vorgebohrte Tiefe erweitert.
C. Einbringen des Implantates Das sterile Implantat wird mit Hilfe der montierten sterilen Einschraubhilfe durch einige Umdrehungen bis zu den ersten Gewindegängen sicher eingesetzt.
Anmerkung: Zur Ausrichtung der Bohrachse können Daumen und Zeigefinger auf beide Seiten des Kieferkamms gesetzt werden. So lässt sich leichter spüren, wenn der Bohrer sich in unmittelbarer Nähe der Schleimhaut bewegt.
Die Einschraubhilfe wird entfernt und die Insertion entweder mit dem Schraubschlüssel für das Winkelstück (ca. 50 U/min) oder mit der verlängerten Ratsche soweit fortgesetzt, bis die Implantatplattform knapp die Schleimhaut berührt. Die Insertion wird mit dem Hand-Schraubschlüssel, der eine gute taktile Kontrolle erlaubt, abgeschlossen.
Siehe rechte Seite für Bohrersysteme.
Um eine gute Primärstabilität zu erhalten, wird für die Installation ein Drehmoment von 40 Ncm empfohlen. Wichtig: Stellen Sie sicher, dass der Implantatkopf fest und im Implantatschlüssel sitzt und der Schlüssel in einer Linie zum Implantat steht. Falls ein übermäßiger Widerstand beim Eindrehen zu spüren ist, wird das Implantat entfernt und die Knochenkavität geringfügig tiefer gebohrt. Damit wird hoher Anpressdruck an der Implantatbasis vermieden und möglichen Schäden an der UnterkieferKompakta vorgebeugt. Siehe Seite 26
24
Chirurgische CePo-Bohrsysteme von Dentatus Dentatus bietet zwei verschiedene Lasermarkierungssysteme für CePo-Pilotbohrer und andere CePo-Bohrer an. Hier erfahren Sie, wie sie zu verwenden sind.
System 1 Die Lasermarkierungen beziehen sich auf die Gewindelänge der Implantate. Die Markierungen sind im Abstand von 7, 10 und 14 mm zur Implantatspitze an der Stelle angebracht, wo die Gewinde der verschiedenen Implantate enden.
Die Markierungen entsprechen den 3 verschiedenen Längen der Dentatus
Die Markierung ist ca. 0,5 mm breit. Implantate: kurz (S), mittel (M) und lang (L). Der obere Rand der Markierungen dient als Referenzpunkt für die Gingivaoberfläche und befindet sich im Abstand von 11, 14 und 18 mm zur Spitze.
Die Implantatplattformen der AnewImplantate müssen stets mit der Gingivaoberfläche bündig sein.
Jede Markierung ist 2 mm breit. System 2
System 1
L M
L
S
M S
Cat. nr. Ø mm MR - 1141 CePo Drill - pilot MR - 1142 CePo Drill - pilot MR - 1145 CePo Drill MR - 1146 CePo Drill
M
Cat. nr. Ø mm MR - 1041 CePo Drill - pilot MR - 1042 CePo Drill - pilot MR - 1045 CePo Drill MR - 1046 CePo Drill
1.8, Long 1.8, Short 2.2 2.4
25
1.8, Long 1.8, Short 2.2 2.4
DEUTSCH
System 2 Ein anwenderfreundliches Markierungssystem, das sich bei der lappenlosen Implantatinsertion auf die tatsächliche Tiefe der Insertion durch die Gingiva bezieht.
1.
2.
3.
4.
Installation von dem Adapter auf dem R/A Driver 1. Indexpunkt am Adapter lokalisieren 2. Die abgeflachte Seite des R/A Drivers zum Indexpunkt hin ausrichten 3. R/A Driver bis zum Stop in die runde Öffnung des Adapters drücken 4. Sicherstellen, dass das Ende des R/A Drivers mit der Unterseite des Adapters bündig abschliesst Nach der Anwendung wird der R/A Driver zur separaten Reinigung und Desinfektion aus dem Adapter gezogen. Die Öffnung im Adapter kann mit einer dünnen Interdentalbürste gereinigt werden. Der Adapter besteht aus eloxiertem Aluminium und enthält einen O-Ring, der einen besseren Sitz des R/A Drivers ermöglicht. Der Adapter sollte ausgetauscht werden, wenn der O-Ring defekt ist. Um das Einstecken des R/A Drivers in den Adapter zu erleichtern kann ein Tropfen ölhaltiges Winkelstück-Pflegemittel vor dem Autoklavieren in die runde Öffnung appliziert werden. Überschüssiges Öl vor dem Verpacken in Sterilisationstüten entfernen.
D. Klinisches prothetisches Vorgehen
verlängert, so dass ein nahtloser Anschluss des Silikons ermöglicht wird.
Achtung:
1. Mit der Fräse in Halb-Kugelform wird eine Retentionsrille angelegt, um das Unterfütterungsmaterial ohne Adhäsiv verankern zu können. Dabei wird der Instrumentenschaft entlang des Prothesenflügels als Führungsschiene genutzt, so dass eine fortlaufende, gleichmäßig tiefe Retentionsrille entsteht.
Falls eine vorhandene Prothese sich auf dem Kieferkamm mit Hilfe der Gegenbezahnung nicht eindeutig positionieren lässt, sollte sie vor der Bearbeitung zunächst mit selbsthärtendem Prothesenkunststoff unterfüttert werden. Mit einem Markierungsstift wird in der Prothese zwei bis drei Millimeter unterhalb der Prothesenflügel die Abschlusskante für das weichbleibende Silikon angezeichnet. Die Markierung wird als geschwungene Linie bis zu den retromolaren Bereichen
2. Mit Hilfe der mit Rille versehenen kugelförmigen Fräse werden Tiefenmarkierungen in der Prothesenunterseite angelegt, ohne die präparierte Abschlusskante zu berühren. So wird 26
in der Prothesenbasis Platz für das Unterfütterungsmaterial geschaffen.
E. Silikon-Unterfütterung
3. Die Kugelfräse dient zur gleichmäßigen Reduzierung der Prothesenbasis in der markierten Tiefe und zur Glättung der Oberfläche. 4. Die Markierungskäppchen werden auf die Atlas-Implantatköpfe gesetzt. Sie dienen zur Markierung der Implantatpositionen in der Prothese. Die Käppchen werden mit einer gesundheitlich unbedenklichen Lebensmittelfarbe bestrichen und die Prothese fest aufgesetzt, um die Markierungen für die Kugelkopfretentionen zu übertragen.
1. Etwas Material aus der 50-ml-TufLink-Kartusche in die aufgesetzte Mischkanüle pressen und in die Prothesenbasis einspritzen. Das Material soll dabei an die vorbereitete Abschlusskante der Retentionsrille fließen. Es muss ausreichend viel Material verwendet werden, damit Druck entstehen kann. Er führt zu einer dichten, porenfreien Basisschicht.
5. Mit der Kugelfräse werden an den markierten Stellen Vertiefungen eingefräst, die einen passiven Sitz der Prothese ermöglichen. Um zu vermeiden, dass die Prothese zu stark reduziert wird, sollte das Instrument nur bis zu etwa 2/3 seines Kugeldurchmessers versenkt werden.
2. Die Prothese wird von hinten nach vorne mit leichten seitlichen Vibrationsbewegungen eingesetzt. Der Patient wird in Schlussbissposition geführt und soll diese nun stabil halten. Das Vorgehen muss zügig erfolgen, da das Silikon bereits zu Beginn der Polymerisation beginnt, fest zu werden.
Anmerkung: Zur Überprüfung können die Kugelköpfe direkt mit Farbe markiert werden, um Vorkontakte auszuschließen. Scharfe Kanten werden abgerundet, um die Entstehung von Rissen im Silikon-Unterfütterungsmaterial zu vermeiden.
3. Nach Abschluss des Abbindevorganges wird die Prothese herausgenommen und die weichbleibende Unterfütterung mit einem spitzen Instrument an einem 27
DEUTSCH
Anmerkung: Der Patientenmund und die Prothese müssen gründlich gereinigt werden um feine Partikel zu entfernen, die sonst in das Unterfütterungsmaterial eingeschlossen werden könnten. Vor dem kurzen Unterfütterungsvorgang wird der Patient darauf hingewiesen, dass er die Prothese ohne Zungen- und Kieferbewegungen für vier bis sechs Minuten durch leichtes Aufbeißen in Position halten muss.
Ende vorsichtig aus der Prothesenunterseite herausgelöst.
Checkliste: nach dem Eingriff a. Muskelansätze – die häufigste Ursache für Prothesenverlagerungen bei funktionellen und parafunktionellen Bewegungen – sollten freigelegt werden.
4. Überschüssiges Unterfütterungsmaterial wird entlang der sich deutlich abzeichnenden Abschlusskante mit einer feinen Schere abgeschnitten. 5. Um die weiche Unterfütterung wieder einzusetzen, wird sie zunächst an einem der äußeren Enden mit leichtem Fingerdruck eingefügt. Mit einem glatten, flachen Instrument kann das Silikon wieder in die Retentionsrille und an die Abschlusskante eingepasst werden. Sie verhindert die Ansammlung feiner Nahrungsreste und Bakterien.
b. Okklusale Frühkontakte und Interferenzen werden entfernt. c. Der Patient sollte sich bei Beschwerden oder Auffälligkeiten sofort melden. Patienteninstruktion Die Patienten sollten 24 bis 48 Stunden lang nur leichte Kost ohne harte oder kauintensive Nahrung zu sich nehmen.
Die mit Atlas stabilisierten und Tuf-Link unterfütterten Prothesen tolerieren auch deutliche Divergenzen der Implantatachsen. Die Prothese lässt sich ohne Belastung der Implantate oder Verletzungen des Gewebes herausnehmen. Korrekturmaßnahmen in Folgesitzungen sind deshalb nur selten erforderlich. Abhängig von verschiedenen Bedingungen sollte die weichbleibende Unterfütterung alle 12 bis 18 Monate ausgetauscht werden. Obwohl sie schnell zu erneuern ist, kann ein Zweitexemplar angefertigt werden, das der Patient für Notfälle in einem mit Wasser gefüllten Behälter aufbewahrt.
a. In den ersten zwei Tagen nach dem Einsetzen der Atlas-Implantate sollten die Patiente ihre Prothese nicht herausnehmen. b. In den ersten vierzehn Tagen danach sollten die Patienten ihre Prothese nachts nicht herausnehmen. Dies beugt einer Schwellung des Weichgewebes durch die postoperative Ödembildung vor, die die passgenaue Reposition des Zahnersatzes auf den Implantaten beeinträchtigen kann. Nach der zweiwöchigen Frist können die Patienten ganz nach Wunsch mit oder ohne Prothese schlafen.
28
Nachträgliche Anpassung von implantatgetragenen Total– oder Teilprothesen im Oberkiefer. Die Vorgehensweise zur nachträglichen Anpassung implantatgetragener Oberkieferprothesen entspricht im Wesentlichen derjenigen, die in der Atlas-Anleitung für Unterkiefer-Totalprothesen dargestellt ist. Damit der weichere, spongiöse Oberkieferknochen den funktionellen Kräften sicher standhalten kann, ist eine Verblockung von sechs bis acht Implantaten mit Hilfe einer Stegverbindung sinnvoll. Die Dentatus Anew-Implantate mit Hilfsteilen für festsitzende Restaurationen können zur Herstellung einer Kunststoff-MetallVerblockung verwendet werden. Durch die Unterfütterung der Prothese mit dem weichbleibenden Tuf-Link-Silikon wird durch die so veränderte Basisgestaltung ein weich abgefederter, angenehmer Sitz und eine sichere Verankerung erreicht.
d. Um etwaige Beschwerden zu lindern, kann der Patient ein schmerzstillendes Medikament einnehmen.
Im Oberkiefer sollten aufgrund der anatomischen Gegebenheiten und der geringeren Knochenqualität sechs bis acht Implantate platziert werden. Diese sollten jedoch nur halb so tief wie in hartem Knochen eingesetzt werden. Die selbstschneidenden Anew-Implantate schaffen sich beim Eindrehen mit dem Hand-Schraubschlüssel unter Knochenverdichtung ihr eigenes Gewinde im Knochen.
e. Die Patienten sollten sich an die Praxis wenden, falls stärkere Schmerzen oder andere Symptome auftreten.
29
DEUTSCH
c. Die Patienten sollten die Prothese zur Durchführung der Mundhygiene täglich herausnehmen. Sie werden angeleitet, die Prothese mit Hilfe einer Zahnbürste mit weichen Nylonborsten, mit Zahncreme und Wasser zu reinigen. Mindestens drei Tage lang sollten die Patienten das Unterfütterungsmaterial am Platz belassen. Nach dieser An-fangsphase können Patienten mit guter manueller Geschicklichkeit das Unterfütterungsmaterial herauslösen (mit Hilfe eines Zahnstochers) und es vorsichtig auf die gleiche Weise wie die Prothese reinigen. Nach der anfänglichen Wundheilungsphase können die Prothesen für eine halbe Stunde täglich in eine Prothesenreinigungslösung eingelegt werden. (Prothesen oder Silikonbasis-Teile nicht über einem offenen Abfluss reinigen!) Die Patienten sollten instruiert werden wie Kopf, Hals und die Plattform der vier Atlas-Implantate zu pflegen sind.
Das Anew-System ist für prothetischen Einzelzahnersatz, mehrgliedrige Versorgungen und verschraubte komplette Brückenversorgungen konzipiert. Die minimal invasiven, weniger aufwändigen chirurgischen und prothetischen Maßnahmen sind für eine breitere Patienengruppe und vielfältigere klinische Situationen geeignet.
Unterfütterungen und schnelle Entlastung von Druckstellen. Zwei kleine Vertiefungen, die mit den Rundfräsen im Abstand von drei bis vier Millimetern angelegt werden, fixieren das Material sicher an Ort und Stelle. Nach der Ausheilung kann dann dauerhaft mit Prothesenkunststoff aufgefüllt werden.
Die bebilderten Anew-Implantat-Gebrauchsanweisungen für die Versorgung von Einzelzahnlücken, mehrgliedrigen Arbeiten und grösseren Brückenkonstruktionen sind auf Anfrage erhältlich.
Weitere Anwendungsmöglichkeiten gibt es im Rahmen chirurgischer Maßnahmen, bei denen Gewebebereiche über längere Zeiträume zuverlässig geschützt werden sollen. Das Tuf-Link-Silikon ist dicht und porenfrei. Auf diese Weise werden Speiseund Bakterieansammlungen vorgebeugt.
Tuf-Link® — Silikon zur Anwendung bei allgemeinen Versorgungen
Atlas Patienteninformationsmaterial
Das weichbleibende Unterfütterungsmaterial Tuf-Link von Dentatus bleibt über längere Zeitspannen hinweg formstabil. Es kann zur Unterfütterung von Oberkieferprothesen, Teilprothesen, nach Sinus-Lift und bei Hart- und Weichgewebsaugmentation verwendet werden. Das Material lässt sich auch zur Basisgestaltung von Registrierschablonen einsetzen, so dass präzise okklusale, vertikale und räumliche Relationen dargestellt werden können. Einer Beschädigung der Meistermodelle kann so vorgebeugt werden.
Das Atlas-Informationsprogramm mit gedruckten und elektronischen Informationsmitteln kann Ihnen helfen, Ihre Behandlungsoptionen und Leistungen bei Patienten mit schlecht sitzenden Prothesen, anzubieten.
Die Tuf-Link 50-ml-Kartusche mit Mischkanülen eignet sich für großflächige Unterfütterungen. Die kleine Tuf-Link 10-ml-Doppelspritze eignet sich für kleine
30
Il sistema implantare Dentatus Atlas®, approvato per l’uso a lungo termine, assicura un supporto per l’ancoraggio e la stabilizzazione di protesi mobili. Le protesi totali ribasate con Atlas Tuf-Link® si caratterizzano per una particolare morbidezza durante la fase masticatoria e per la salda ritenzione, senza dover far ricorso alle restrittive tecnologie con O-ring in metallo. Gli strumenti rotanti per protesi Dentatus, sono stati realizzati per uniformare la riduzione in profondità e per creare un alloggio che tenga saldamente in posizione la ribasatura, senza utilizzo di adesivo. La breve procedura di una sola seduta per l’applicazione del ribasante siliconico evita stress e abrasioni ai tessuti molli, soprattutto in caso di creste irregolari, senza necessità di ulteriori sedute per il controllo dei tessuti.
Il protocollo chirurgico e quello protesico dell’impianto Dentatus Narrow-Body sono stati sviluppati in collaborazione con il Reparto di implantologia della New York University College of Dentistry. Bernard Weissman -Presidente
31
ITALIANO
L’Atlas Dome Keeper con Tuf-Link assicura confort e ritenzione per le protesi totali e parziali mobili, senza la necessità di dispositivi di ritenzione a barra o con ganci.
utilizzare solo frese e alesatori affilati. Come precauzione, le frese utilizzate dovrebbero essere immediatamente scartate.
AVVERTENZE E NOTE Gli impianti sterili Atlas, inseriti su driver manuali , sono stati realizzati per un inserimento iniziale dell’impianto diretto e sicuro. Gli accessori, compresi le frese e gli alesatori, vengono forniti puliti e dopo averli estratti dalla loro confezione, prima dell’uso, devono essere sterilizzati secondo i protocolli chirurgici.
Bisogna prestare assoluta attenzione per evitare l’ingerimento o l’aspirazione accidentale degli impianti o degli altri piccoli componenti utilizzati in queste procedure. Quando possibile, gli strumenti dovrebbero essere legati con un filo sottile agli indumenti del paziente.
Gli impianti sono consegnati sterili e devono essere utilizzati come monouso. Non utilizzare l’impianto se notate la confezione aperta o se l’impianto è stato aperto in una precedente occasione. Se l’impianto viene riutilizzato vi sono rischi di infezioni incrociate.
Particolare attenzione deve essere prestata all’uso di impianti Atlas per le protesi superiori. Prima dell’uso, valutare attentamente l’osso mascellare più morbido e le condizioni anatomiche. Cautela: Le linee guida stampate, comprese le Avvertenze e Note, devono essere utilizzate in aggiunta ai protocolli clinici e chirurgici accettati. Le leggi federali limitano la vendita di questi dispositivi a un medico autorizzato o a un odontoiatra.
Tutti i dispositivi utilizzati nelle procedure chirurgiche devono essere sterilizzati prima dell’uso in un’autoclave a vapore. I seguenti parametri sono stati validati secondo gli standard riconosciuti da FDA ANSI/AAMI/ ISO 17665-1:2003 in quanto provvedono alla Certificazione di Sterilità di 10-6. Temperatura: 132 °C, pressione: 30 psi, tempo: 8 minuti. In ogni caso, lo studio dovrebbe verificare che la propria autoclave a vapore sia conforme agli standard riconosciuti (negli USA: standard approvati da FDA).
Gli impianti in lega di titanio Narrow-Bodied sono approvati dall’FDA per l’utilizzo a lungo termine e per ogni periodo di tempo deciso dall’odontoiatra. Le istruzioni per l’uso informano l’operatore sul corretto utilizzo dei sistemi implantari Dentatus. L’utilizzo è consigliato ad odontoiatri che abbiano basi di chirurgia e di implantologia. E’ responsabilità dell’operatore mantenersi sempre aggiornato sulle varie tecniche chirurgiche implantari.
Le frese CePo™ e gli alesatori devono essere utilizzati con abbondante irrigazione di acqua sterile biocompatibile o di soluzioni saline sterile per evitare danni da surriscaldamento ed eventuale necrosi dell’osso. Per la realizzazione di osteotomie nell’osso duro mandibolare di tipo D1 e D2, bisogna 32
PROCEDURE CLINICHE ATLAS
abbondante irrigazione di acqua sterile biocompatibile o di soluzioni saline sterile. Si realizzano le osteotomie con profondità corrispondente alla zona endossea dell’impianto.
Per il posizionamento ideale dell’impianto, bisogna eseguire le corrette misurazioni, radiografie e scansioni TC. Si possono utilizzare appositi calibri per osservare il volume osseo, con particolare attenzione alle irregolarità nelle concavità vestibololinguali dell’arcata. La disponibilità ossea dovrebbe essere valutato con un righello, al fine di stabilire l’altezza totale della cresta, posizionando il righello da sotto al mento fino all’altezza della cresta. Dalla misurazione si deduce uno spessore totale di circa 6-8 mm di tessuto molle (sotto al mento e sopra alla cresta) e la restante misurazione dell’osso duro viene utilizzata come guida per selezionare la corretta lunghezza dell’impianto.
B. Nota: per queste procedure si necessita di un’adeguata anestesia locale mediante infiltrazione.
A.
Tutte le osteotomie vengono prima eseguite con la fresa pilota CePo 1,4. Per posizionare impianti di diametro maggiore all’1,8 mm utilizzare le frese alesatrici corrispondenti all’impianto con un movimento di saliscendi.
Le posizioni degli impianti dovrebbero essere indicate con un marcatore sterile sulla mucosa. Si dovrebbero posizionare 4 impianti Atlas nella zona del forame mentoniero, equidistanti per una ritenzione e stabilizzazione bilanciata della protesi.
Nota: per ottenere un allineamento adeguato della fresa durante l’osteotomia, si possono posizionare il pollice e l’indice su entrambi i lati della cresta. Così si facilita il riscontro tattile quando la fresa è in movimento in prossimità della mucosa.
La fresa pilota Dentatus CePo 1,4 viene usata per prima per marcare il tessuto (senza rotazione) segnando l’osso per una precisa localizzazione delle osteotomie. Le frese vanno usate a 1300-1500 RPM con
Vedi pagina seguente per sistema di frese.
33
ITALIANO
Le marcature laser della fresa CePo sono state realizzate per l’inserimento di impianti con l’incisione di un lembo ed esposizione dell’osso. Nelle procedure flapless, le osteotomie vengono realizzate a 4-5 mm più in profondità per compensare i livelli variabili della mucosa ed evitare l’eccessivo affondamento degli impianti.
Sistema di frese chirurgiche CePo Dentatus Dentatus offre due sistemi di marcatura laser diversi sulle frese CePo e sulle frese CePo pilota. Le presenti informazioni servono da guida all’uso dei sistemi suddetti.
Sistema 1 Le marcature laser si riferiscono alla lunghezza della porzione filettata degli impianti.
Sistema 2 Sistema di marcatura di facile utilizzo, che si riferisce alla reale profondità di inserimento attraverso la gengiva nel corso di procedure implantari con tecnica flapless.
Le marcature si trovano a 7, 10 e 14 mm dalla punta dell’impianto, nel punto in cui termina la filettatura sulle varie tipologie di impianti.
Le marcature corrispondono a 3 diverse lunghezze degli impianti Dentatus: corto (S), medio (M) e lungo (L).
La larghezza della marcatura è di circa 0,5 mm.
Il bordo superiore della linea di ogni marcatura viene utilizzato come riferimento per la superficie gengivale e viene posizionato a 11, 14 e 18 mm dalla punta dell’impianto.
Le piattaforme implantari sugli impianti Anew devono trovarsi sempre a filo con la superficie gengivale.
La larghezza di ogni marcatura è di 2 mm. Sistema 2
Sistema 1
L M
L
S
M S
Cat. nr. Ø mm MR - 1141 CePo Drill - pilot MR - 1142 CePo Drill - pilot MR - 1145 CePo Drill MR - 1146 CePo Drill
M
Cat. nr. Ø mm MR - 1041 CePo Drill - pilot MR - 1042 CePo Drill - pilot MR - 1045 CePo Drill MR - 1046 CePo Drill
1.8, Long 1.8, Short 2.2 2.4
34
1.8, Long 1.8, Short 2.2 2.4
C. Inserimento dell’impianto
che assicura il riscontro tattile del corretto posizionamento.
Il driver manuale sterile applicato all’impianto sterile viene utilizzato per inserire in modo sicuro l’impianto avvitandolo leggermente per le prime spire.
Per ottenere una stabilità primaria è consigliabile l’inserimento dell’impianto con un torque di circa 40 Ncm. Importante! assicuratevi che l’impianto sia ben inserito nei vari driver e che il driver sia bene allineato, in asse con l’impianto.
1.
Se si percepisce una resistenza eccessiva all’inserimento dell’impianto bisogna rimuovere l’impianto e approfondire leggermente l’osteotomia. Questo eviterà stress elevati e gli eventuali danni all’osso mandibolare.
2.
3.
4.
Il montaggio dell’ adattore sul criccetto 1. Individuare il punto di riferimento sull’adattatore 2. Allineare la parte piatta del fusto del cricchetto con il punto di riferimento sull’adattatore 3. Inserire il fusto del cricchetto nell’apertura finchè non si avverte uno stop 4. Assicurarsi per ultimo che la parte finale del fusto del cricchetto sia ben ingaggiato nell’adattatore manuale Dopo l’uso, rimuovere l’adattatore manuale dal cricchetto per una detersione ottimale. Pulire la parte interna degli strumenti con uno spazzolino. L’adattatore è costruito in alluminio anodizzato e viene fornito con un O-ring all’interno per migliorare l’ingaggio con il cricchetto . Qualora l’ O-ring si danneggiasse si consiglia di sostituire completamente l’adattatore poiché verrebbe a mancare la ritenzione necessaria. Per facilitare l’assemblaggio dell’adattatore manuale con il cricchetto è bene utilizzare qualche goccia di olio lubrificante negli augelli prima della disinfezione in autoclave. Rimuovere accuratamente ogni traccia di olio lubrificante prima di effettuare l’imbustatura degli strumenti prima della disinfezione.
35
ITALIANO
Il driver viene quindi rimosso e l’inserimento può essere continuato con un inseritore da contrangolo Hpc R/A (a 50 RPM) o manuale o con il cricchetto Extended Power Ratchet Wrench. In tutti i casi bisogna fare in modo che la piattaforma dell’impianto si appoggi al tessuto mucoso. L’inserimento viene completato con il driver manuale
protesi. Le cappette sono colorate con sostanze a base vegetale. Si preme saldamente la protesi per trasferire le posizioni marcate sui Dome Keeper.
D. Procedure protesiche cliniche Cautela:
5. Con la fresa a scanalature verticali si creano degli spazi permettendo alla protesi di posizionarsi passivamente. Per evitare l’eccessiva riduzione della protesi, lo strumento dovrebbe essere inserito per i 2/3 della sua profondità sferica.
Quando una protesi già esistente non può essere posizionata in occlusione con la dentizione antagonista, la protesi dovrebbe essere prima ribasata con resina ad autopolimerizzazione rapida e dopo si può iniziare la procedura di fitting. Con un marcatore, segnare il bordo della protesi che dovrebbe essere localizzata 2-3 mm sotto le estensioni della flangia. La marcatura viene estesa alla zona retro molare con una forma curva continua
Nota: una verifica può essere eseguita applicando i marcatori direttamente sulla testa dei Dome Keeper per la rifinitura e l’arrotondamento di tutte le zone appuntite per evitare eventuali strappi nel ribasante siliconico.
1. Si utilizza la fresa a semi sfera per creare un alloggio per la ritenzione del silicone senza uso di adesivo. Il manico dello strumento viene appoggiato contro la flangia come guida per la realizzazione di una linea continua a profondità controllata.
E. Procedura di ribasatura Nota: la bocca del paziente, la lingua e la protesi vengono accuratamente risciacquate per rimuovere le particelle fini che potrebbero essere inglobate nel ribasante. Una volta inserito il ribasante bisognerà tenere la protesi in occlusione centrica per 4-6 minuti, senza fare movimenti con la lingua .
2. Con lo fresa a scanalature orizzontali si creano profonde demarcazioni nella protesi, senza danneggiare la linea già creata, in modo da creare una sede per una ribasatura uniforme.
1. Si fa uscire un po’ di materiale dal dispenser da 50 ml di Tuf-Link con puntale automiscelante prima di iniettare il silicone nella base della protesi, direzionando il flusso nella linea creata. Usare una quantità sufficiente di silicone per creare la pressione
3. La fresa a scanalature verticali si usa per lisciare la superficie della nicchia creata. 4. Le cappette rosse date in dotazione con il kit chirurgico e protesico Atlas servono per marcare la posizione nella 36
necessaria per una ribasatura densa e priva di porosità.
una ribasatura di scorta per il paziente che potrà conservarla immersa in acqua ed usarla in caso di emergenza.
2. La protesi viene inserita in bocca partendo dalla parte posteriore e guidata in avanti con movimenti pulsati laterali. Si fa in modo che il paziente occluda e mantenga la protesi in posizione. La procedura deve essere eseguita rapidamente, in quanto il silicone inizia a indurire già nelle prime fasi di polimerizzazione.
CONTROLLI POST-OPERATORI a. Bisognerebbe eliminare le aree di contatto con i muscoli, causa frequente dello spostamento della protesi durante i movimenti funzionali e parafunzionali.
c. Il paziente dovrebbe comunicare immediatamente qualunque irregolarità o disagio.
4. Il ribasante in eccesso viene tagliato con apposite forbicine.
ISTRUZIONI PER LA CURA DOMICILIARE DA PARTE DEL PAZIENTE
5. Per inserire nuovamente il ribasante, posizionarlo prima in un’estremità della protesi e poi inserirlo nella sede con una leggera pressione delle dita. Per inserire il ribasante lungo la linea creata, si può utilizzare uno strumento piatto.
I pazienti possono assumere immediatamente alimenti, ma dovrebbero comunque seguire un regime di dieta per 24-48 ore. a. Il paziente non dovrebbe rimouvere la protesi per le prime 48 ore. b. Il paziente non dovrebbe rimuovere la protesi durante la notte per le prime due settimane dall’applicazione di Atlas. Questo eviterà la formazione di edema sviluppato dal posizionamento chirurgico e dalla forzatura dei tessuti molli, che potrebbe interferire con il riposizionamento della protesi sugli impianti. Dopo due settimane, il paziente può dormire con o senza la protesi.
Grazie al silicone resiliente, gli impianti Atlas tollerano angolazioni notevoli. La protesi, quando viene rimossa non crea stress agli impianti o abrasioni ai tessuti molli. Raramente sono necessari ulteriori appuntamenti per il controllo dei tessuti. Mediamente, la ribasatura rimane resiliente per 12-18 mesi. Il silicone è facilmente sostituibile ed è quindi possibile realizzare 37
ITALIANO
b. Dovrebbero essere corretti i contatti occlusali e i punti di interferenza.
3. A polimerizzazione avvenuta, si rimuove la protesi e si solleva delicatamente il ribasante dalla base della protesi con uno strumento appuntito in una delle estensioni distali.
c. Il paziente dovrebbe rimuovere la protesi brevemente ogni giorno per l’igiene orale. Istruire il paziente a usare uno spazzolino con setole in nylon morbide con dentifricio o acqua per pulire la protesi. Dire al paziente di non cercare di rimuovere la ribasatura per almeno 3 giorni. Dopo questo periodo iniziale, i pazienti con una buona manualità possono rimuovere la ribasatura (con uno stuzzicadenti) e pulirla delicatamente così come la protesi. Dopo il periodo di guarigione iniziale, la protesi può essere immersa ogni giorno per 30 minuti in una soluzione pulente. (Nota: istruire il paziente a non pulire la protesi o la ribasatura in silicone su uno scarico aperto). Istruire il paziente su come pulire la testa, il collo e la piattaforma dei quattro impianti Atlas.
L’osso mascellare poroso, più morbido può non essere in grado di sopportare le forze funzionali senza una barra splintata che collega 6-8 impianti. È possibile utilizzare gli impianti Dentatus Anew con componenti specifici per restauri fissi per realizzare uno splintaggio resina-metallo. L’adattamento della protesi con ribasatura in silicone Tuf-Link assicura una ritenzione morbida, confortevole e sicura, con una forma palatale modificata. Un’attenta considerazione deve essere fatta nei confronti delle limitazioni anatomiche e dell’osso nell’arcata superiore, usando 6-8 impianti con osteotomie profonde la metà rispetto a quelle che si eseguono in osso duro. Gli impianti Anew autofilettanti, inseriti con driver manuale, creeranno da soli la forma filettata condensata nell’osso. Gli impianti del Sistema Anew, realizzato per procedure protesiche, vengono utilizzati per riabilitazioni si una monoedentulia oppure per ponti fissi avvitati . Le procedure chirurgiche e cliniche minimamente invasive risultato più economiche ed accessibili ad un maggior numero di pazienti.
d. Il paziente può assumere un analgesico per alleviare qualunque disagio. e. Dire al paziente di contattare immediatamente lo studio in caso di dolore forte o altri sintomi. ADATTAMENTO DI PROTESI TOTALI SUPERIORI SU IMPIANTI E PROTESI PARZIALI REMOVIBILI
Su richiesta, è disponibile il manuale tecnico illustrato dell’impianto Anew per la sostituzione di un elemento singolo e per restauri su più elementi o ad arcata completa.
Le procedure tecniche di adattamento per le protesi su impianti sono sostanzialmente le stesse di quelle descritte nel manuale Atlas per le protesi inferiori.
38
MATERIALE SILICONE TUF-LINK® PER USO GENERALE Il ribasante resiliente Dentatus Tuf-Link, che mantiene una forma stabile per lunghi periodi di tempo, può essere utilizzato per ribasare protesi inferiori e superiori e protesi parziali mobili.
ITALIANO
Il dispenser da 50 ml di Tuf-Link con puntali automiscelanti risulta pratico per ribasature di ampio volume. Il dispenser piccolo da 10 ml Tuf-Link è ideale per piccole ribasature e per alleviare velocemente le abrasioni tissutali. Due piccoli intagli realizzati con le frese a pallina a distanza di 3-4 mm assicureranno la ritenzione del dispositivo in posizione. Dopo la guarigione, lo spazio può essere riempito in modo permanente con resina dura. Vi sono altre applicazioni nelle procedure chirurgiche in cui i siti di tessuto devono essere ben protetti per lunghi periodi di tempo. Il materiale in silicone Tuf-Link è denso e privo di porosità, evitando così l’accumulo di residui di cibo e di batteri.
39
40
Le système d’implants Atlas® de Dentatus, qui est approuvé pour un usage à long terme, offre un support d’ancrage stable et une stabilisation aux prothèses posant problème. Les prothèses hybrides garnies avec Atlas Tuf-Link® forment un revêtement protégeant de l’impact lors de la mastication et apportent une rétention solide sans nécessiter le recours aux technologies contraignantes d’O-ring de coiffe métalliques. Les instruments pour prothèses Dentatus sont conçus pour assurer une réduction en profondeur homogène et pour former une contre-dépouille qui maintient fermement le rebasage en place sans adhésif. Cette courte procédure dentaire d’installation d’un rebasage souple empêche la pression et l’abrasion des tissus, particulièrement sur les crêtes irrégulières et bombées sans nécessiter de rendez-vous de suivi afin de corriger les tissus.
Les protocoles chirurgicaux de restauration à base d’implants de petit diamètre de Dentatus ont été mis au point en coopération avec le département de dentisterie spécialisé dans les implants (Department of Implant Dentistry) du College of Dentistry de l’Université de New York. Bernard Weissman -Président
41
FRANÇAIS
L’Atlas Dome Keeper avec Tuf-Link peut apporter confort et rétention aux prothèses complètes, ainsi qu’aux prothèses partielles amovibles sans avoir recours aux crochets à barre ou aux dispositifs de rétention avec barre.
nécrose osseuse. Au moment de pratiquer une ostéotomie dans l’os mandibulaire D-1 et D-2, seuls les alésoirs et les forets tranchants doivent être utilisés. À titre de précaution, les forets émoussés doivent être éliminés immédiatement.
REMARQUES ET AVERTISSEMENTS Les implants stérilisés Atlas, attachés aux clés manuelles, sont conçus pour une installation initiale directe et sûre. Les accessoires, y compris les forets et les alésoirs, sont livrés propres à leur sortie d’usine, et après que leur emballage a été retiré, ils doivent être stérilisés conformément aux protocoles chirurgicaux avant toute utilisation.
La plus grande prudence doit être exercée pour empêcher l’ingestion ou l’aspiration accidentelle des implants ou d’autres petits composants utilisés au cours de ces procédures. Les outils doivent, dans la mesure du possible, être attachés aux vêtements du patient à l’aide d’un cordon fin.
Les implants sont délivrés en emballage individuel stérile et pour un usage unique. Ne pas utiliser l’implant si l’enveloppe est ouverte ou endommagée. Risque de contamination croisée si réutilisé.
Il est nécessaire de prêter une attention particulière à l’utilisation d’implants Atlas sur les prothèses supérieures. L’os maxillaire plus souple et les restrictions anatomiques doivent être examinés attentivement avant toute utilisation.
Tous les appareils utilisés dans les procédures cliniques doivent être stérilisés à la vapeur en autoclave avant toute utilisation. Les paramètres suivants ont été validés conformément à la norme ANSI/AAMI/ISO 17665-1:2006 reconnue par la FDA afin de fournir un niveau garanti de stérilité de 106. Température : 132 °C, pression : 30 psi, durée : 8 minutes. Toutefois, l’établissement de santé doit valider sa propre machine de stérilisation à la vapeur en autoclave onformément à une norme reconnue (aux É.-U. :norme approuvée par la FDA).
Avertissement : Les directives imprimées, notamment les avertissements et les remarques, doivent être considérées comme un complément des procédures cliniques et des protocoles chirurgicaux acceptés. Les lois fédérales limitent la vente de ce dispositif aux médecins et aux dentistes habilités. Les implants en alliage de titane de petit diamètre de Dentatus sont approuvés par la FDA pour une utilisation à long terme et pour toute durée établie par le prestataire de soins de santé.
Les forets pilotes et les alésoirs CePo™ doivent être utilisés sous vaporisation abondante avec du sérum physiologique ou de l’eau stérile pour empêcher les dégâts dus à la surchauffe et une éventuelle
42
mentonnier à des distances identiques pour assurer l’équilibre de la stabilisation et de la rétention entre les arcs.
Ces instructions informent l’utilisateur sur les procédures à suivre quant à l’utilisation des implants Dentatus. Ils doivent être utilisés uniquement par des cliniciens possédant au minimum un niveau basique avec les implants et dans la pratique clinique. Il est de la responsabilité du praticien de se tenir informé , éduqué et entrainé sur les techniques de pose des traitements implantaires. PROCÉDURES CLINIQUES ATLAS Pour déterminer la position et l’angle adéquats en vue de l’installation de l’implant, des radiographies, des examens radiologiques et des numériseurs appropriés doivent être utilisés afin d’établir l’emplacement idéal de l’implant. Des compas à angle droit peuvent être utilisés pour examiner la largeur de l’os en prêtant une attention particulière aux irrégularités des concavités de la mâchoire bucco-linguale.
Les marques au laser du foret CePo sont conçues pour l’installation d’implants effectuée au moyen de procédures avec lambeau chirurgical de l’os exposé. Pour les procédures sans lambeau, les ostéotomies sont effectuées à une profondeur supérieure de 4 à 5 mm afin de compenser les différents niveaux des muqueuses et d’empêcher l’enfoncement de l’espace destiné à l’implant.
La mesure de l’os peut être évaluée à l’aide d’une règle pour déterminer la hauteur totale de la crête : il suffit de placer la règle entre la partie inférieure du menton et la partie supérieure de la crête. Il faut déduire environ 6 à 8 mm de tissu mou sous le menton et au-dessus de la crête, et la mesure restante de l’os est utilisée à titre indicatif afin de sélectionner la longueur d’implant appropriée.
B. Remarque : l’infiltration d’un anesthésique local est suffisante pour ces procédures. Toutes les ostéotomies sont dans un premier temps réalisées à l’aide du foret pilote CePo 1.4. Pour installer des implants de diamétre supérieur à 1.8 mm , les puits de forage sont élargis grace à des forets ou alésoirs pré-marqués dans un mouvement linéaire de haut en bas jusqu’à la profondeur pré-établie.
A. L’emplacement des implants doit être indiqué sur la muqueuse à l’aide d’un marqueur stérile. Quatre implants Atlas doivent être installés devant le foramen 43
FRANÇAIS
Le foret pilote CePo 1.4 de Dentatus permet dans un premier temps de percer le tissu (sans rotation), effectuant ainsi une indentation dans l’os qui permet un emplacement précis des ostéotomies. Les forets, utilisés entre 1300 et 1500 tours par minute avec une vaporisation abondante avec du sérum physiologique ou de l’eau stérile, sont inclinés en vue de l’insertion de l’implant dans l’os. Les ostéotomies sont percées jusqu’à une profondeur permettant à la plateforme de l’implant de reposer sur la muqueuse.
permet de sentir au toucher que l’installation terminée est adéquate.
Remarque : pour aligner la position du foret en vue de l’ostéotomie, vous pouvez placer le pouce et l’index de chaque côté de la crête pour mieux sentir les mouvements du foret lorsqu’il est utilisé à proximité de la muqueuse.
Pour obtenir une bonne stabilité primaire un couple de serrage à environ 40 Ncm est recommandé.
Voir page suivante pour gammes de forets
Important : assurez-vous que l’implant est correctement positionné sur la clé et que celle-ci forme une ligne droite avec l’implant.
C. Installation de l’implant La clé manuelle stérile attachée à l’implant stérilisé est utilisée pour installer l’implant en quelques tours en toute sécurité.
Lorsque vous sentez une résistance excessive, retirez l’implant et augmentez légèrement la profondeur de l’ostéotomie. Cela empêchera toute résistance intense lors de la descente de l’implant, ainsi que tout dégât éventuel de l’os mandibulaire.
La clé est ensuite retirée, et l’installation se poursuit à l’aide de l’adaptateur pour contre-angle (à environ 50 tours par minute) ou de la clé à cliquet allongée (un peu avant la plateforme touchant le tissu des muqueuses). L’installation se termine à l’aide de la clé à oreilles manuelle qui vous
Voir page 46 pour assemblage de l’adaptateur manuelle sur l’adaptateur pour contre-angle
44
Gammes de forets chirurgicaux Dentatus CePo Dentatus propose deux différents types de marquage laser pour pilotes CePo et forets CePo. Cette brochure vous servira de guide d’utilisation.
Système 1 Les marquages laser correspondent à la longueur du filetage des implants.
Système 2 Un système de marquage convivial qui se base sur la profondeur réelle de l’emplacement à travers la gencive, lorsqu’on pratique une pose d’implant sans lambeau. Les marquages correspondent aux trois différentes longueurs des implants Dentatus : implant court (S), moyen (M) ou long (L).
Les marquages se situent à 7, 10 ou 14 mm de l’extrémité de l’implant, là où se termine le filetage selon les différents implants. La largeur du marquage est d’environ 0,5 mm. Les plateformes d’implants des implants Anew doivent toujours affleurer au niveau de la surface gingivale.
La largeur de chaque marquage est de 2 mm.
Système 2
Système 1
L M
L
S
M S
Cat. nr. Ø mm MR - 1141 CePo Drill - pilot MR - 1142 CePo Drill - pilot MR - 1145 CePo Drill MR - 1146 CePo Drill
M
Cat. nr. Ø mm MR - 1041 CePo Drill - pilot MR - 1042 CePo Drill - pilot MR - 1045 CePo Drill MR - 1046 CePo Drill
1.8, Long 1.8, Short 2.2 2.4
45
1.8, Long 1.8, Short 2.2 2.4
FRANÇAIS
La ligne supérieure de chaque marquage sert de référence pour la surface gingivale ; elle est placée à 11, 14 ou 18 mm de l’extrémité (selon les modèles).
1.
2.
3.
4.
Assemblage de l’adaptateur manuelle sur l’adaptateur pour contre-angle. 1. Localiser l’orifice sur l’adaptateur manuel 2. Aligner la partie aplatie du manchon de la pièce pour contre angle avec l’orifice de l’ adaptateur manuel 3. Pousser jusqu’au stop le prolongateur pour contre angle dans cette ouverture 4. Assurez vous que le bout du manchon de l’adaptateur pour contre angle est bien au raz sans dépasser la partie extérieure de l’adaptateur manuel Après utilisation , retirer le prolongateur contre angle de l’ adaptateur manuel par une simple poussée pour nettoyage et désinfection séparée. Nettoyer l’orifice avec une micro brosse interdentaire. L’adaptateur manuel est fabriqué en aluminium anodysé et livré avec un anneau interne pour garantir une meilleure friction sur l’adaptateur contre angle. Quand l’ anneau est usé , il convient de jeter l’adaptateur manuel. Afin de faclliter l’assemblage adaptateur contre angle-adaptateur manuel , une petite goutte de lubrifiant pour contre angles dentaires sera appliquée dans l’orifice avant autoclavage. Eliminer toute trace de lubrifiant avant de mettre en sachet pour la stérilisation.
nement de la contre-dépouille qui devrait être située entre 2 et 3 mm en dessous des extensions du bord libre. Le repère se prolonge jusqu’aux tubercules rétromolaires de forme arrondie pour une adaptation uniforme du rebasage.
D. Procédures prothétiques cliniques Avertissement : Lorsqu’il n’est pas possible de localiser une prothèse existante sur la crête parallèle aux dents opposées, la prothèse doit dans un premier temps être regarnie à l’aide de résine auto-polymérisable avant de démarrer la procédure de réajustement.
1. L’instrument tranchant en forme de demi-sphère sert à créer une contredépouille pour faciliter la rétention du rebasage sans adhésif. La tige de l’instrument s’appuie contre le bord libre qui sert de guide de renforcement afin de créer une gorge de profondeur homogène.
Un marqueur est utilisé pour repérer le contour de la prothèse en vue du position46
2. L’instrument bombé à rainure sert à créer des traces indiquant la profondeur sans abîmer la contre-dépouille préparée afin de réduire la base pour un rebasage uniforme.
E. Procédures de rebasage du silicone Remarque: il faut rincer méticuleusement la bouche, la langue et la prothèse du patient afin d’éliminer les particules fines pouvant être incorporées dans le rebasage. À titre de préparation à la procédure de rebasage rapide, il faut avertir le patient qu’il devra maintenir sa prothèse en place en appuyant légèrement sur celle-ci à l’aide des dents antagonistes, et garder cette position pendant 4 à 6 minutes sans bouger la langue ou la mâchoire.
3. L’instrument tranchant bombé sert à réduire la base au niveau indiqué de la profondeur et à lisser la surface.
1. La seringue Tuf-Link de 50 ml dotée d’un embout automélangeur est purgée avant d’injecter la silicone dans la plaque-base en guidant le produit vers la contre-dépouille. Il faut utiliser suffisamment de silicone pour créer la pression assurant un rebasage dense et non poreux.
5. L’instrument bombé pour prothèses sert à faire une indentation dans les espaces indiqués, ce qui permet à la prothèse de rester en place. Pour éviter une réduction excessive de la prothèse, l’instrument doit être enfoncé aux deux tiers de sa profondeur sphérique.
2. La prothèse est insérée par l’arrière et enfoncée vers l’avant en effectuant des mouvements latéraux. Le patient est invité à serrer les dents antagonistes contre la prothèse et à ne pas bouger. La procédure doit être effectuée promptement, étant donné que le silicone commence à se solidifier dès le début de la polymérisation.
Remarque: Il est possible de procéder à une vérification en appliquant les repères directement sur les têtes des Dome Keeper pour la mise au point finale et pour polir les éléments coupants afin d’empêcher les déchirures du rebasage en silicone.
3. Une fois polymérisée, la prothèse est retirée et le rebasage est délicatement soulevé de la base de la prothèse à l’une des extrémités distales à l’aide d’un instrument pointu. 47
FRANÇAIS
4. Les coiffes de marquage rouges placées sur les implants Atlas sont utilisées pour indiquer la position de ces derniers dans la prothèse. Les coiffes sont revêtues d’un colorant ou d’un repère au marqueur à base végétale sans risque, et la prothèse est enfoncée fermement afin de transférer les positions indiquées pour les Dome Keepers.
4. À l’aide de ciseaux fins à long bec, l’excédent de rebasage est coupé le long de la contre-dépouille bien délimitée.
b. Les contacts occlusaux et les points de gênes doivent être corrigés. c. Le patient doit immédiatement signaler toute irrégularité et toute douleur.
5. Pour réinsérer le rebasage, il faut dans un premier temps l’introduire à une extrémité de la prothèse, puis le mettre en place en appuyant légèrement avec le doigt. Il est possible d’utiliser un instrument plat et lisse pour guider le rebasage dans la contre-dépouille, ce qui empêchera l’accumulation de fines particules alimentaires.
SOINS À DOMICILE Les patients peuvent manger immédiatement; ils doivent cependant consommer des aliments mous et éviter les aliments solide ou qui doivent être mâchés pendant 24-48 heures. a. Les patients ne doivent pas retirer leur prothèse pendant les deux première jours suivant l’installation des implants Atlas.
Les prothèses Atlas Tuf-Link à alignement automatique supportent les angulations d’implants importantes. La prothèse, une fois enlevée sans stress pour l’implant et sans abrasion des tissus, nécessite rarement de rendez-vous de suivi afin de corriger les tissus. En fonction de chaque cas, les rebasages conservent leur élasticité entre 12 et 18 mois. Bien qu’ils soient rapides à changer, il est possible de remettre un rebasage de remplacement au patient qui le conservera dans un récipient rempli d’eau dans l’éventualité d’une urgence.
b. Les patients ne doivent pas retirer leur prothèse pendant la nuit pendant les deux premières semaines suivant l’installation des implants Atlas. Cela empêchera tout oedème formé pendant l’intervention chirurgicale d’appliquer de la pression sur les tissus mous et de gêner éventuellement le repositionnement de la prothèse sur les implants. Après le délai de deux semaines, les patients peuvent dormir avec ou sans leur prothèse.
LISTE DE VÉRIFICATIONS POSTOPÉRATOIRES
c. À des fins d’hygiène buccale, les patients doivent brièvement retirer leur denture chaque jour. Encouragez-les à utiliser une brosse à dents à soie en nylon souple avec du dentifrice ou de l’eau pour nettoyer la prothèse. Assurez-vous que les patients
a. Les zones d’impact sur les muscles, qui constituent la cause fréquente de dislocation des prothèses dans les mouvements fonctionnels et parafonctionnels, doivent être éliminées. 48
n’essaient pas de retirer le rebasage en silicone pendant au moins 3 jours. Après ce délai, les patients adroits peuvent retirer le rebasage (à l’aide d’un cure-dents) et le nettoyer délicatement de la même façon que la prothèse. À la suite de la période de guérison initiale, les prothèses peuvent être immergées dans l’eau pendant 30 minutes chaque jour dans une solution nettoyante pour prothèses.(Remarque : assurez-vous que les patients ne nettoient pas leurs prothèses ou leurs rebasages en silicone au-dessus d’un évier non bouché.) Expliquez aux patients comment nettoyer la tête, le col et la plateforme des quatre implants Atlas.
Il se peut que l’os maxillaire poreux et plus mou ne supporte pas les forces fonctionnelles sans le soutien d’une barre de liaison reliant 6 à 8 implants. Les implants Anew de Dentatus dotés de composants conçus pour une restauration fixe peuvent être utilisés pour créer une barre en résine-métal. Le réajustement de la prothèse à l’aide du rebasage en silicone Tuf-Link offre une rétention stable, confortable et sûre avec une forme palatine modifiée.
d. Les patients peuvent prendre un analgésique pour soulager toute gêne éprouvée.
Le système Anew, conçu pour les procédures reconstructives, est utilisé pour remplacer des dents isolées, des restaurations de plusieurs dents et des bridges fixes de l’arcade complète retenus par des vis. Les procédures cliniques et chirurgicales à invasion minimale et moins éprouvantes sont accessibles et plus abordables pour les patients dont les besoins varient beaucoup.
e. Les patients doivent appeler le cabinet en cas de douleur sévère ou si d’autres symptômes apparaissent. RÉAJUSTEMENT DES PROTHÈSES HYBRIDES ET DES PROTHÈSES PARTIELLES AMOVIBLES SOUTENUES PAR DES IMPLANTS MAXILLAIRES
Les guides techniques illustrés des implants Anew permettant de remplacer une seule dent manquante ou de restaurer plusieurs dents ou l’arcade complète sont disponibles sur demande.
Les procédures techniques de réajustement pour les prothèses soutenues par des implants sont essentiellement les mêmes que celles décrites dans le guide des prothèses hybrides de la mandibule Atlas.
49
FRANÇAIS
Une attention particulière doit être prêtée à l’os et aux restrictions maxillaires et anatomiques en utilisant 6 à 8 implants et des ostéotomies peu profondes allant jusqu’à la moitié du puits pratiqué dans l’os. Les implants Anew autotaraudants avec clé manuelle forment leur propre filet dans l’os.
SILICONE TUF-LINK® POUR UN USAGE GÉNÉRAL
PROGRAMME MARKETING ATLAS Le programme Atlas Denture Comfort accompagné de ses documentations et de ses supports médiatiques peut vous aider à faire connaître votre cabinet de pose d’implants auprès des nombreux patients qui souffrent de restaurations inadéquates. Le programme marketing s’appuie sur le site Web destiné aux consommateurs, www. denturecomfort.com, qui offre une fonction de recherche de dentistes par code postal. Le programme comprend des outils de marketing tels que des dépliants destinés aux patients, des affiches, des cartes postales, des communiqués de presse et bien plus encore.
Le rebasage résistant Tuf-Link de Dentatus qui conserve une forme stable sur une longue période peut être utilisé pour regarnir les prothèses supérieures, les prothèses partielles amovibles, pendant les soulevés de sinus et les procédures de reconstruction des tissus durs et mous. Le rebasage peut également être utilisé pour regarnir les formes initiales afin d’établir des relations occlusales, verticales et spatiales sans abîmer les modèles. La seringue Tuf-Link de 50 ml otée d’embouts automélangeurs est très pratique pour les rebasages de gros volume. La petite seringue Tuf-Link de 10 ml, est conçue pour les petits rebasages et pour soulager rapidement les abrasions de tissus.
Vous pouvez également nous joindre par courrier électronique à info@dentatus.se ou consulter la gamme complète des produits originaux de Dentatus sur notre site Web: www.dentatus.com.
Deux petites indentations réalisées à l’aide d’une fraise ronde et espacées de 3 à 4 mm permettront de maintenir la petite piéce en place. L’espace pourra ensuite être rempli de résine solide de façon permanente après la guérison. La seringue peut également être utilisée dans les procédures chirurgicales lorsque la zone des tissus doit être protégée pendant de longues périodes. Le silicone Tuf-Link est dense et non poreux, ce qui empêche le contact avec les aliments et l’accumulation des bactéries.
50
NOTES:
51
NOTES:
52