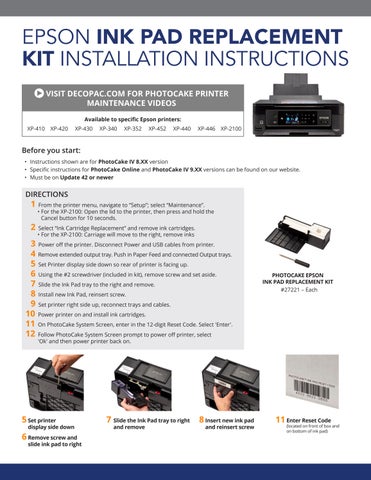
KIT INSTALLATION INSTRUCTIONS
VISIT DECOPAC.COM FOR PHOTOCAKE PRINTER MAINTENANCE VIDEOS
Before you start:
• Instructions shown are for PhotoCake IV 8.XX version
• Specific instructions for PhotoCake Online and PhotoCake IV 9.XX versions can be found on our website.
• Must be on Update 42 or newer
DIRECTIONS
1 From the printer menu, navigate to “Setup”; select “Maintenance”.
• For the XP-2100: Open the lid to the printer, then press and hold the Cancel button for 10 seconds.
2 Select “Ink Cartridge Replacement” and remove ink cartridges.
• For the XP-2100: Carriage will move to the right, remove inks
3 Power off the printer. Disconnect Power and USB cables from printer.
4 Remove extended output tray. Push in Paper Feed and connected Output trays.
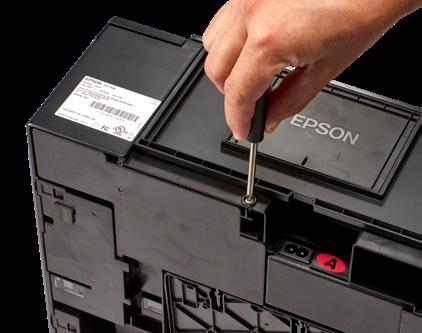
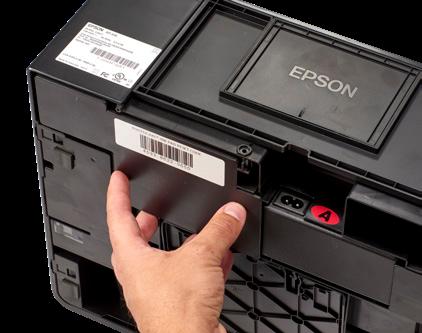
5 Set Printer display side down so rear of printer is facing up.
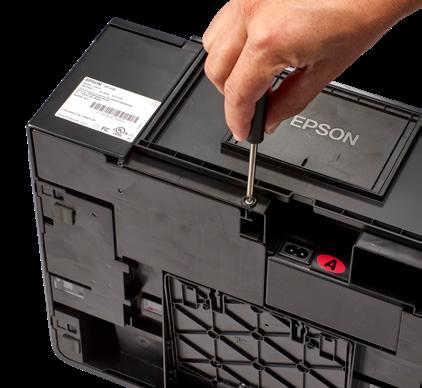
6 Using the #2 screwdriver (included in kit), remove screw and set aside.
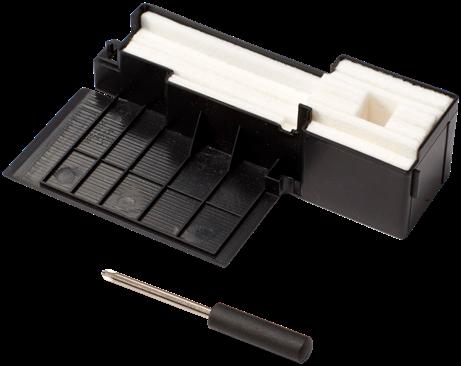
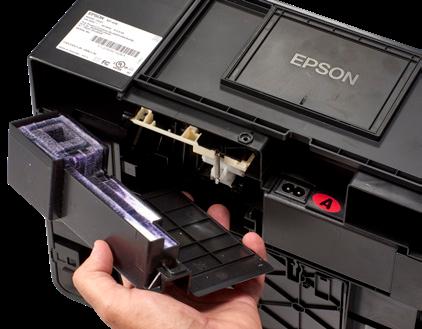
7 Slide the Ink Pad tray to the right and remove.
8 Install new Ink Pad, reinsert screw.
9 Set printer right side up, reconnect trays and cables.
10 Power printer on and install ink cartridges.
11 On PhotoCake System Screen, enter in the 12-digit Reset Code. Select 'Enter'.
12 Follow PhotoCake System Screen prompt to power off printer, select 'Ok' and then power printer back on.
5 Set printer display side down
6 Remove screw and slide ink pad to right

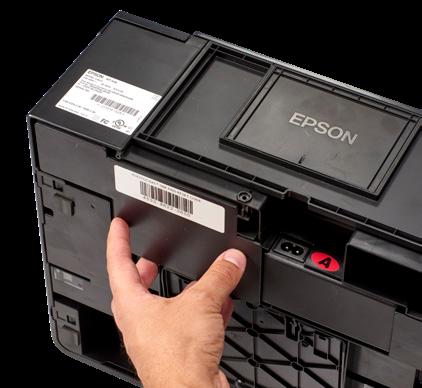
7 Slide the Ink Pad tray to right and remove 8 Insert new ink pad and reinsert screw
PHOTOCAKE EPSON INK PAD REPLACEMENT KIT #27221 – Each
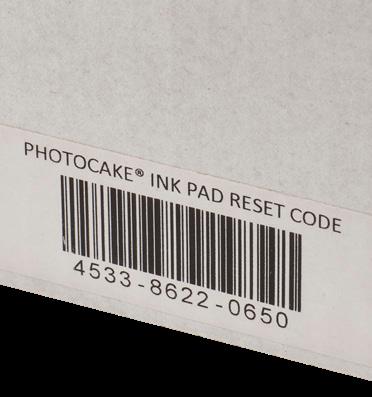
11 Enter Reset Code (located on front of box and on bottom of ink pad)
INSTRUCCIONES DE INSTALACIÓN DEL KIT DE REEMPLAZO DE ALMOHADILLA DE TINTA EPSON
VISITE DECOPAC.COM PARA VER VIDEOS DE
Disponible para impresoras Epson específicas:
Antes de comenzar:
• Las instrucciones mostradas son para la versión 8.XX de PhotoCake IV
• Las instrucciones específicas para PhotoCake Online y las versiones 9.XX de PhotoCake IV se pueden encontrar en nuestro sitio web.
• Debe tener la actualización 42 o más reciente.
INSTRUCCIONES
1 En el menú de la impresora, vaya a “Configuración”; seleccione “Mantenimiento”. •Para la XP-2100: Abra la tapa de la impresora y mantenga pulsado el botón Cancelar durante 10 segundos.
2 Seleccione “Reemplazo del cartucho de tinta” y retire los cartuchos de tinta.
• Para la XP-2100: El carro se moverá hacia la derecha, retire las tintas.
3 Apague la impresora. Desconecte cable de energía y los cables USB de la impresora.
4 Retire la bandeja de salida extendida. Empuje las bandejas de alimentación de papel y de salida conectadas.
5 Coloque la impresora con la pantalla hacia abajo, de modo que la parte posterior de la impresora quede hacia arriba.
6 Con el destornillador # 2 (que se incluye en el kit), retire el tornillo y déjelo a un lado.
7 Deslice la bandeja de almohadilla de tinta hacia la derecha y retírela.
8 Instale la nueva almohadilla de tinta y vuelva a colocar el tornillo.
9 Coloque la impresora en posición correcta y vuelva a conectar las bandejas y los cables.
10 Encienda la impresora e instale los cartuchos de tinta.
11 En la pantalla del sistema de PhotoCake ingrese el código de restablecimiento de 12 dígitos. Seleccione “Ingresar”.
12 Siga las instrucciones de la pantalla del sistema de PhotoCake para apagar la impresora, seleccione “Aceptar” y vuelva a encenderla.
5 Coloque la pantalla de la impresora hacia abajo.
6 Con el destornillador # 2, retire el tornillo y déjelo a un lado.
7 Deslice la bandeja de almohadillas de tinta hacia la derecha y retírela
8 Inserte una nueva almohadilla de tinta y vuelva a colocar el tornillo.
KIT DE REEMPLAZO DE ALMOHADILLA DE TINTA EPSON PHOTOCAKE #27221 – Cada uno
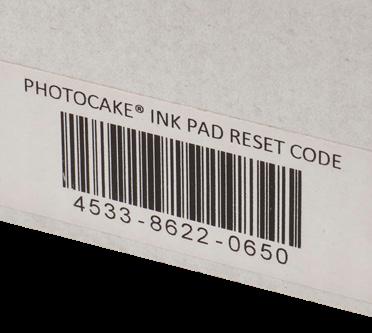
11 Ingrese el código de restablecimiento. (que se encuentra en la parte frontal de la caja y en la parte inferior de la almohadilla de tinta)