7 minute read
Checking the body of a response

from POSTMAN API
by danzzersdev
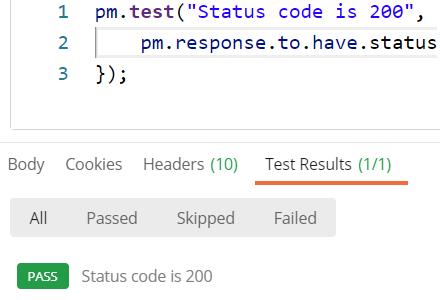
Try it out This is very basic check, but I want you to take a couple of minutes to make sure you understand how it works. Try changing the expected status code and ensure that it fails. The test will be run after you send the request and you can view the results on the Test Results tab in the response section. If you click on the Test Results tab, you should see something that looks like this:
Figure 6.3 – Check on the test results The script is asserting that the response should be 200. Play around with this assertion a bit and make sure you understand what is going on. Can you make it fail? Make sure you understand how it works. I will be showing you some more assertions, but they share many of the same components as this one so make sure you fully understand what is going on here before moving on to look at how to check data in the body of a response.
Advertisement
You have seen how to verify that an API response has the status code you expect it to, but there is a lot more that you can do with tests in Postman. You can check many things in the data of the response itself. I want to show you a couple of examples of how to do that, so that you can have the confidence to create these kinds of assertions on your own.
Checking whether the response contains a given string For the first example, I will show you how to check that a response contains a string that you expect it to. The snippets are a very helpful way to learn about the available functionality, so let's use another one to look at how you can verify that the body of a request has the correct data. Scroll down in the snippets section until you see a snippet called Response body: Contains string. Ensure that your cursor is on the last line of the tests text field and then click on the snippet to add the code for it to the tests. You should see a code snippet that looks like this:
pm.test("Body matches string", function () { pm.expect(pm.response.text()).to.include("string_you_want_ to_search"); });
As you can see, there is a lot of similarity between this snippet and the previous snippet. It once again uses the pm.test method to define the test and we give it a function that does an assertion. In this case, the assertion is a bit different, though. You are still looking for response data with the pm.response object, but now you have the .text() method attached to it. Since the pm.response object is just that, an object; you need to turn it into a string before you can check whether it includes the string you want. This is what the .text() method does. It turns the response object into a string that Postman can search through. Replace string_you_want_to_search with a search term such as Luke. Give the test a more descriptive name as well – perhaps something like Check that the response body contains Luke – and send the request again. In the Test Results tab, you should now see that there are two passing tests.
Checking JSON properties in the response Now let's look at another example snippet. This time choose the Response body:JSON value check snippet. You will see that the following code is added to the tests:
pm.test("Your test name", function () { var jsonData = pm.response.json(); pm.expect(jsonData.value).to.eql(100); });
There are a couple of new things in this snippet. In the first place, you can see the use of the var keyword. This is used in JavaScript to define a variable, so in this case, we are creating a variable called jsonData. The data for this variable is coming from the pm.response object, but this time instead of calling .text() to convert it into a string, the snipped is calling .json(), which will turn it into JSON. JSON stands for JavaScript Object Notation and it is a format that is used for storing and transporting data. It is structurally similar to a dictionary or hash map object and is a very common standard. Many APIs will return data in a JSON structure. The Star Wars API is no exception to this and so you can directly convert the response object for a call to that API into JSON. The variable can then be used in an assertion. You can see that Postman has put in a default assertion that is expecting the value of the jsonData variable to equal 100. If you send the request, you will see that this test fails with an assertion error where it tells you that it expected undefined to deeply equal 100, as you can see in the following figure:
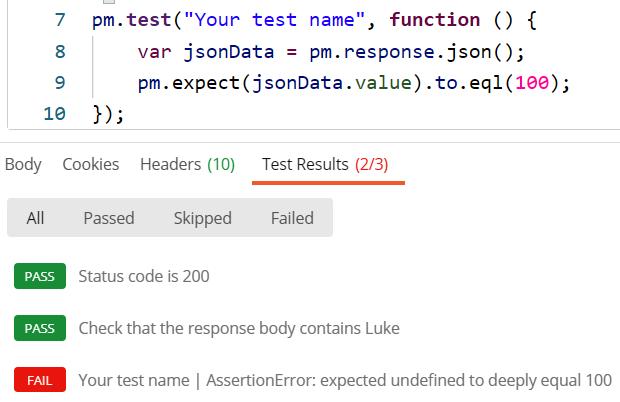
Figure 6.4 – Test assertion fails This warning sounds a bit cryptic, but all it is telling you is that it was trying to compare the two values that you gave and one of them was undefined while the other was 100. It was expecting those two values to be equal and hence the assertion failed. This tells you that jsonData.value is undefined. But why? Well, in order to understand that, let's look at the console log.
In JavaScript you can log things to the console. This is similar to printing in other languages. Since Postman is using JavaScript, you can use console.log to print out information. This is very helpful when trying to debug something, so let's try it out here. In the line after the variable definition, add this code:
console.log(jsonData);
Now send the request again. In order to see the data that has been logged, you will need to open the console in Postman. As shown in the following figure, you can do that by clicking on the Console button at the bottom of the Postman app:
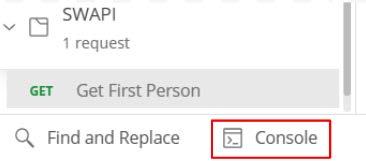
Figure 6.5 – Open the Postman console At the bottom of the console, you should see the jsonData object that you logged:
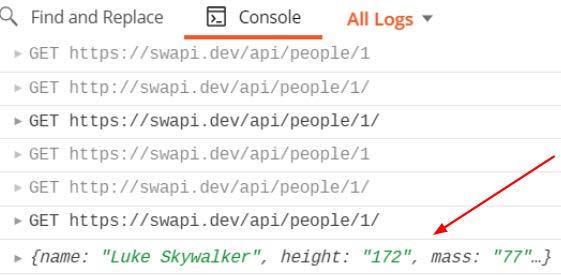
Figure 6.6 – Logged object
This looks like what you'd expect to see, so why does the assertion think that things are undefined? Well, we need to look for a minute at the .value operator. This snippet is a bit tricky. This looks like it is a valid operator, but it is actually just a placeholder to let you know that you need to get some value out of the jsonData object. In JavaScript, it is easy to do that with dot notation. So, if you want to get the height field, you can just reference it by its name like this:
jsonData.height
You will need to change what you expect it to equal. In this case, it should be equal to "172", so put that in to make the line look this this:
pm.expect(jsonData.height).to.eql("172");
Now if you send the request, it should pass. Don't forget to remove console.log and change the name to something more descriptive.
Important note You can access the properties of objects in JavaScript using either bracket or dot notation. They both give you access to the same information, but I think that dot notation is more readable than using bracket notation, and so I will stick with that throughout this book. In dot notation, you can access the properties of an object by using the syntax objectname.propertyName. You can also access nested objects in this way, and so you could see something like objectname.subobjectName.propertyName.
This example should give an idea of the kinds of options you have for checking response data. Many APIs send responses in JSON format, and with the options you have learned about in this example, you should be able to create checks for almost anything that you might get in an API response. In order to make sure that you understand what is going on here, though, I would encourage you to explore this a bit more.
Try it out You have a seen a couple of examples that show how to check for data in API responses. Now I want you to try your hand at this without step-by-step examples. See if you can take what you have learned and put it into practice on your own. You can play around and set yourself a few challenges on your own if you want. To help you get started, here are a few ideas of tests that you could create:
• Create a test that verifies Luke's eye color. • Create a test that verifies the URL of Luke's home world.