9 minute read
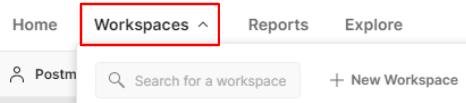
Integrating with Burp Suite

from POSTMAN API
by danzzersdev
Trying out different roles in an important aspect of authorization testing, but there is another level of detail that is important for this as well. In the example of a learning system, someone might have a student role within the system, but that does not mean that they can access data from any course in the system. They should only be able to see data from certain courses that they are enrolled in. There isn't really a standard term for this, but it is sometimes called things such as rights-based security or programmatic security. This kind of security is often mixed up with business logic in an application and so it is a very important type of authorization to check for in your tests. I have seen cases where the user interface correctly restricts users from things they do not have the rights to, but that same security is not applied correctly in the API, meaning users can see things they do not have the right to. You cannot fully mitigate all authorization mistakes, but when you set up tests, be sure to include negative authorization checks. Postman can be helpful for this. Once you have defined all your test cases in Postman, you can run them with different credentials to check whether they are correctly authorized. Doing this allows you to reuse your tests for security purposes.
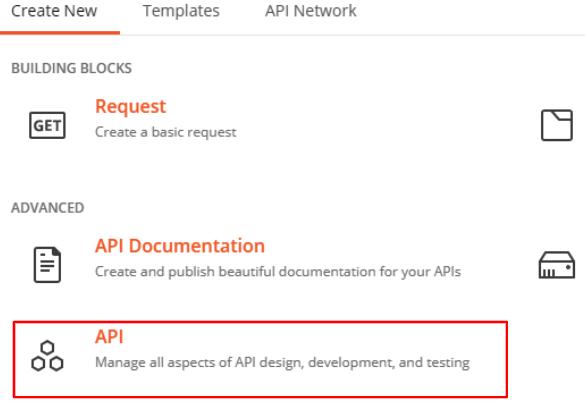
I have talked about a few security testing approaches that you can use in Postman. There are also many other tools that are specifically designed around security testing. These tools are not the focus of this book, but some of them can be used along with Postman to enhance your security testing. A lot of these tools use network proxies to help you understand and test network traffic. I can't show you how each tool works, but I will walk you through integrating Postman with one of them so that you can get an idea of how to do this.
Advertisement
If you want to follow along with this at home (and I would recommend that you do), you will need to download and install Burp Suite. You can get a free community edition
here: https://portswigger.net/burp/communitydownload. Once you have downloaded and installed it, start it up and click your way through the startup wizard, leaving the default options in place. With Burp Suite opened, you can now check that it is set up the way you need. Use the following steps to configure Burp Suite:
1. Go to the Proxy tab and select the Options sub-tab. 2. In the Proxy Listeners section, ensure that the Running checkbox beside the listener running on 127.0.0.1:8080 is selected:
Figure 5.10 – Burp Suite proxy listener running 3. Now go to the Intercept sub-tab, and on click on the Intercept is on button to turn off intercepting:

Figure 5.11 – Turn off Intercepting Now that you have Burp Suite properly configured, it's time to set up Postman as well. Burp Suite is an internet proxy, and Postman can be set up up to route through a proxy, so that you can use it in conjunction with a proxy. In order to do this, follow these steps:
1. Click on the Settings cog at the top of the application and choose Settings from the menu. 2. On the popup, click on the Proxy tab.
3. You can now set up a custom proxy that will use the Burp Suite proxy. In order to do that, select the Add a custom proxy configuration option and then in the Proxy
Server box, put in the IP address of the proxy server Burp Suite is using (in this
case, 127.0.0.1:8080):

Figure 5.12 – Configure a proxy server in Postman
Since the data we send from Postman will now go through a Burp Suite, the security certificate will be from Burp Suite and will probably not be trusted. 4. In order to fix this, you can go to the General tab on the SETTINGS popup and turn off the SSL certificate verification option:

Figure 5.13 – Turn off SSL certificate verification 5. Close the dialog and then send a request from Postman.
If you go over to Burp Suite, you should see that the request has been routed through the Burp Suite proxy. You should see something similar to the following screenshot, where the API request details show up in the Target tab:

Figure 5.14 – Request captured in Burp Suite Now that you have configured everything so that you can use Burp Suite and Postman together, you can use the security tools of Burp Suite in conjunction with the API testing tools of Postman. This book isn't about how to use the security testing tools in Burp Suite, but if you want to dive deeper into this, you can look at some of the security tests that you can do with it by looking through the documentation in the Next steps section of the Portswigger getting started documentation (which you can find here: https://
portswigger.net/burp/documentation/desktop/getting-started).
I've shown you how to do this with this one particular ool, but you can also set up Postman to work with other proxies and tools like this.
Important note Don't forget to turn off your custom proxy in Postman once you are done using Burp Suite! Otherwise, the calls that you send from Postman will seem to hang, and you will eventually get a connection or tunneling error.
Proxy tools allow you to view and manipulate data and are helpful for security testing. Although Postman itself is not a security testing tool, it can be used to help you check for security issues in your APIs. Security testing is a large, complex, and important topic. I've just scratched the surface of it in these few pages, but even if you aren't an expert on security (I'm definitely not!), don't be afraid to use what you know to check that your API is secure.
Summary
This chapter has covered a lot of territory. Security is a complex and important topic and understanding how to work with it is an important part of API testing. In this chapter, I have shown you how to think about API security and what the distinction is between authorization and authentication in security. I also showed you how to use the various Postman authorization types to give you access to secured APIs. You learned how to log in with many different authorization types ranging from Basic Auth to API keys and tokens to OAuth 2.0. I also showed you some of the other authorization options in Postman and showed you how to get started with them. We didn't just look at how to call secured APIs in this chapter though. I also helped you get started with a few security testing techniques such as fuzzing, command injection, and authorization testing and showed you how to use them in Postman. In addition, you learned how to integrate Postman with other external security testing tools. To help with this, I showed you an example of how to integrate Postman with Burp Suite so that you could see how this might work. All in all, we covered a lot of ground in this chapter. I hope you are excited to continue learning about Postman in the next chapter, where I will show you how to create test validation scripts. This will involve using JavaScript in Postman and will be a lot of fun as you learn how to check that requests are doing what they should be and a lot of other powerful things that Postman can help you with. Let's continue with that in the next chapter!
6 Creating Test Validation Scripts
At one company that I worked at, I was trying to figure out the value of some of the test automation scripts that we had. In order to do this, I was analyzing the test results to see which scripts were giving us the most information. One of the rules I used to determine which scripts might not be adding value was to look at scripts that had never failed. My hypothesis was that if a script had been running for some time and had never failed, it was unlikely to fail in the future and so was not giving us valuable information. I had identified several test scripts that had never failed and was looking through them. Imagine my surprise when in several of them I found assertions that where checking things such as whether true==true or 5 == 5? No wonder the tests had never failed. It was impossible for them to fail. Although these were egregious examples, the reality is that often a well-designed test suite will fail to deliver on its promise because of poor assertions. You can have a test suite that is checking all the necessary endpoints with all the correct inputs. It can have perfect coverage and be impeccably structured, but without good assertions, it isn't doing you much good.
In this chapter, I will show you how to set up good test validation scripts in Postman. Postman uses JavaScript for this. If you are not familiar with JavaScript, don't worry about it. I will walk carefully through the examples so you should be able to follow along. Postman also provides some helpful examples that you can use. You do not need to be an expert in JavaScript in order to follow along in this chapter, but I hope that by the end of this chapter you will be an expert in creating good test validation. In addition to using JavaScript for test validation, Postman provides ways to create setup and teardown scripts. You can use these to set some things up before you run a test and to do cleanup after a test has completed. By the end of this chapter, you will be able to use all this functionality in Postman. You will be able to create test validation assertions using JavaScript in Postman, validate body and header data in API responses, use the assertions that the Postman team has created, set up variables and other data before sending a request, create workflows that include multiple requests, create loops to run the same request multiple times with different data, run requests in the collection runner, and use environments to manage and edit variables. The following are the topics that we are going to cover in this chapter:
• Checking API responses • Setting up pre-request scripts • Using environments in Postman
Technical requirements
The code used in this chapter can be found at https://github.com/
PacktPublishing/API-Testing-and-Development-with-Postman/tree/ master/Chapter06 .
Checking API responses
Since Postman uses JavaScript for the checks in a test, it has a lot of power and flexibility built into it. I'm going to walk you through various things that you can do with this. In order to do that, it will be easiest to work with actual API calls. For that purpose, I will once again use the Star Wars API (https://swapi.dev). If you don't have one yet, create a collection in Postman called something like Star Wars API – Chapter 6 and in that collection create a request called Get First Person. This request should call the / people/1 endpoint from the Star Wars API. You can also download the collection from the GitHub repository for this course (https://github.com/PacktPublishing/
API-Testing-and-Development-with-Postman/tree/master/Chapter06) and then import that package, if you would prefer.