Aquamarine
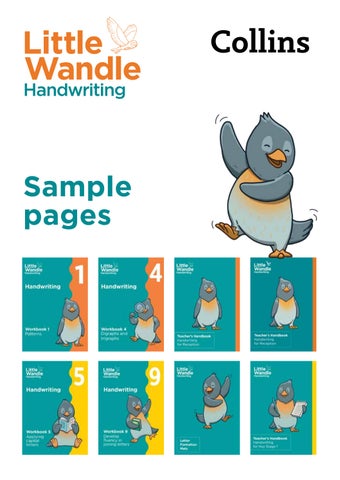
Sample pages
Aquamarine
Little Wandle Handwriting
The programme will be extended into KS2 with resources starting to publish from Spring 2027 and will support schools with the teaching of both handwriting and spelling
NEW
Make a strong start in Reception and KS1 Little Wandle Handwriting ensures early development of fluent, legible handwriting and provides a structured approach to teaching handwriting. • Delivers clear teaching guidance on how to model, assess and review handwriting • Includes high-quality, engaging pupil materials to carefully support children’s step-by-step progress • Is written in collaboration with experts at Little Wandle and based on the latest research on how to teach handwriting • Provides coverage of the Early Learning Goals, National Curriculum and works alongside the Little Wandle Letters and Sounds Revised progression Collins have partnered with Little Wandle to produce print resources that support the delivery of the Handwriting programme. They include Pupil Workbooks, classroom resources, and Teacher Handbooks, which offer a print copy of the planning and guidance available on the Little Wandle website. Unit 6: Capital letters A From the top, diagonally down to the left, up to the top, diagonally down to the right. Lift up and across.
Unit 6: Capital letters
Lower-case letters: curly letter family
Write over the letters.
a Around the astronaut’s helmet and down into space. Trace the letters with your finger.
Write over and copy the letters.
Write over the letters.
Letter check-up Around the astronaut’s helmet and down into space. © 2026 HarperCollinsPublishers. © 2026 Wandle Learning Trust. All rights reserved.
4
5 28486 P001_156.indd 3
Pages from the Pupil Workbooks and Letter Formation Cards
Planning and guidance An online subscription to Little Wandle Letters and Sounds Revised includes the Little Wandle Handwriting programme for Reception, Year 1 and Year 2. Lesson plans and resources, plus a range of ‘How to’ videos modelling the teaching of handwriting, are all included. Fully aligned with the DfE writing framework guidance on transcription/teaching handwriting
2
collins.co.uk/findarep
17/12/2025 16:24
‘Ready to write’ checklist: the four Ps s
Little Wandle Handwriting
Pages from the Teacher Handbook
Pencil grip Children need to learn how to hold their pencil correctly from the outset, as grip affects the flow, speed and overall quality of handwriting. Without a proper grip, children’s hands can tire more quickly, their writing can become harder to read and they may struggle to write for extended periods – an essential skill as they progress through school.
It is important to establish routines for getting ready for handwriting lessons. The routines of warming up fingers, having the correct posture and holding the pencil correctly so that children are ready to write are key. These routines need to be a common policy in the school, and have clear expectations that are established right from the start and reinforced so that they become embedded and automatic.
Young children need to develop the muscles in their hands to build the strength required for a proper pencil grip. For some, this will take longer and require additional practice. Children initially start to hold the pencil within their fist (age 1–1.5 years), progress to holding the pencil shaft with all their fingers (2–3 years) and then move on to a static, then dynamic tripod grasp. Children typically progress through a series of grasp patterns before developing a tripod grip.
The Little Wandle ‘Ready to write’ checklist ensures children are well prepared to start handwriting with confidence and control. The children are taught and reminded of four elements prior to starting their handwriting lesson.
Tripod grip
Posture Pencil grip Paper position Pressure Posture If children have a poor posture when writing, it can result in pain and fatigue, causing poor presentation, handwriting that is difficult to read, slow speed and lack of motivation to write. By modelling, monitoring and reinforcing good posture from the beginning, poor habits can be prevented from developing and children can be supported in building the stamina and speed needed for fluent writing. •
Feet are flat on the floor or supported on a wide, stable raised surface.
•
Knees form a 90 degrees angle, with about two fingers’ space behind the knees to prevent pressure on the lower thighs.
•
Hips are positioned at approximately 90 degrees, with the back fully supported by the chair.
•
Seat position with the back against the chair maintaining a small gap (about the width of a fist) between the stomach and the table, so there is sufficient space to breathe comfortably.
•
Table and chair height should allow the forearms to rest comfortably on the surface – without leaning forward (too low) or raising the shoulders (too high).
•
Work surface must be clean, smooth and clear of clutter to promote proper hand and arm placement and allow arms to move freely to write.
The tripod grip is typically the easiest for children to learn. It can be modelled by showing how to pinch the pencil between the ball of the thumb and index finger – about a finger’s width from the pencil tip – while resting the middle finger underneath for support, and the other fingers tucked into the hand. Using a small sticker to mark the correct grip position can be a helpful visual aid. The ideal location of the fingers is about 3cm from the pencil tip. For children who find pencil grip challenging, timely intervention and additional practice are essential to prevent the development of incorrect habits. See the ‘Pencil grip’ video on the Little Wandle website. For children who continue to have difficulty with fine and gross motor skills, adaptive equipment can used to support their development. Writing implements and equipment •
Pencils are an ideal tool for introducing letter formation as they provide a smooth glide across the page helping young children develop control during the complex process of learning to write. Some children may benefit from using thicker, triangular pencils to support the development of a tripod grip.
•
However, the size of the pencil should be appropriate for the child’s hand. While some children may initially find a chunkier pencil easier to grip, as they develop pencil control, it’s important to ensure the pencil is not too large, as this can hinder comfort and proper grip development.
•
There are pencil grips commercially available that promote a good tripod position. An elastic band placed at the tip of the pencil will prevent the fingers from slipping forwards onto the point.
23
22
00284_P001_064.indd 22
07/10/2025 15:05
00284_P001_064.indd 23
A range of ‘How to’ videos modelling direct instruction of handwriting.
07/10/2025 15:05
Meet the series editor Rachel Davis MBE is the co-founder of Little Wandle and has a wealth of experience in education including 20 years as the headteacher of an outstanding school in Birmingham and 12 years as an Ofsted Inspector. She also serves as the Strategic Lead for an English Hub. Rachel is committed to enabling every child to become a confident reader and writer, giving them the best possible start in life.
Title
ISBN
Price
Teacher’s Handbook: Handwriting for Reception
978-0-00-880028-4
£19.99
Workbook 1: Patterns
978-0-00-880029-1
£0.99
Workbook 2: Lower-case Letters
978-0-00-880030-7
£1.99
Workbook 3: Capital Letters
978-0-00-880031-4
£1.99
Little Wandle Handwriting Reception
Workbook 4: Digraphs and Trigraphs
978-0-00-880032-1
£1.99
Reception Letter Formation Cards
978-0-00-882848-6
£59.99 + VAT
Workbook 5: Applying Capital Letters
978-0-00-881112-9
£2.99
Workbook 6: Forming Digits and Words
978-0-00-881113-6
£2.99
Workbook 7: Writing Sentences
978-0-00-881114-3
£2.99
Year 1 Letter Formation Cards
978-0-00-882849-3
£59.99 + VAT
Workbook 8: Joining Letters
978-0-00-885340-2
£2.99
Workbook 9: Develop Fluency in Joining Letters
978-0-00-885885-8
£2.99
978-0-00-881111-2
£29.99
978-0-00-882850-9
£25.99 + VAT
View sample pages and find out more
Year 1
Year 2
Year 1 & Year 2 Teacher’s Handbook: Handwriting for Key Stage 1 All years Letter Formation Desk Mats
collins.co.uk/LittleWandleHandwriting
3
Teacher’s Handbook
Teacher’s Handbook: Handwriting for Reception
Teacher’s Handbook: Handwriting for Reception Introduction Why is handwriting important? Making a strong start in Reception Writing names National guidance and expectations Early Years Foundation Stage Framework (revised 2025) Development Matters (revised 2023) The National Curriculum in England (2014) The Writing Framework (2025) Executive function and handwriting Working memory Inhibitory control (self-control) Cognitive flexibility The relationship between handwriting and writing Transcription Oral composition Preparing for handwriting Drawing and forming lines The importance of developing core strength and motor control Gross motor control Fine motor control Dominant hand and left-handed children Supporting left-handed children in writing Little Wandle Handwriting Programme pedagogy Lesson structure and programme content ‘Ready to write’ checklist: the four Ps Posture Pencil grip Paper position Pressure Setting up your classroom The environment Useful resources Hand warm-up routines Hand exercises Teaching Little Wandle Handwriting in Reception Lesson organisation in Reception Teaching routines for handwriting 2
43
collins.co.uk/findarep findarep.collins.co.uk
Teacher’s Handbook: Handwriting for Reception Teacher’s Handbook
‘Ready to write’ rhyme Using the pupil workbooks Practising patterns Teaching letter families Links to phonics lessons Pace and progression Resources for teaching Unit aims and content Unit 1: Practising patterns Units 2 to 5: Letter formation Unit 6: Capital letters Unit 7: Digraphs and trigraphs Additional practice Assessment and providing additional support Assessment for Learning Additional support Engaging parents Home learning Teaching handwriting in Key Stage 1 Year 1 Year 2 Developing a handwriting policy What to include in a handwriting policy Glossary References
Appendices Appendix 1 – Audit: Handwriting
44
Appendix 2 – Lesson templates
46
Unit 1: Practising patterns
46
Units 2 to 5: Lower-case letters Unit 6: Capital letters
47 48
Unit 7: Digraphs and trigraphs
49
Appendix 3 – Unit guidance Unit 1: Patterns Unit 2: Curly letter family Unit 3: Long letter family Unit 4: Bouncy letter family Unit 5: Zig-zag letter family Appendix 4 – Capital letter formation phrases
50 50 53 56 58 60 62
3
collins.co.uk/LittleWandleHandwriting collins.co.uk/LittleWandleHandwriting
45
Teacher’s Handbook
Teacher’s Handbook: Handwriting for Reception
Introduction
The LittleWandle Handwriting programme provides a structured approach to teaching handwriting right from the start of Reception. It has been developed around research into the teaching of writing and national requirements and guidance, including the National Curriculum in England, the Writing Framework and Ofsted findings. The programme has been carefully designed to support the development of legible and fluent handwriting using an easy-to-follow approach with consistent routines and memorable mantras. The Writing Framework 2025 highlights the importance of this approach. It states: Pupils should be taught handwriting precisely, in a clearly sequenced progression, starting from reception, to support their gradual acquisition of skills. Little Wandle Handwriting can be taught alongside Little Wandle Letters and Sounds Revised, and the programme progression takes account of children’s growing phonic knowledge. It uses the well-loved and familiar mnemonics from the core Little Wandle programme to ensure children can make links in their learning.
5
56
collins.co.uk/findarep findarep.collins.co.uk
Handwriting: • Develops the brain Writing by hand activates multiple areas of the brain associated with memory, attention, language and problem-solving. It promotes neural connections that are not fully engaged when typing. • Improves fi ne motor skills Handwriting builds strength and coordination in the hands and fingers. This fine motor control is essential for many daily activities beyond writing, like using cutlery and scissors, buttoning clothes or tying shoelaces. •
Boosts learning and retention
Teacher’s Handbook
Handwriting remains a crucial skill in a child’s development and daily functioning, even in our increasingly digital world. As educators, it’s important to understand why handwriting matters and how to communicate its value to children and parents.
Teacher’s Handbook: Handwriting for Reception
Why is handwriting important?
Research shows that children tend to remember and understand material better when they write notes by hand. The act of forming letters and words helps reinforce learning. The slower pace of handwriting allows time for thinking and processing, aiding comprehension and memory.
• Helps with writing quickly and legibly for assessments Fluent, legible handwriting that requires little conscious effort allows children to concentrate on higher-level writing skills. In time-limited assessments – still a common format for formal qualifications – slow or unclear handwriting can hinder performance and limit academic achievement. •
•
•
Enhances literacy skills Handwriting contributes to reading and spelling development. The process of writing letters helps children recognise and remember letter shapes and sounds more effectively. Encourages focus and attention Writing by hand requires more concentration than typing. It can help children slow down, organise their thoughts and think more deeply about what they are writing. Is a practical life skill Handwriting is necessary for tasks like filling out forms, signing documents, taking notes or writing thank you cards.
6
collins.co.uk/LittleWandleHandwriting
collins.co.uk/LittleWandleHandwriting
67
Teacher’s Handbook
Teacher’s Handbook: Handwriting for Reception
Making a strong start in Reception
The Reception year is essential for the early development of fluent and legible handwriting. In the same way that teaching children to decode and blend with automaticity enables children to think about the meaning of what they are reading, when children’s transcription skills become automatic and they develop fluent handwriting, then their minds are freed to think about what they are writing. By teaching handwriting right from the start, it means that children do not develop incorrect habits that are hard to break. Direct teaching of handwriting will prepare the children with the skills to develop fluent, speedy writing later on. The ‘Strong foundations in the first years of school’ report (Ofsted, 2024) identified that some settings introduce complex tasks too early, leaving children without the foundational knowledge of how to hold a pencil correctly and form letters and numbers. It highlights the importance of building in time to explicitly teach handwriting from the start of Reception. ‘Teaching handwriting only in phonics sessions, as some schools do, is part of the problem. It means that children do not learn the basics of letter formation that establish the foundations for speedy and fluent handwriting later on. Further, plans to teach handwriting in Key Stage 1 do not always include important elements that the National Curriculum requires, such as making sure that children understand which letters belong to which handwriting ‘families’ and that they practise these. Incorrect letter formation then becomes a habit. Even when schools provide explicit handwriting lessons, teachers do not always demonstrate well enough to children what they need to do.’ Strong foundations in the first years of school (Ofsted, 2024)
Writing names Children will sometimes come to school writing their name. They may have poor pencil grip and letter formation, and some children may write in capitals. You will need to prevent these habits from becoming embedded by correcting their pencil grip and modelling correct letter formation straight away. Schools may wish to take the opportunity at induction sessions before the children start school to show parents the tripod grip and how to achieve this with the ‘pinch, pinch, pinch, flip’ routine (see the ‘Pencil grip’ video) and the correct way to form letters. For further information on engaging parents, see page 38.
7
78
collins.co.uk/findarep findarep.collins.co.uk
The Little Wandle Handwriting programme is based on the principle of direct teaching of transcription skills. It has been carefully planned to develop the children’s skills in accurate letter formation, with regular review and assessment. It is essential that you consistently model handwriting to a high standard. Each letter must be correctly formed and consistent in size, with clear starting and finishing points. You also need to demonstrate the correct pencil grip and proper writing posture. Children should be taught the Little Wandle ‘Ready to write’ checklist and encouraged to refer to it, not only during handwriting lessons, but across all writing activities throughout the curriculum, ensuring clear and consistent expectations. Each handwriting lesson should be delivered by a teacher or trained teaching assistant. The children should not be left to practise without supervision from a trained adult who will monitor the children’s work and pick up on incorrect pencil grip and letter formation. Strong modelling of starting points for letters and the correct orientation is essential. When forming the letters, the Little Wandle formation phrases should be used. You can make reference to the sound of the letters but the focus of the lesson must remain clearly on handwriting.
Teacher’s Handbook
Programme pedagogy
Teacher’s Handbook: Handwriting for Reception
Little Wandle Handwriting
Ofsted’s ‘Strong foundations in the first years of school’ guidance (2024) makes clear the importance of a separate phonics lesson from handwriting: Teaching handwriting only in phonics sessions, as some schools do, is part of the problem. It means that children do not learn the basics of letter formation that establish the foundations for speedy and fluent handwriting later on.
Lesson structure and programme content The handwriting lessons are designed to be short and focused, involve recall from the previous day, with direct, explicit teaching through strong modelling. This is followed by repeated practice, accompanied by precise feedback, to embed the learning in the long-term memory and ensure it becomes automatic. Long-term memory
Environment Learning Attention
Learning Working memory
Forgotten
20
collins.co.uk/LittleWandleHandwriting
collins.co.uk/LittleWandleHandwriting
89
Teacher’s Handbook
Teacher’s Handbook: Handwriting for Reception
‘Ready to write’ checklist: the four Ps Itis important to establish routines for getting ready for handwriting lessons. The routines of warming up fingers, having the correct posture and holding the pencil correctly so that children are ready to write are key. These routines need to be a common policy in the school, and have clear expectations that are established right from the start and reinforced so that they become embedded and automatic. The Little Wandle ‘Ready to write’ checklist ensures children are well prepared to start handwriting with confidence and control. The children are taught and reminded of four elements prior to starting their handwriting lesson.
Posture Pencil grip Paper position Pressure Posture If children have a poor posture when writing, it can result in pain and fatigue, causing poor presentation, handwriting that is difficult to read, slow speed and lack of motivation to write. By modelling, monitoring and reinforcing good posture from the beginning, poor habits can be prevented from developing and children can be supported in building the stamina and speed needed for fluent writing. • Feet are flat on the floor or supported on a wide, stable raised surface. • Knees form a 90 degrees angle, with about two fingers’ space behind the knees to prevent pressure on the lower thighs. • Hips are positioned at approximately 90 degrees, with the back fully supported by the chair. • Seat position with the back against the chair maintaining a small gap (about the width of a fist) between the stomach and the table, so there is sufficient space to breathe comfortably. • Table and chair height should allow the forearms to rest comfortably on the surface – without leaning forward (too low) or raising the shoulders (too high). • Work surface must be clean, smooth and clear of clutter to promote proper hand and arm placement and allow arms to move freely to write.
22
910
collins.co.uk/findarep findarep.collins.co.uk
Use this guidance from the Writing Framework (DfE, 2025) to audit your current practice. Handwriting routines
Current practice
Handwriting is taught explicitly and regularly across the school to all pupils. This begins early in Reception and is in addition to writing in phonics lessons. Pupils across the school are taught consistent routines for handwriting that support a comfortable writing position and enable them to form letters legibly and to develop fluency. Routines consider posture, paper positioning and pencil hold (including for left-handed children). All adults who work with pupils expect consistently high standards of handwriting and provide good models of handwriting that align with the school’s agreed style, across all areas of the curriculum.
Teacher’s Handbook
Audit: Handwriting
Teacher’s Handbook: Handwriting for Reception
Appendix 1
Handwriting instruction focuses on letter formation, size, orientation, spacing and consistency. Teachers make sure all children in every year group regularly practise handwriting to develop physical skill and control, and maintain fluency and legibility. Teachers teach pupils how to hold the pencil using the tripod grip, and support and encourage them to use it when they write. Pupils who need support have access to appropriate resources and equipment to enable them to make progress in handwriting in line with their peers. Teachers routinely model handwriting in the writing lesson to enable pupils to see how letters are formed. Teachers seek advice and work with the SENCO and other adults to support children needing adaptations or further support.
Actions to be taken:
Term actions to be reviewed by:
44
collins.co.uk/LittleWandleHandwriting collins.co.uk/LittleWandleHandwriting
1011
Workbook 1 - Patterns
Reception Workbook 1: Patterns
Unit 1: Practising patterns Draw over and copy the spirals.
Draw over and copy the spirals.
18 12
findarep.collins.co.uk
collins.co.uk/findarep
Unit 7: Digraphs and trigraphs
Workbook 1 - Patterns Reception Workbook 1: Patterns
Unit 1: Practising patterns Practice picture
Draw the spirals. Keep your pencil on the page.
Pattern check-up
19 collins.co.uk/LittleWandleHandwriting
collins.co.uk/LittleWandleHandwriting
13
Workbook 2 - Lower Case Letters
Reception Workbook 2: Lower-case Letters
Unit 4: Bouncy letter family Down, up and over the mouse’s ears. Trace the letter with your finger.
Write over the letters.
32 14
findarep.collins.co.uk
collins.co.uk/findarep
Unit 7: Digraphs and trigraphs
Workbook 2 - Lower CaseLetters Letters Reception Workbook 2: Lower-case
Unit 4: Bouncy letter family Write over the letters.
Write over and copy the letter.
Copy the letter.
Letter check-up
33 collins.co.uk/LittleWandleHandwriting
collins.co.uk/LittleWandleHandwriting
15
Workbook 3 - Capital Letters
Reception Workbook 3: Capital Letters
Unit 6: Capital letters Q From the top – all around the O. Lift off. Short line diagonally down. q Around the queen’s face, down her robe and a flick at the end. Trace the letters with your finger.
Write over the letters.
12 16
findarep.collins.co.uk
collins.co.uk/findarep
Unit 7: Digraphs and trigraphs
Workbook 3 - Capital Reception Workbook 3: CapitalLetters Letters
Unit 6: Capital letters Write over the letters.
Write over and copy the letters.
Letter check-up
13 collins.co.uk/LittleWandleHandwriting
collins.co.uk/LittleWandleHandwriting
17
Workbook 4 - Digraphs and Trigraphs
Reception Workbook 4: Digraphs and Trigraphs
Unit 7: Digraphs and trigraphs Catchphrase: a light in the night i Down the iguana and dot the leaf. g Around the goat’s face and curl under its chin. h Down, up and over the helicopter. Trace the letters with your finger.
Write over the letters.
28 18
findarep.collins.co.uk
collins.co.uk/findarep
Unit 7: Digraphs and trigraphs
Workbook 4 - Digraphs and Triigraphs Reception Workbook 4: Digraphs and Trigraphs
Unit 7: Digraphs and trigraphs Write over the letters.
Write over the letters and the word.
Copy the letters and the word.
Letter check-up
29 collins.co.uk/LittleWandleHandwriting
collins.co.uk/LittleWandleHandwriting
19
Reception Letter Formation Cards
Lower-case letters: curly letter family
Curl around the cat. © 2026 HarperCollinsPublishers. © 2026 Wandle Learning Trust. All rights reserved.
20
collins.co.uk/findarep
Reception Letter Formation Cards
Lower-case letters: curly letter family
© 2026 HarperCollinsPublishers. © 2026 Wandle Learning Trust. All rights reserved.
collins.co.uk/LittleWandleHandwriting
21
Teacher’s Handbook: Handwriting for Key Stage 1
Year 1 Overview and progression
The Little Wandle Handwriting programme for Year 1 is organised into teaching units with clearly defined outcomes and assessment criteria. Individual lesson plans identify the content for each lesson, alongside lesson templates which provide the detail for how each part of the lesson should be delivered. Assess and review weeks are built into the teaching progression to provide time to revisit areas that require additional practice. Use Assessment for Learning in lessons to identify areas for additional practice in the Assess and review lessons. Term
Workbook
Unit number Duration
Content
Autumn
Workbook 5
Unit 1
6 weeks
Lower-case letters
Unit 2
7 weeks
Applying capital letters
Unit 3
2 weeks
Forming digits
Unit 4
4 weeks
Digraphs and trigraphs
Unit 5
6 weeks
Useful words
Unit 6
7 weeks
Words with Phase 5 GPCs
Unit 7
2 weeks
Days of the week
Unit 8
1 week
Sentences with punctuation
Unit 9
3 weeks
Sentences with useful words
Spring
Summer
Workbook 6
Workbook 7
Autumn term Unit 1: Lower-case letters • • • • • •
c, a, d, g, o, q (Week 1) e, s, f, l, i, t (Week 2) j, u, y, m, n, r (Week 3) b, p, h, v, w, x (Week 4) z, k (Week 5) Assess and review (Week 6)
Unit 2: Applying capital letters
• • • • • • •
A, B, C, D (Week 7) E, F, J, H (Week 8) I, J, K, L (Week 9) M, N, O, P (Week 10) Q, R, S, T (Week 11) U, V, W, X, Y, Z (Week 12) Assess and review (Week 13)
• •
Numbers 0–5 (Week 1) Numbers 6–9 (Week 2)
Spring term Unit 3: Forming digits
52
22
collins.co.uk/findarep
• • • •
Unit 5: Useful words
Focus words: • • • • • •
Teacher’s Handbook: Handwriting for Key Stage 1
Unit 4: Digraphs and trigraphs
ll, ff, ss, zz, qu, ck, ch, sh (Week 3) th, ng, nk, ai, ee, igh, oa, oo (Week 4) ar, or, ur, ow, oi, ear, air, er (Week 5) Assess and review (Week 6) and, go, his, be, her, full, he, into (Week 7) push, pull, she, put, the, me, is, as (Week 8) we, to, all, are, by, my, I, was (Week 9) they, said, you, come, do, have, here, like (Week 10) love, little, has, one, some, there, so, today (Week 11) Assess and review (Week 12)
Summer term Unit 6: Words with Phase Writing words with the GPCs: 5 GPCs • ay, a-e, ea, e (Week 1) • ie, i-e, o, o-e (Week 2) • ue, ew, u-e, aw (Week 3) • ea, ir, ou, oy (Week 4) • i, a, ow, u (Week 5) • ph, wh, ie, g (Week 6) • Assess and review (Week 7) Unit 7: Days of the week
• •
Monday, Tuesday, Wednesday, Thursday (Week 8) Friday, Saturday, Sunday (Week 9)
Unit 8: Sentences with punctuation
•
Focus punctuation: . ? ! (Week 10)
Unit 9: Sentences with useful words
•
Focus words: again, ask, because, could, eye, beautiful, friend, call (Week 11) Focus words: laugh, our, people, house, school, should, their, water (Week 12) Assess and review (Week 13)
• •
53
collins.co.uk/LittleWandleHandwriting
23
Teacher’s Handbook: Handwriting for Key Stage 1
Outcomes and assessment criteria – Year 1 Unit 1: Lower-case letters Duration: 5 weeks
Unit 1 builds on the letter formation of lower-case letters taught in Reception. The focus is on developing controlled and fluent letter formation and refining the shaping and sizing of the letters. The Letter-specific assessment criteria grids show the correct way of forming each letter. The letters are taught in letter families because the common features of the starting points and direction help to reduce the cognitive load, making correct letter formation automatic. Children can use Penguin Land to remember how to size their letters correctly. Lessons 1 to 3 teach two letters from the same letter family and from lesson 2 include a short review of the lower-case letters from the previous lesson. The letters are then practised in words, where attention is drawn to the spacing between words. In lesson 4, the lower-case letters from the week are practised in a short sentence. An additional sentence provides the opportunity for additional practice. The unit has five lessons of learning followed by one week to Assess and review. To teach the unit, use the lesson templates and plans provided. Key outcomes In this unit, the children will: • • • • • • • • • •
Use the correct pencil grip (tripod grip). Begin to size and space letters correctly. Form the letters from the curly letter family accurately, with a controlled curve – ‘a’, ‘d’, ‘g’, ‘o’, ‘q’, ‘e’, ‘s’ and ‘f’. Use the up and down movement for the letters ‘a’, ‘b’, ‘d’, ‘g’, ‘h’, ‘m’, ‘n’, ‘p’, ‘q’, ‘r’, ‘u’ and ‘y’. Ascenders reach the top-line – ‘b’, ‘d’, ‘h’, ‘k’, ‘l’, ‘t’ and ‘f’. Form a straight ascender for the letters ‘b’, ‘d’, ‘h’, ‘k’, ‘l’, ‘t’ and ‘f’. Form a straight descender for the letters ‘g’, ‘j’, ‘p’, ‘q’, ‘y’ and ‘f’. Lift the pencil off and cross the letters ‘f’ and ‘t’. Make a loop for the letter ‘e’. Form ascenders and descenders with accuracy.
Key assessment criteria For every letter, check that a child: • • • • • • •
Follows the four Ps (Posture, Pencil grip, Position, Pressure). Forms lower-case letters in the correct direction, beginning and finishing at the correct place. Uses controlled, curved and straight line movements. Forms ascenders and descenders with accuracy. Positions letters correctly on a line. Begins to size and space letters correctly in relation to each other. Leaves a space between words.
54
24
collins.co.uk/findarep
Teacher’s Handbook: Handwriting for Key Stage 1
Lesson plans – Year 1 Unit 1: Lower-case letters Autumn 1 Week 1 Lesson Revisit prior learning
Lesson focus
Practice words
1
Lower-case letters: c, a
can, act
2
Lower-case letters: c, a Lower-case letters: d, g
dog, good
3
Lower-case letters: d, g Lower-case letters: o, q
cool, quack
4
Lower-case letters: o, q Sentences: A duck can quack. He is a good dog.
Autumn 1 Week 2 Lesson Revisit prior learning
Lesson focus
Practice words
1
Lower-case letters: e, s
goes, seed
2
Lower-case letters: e, s
Lower-case letters: f, l
flag, left
3
Lower-case letters: f, l
Lower-case letters: i, t
igloo, sit
4
Lower-case letters: i, t
Sentences: A cat gets on a log. A soft dog can dig.
Autumn 1 Week 3 Lesson Revisit prior learning
Lesson focus
Practice words
1
Lower-case letters: j, u
jug, just
2
Lower-case letters: j, u
Lower-case letters: y, m
yum, may
3
Lower-case letters: y, m Lower-case letters: n, r
run, train
4
Lower-case letters: n, r
Sentences: A doll is under my bed. I see red jam.
Autumn 1 Week 4 Lesson Revisit prior learning
Lesson focus
Practice words
1
Lower-case letters: b, p
bump, beep
2
Lower-case letters: b, p Lower-case letters: h, v
hover, vanish
3
Lower-case letters: h, v Lower-case letters: w, x
box, wind
4
Lower-case letters: w, x Sentences: The car horn went beep. The fox is at the vets.
55
collins.co.uk/LittleWandleHandwriting
25
26
Revisit and review (5 minutes ×2)
Quick review (from Hand exercises Lesson 2 onwards) Choose two exercises from the Hand warm-up routines. • Say: Let’s review the lower-case letters we • Say: Let’s get our hands learned in the last ready for writing. session. • Model the first exercise. • Show the Letter • Say: Copy me. Observe Formation Card for the children and provide first letter. support as required. • Say: The letter is • Repeat with the next [say the letter]. The exercise. phoneme is [say the • Say: Now our hands are sound]. warmed up and ready for • Model forming writing. the letter on a lined whiteboard, Get ready to write encouraging children • Say: Check you are sitting to join in with the up straight with your back formation phrase. against the chair and feet flat on the floor. There Write the review letter should be a small gap • Say: Now write the between your tummy and letter [say the letter at the table. least three times] in the • Sing the ‘Ready to write’ Letter check-up box. rhyme (optional): • Encourage children to say the formation Let’s sit up straight, feet phrase aloud to nice and flat, support correct Tilt your paper – just like formation. that! • Circulate to provide Pinch your pencil, give it individual support and a flip, additional modelling Check your hold and then where needed. Check your grip. every child’s pencil grip. Now we can begin to write, Repeat this for the But not too hard and not second letter. too light.
Warm-up (2 minutes ×2)
collins.co.uk/findarep Model writing the new letter • Say: Now we’re going to write the letter. • Model writing the letter on a lined whiteboard, reciting the formation phrase as you write. • Model the letter three times. Tick the best version and explain your reason for choosing that letter. • Say: Now I’m going to make my letter formation even better. • Model the letter again, three times, emphasising the assessment criteria.
The four Ps • Say: Remember the four Ps. • Refer to each one and check that the children are ready to begin writing.
Teach formation of the new letter • Say: Let’s practise writing a letter we learned in Reception. • Show the Letter Formation Card. • Say: This is the letter [say the letter]. Its phoneme is [say the sound]. It is from the [e.g. curly] letter family. • Say: This is a sea/ice/sky letter. It goes up to the sky/stays on the ice/goes under the sea. Show the Penguin Land card. • Sing the ‘Ascenders/ descenders’ rhyme (optional). • Put your finger on the starting point on the card, then recite the formation phrase while tracing the letter. • Repeat, encouraging children to join in with the phrase.
Use Assessment for Learning to identify children needing further practice.
• Say: Remember to form these letters correctly in your lessons this week.
Repeat for each word.
Writing words • Say: Now we’re going to write lower-case letters in words. • Model writing the word on a lined whiteboard, emphasising correct formation and sizing. Say the formation phrase as you write. • Say: Now I’m going to make my word even better. • Model the word again, emphasising the assessment criteria. • Say: Now practise writing the word in your book twice. • Circulate to provide individual support and additional modelling where needed. • Say: Can you make your word even better? Practise the word again. Have you improved it?
Repeat the teach, model and apply routine for each letter.
Write the new letter • Say: Now you are ready to write. Use your pencil to write the letter in your book at least three times. • Circulate to provide individual support on pencil grip, starting points and formation where needed. • Say: Face the board and look at my letters. • Say: Now look at the letters you have written and put a little tick next to the letter that you think is your best. Notice what is good about that letter. • Say: Can you make your letter even better? Practise the letter again. Look carefully. Have you improved it?
Apply and practise (8 minutes ×2)
Teach and model (5 minutes ×2)
Use the lesson templates in conjunction with the lesson plans.
Use for Lessons 1–3
Lesson template – Year 1 Unit 1: Lower-case letters
Teacher’s Handbook: Handwriting for Key Stage 1
57
Target:
Letters are correctly orientated
.
Forms capital letters correctly
Forms letters in the bouncy letter family correctly m, n, r, b, p, h
Correct starting point for each letter
Forms letters in the long letter family correctly l, i, t, j, u, y
Writing is legible
Forms letters in the zig-zag letter family correctly v, w, x, z, k
Forms letters in the curly letter family correctly c, a, d, g, o, q, e, s, f
Uses correct pencil grip
Name:
Year 1 termly assessment sheet Teacher’s Handbook: Handwriting for Key Stage 1
Appendix 10
164
collins.co.uk/LittleWandleHandwriting
27
Year 1 Workbook 5: Applying Captial Letters
Unit 2: Applying capital letters
William Winter Wood
Write the letter.
86 28
Unit 2: Applying capital letters
collins.co.uk/findarep
11129_p001_096.indd 86
23/03/2026 17:08
Year 1 Workbook 5: Applying Captial Letters
Capital letter W Write the names.
Letter check-up
87 11129_p001_096.indd 87
Uni
23/03/2026 17:08 collins.co.uk/LittleWandleHandwriting
29
Year 1 Workbook 6: Forming Digits and Words
Numbers 2 and 3 From the butterfly’s head, around its top wing and around its bottom wing.
Write the number.
Number check-up
5 30
collins.co.uk/findarep
11136_p001_090.indd 5
23/03/2026 17:35
U
Year 1 Workbook 6: Forming Digits and Words
Sentence practice Write the sentence.
53 11136_p001_090.indd 53
Uni
23/03/2026 17:35 collins.co.uk/LittleWandleHandwriting
31
Year 1 Workbook 7: Writing Sentences
Unit 6: Words with Phase 5 GPCs
Write the words.
Word check-up
30 32
Unit 2: Applying capital letters
collins.co.uk/findarep
11143_P001_096.indd 30
24/03/2026 17:21
Year 1 Workbook 7: Writing Sentences
Sentence practice Write the sentence.
31 11143_P001_096.indd 31
Uni
24/03/2026 17:21 collins.co.uk/LittleWandleHandwriting
33
Year 1 Letter Formation Cards
Trigraphs
air
chair in the air
© 2026 HarperCollinsPublishers. © 2026 Wandle Learning Trust. All rights reserved.
34
collins.co.uk/findarep
28493 Y1Cards.indd 175
16/03/2026 12:20
Year 1 Letter Formation Cards
Words with Phase 5 GPCs
© 2026 HarperCollinsPublishers. © 2026 Wandle Learning Trust. All rights reserved.
28493 Y1Cards.indd 205
16/03/2026 12:20 collins.co.uk/LittleWandleHandwriting
35
Year 2 Workbook 8: Joining Letters
Unit 3: Diagonal joins from the baseline to curly letters
ac uc
Are your letter joins smooth?
Draw the pattern.
Write the joined letters.
ac
ac
uc
uc
Letter join check-up
ac uc
48 36
Unit 2: Applying capital letters
collins.co.uk/findarep
Write the sentence.
The big duck quacks again.
Year 2 Workbook 8: Joining Letters
Sentence practice
Additional practice
My backpack had a zig zag tag.
Word check-up
49 collins.co.uk/LittleWandleHandwriting
Uni 37
Year 2 Workbook 9: Develop Fluency in Joining Letters
Unit 7: Punctuation
’
Do you know why we use apostrophes? Can you see what the apostrophe is replacing?
Practise the punctuation mark.
’ ’ Write the sentences.
Where’s Mum? I’m sure she’s at Grandma’s house.
Punctuation check-up
Grandma’s house 4 38
Unit 2: Applying capital letters
collins.co.uk/findarep
ing
Check your joined letters are evenly spaced.
Practise the letter joins.
ing
ing
Write the words.
dancing
jumping
singing
walking
Year 2 Workbook 9: Develop Fluency in Joining Letters
Unit 10: Practise joining words ending in -ing
Word check-up
dancing 14
Unit 2: Applying capital letters collins.co.uk/LittleWandleHandwriting
39
We're here to help! Our sales consultants and customer services teams would be delighted to talk to you about any of our resources to support your teaching. Phone or email us on the details below to arrange a visit, request free samples or receive a bespoke quotation tailored to the needs of your school. Find your local rep: collins.co.uk/findarep
Contact our friendly customer service team 01484 668 148
education@harpercollins.co.uk
Find us online collins.co.uk/LittleWandleHandwriting @CollinsSchools @CollinsPrimary /CollinsPrimary /CollinsEducation /company/CollinsBooks
Aquamarine
LWHS2607 HarperCollins Publishers Ltd is registered in Scotland at 1 Robroyston Gate, Robroyston, Glasgow G33 1JN. Company No. 27389.
Prices: Prices are correct at the time of going to press. E&OE. Collins reserves the right to change these prices without further notification. Paper from sustainable sources and ink made from natural materials. Please recycle.