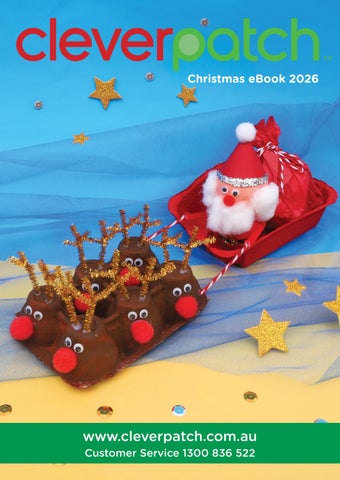
Christmas eBook 2026
www.cleverpatch.com.au Customer Service 1300 836 522
5 jolly craft ideas for the Christmas season! Contents
Santa Stuck in a Chimney....................................................................... 3 Egg Carton Santa Sleigh.....................................................................4-5 Flowerpot Reindeer.................................................................................. 6 Hanging Bead Elf Frame......................................................................... 7 Patty Pan Tree Ornament....................................................................... 8 Templates...................................................................................................... 9 We’ve supplied FREE templates just for you! Print as many times as you like.
KEY: Adult supervision is recommended when using scissors.
GLUE GUN
Adult supervision is recommended when using a glue gun.
Keep an eye out for these icons throughout the eBook and be sure to consult an adult if needed.
CleverPatch Pty Ltd ABN 48 130 866 885
ISBN:
978-1-922894-77-9
Live Chat:
www.cleverpatch.com.au
Submit an Enquiry: www.cleverpatch.com.au/contact
NEW Christmas Catalogue out now! 2
Phone:
1300 836 522
Fax:
1300 244 139
The Patch:
9 Balbu Close, Beresfield, NSW 2322 Australia
Mail:
PO Box 7, Hunter Region Mail Centre, NSW 2310 Australia © CleverPatch ™ 2026 - www.cleverpatch.com.au
Santa Stuck in a Chimney Materials: • Paper Cups – Pack of 20 – 11085 • CleverPatch™ Acrylic Paint Tubes – 100ml – Set of 12 Colours – 20811 • Decofoam Balls – 7cm – Pack of 10 – 12267 • Decofoam Balls – 3cm – Pack of 50 – 12265 • Cotton Balls – White – Pack of 240 – 11252 • Chenille Stems – Christmas – Pack of 200 – 11551 • CleverPatch™ Glitter Shaker – Gold – 9g – 17723 • CleverPatch™ Tacky Glue – 250ml – 16494 • CleverPatch™ Cover Paper Assorted – A4 – Pack of 275 – 13652 • Other materials required: Scissors, paint brushes and templates (page 9).
1. Paint a brick pattern onto a paper cup by painting rectangles using different shades of brown. Allow to dry.
2. Glue some cotton balls around the cup, just below the rim. Allow to dry.
3. Paint two 3cm decofoam balls black and one 7cm decofoam ball red. Allow to dry.
4. Wrap a red chenille stem around your finger and carefully pull it off to create a coil spring. Straighten both of the ends. Repeat to create another spring.
5. Push a black decofoam ball on one end of each of the chenille stem springs. These will be your legs.
6. Gently push the other end of each chenille stem leg into the red decofoam ball as shown. Print and trace the templates on page 9 onto black paper. Cut them out.
7. Apply glue to the buckle piece and shake on some glitter. Allow to dry. Glue the buckle to the middle of the belt. Wrap the belt around the red decofoam ball, securing with glue. Allow to dry.
8. Insert the decofoam body into the paper cup. Your Santa Stuck in a Chimney is now ready to display!
© CleverPatch ™ 2026 - www.cleverpatch.com.au
3
Egg Carton Santa Sleigh Materials:
GLUE GUN
• Egg Carton – 6 Wells – 22267
• Wiggle Eyes Black – 0.7cm – Pack of 100 – 16477
• CleverPatch™ Acrylic Paint Tubes – 100ml Set of 12 Colours – 20811
• CleverPatch™ Glue Gun Starter Set – 12505
• Chenille Stems – Tinsel Gold – Pack of 100 – 11552
• CleverPatch™ Cover Paper – A4 – Red – Pack of 100 18160
• Chenille Stems – Christmas – Pack of 200 – 11551
• Tissue Paper – Red – Pack of 5 – 11908
• Decofoam Balls – 5cm – Pack of 100 – 10846
• Baker’s Twine – Red & White – 100 Metres – 15076
• Pom Poms – Assorted – Pack of 400 – 12297
• CleverPatch™ Glitter Shakers – 9g – Set of 7 Colours – 17914
• Cotton Balls – White – Pack of 240 – 11252
• Other materials required: Scissors, ruler, paint brushes and template (page 9).
1. Cut the lid off the egg carton so you have two halves. Paint the lid red and the base brown using acrylic paint. Make sure you paint the top and bottom of both pieces. Allow to dry.
2. Glue a small red pom pom and two wiggle eyes to each egg cup as shown. Allow to dry.
3. Take a gold chenille stem and cut four 5cm pieces. Twist one piece around another, leaving some length on each end and bending them upwards as shown. Repeat with the remaining two pieces.
4. Glue the antlers to an egg cup, holding in place until the glue starts to dry. Allow to dry.
5. Repeat Steps 3 & 4 to give the remaining five reindeer antlers. Allow to dry.
6. Using two decofoam balls, paint one red and another one a skin tone. We mixed red, yellow, white and a little bit of blue to create a skin tone. Allow to dry.
7. Glue the two decofoam balls together as shown. Allow to dry.
8. Glue two wiggle eyes and a small red pom pom onto the front to create a face. Allow to dry.
9. Lightly pull apart some cotton balls and glue around the face to create a beard. Allow to dry.
4
© CleverPatch ™ 2026 - www.cleverpatch.com.au
Ho Ho Ho! Merry Christmas!
Super cute Christmas decor to display!
10. Print and trace the template on page 9 onto red cover paper and cut out. Overlap the edges to create a cone shape and secure with glue. Allow to dry.
11. Glue a small white pom pom to the point of the cone and glue some silver glitter around the edge of the brim to complete Santa’s hat. Allow to dry.
12. Glue the hat onto Santa’s head. Allow to dry. Cut two 5cm pieces of red chenille stem and push into each side of Santa’s body. Use black paint, glue and gold glitter to create a belt. Allow to dry.
13. Glue Santa to the inside of the egg carton lid at the front. Allow to dry.
14. Cut a 30 x 30cm piece of red tissue paper. Place a handful of cotton balls into the middle of the tissue paper square.
15. Gather all the sides of the tissue paper together and twist lightly to hold the cotton balls. Secure and tie together with twine. This will be Santa’s sack.
16. Glue Santa’s Sack to the egg carton lid behind Santa. Allow to dry.
17. Cut two 6cm lengths of twine. Glue one end to Santa’s arm and the other end to the Reindeer egg carton base. Repeat for the second length on the other side. Your Egg Carton Santa Sleigh is now complete!
© CleverPatch ™ 2026 - www.cleverpatch.com.au
5
Flowerpot Reindeer Materials:
GLUE GUN
• Terracotta Flowerpot – 15317 • CleverPatch™ Paint Markers – Bullet Tip – Primary Pack of 8 Colours – 21583 • Wiggle Eyes Black – 1.5cm – Pack of 100 – 10816 • Christmas Pom Poms – Glitter – Pack of 100 – 16097 • Chenille Stems – Tinsel Gold – Pack of 100 – 11552 • Cup Sequins – Multi – 50g Pack – 11126 • Felt Squares – Pack of 100 – 10785 • CleverPatch™ Glue Gun Starter Set – 12505 • Other materials required: Scissors and template (page 9).
1. Flip over the flowerpot and colour the bottom with paint markers as shown. Allow to dry.
2. Glue some sequins to the bottom section and allow to dry.
3. Glue a pom pom onto the pot as a nose. Glue on a pair of wiggle eyes above the pom pom. Allow to dry.
4. Print and trace the templates on page 9 onto brown felt. Cut out the felt shapes. Pinch the straight end of each ear and glue together. Hold until the glue starts to set. Allow to dry.
5. Cut two 7cm pieces of gold chenille stem. Twist one piece around another, leaving some length on each end and bending them upwards. Repeat so you have two antlers.
6. Glue the antlers and ears to the top of the flowerpot, holding in place until they begin to dry. Allow to dry.
7. Your Flowerpot Reindeer is now ready to display!
6
© CleverPatch ™ 2026 - www.cleverpatch.com.au
Hanging Bead Elf Frame Materials: • Wooden Circle Frames – Pack of 20 – 11680 • CleverPatch™ Acrylic Paint Tubes – 100ml Set of 12 Colours – 20811 • Christmas Rhinestones – 100g Pack – 20925
• Pom Poms – Assorted Pack of 400 – 12297 • Wiggle Eyes Black – 0.7cm Pack of 100 – 16477
• CleverPatch™ Tacky Glue – 250ml – 16494
• CleverPatch™ Cover Paper Assorted A4 – Pack of 275 – 13652
• Chenille Stems – Christmas – Pack of 200 11551
• Other materials required: Scissors, paint brushes and template (page 9).
• Pony Beads – Christmas – 500g Tub – 21371 • Wooden Beads – Natural – 340g Tub 10841
1. Decorate the circle frame with paint and allow to dry. Glue on some Christmas rhinestones. Allow to dry.
2. Paint one large and two small wooden beads green. Allow to dry.
3. Thread a chenille stem through the large wooden bead. Add six pony beads on either side. Twist the ends around the last beads to secure. Cut off the excess.
4. Bend the beaded arms into a hook shape.
5. Fold a chenille stem in half. Thread six pony beads and one small wooden bead onto each side.
6. Twist the ends around the wooden beads to secure. Cut off the excess.
7. Glue two wiggle eyes onto a large wooden bead, then paint a nose and smile. Allow to dry. Print and trace the template on page 9 onto green cover paper and cut out. Overlap the edges to create a cone shape and secure with glue. Allow to dry.
8. Glue the head and legs to the green body bead. Allow to dry. Glue the hat to the top of the head bead. Glue a small pom pom to the top of the hat. Allow to dry.
9. Attach the elf to your frame as shown, by securing its hands to the frame with glue. Your Hanging Bead Elf Frame is now ready to display!
© CleverPatch ™ 2026 - www.cleverpatch.com.au
7
Patty Pan Tree Ornament Materials: • Mini Patty Pans – Christmas – Pack of 1,000 – 12655 • Patty Pans – Bright – Pack of 1,000 – 21155 • Foam Glitter Star Stickers – Assorted – Pack of 168 – 16842 • Christmas Rhinestones – 100g Pack – 20925 • Self-Adhesive Rhinestones – Assorted Colours Pack of 540 – 20193 • CleverPatch™ Tacky Glue – 250ml – 16494 • Christmas Ribbons – Assorted – 35g Pack – 17992 • Other materials required: Glue brushes and scissors.
1. Pick out three patty pans in any colours you’d like. Make sure you have one mini and two regular size ones.
2. Fold the patty pans in half and flatten.
3. Stack the patty pans on top of each other, with the small one on top. Glue each layer together. Allow to dry.
4. Decorate the patty pans however you’d like using rhinestones. Attach the non-adhesive ones with glue and allow to dry.
5. Attach a foam glitter star sticker to the top patty pan. Only remove and tear off the bottom half of the backing paper.
6. Cut a 12cm length of ribbon and tie the two ends together. Glue the knot to the back of the star. Allow to dry.
7. Your Patty Pan Tree Ornament is now ready to display on your tree!
8
© CleverPatch ™ 2026 - www.cleverpatch.com.au
Santa Stuck in a Chimney
Use this template to help you complete the activity on pages 4 and 5.
Use these templates to help you complete the activity on page 3. © CleverPatch™ | cleverpatch.com.au
Egg Carton Santa Sleigh
© ™
h tc
Pa
er
v le
C | u
.a
m
co
h.
tc
pa
er
ev cl
Flowerpot Reindeer Use these templates to help you complete the activity on page 6.
© CleverPatch™
© CleverPatch™
© CleverPatch™
Hanging Bead Elf Frame Use this template to help you complete the activity on page 7. ©
C
le
ve
rP
at
ch
™
|
cl
ev
er
pa
tc
h.
co
m
.a
u
© CleverPatch ™ 2026. Subject to terms of use at www.cleverpatch.com.au
9