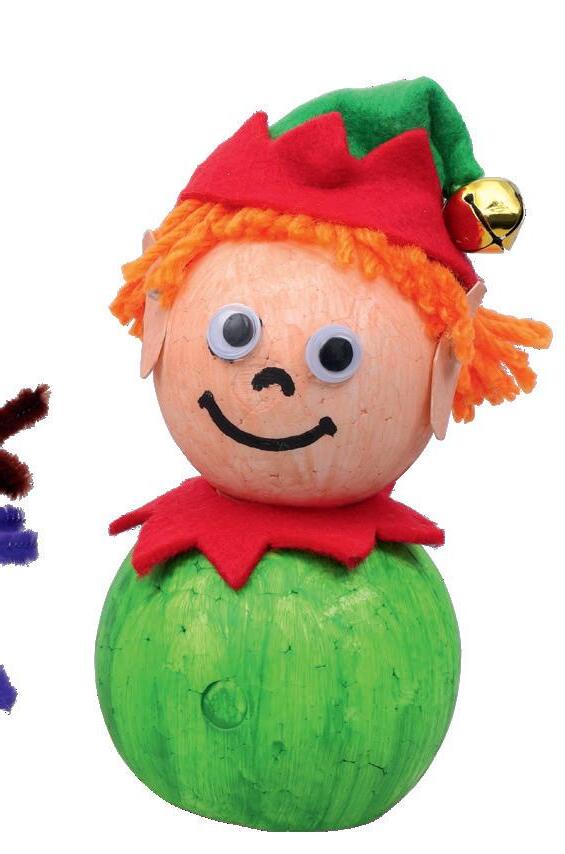

• Tissue Paper – Dark Green – Pack of 5 – 17590
• Decofoam Wreaths – Pack of 10 – 20398
• Christmas Ribbons – Assorted – 35g Pack – 17992
• Pom Poms – Glitter – Pack of 100 – 10829
• CleverPatch™ Tacky Glue – 250ml – 16494
• Other materials required: Scissors and ruler.
The perfect decoration to get you into the Christmas spirit!
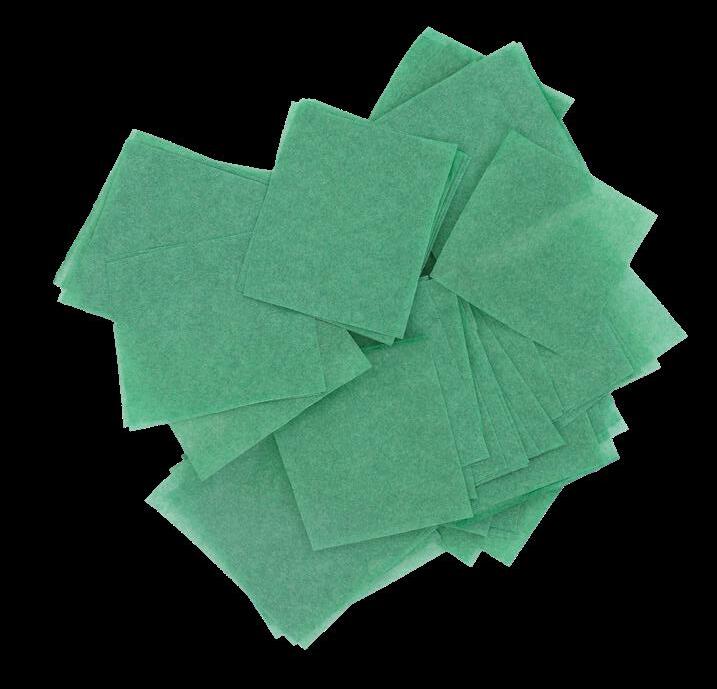
1. Cut three sheets of dark green tissue paper into small 5 x 5cm squares. You may need more squares depending on how close you lay each piece on the wreath.
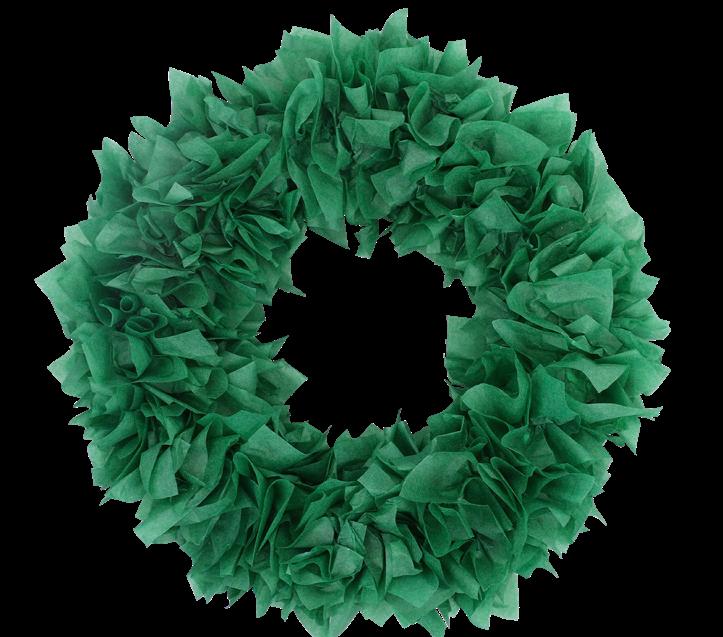
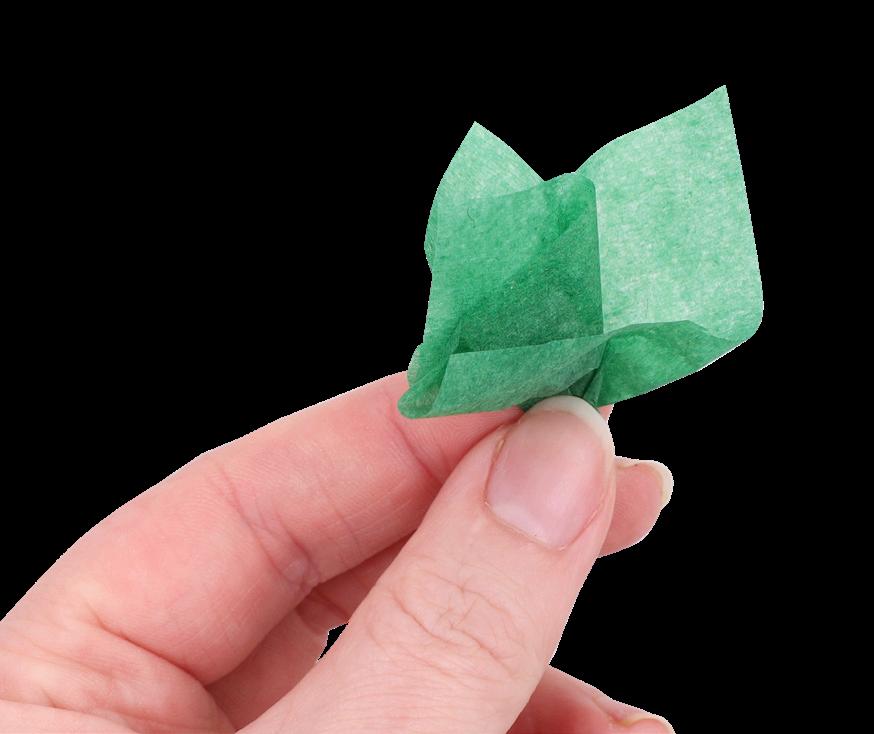
2. Gather the centre of a square piece so the edges bunch up. Squeeze the centre together slightly.
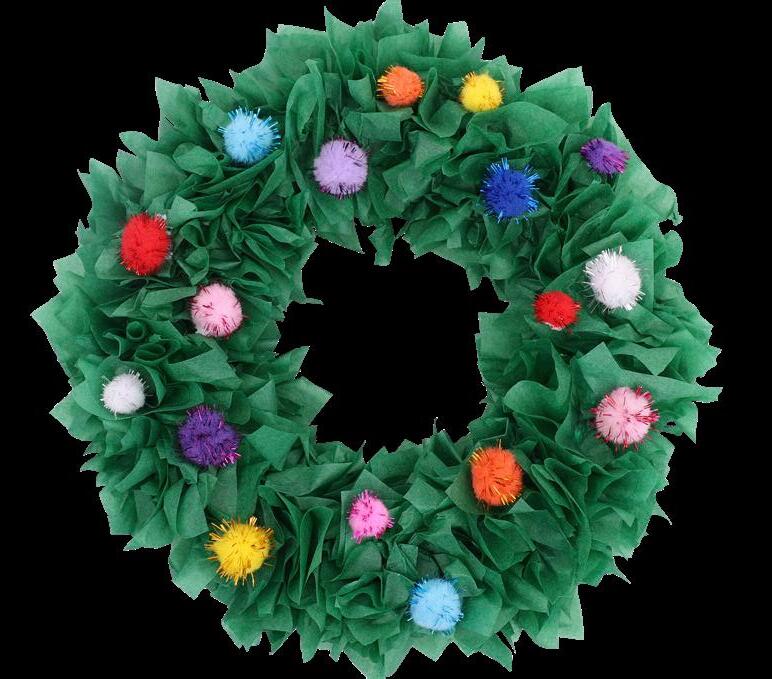
4. Continue adding on each square of tissue paper in the same way until the wreath is completely covered. Allow to dry.
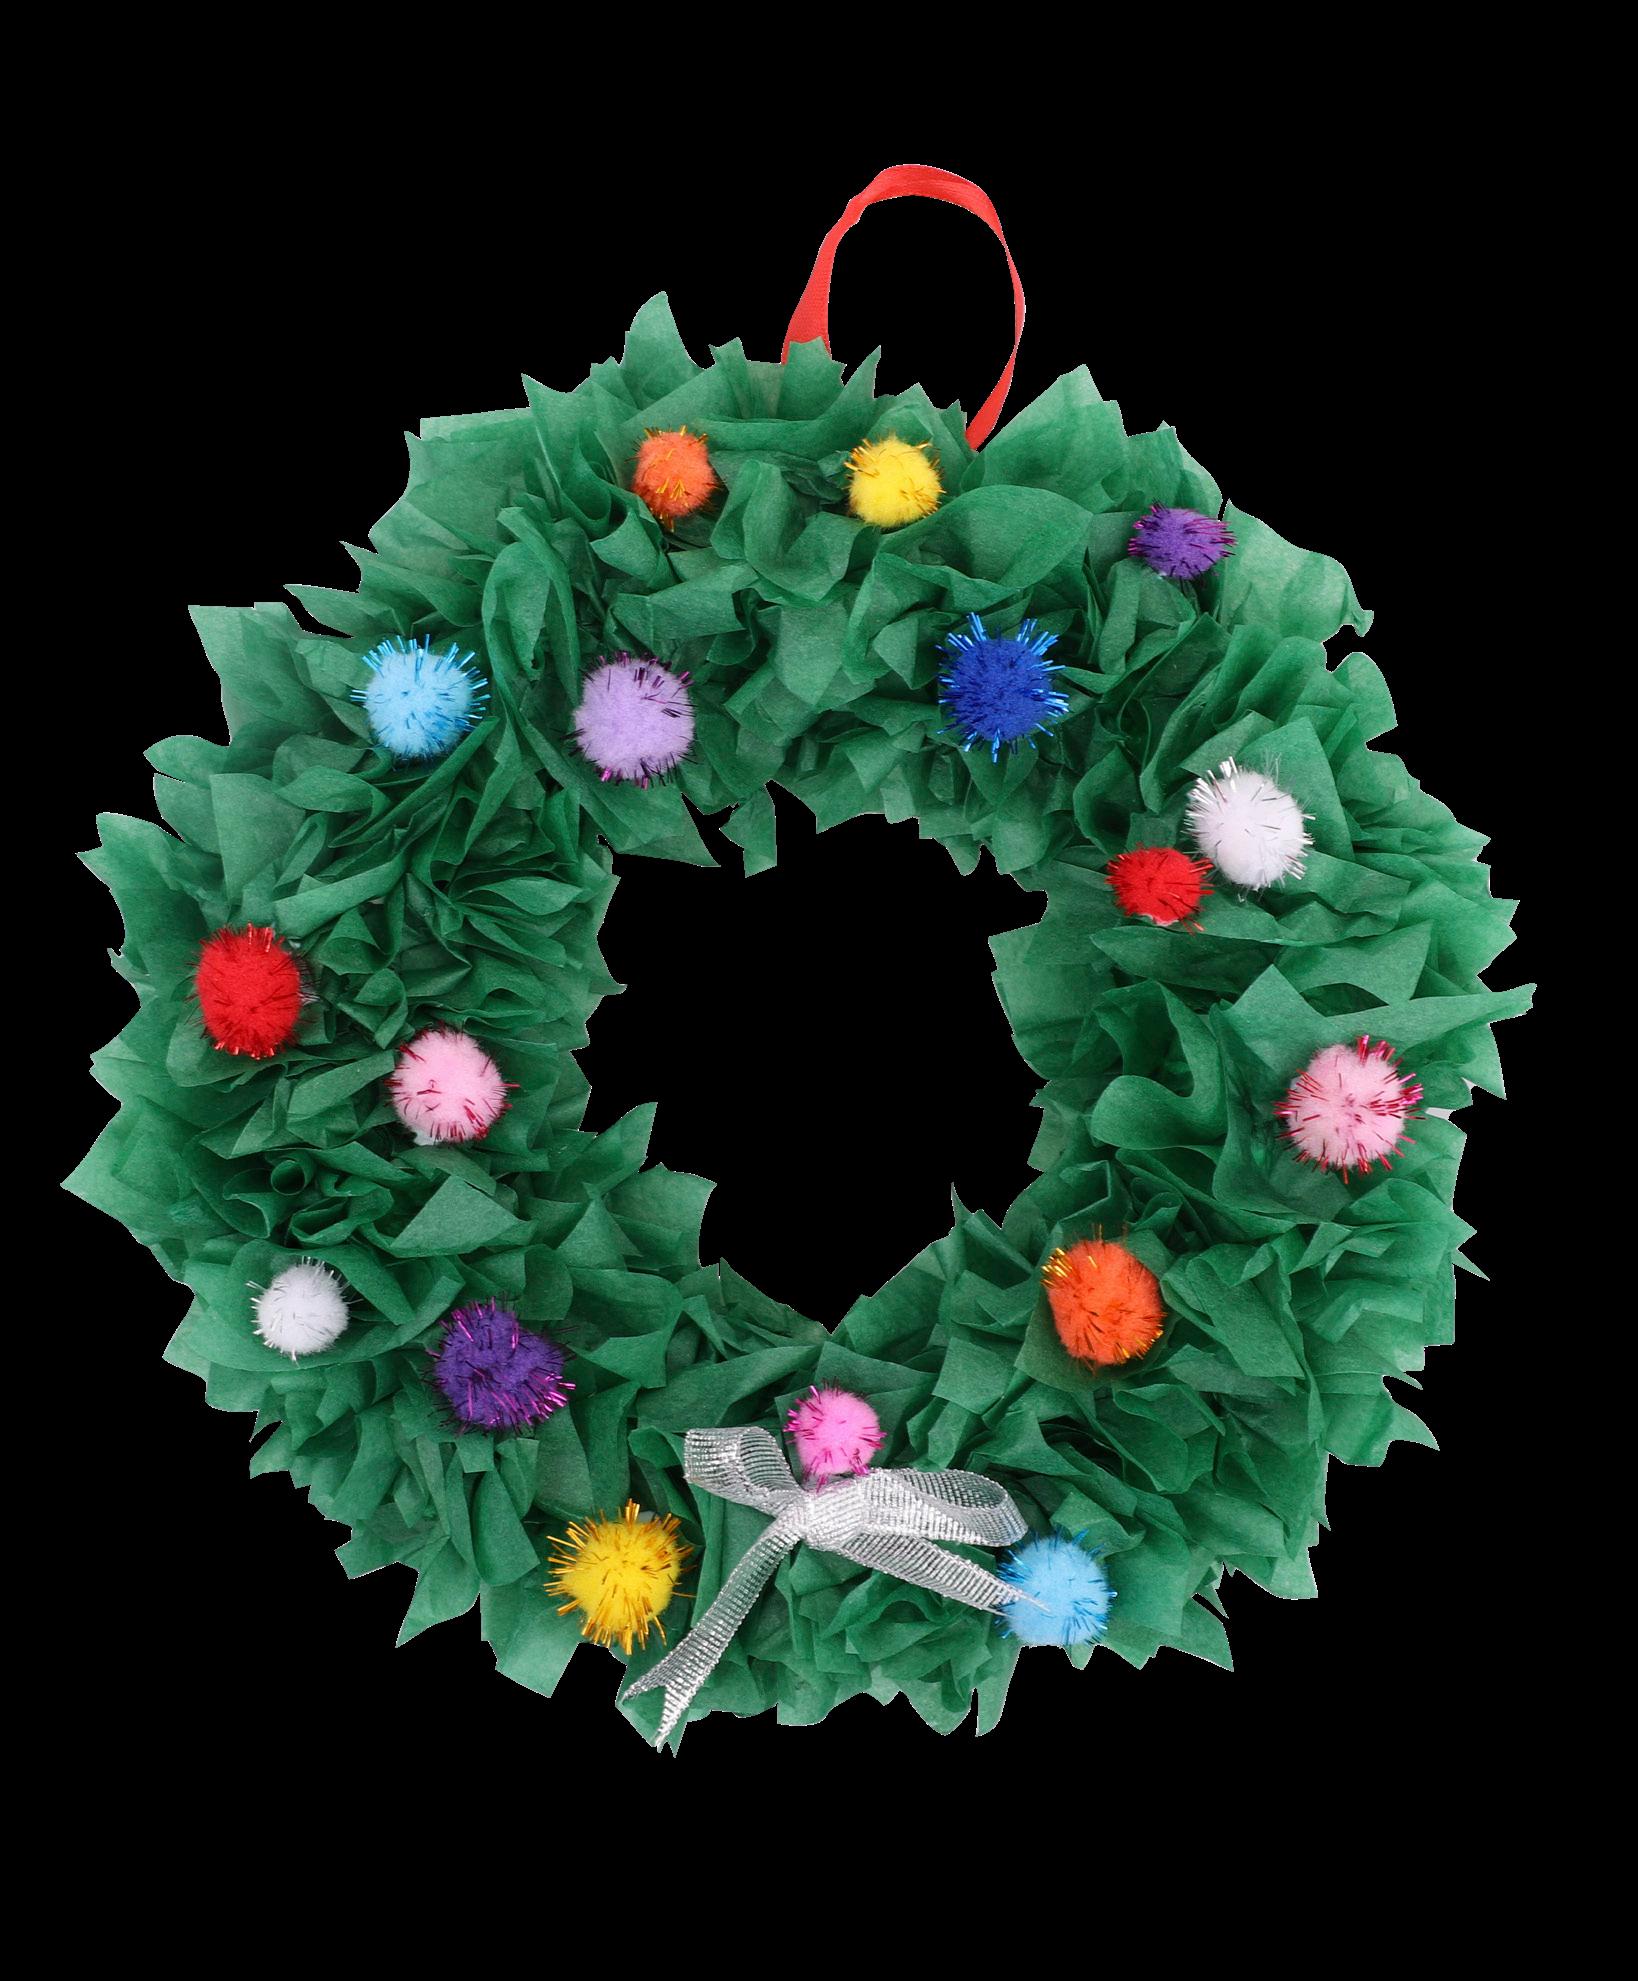
5. Decorate the wreath with pom poms, gluing them in place. Allow to dry.
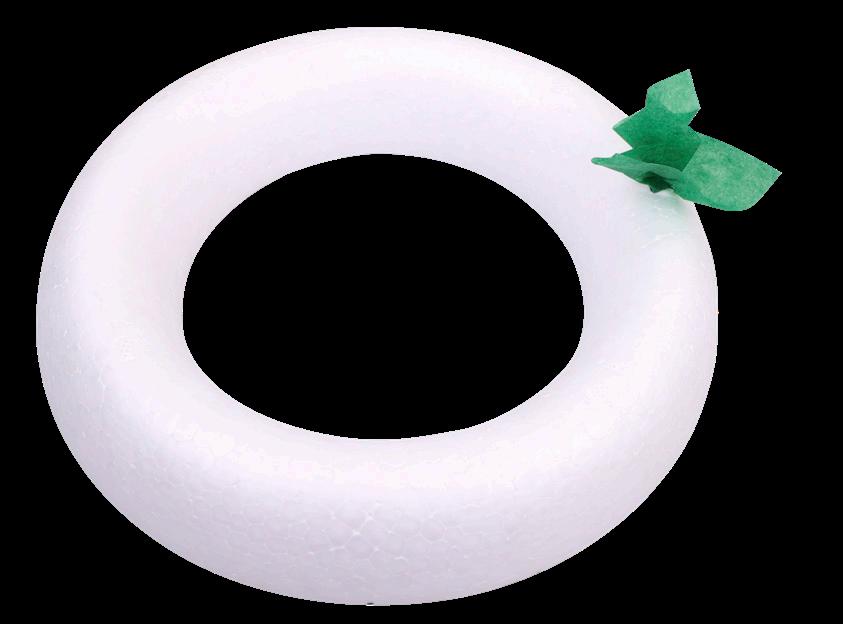
3. Glue the centre of the tissue paper piece to your decofoam wreath using tacky glue.
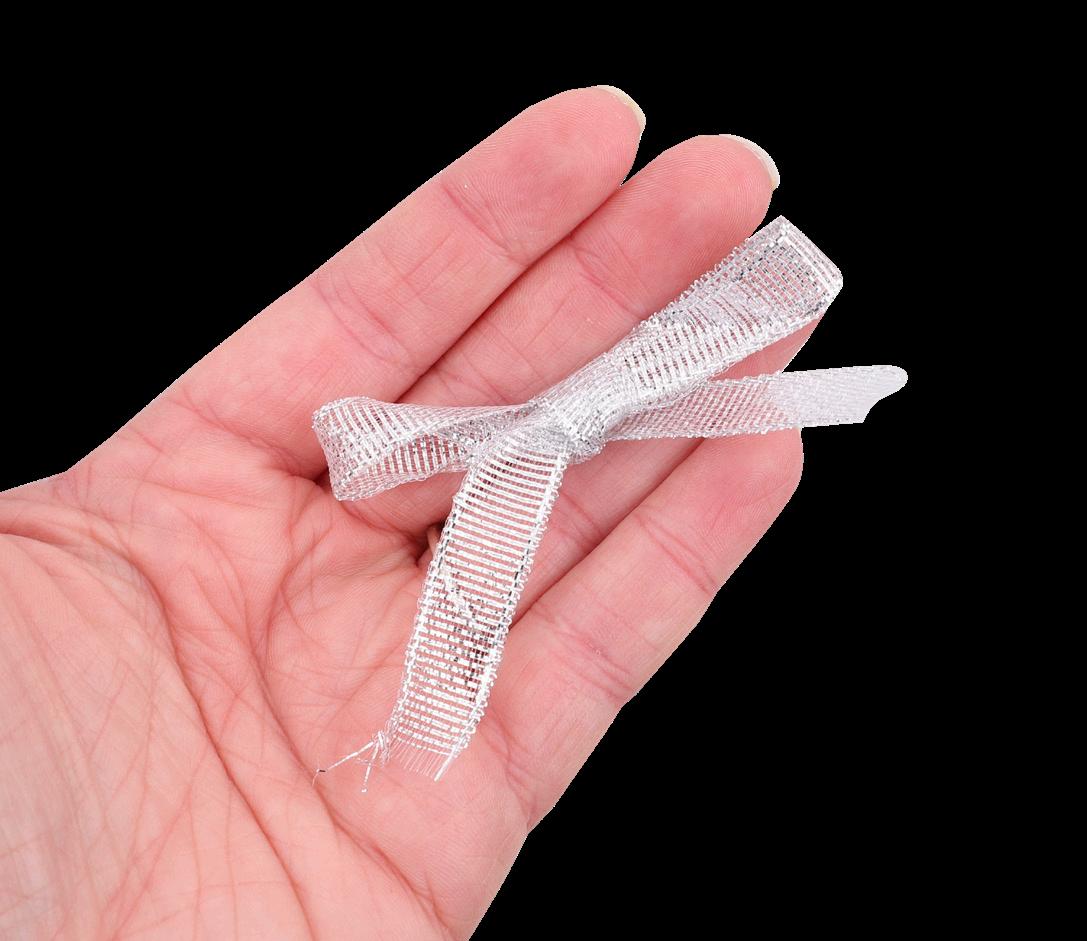
7. Make two loops in another length of ribbon and tie them together with a knot to create a bow.
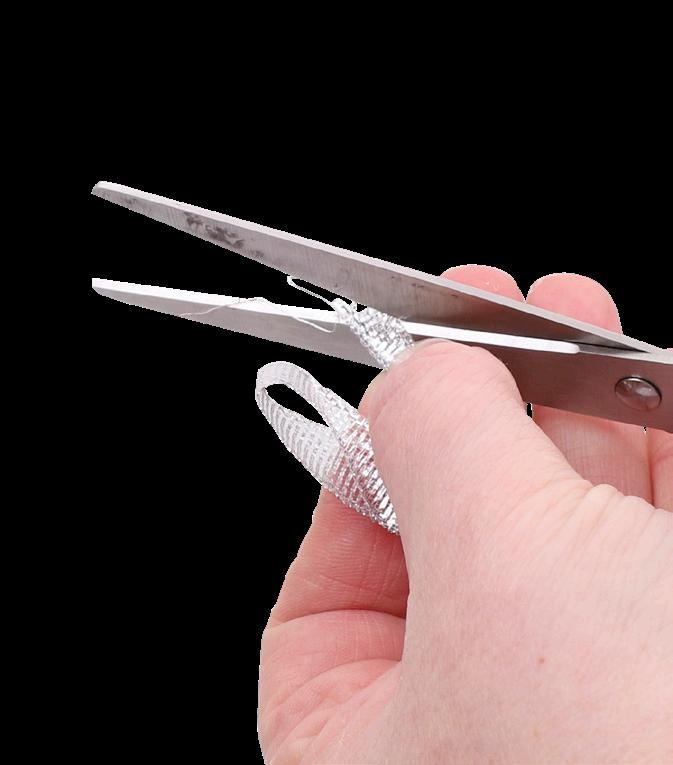
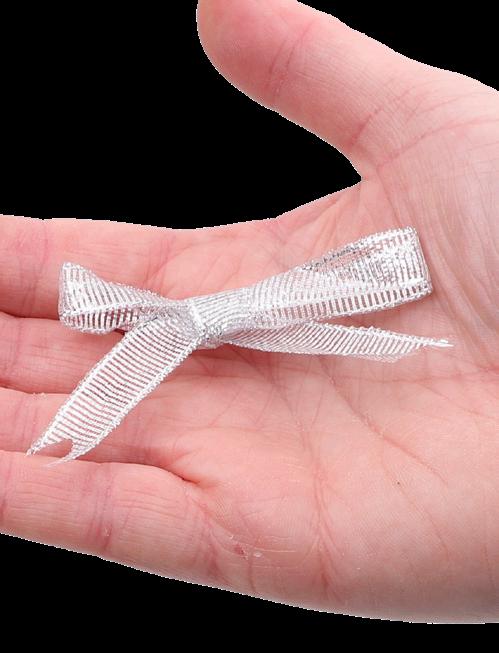
8. Adjust the lengths of the tail ends. Fold an end in half and cut diagonally across the folded edge to create a neat bow end. Repeat for the other end.
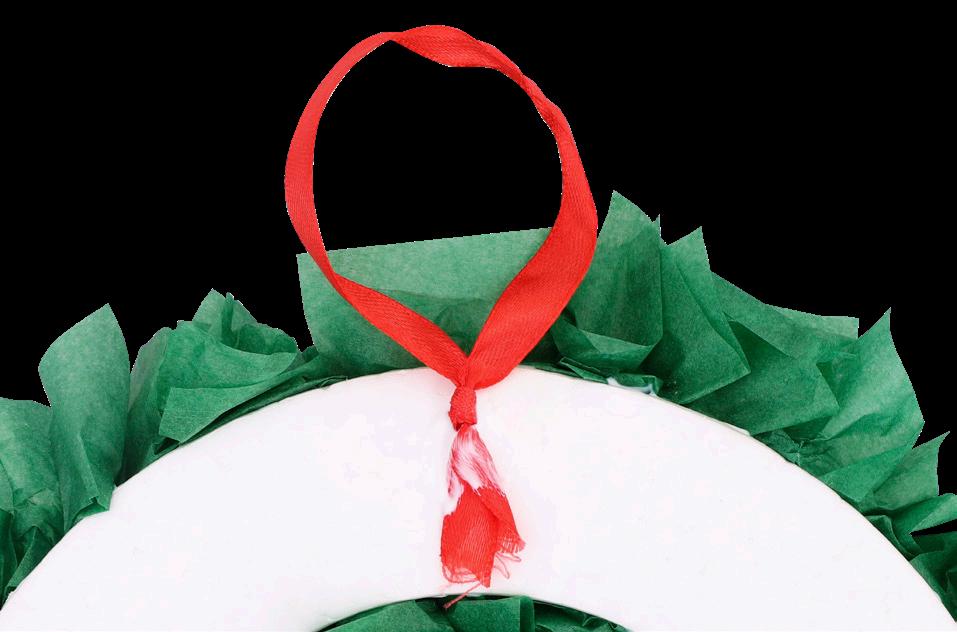
6. Choose a length of ribbon. Tie the ends into a knot to create a loop. Glue the knot to the back of the wreath to create a hanger and allow to dry.

9. Glue the bow to the bottom of your wreath and allow to dry. Your Tissue Paper Wreath is now ready to hang!
• Decofoam Character Shapes Pack of 10 – 21372
• Chenille Stems – Animal Pack of 100 – 21116
• Pom Poms – Assorted Pack of 150 – 16600
• Wiggle Eyes Black – 1cm Pack of 100 – 10815
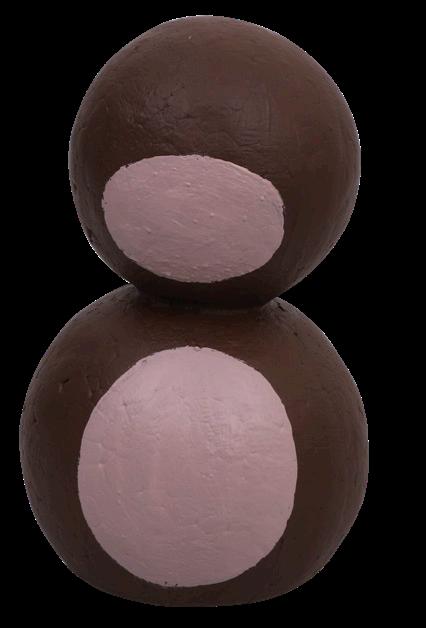
1. Mix black and burnt sienna paint to create dark brown. Paint a decofoam character shape using the dark brown mixture. Allow to dry. Add white paint to the dark brown and paint ovals for the reindeer’s face and belly, as shown. Allow to dry.
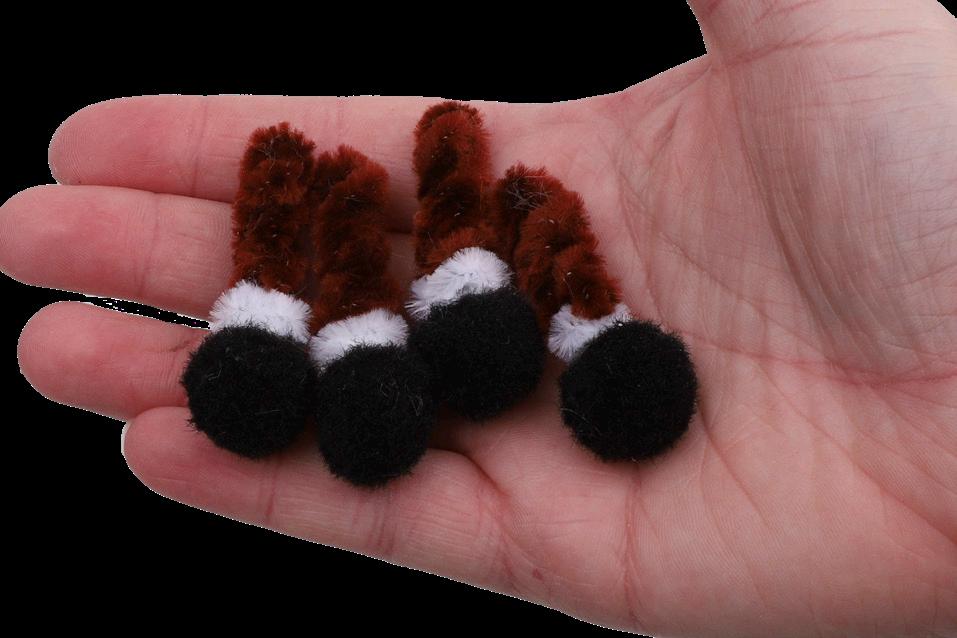
4. Insert the white chenille stem end into a black pom pom. Glue in place to secure and allow to dry. Repeat steps 2-4 three more times to create four legs in total.
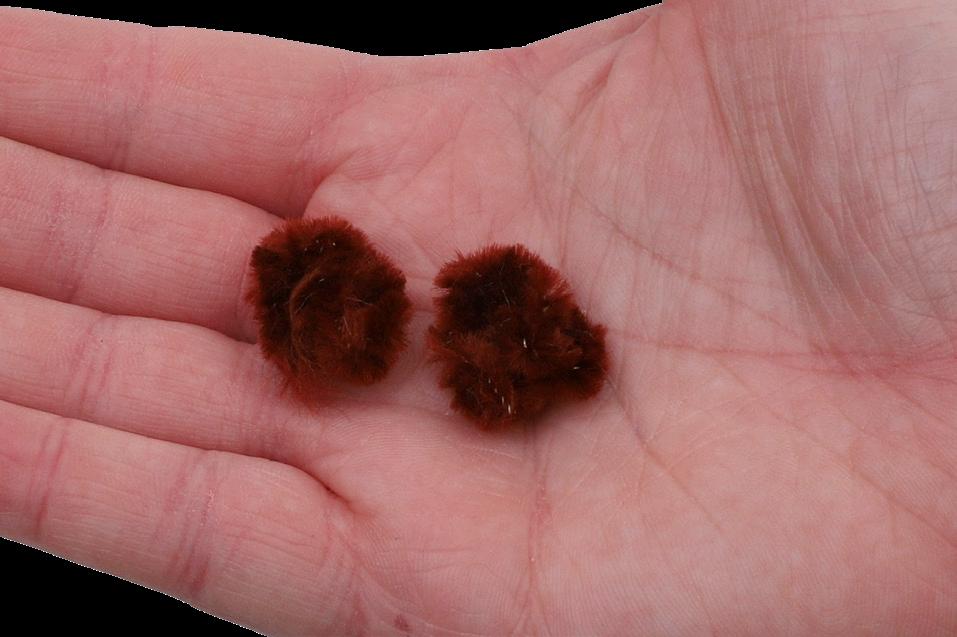
7. Cut another chenille stem in half and fold one piece in half and twist. Fold in half two more times, twisting between each fold. Fold a fourth time to create a small ear shape. Repeat with the other piece - you now have two ears!
• Christmas Ribbons – Assorted 35g Pack – 17992
• CleverPatch™ Acrylic Paint Tubes 75ml – Set of 14 Colours – 20811
• CleverPatch™ Tacky Glue 250ml – 16494
• Other materials required: Scissors, paint brushes and ruler.
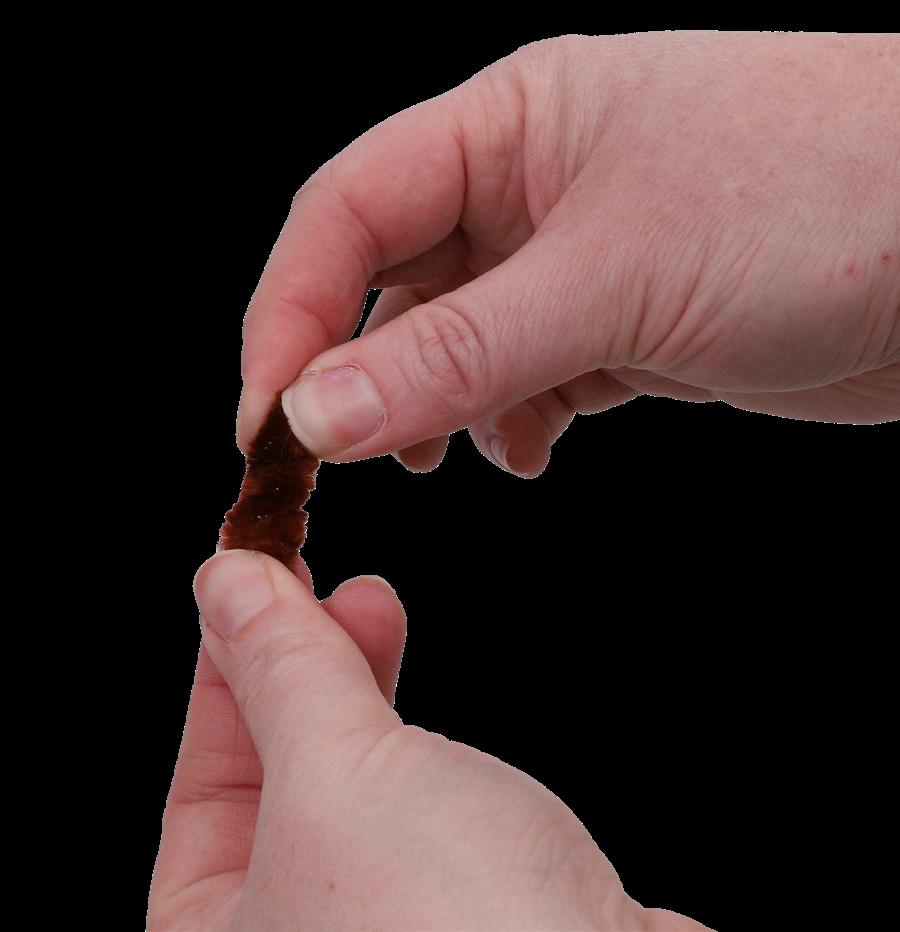
2. Fold a brown chenille stem in half and twist together until a tight loop is formed. Fold in half again and twist together in the same way. Fold in half a third time and twist together. This will be a leg for the reindeer.
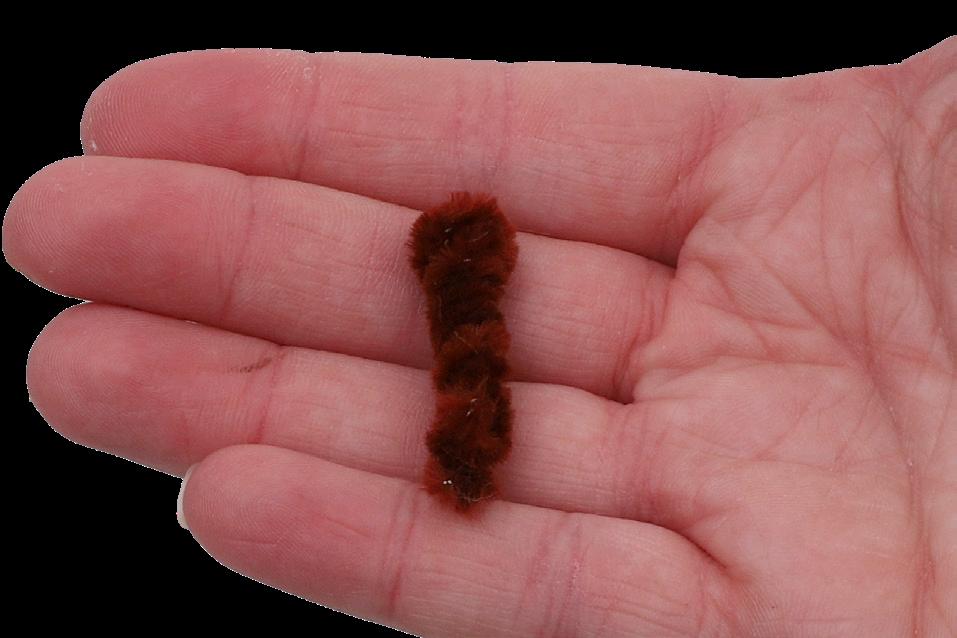
5. Cut another brown chenille stem in half. Fold one piece in half and twist together. Fold in half one more time and twist together.
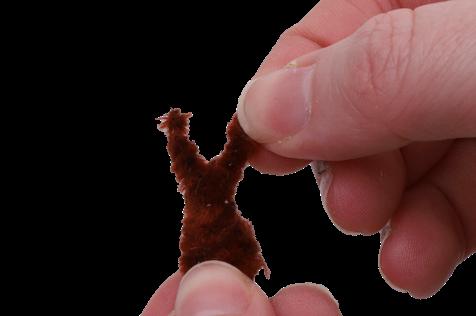
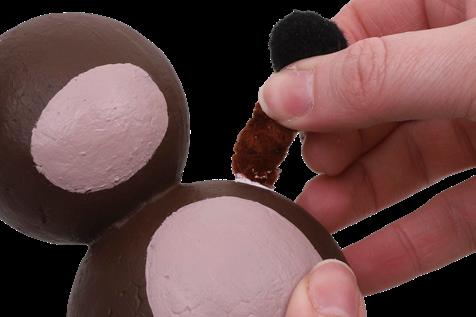
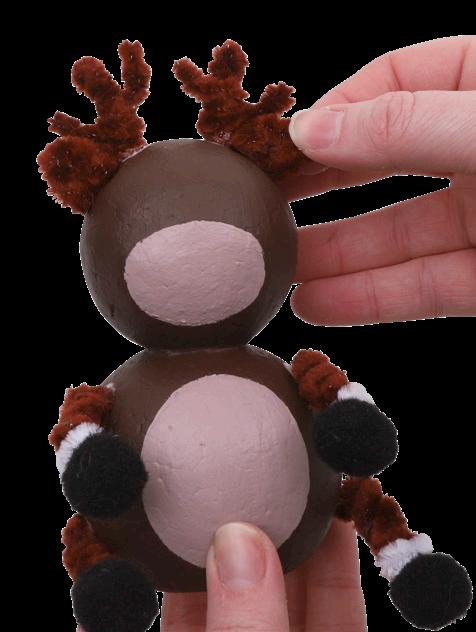
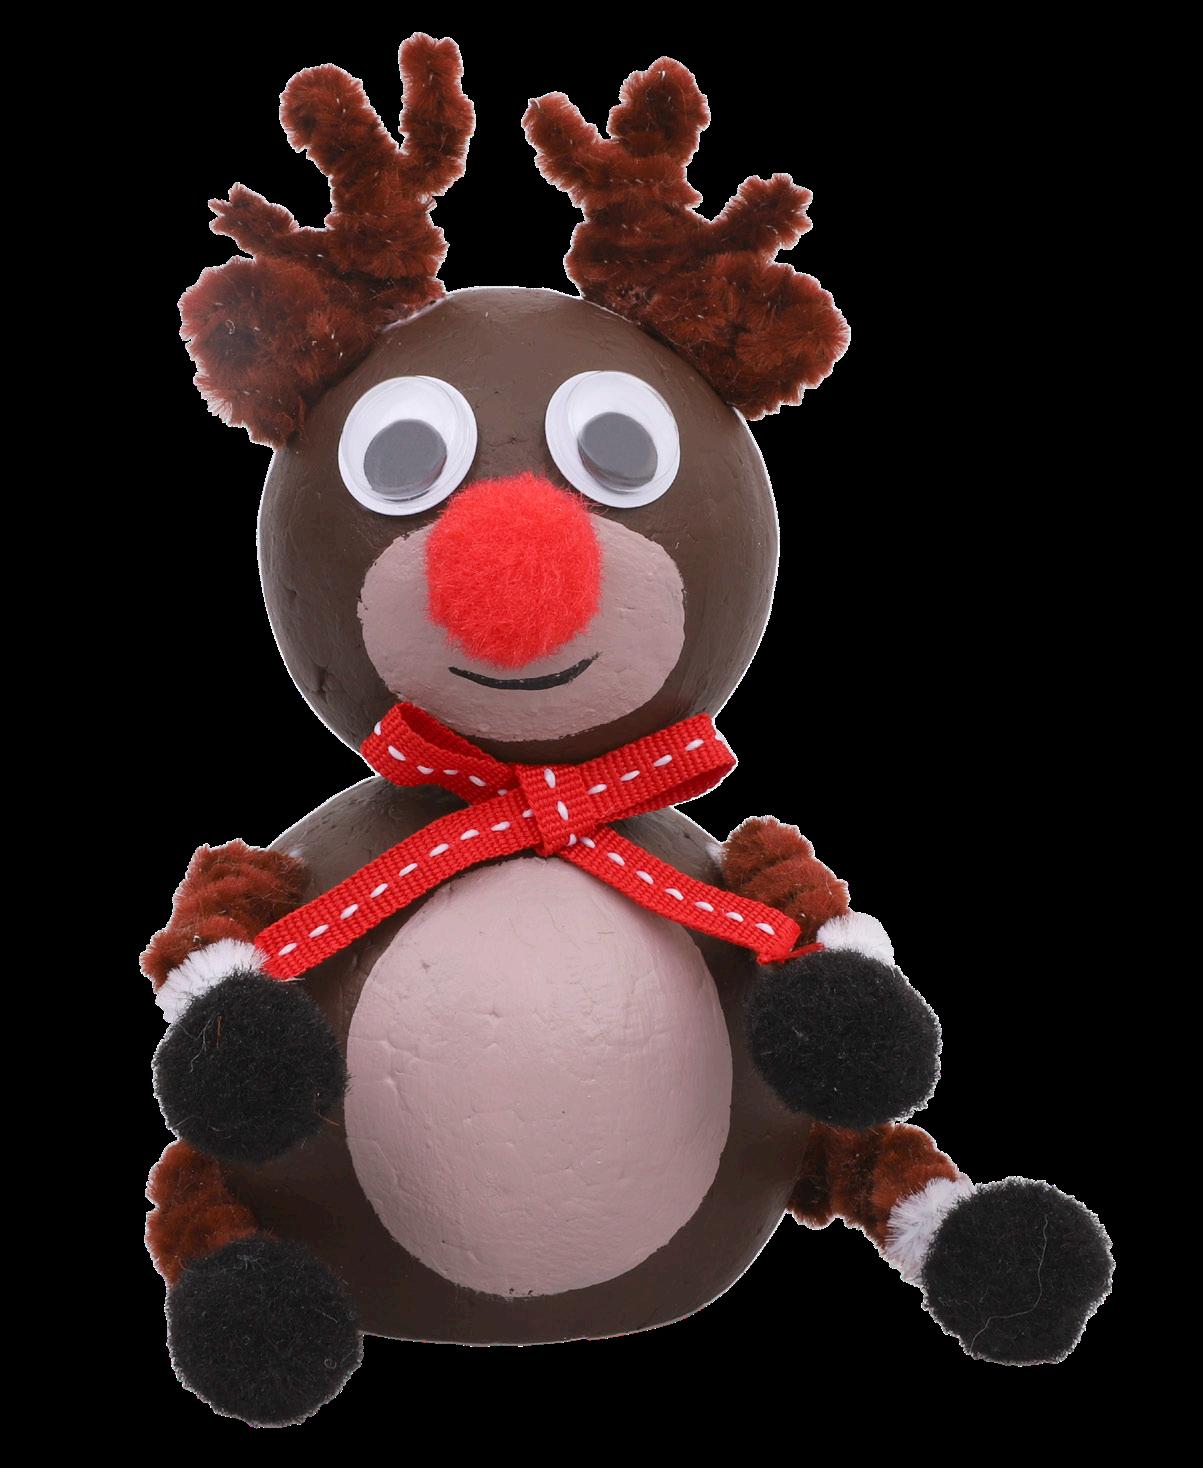
8. Cut a 2cm length of a brown chenille stem and insert into a loop in the end of a leg. Twist the ends and add glue. Push the twisted ends into the side of the decofoam. Repeat this step to attach the remaining legs, ears and antlers. Allow to dry.
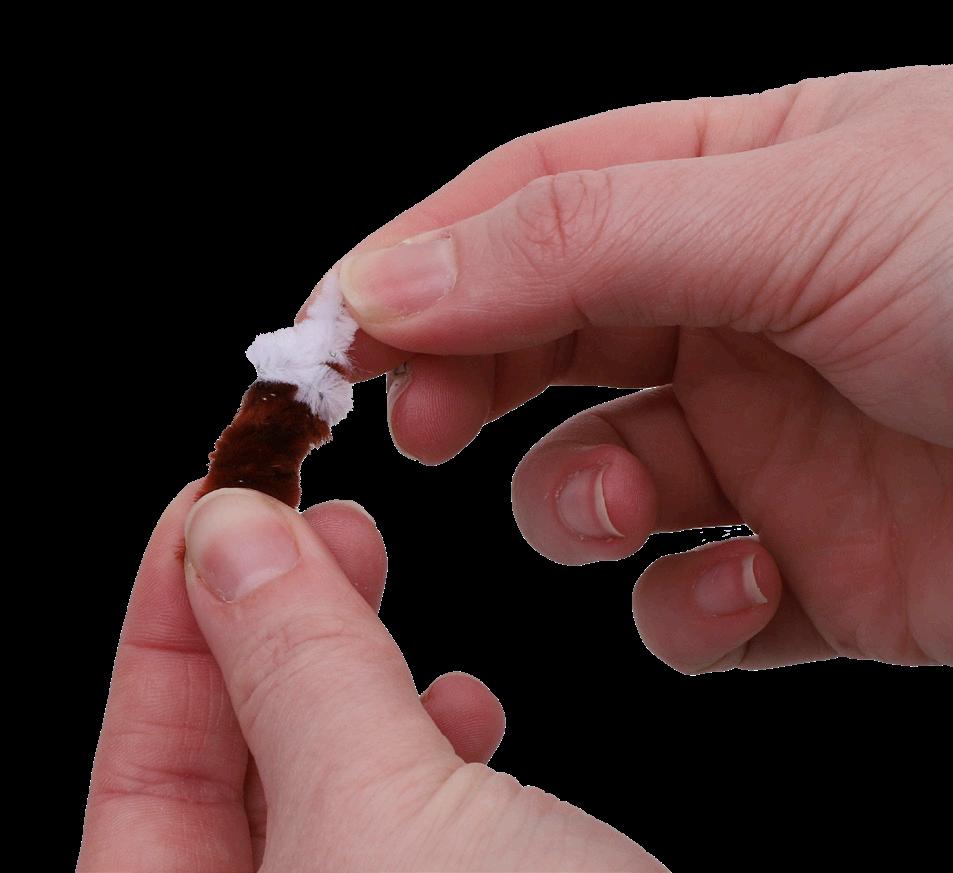
3. Thread a white chenille stem end about 1.5cm through a loop in one end of the leg. Bend the end up then wrap the longer end around twice. Cut the excess off the longer end and set the remainder aside.
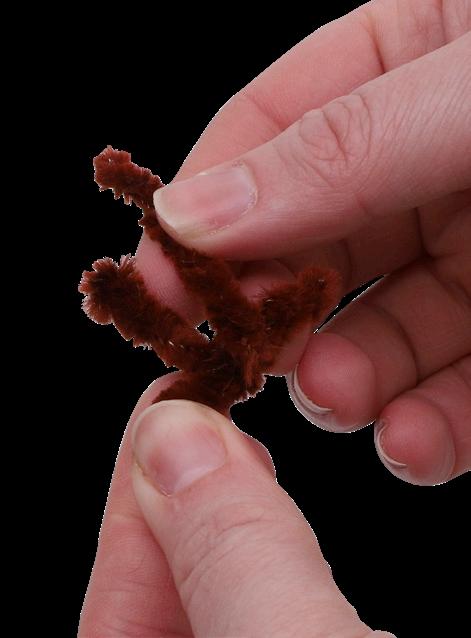
6. Fold the second piece in half and twist together. Wrap this half twice around the first half, leaving a small tail on each end. Position the ends to create an antler shape. Repeat steps 5 and 6 to create a second antler.
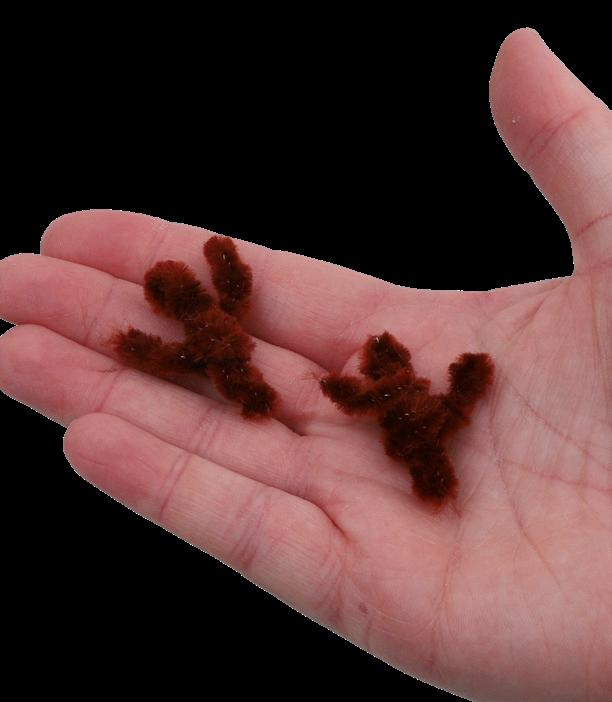
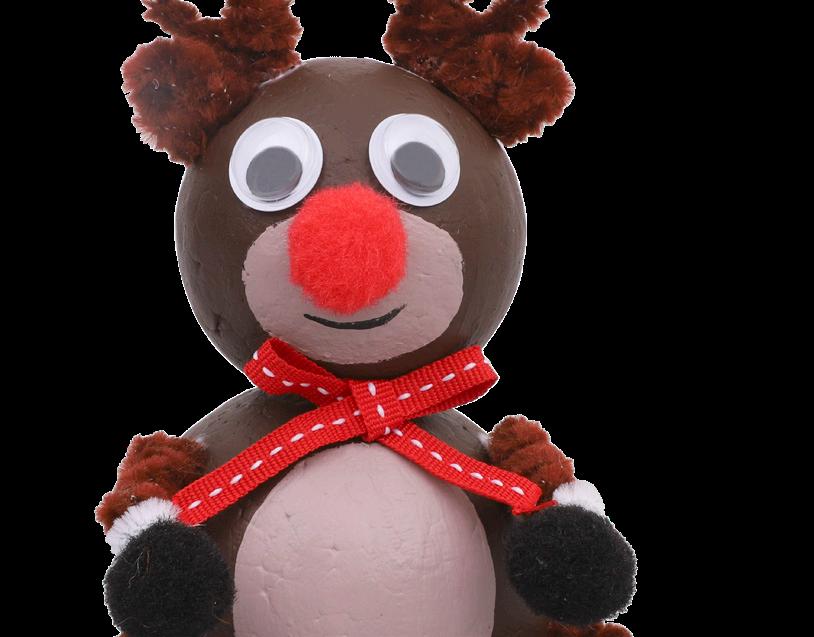
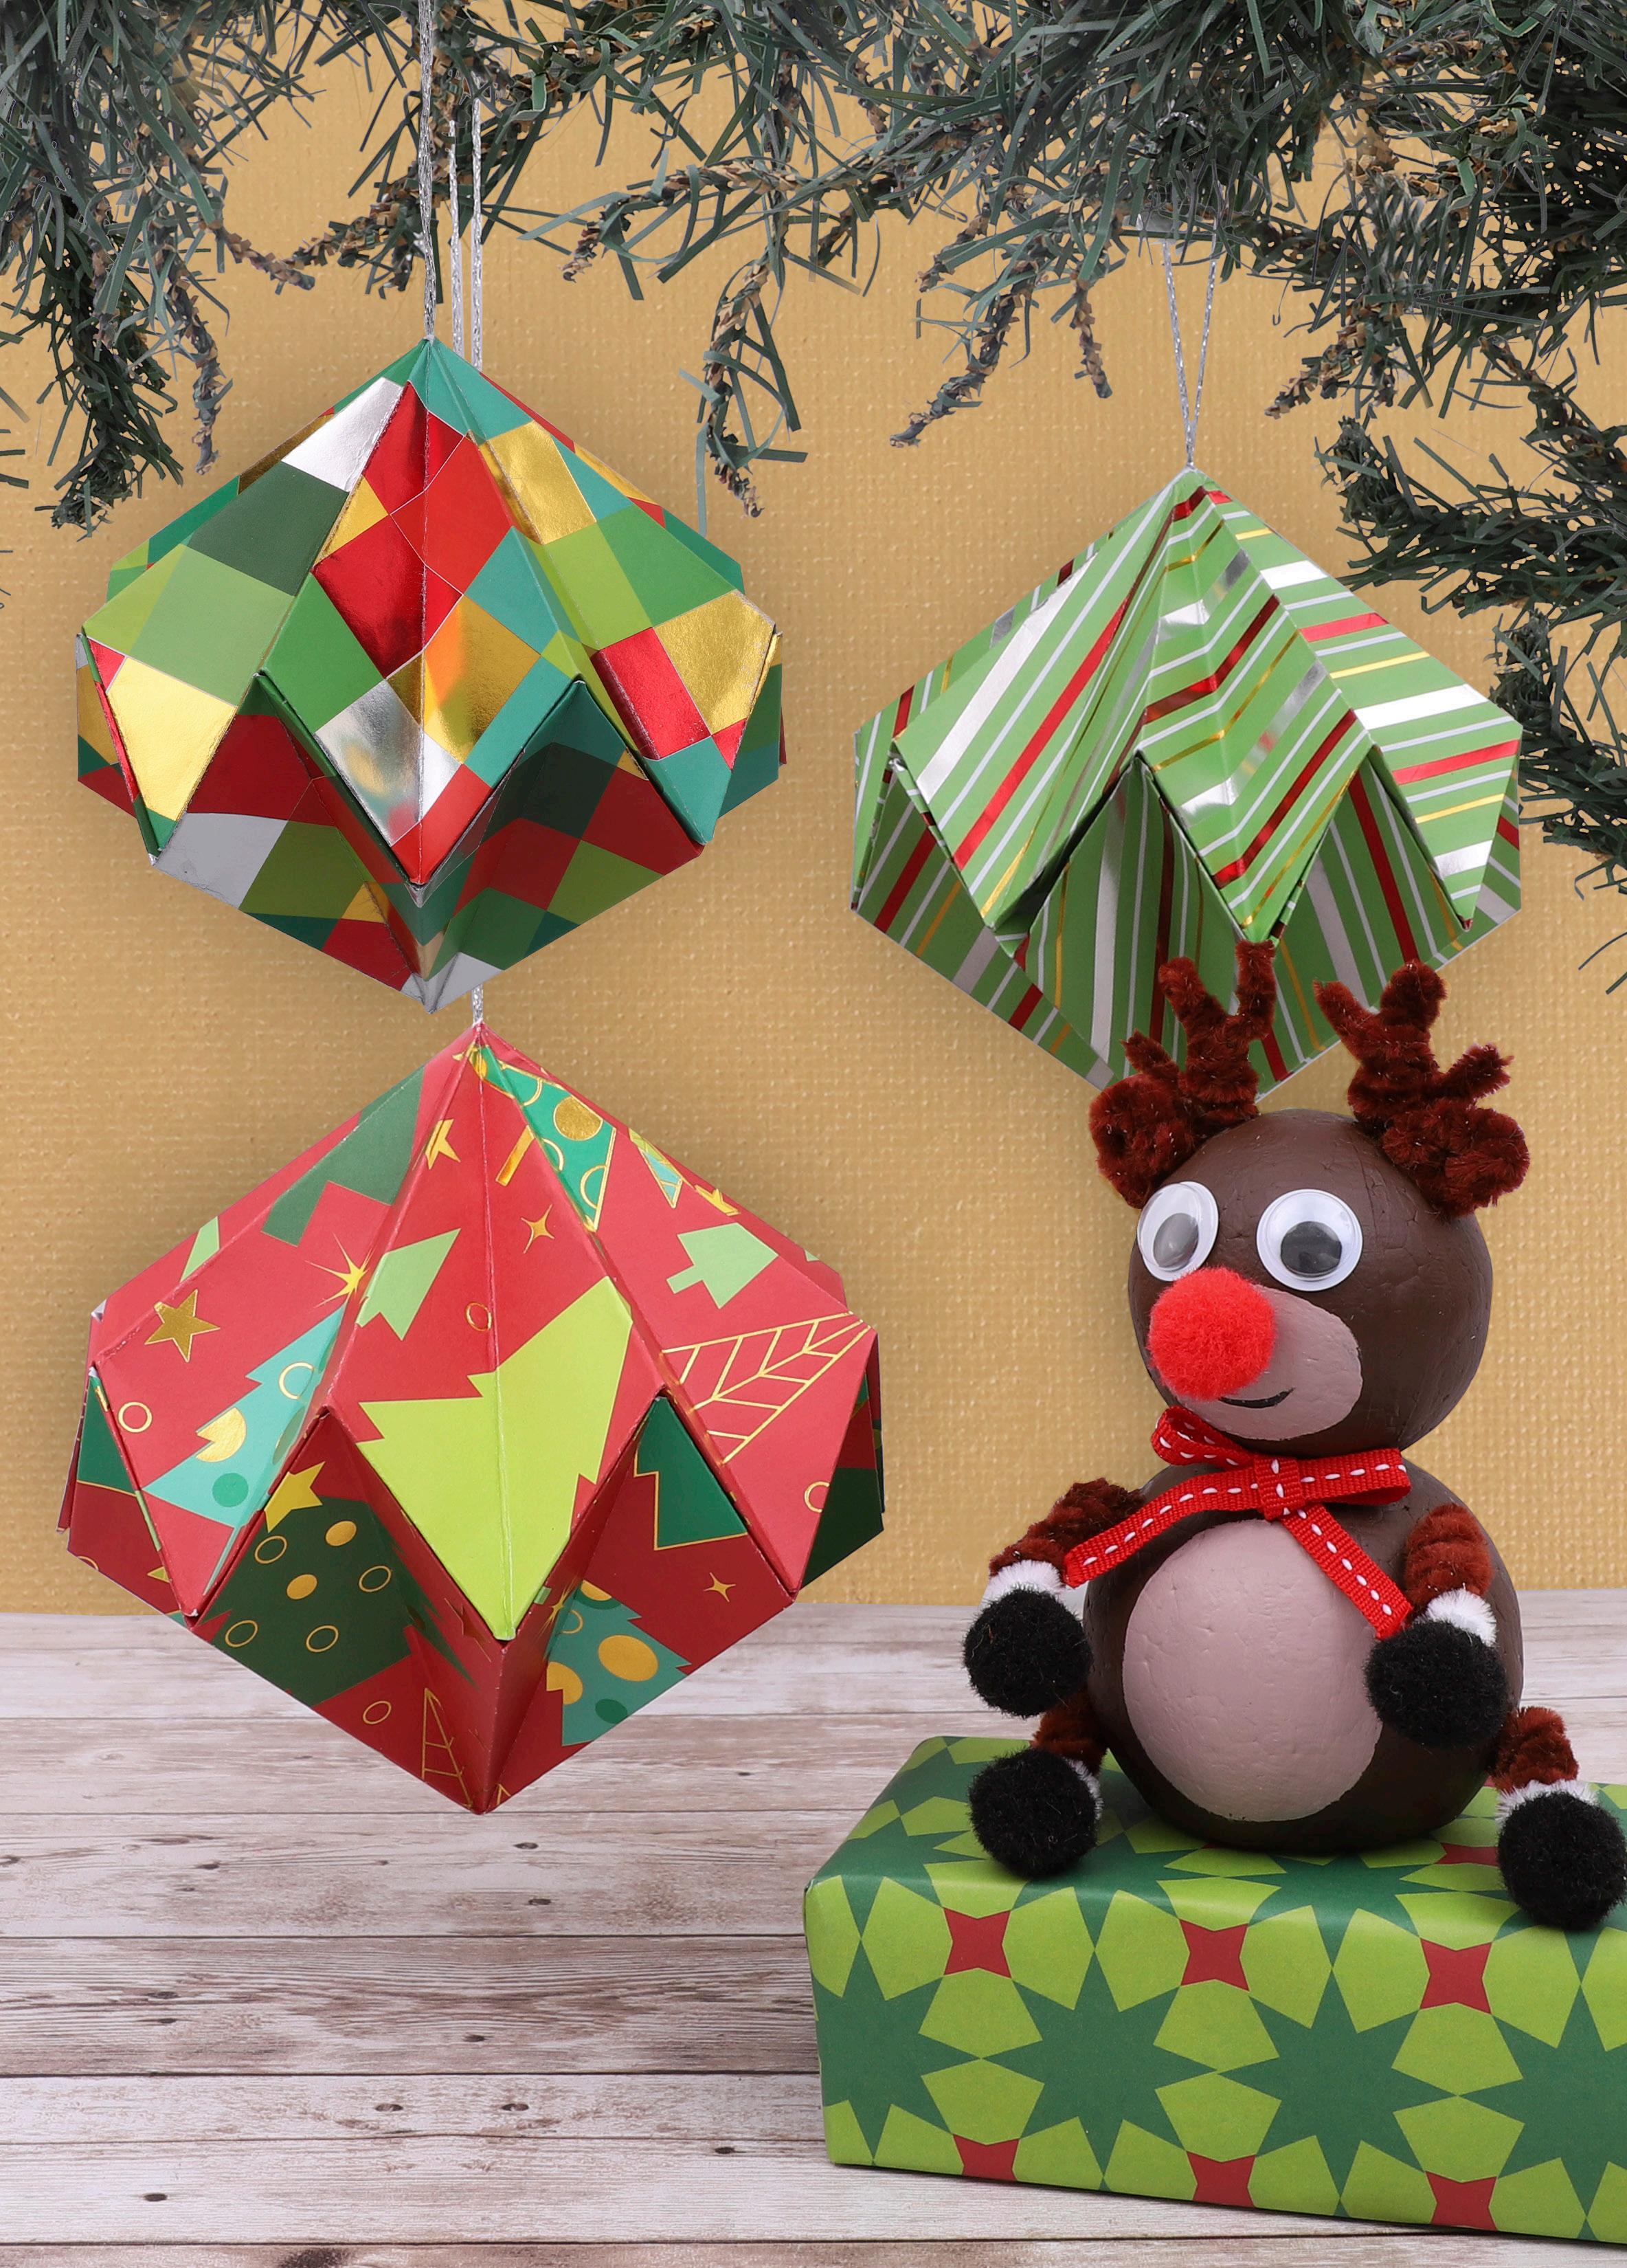
9. Make two loops in a length of ribbon and tie them into a knot to create a bow. Glue the bow, two wiggle eyes and a pom pom nose, as shown. Paint a smile to complete your reindeer’s face. Allow to dry. Your Reindeer is now ready to display!
• Stretched Canvas Frame – Small – Square – 13466
• CleverPatch™ Acrylic Paint Tubes – 75ml Set of 14 Colours – 20811
• Embroidery Thread – Set of 10 Colours – 20175
• Sewing Needles – Sharp – Pack of 6 – 17870
• Other materials required: Scissors, HB pencil, paint brushes and template (page 10).
1. Paint a background onto your canvas. You might like to create a gradient or apply one flat colour. Allow to dry.
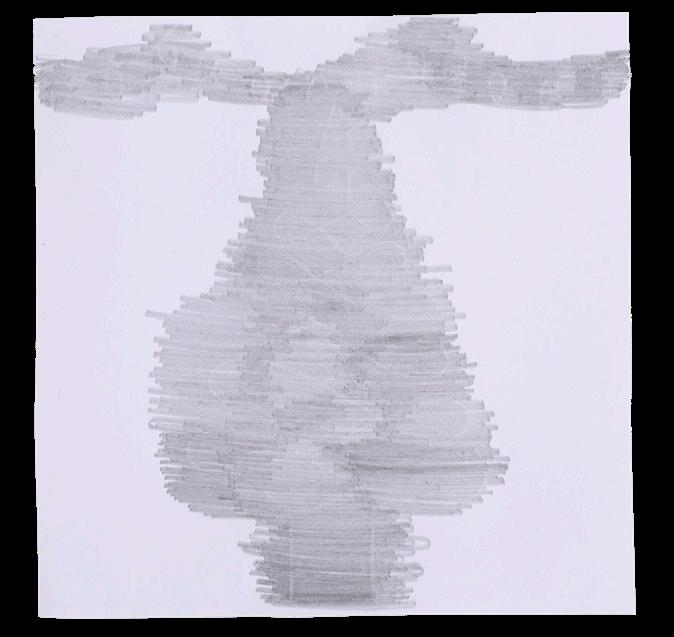
2. Print out the template on page 10. Cut out around the template and colour the back using a HB pencil.
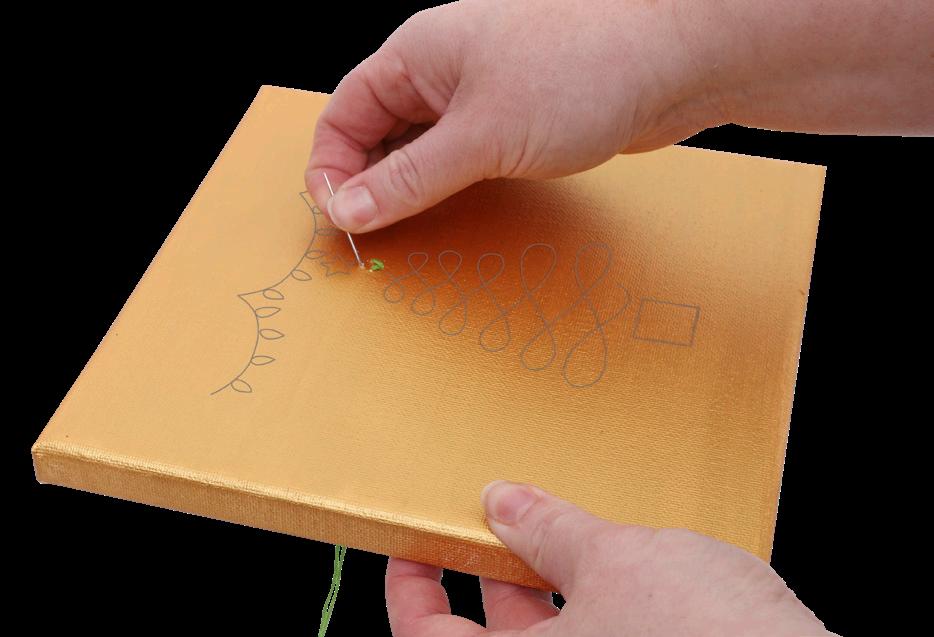
5. Thread the needle through the back of the canvas at a starting point for your first colour and pull through until the knot catches at the back. Create a back stitch over the line for that colour. Tie a knot at the back to secure and trim any excess.
CleverTip: Click here to see how to sew a back stitch.
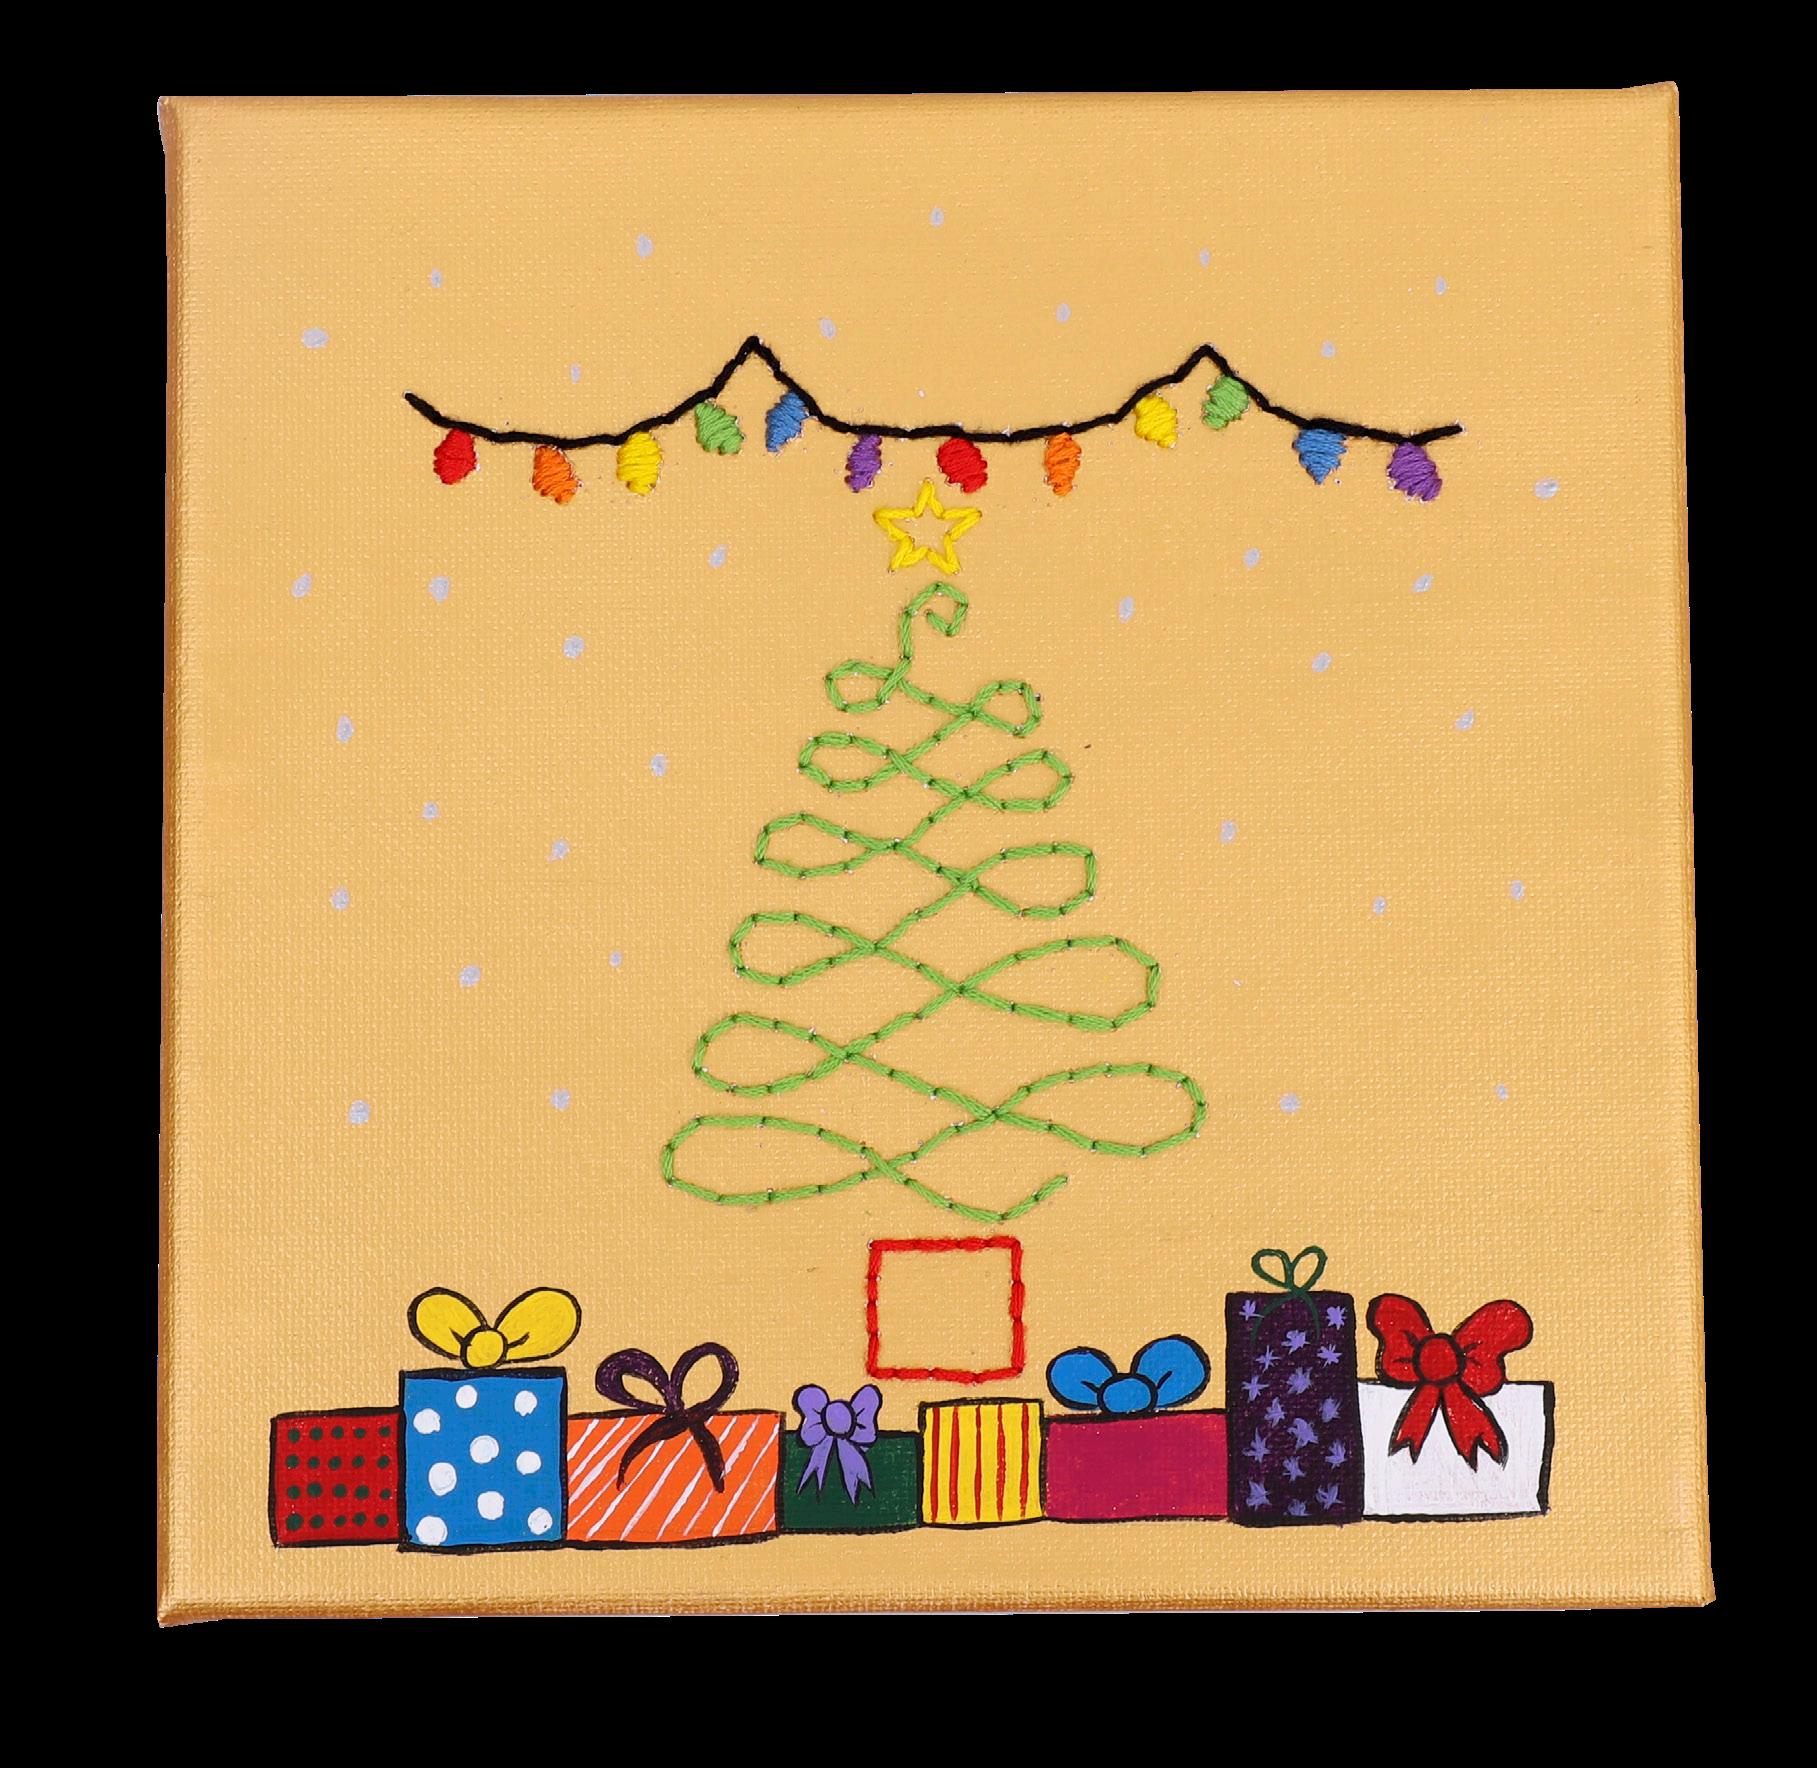
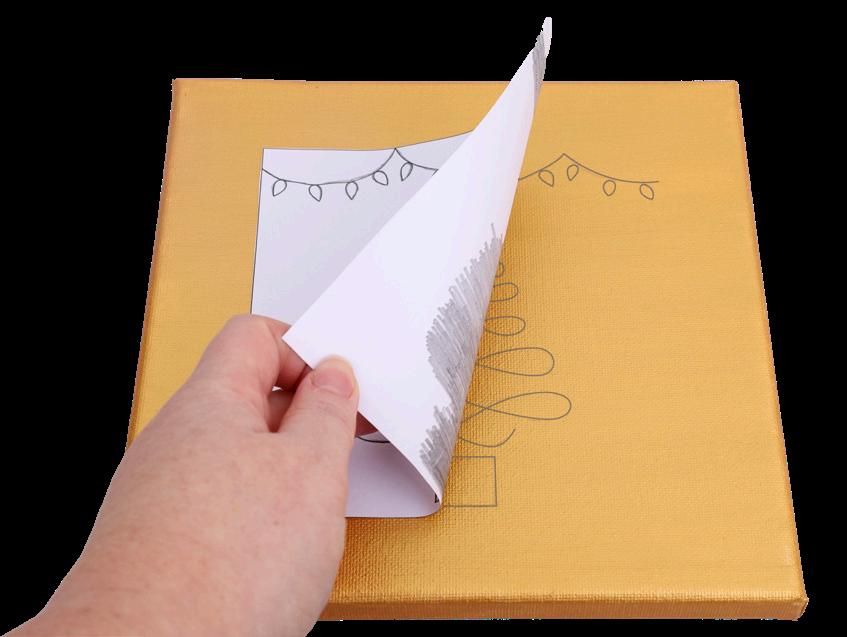
3. Place the template onto your canvas so it is centred. Trace over the lines on the template. Lift the template to check the design has transferred. Once transferred completely, remove the template.
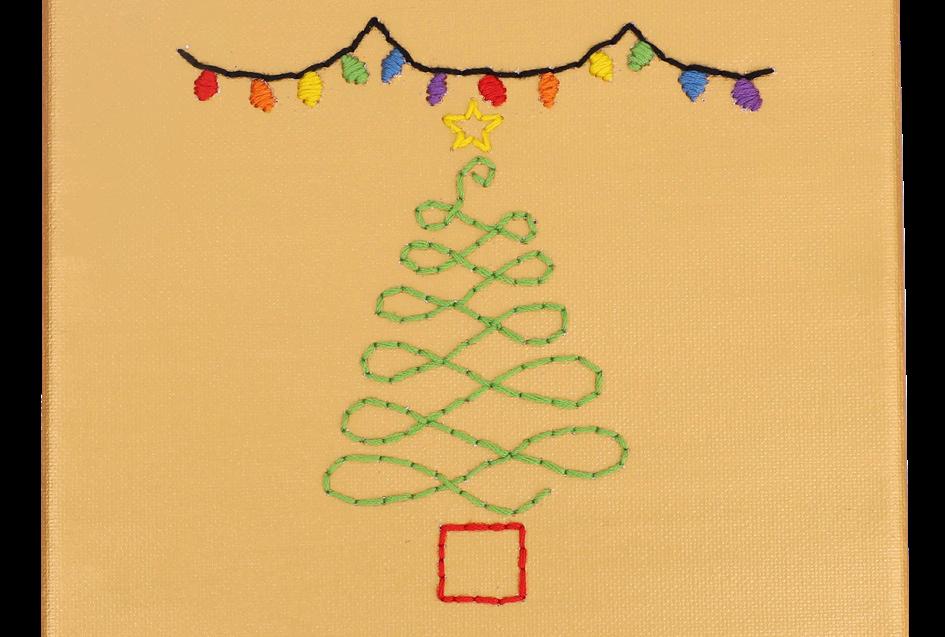
6. Continue to sew back stitches with each of the remaining colours according to your plan until the design is complete. You can create blocks of colour by making an outline with a back stitch then sewing back stitches side by side to fill in the shape.
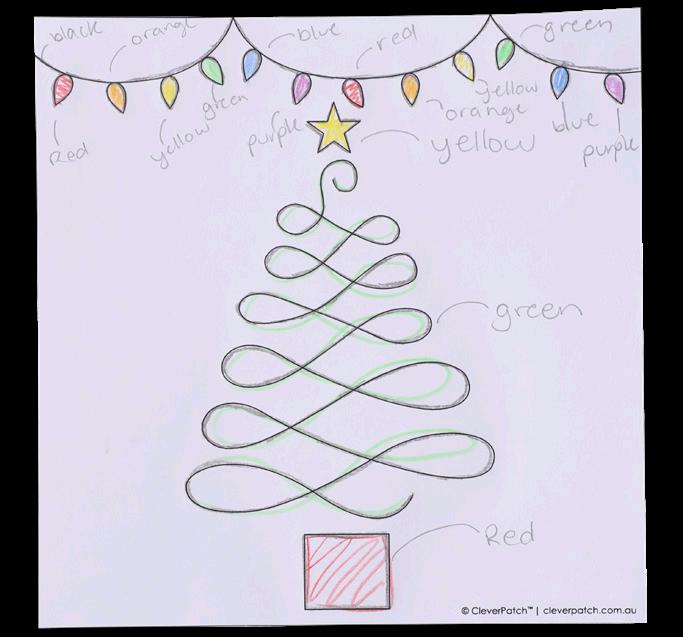
4. Use the template to plan the colours you would like to use. Choose your first colour and thread a length of embroidery thread through a needle. Tie a knot in the end.
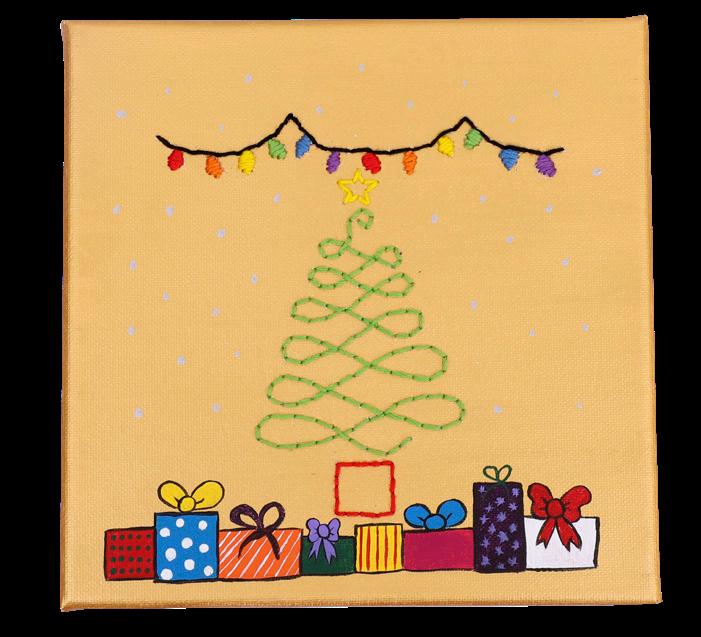
7. Paint any extra details to your canvas to complete the artwork. We have chosen to add some presents under the tree and silver dots in the background. Allow to dry. Your Embroidery Artwork is now ready to display!
• Christmas Craft Paper – Foil Details – Pack of 20 – 21387
• Metallic Yarn – Silver – 20g – 10241
• Sewing Needles – Blunt Tip – Pack of 25 – 11591
• CleverPatch™ Junior PVA Glue – 250ml – 10364
• Other materials required: Scissors and a ruler.
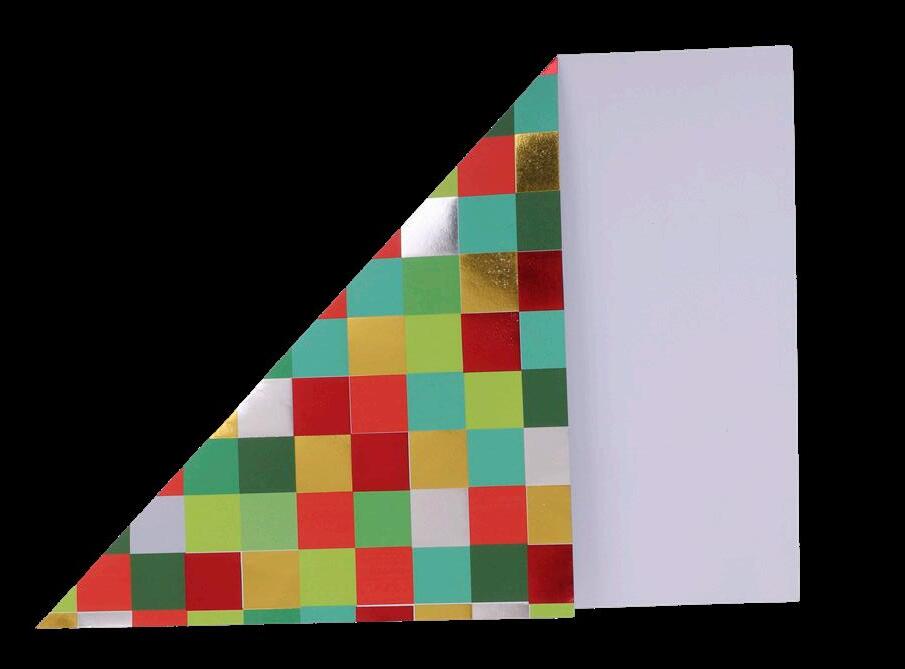
Cut along here
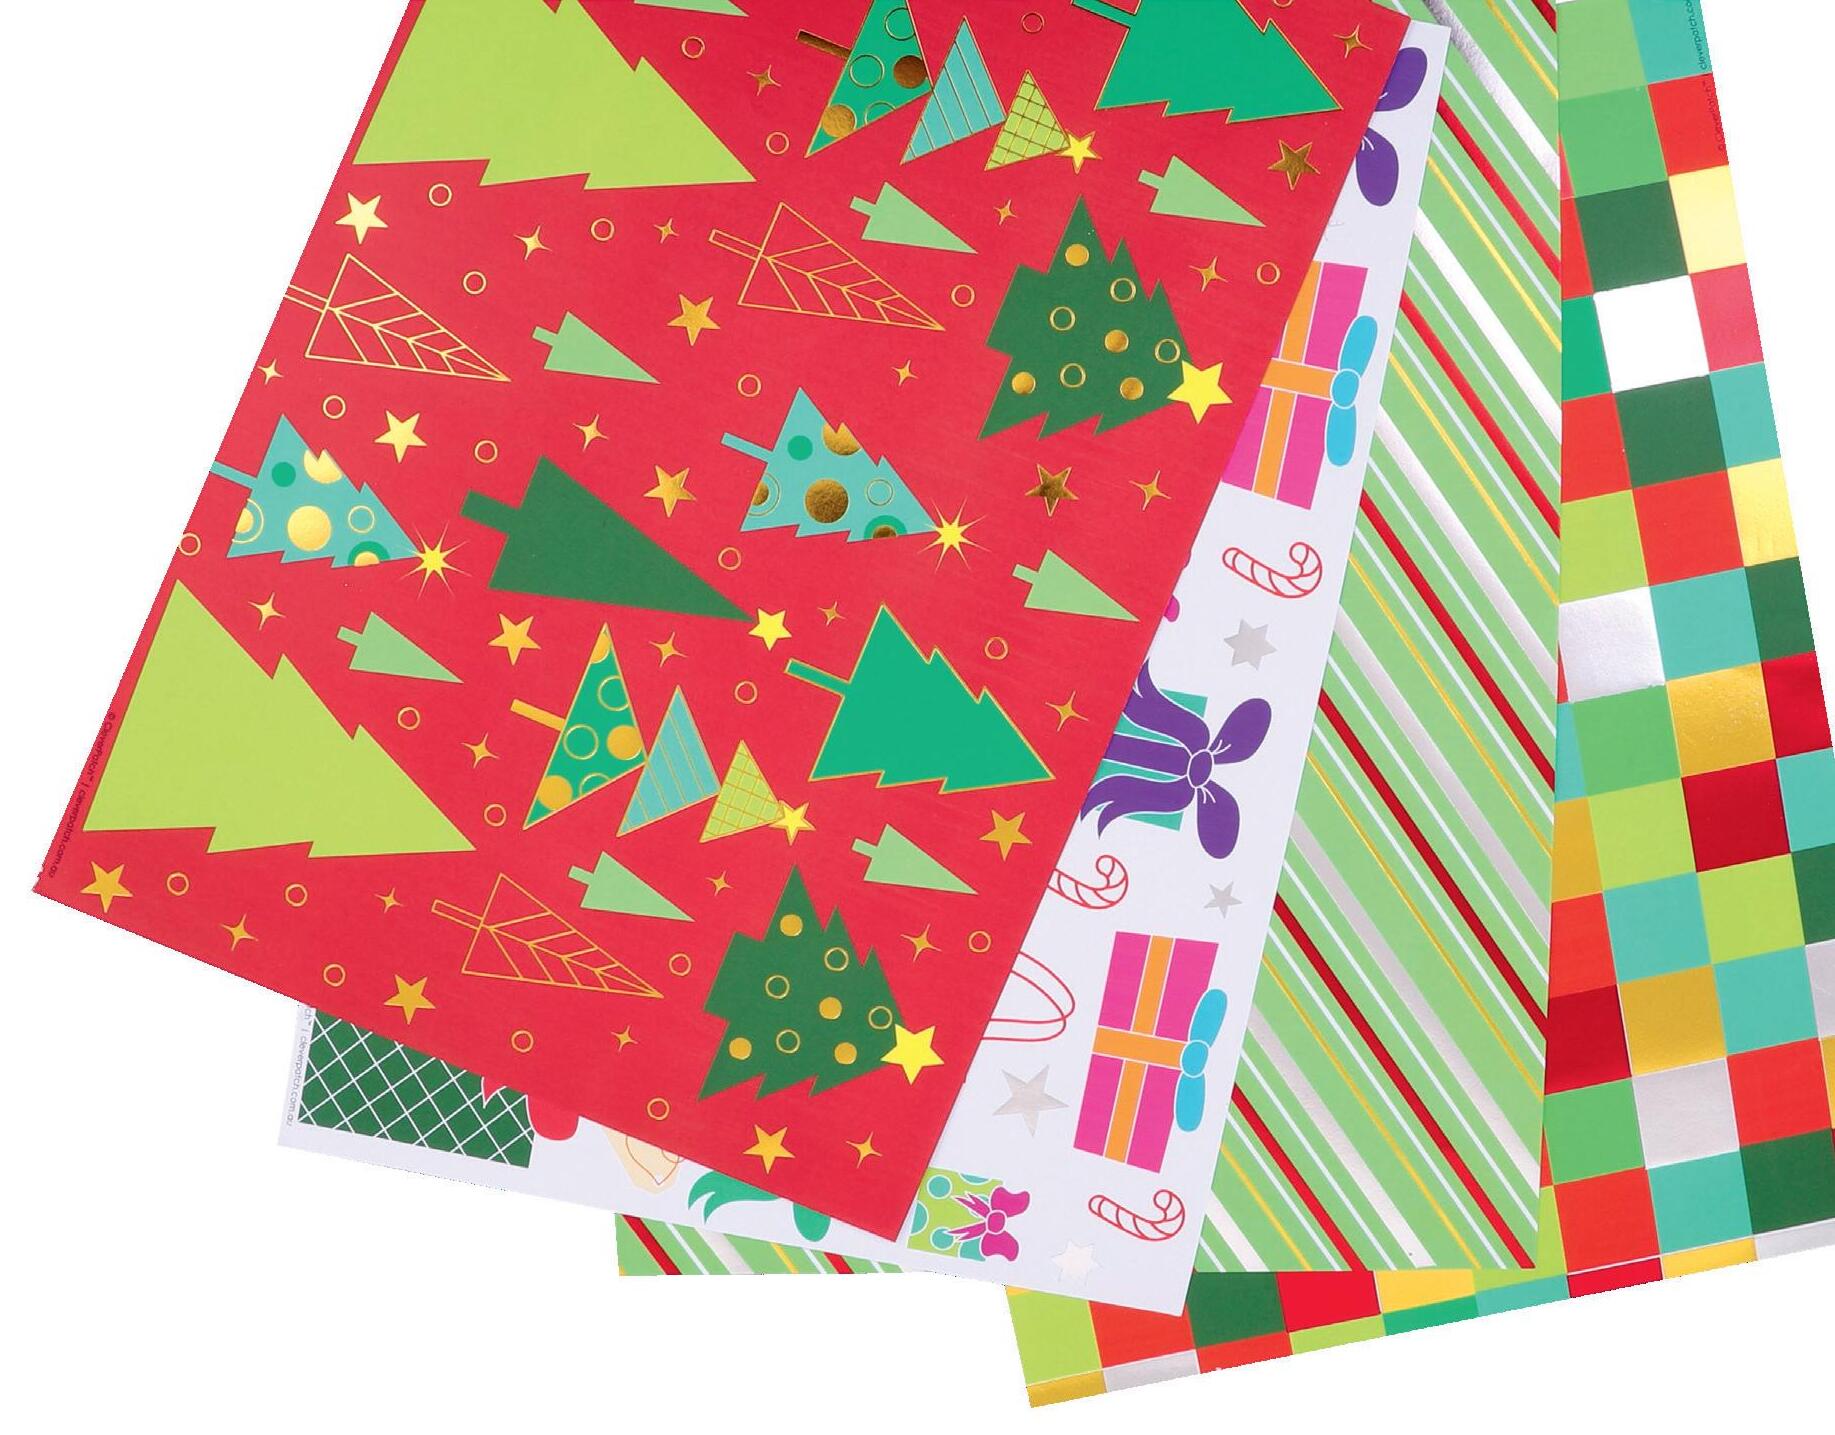
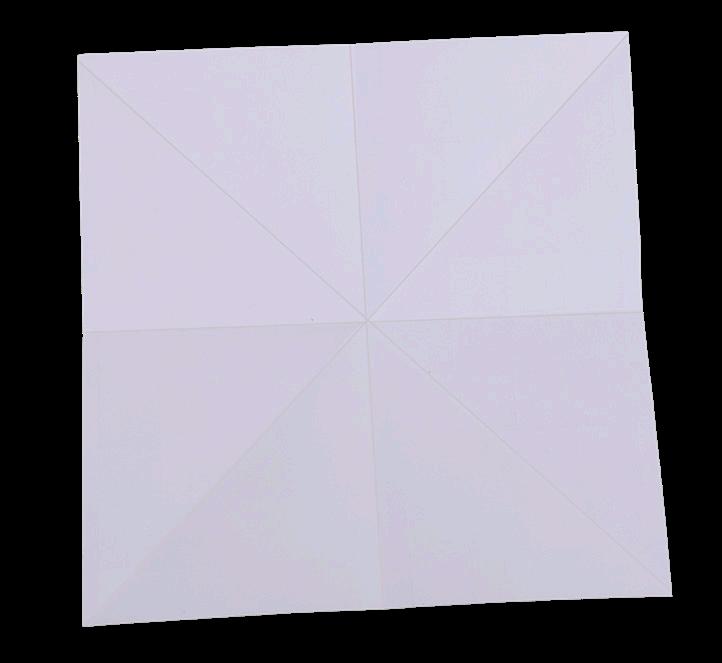
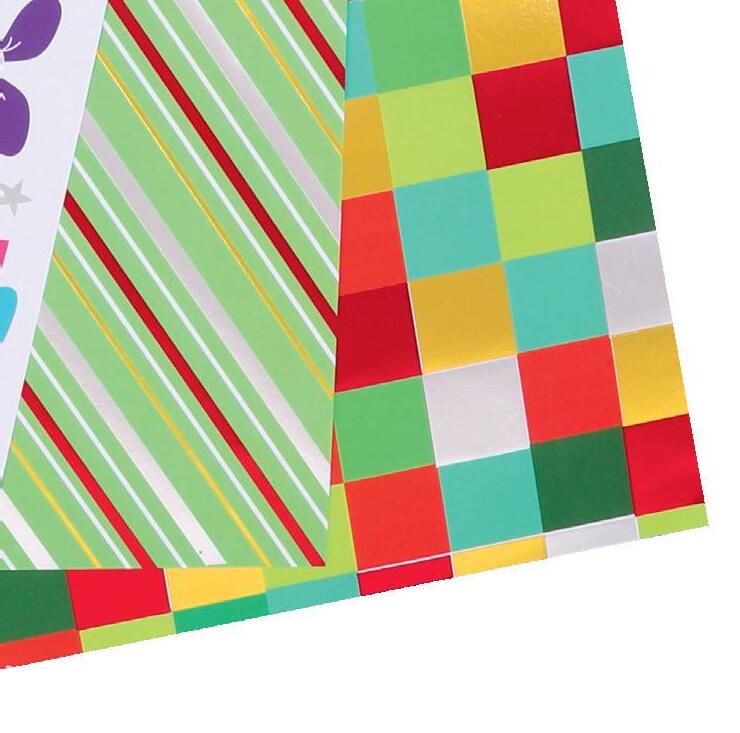
1. Choose a design of Christmas craft paper. Fold a corner over, design side facing down, align the opposite edge and crease. Cut off the excess paper along the short edge, as shown. Unfold to reveal a square.
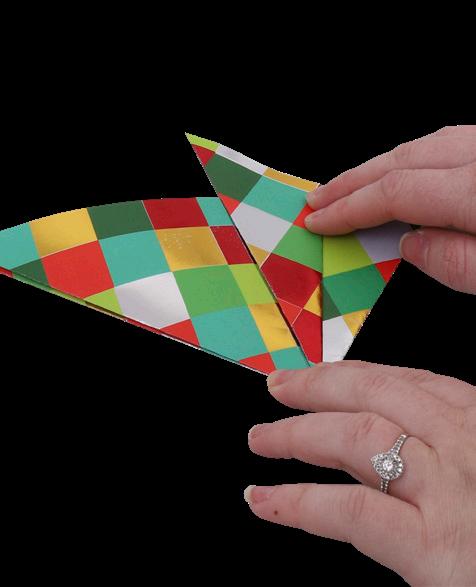
4. Ensure the pointed end is facing towards you. Take the right top flap of the triangle and fold up to align with the middle crease. Repeat for the left side.
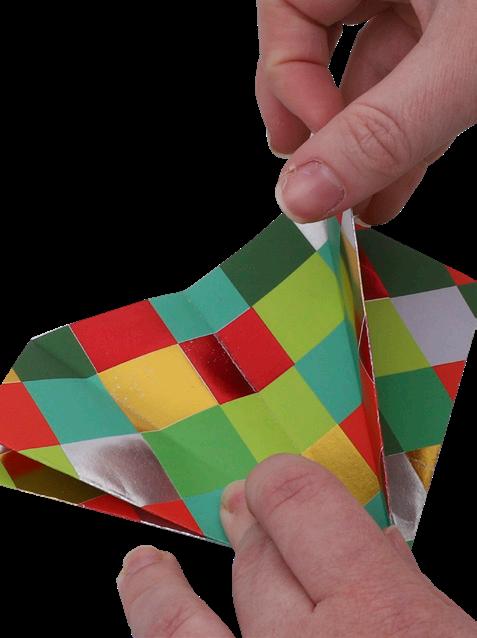
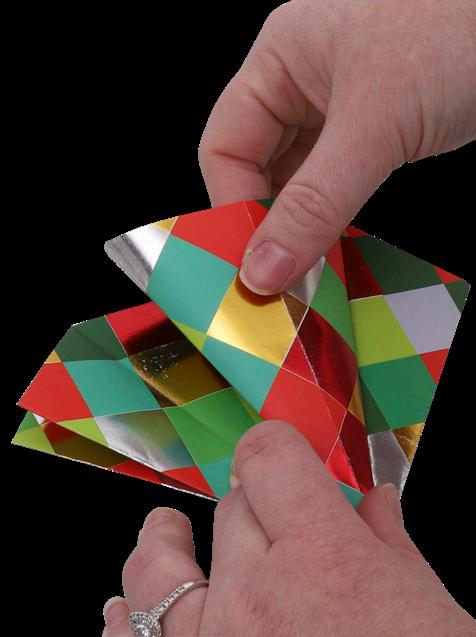
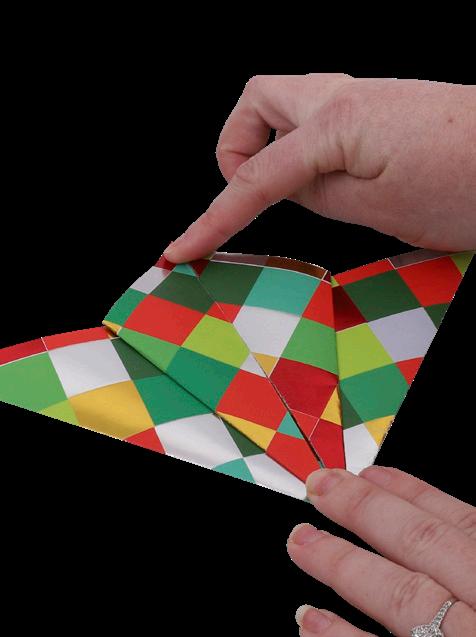
7. Squash fold the top flap on the right towards the centre. You may need to insert your finger between the two layers of the flap so that it opens up. Push down and crease along the sides.
2. Fold the square corner to corner to make a second diagonal crease then unfold. Flip the paper over and fold in half horizontally then unfold. Turn the square once then fold in half again. Unfold then flip the paper so the design is facing down again.
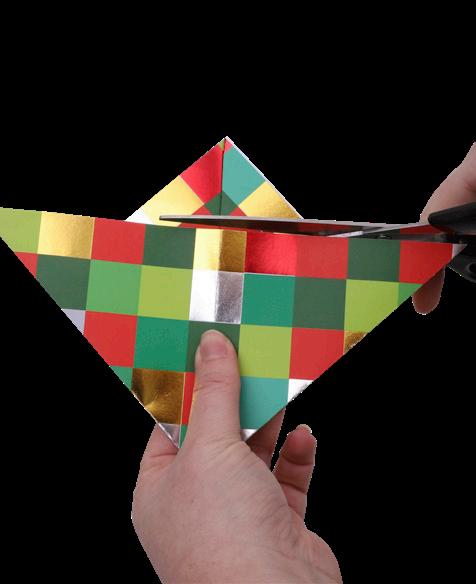
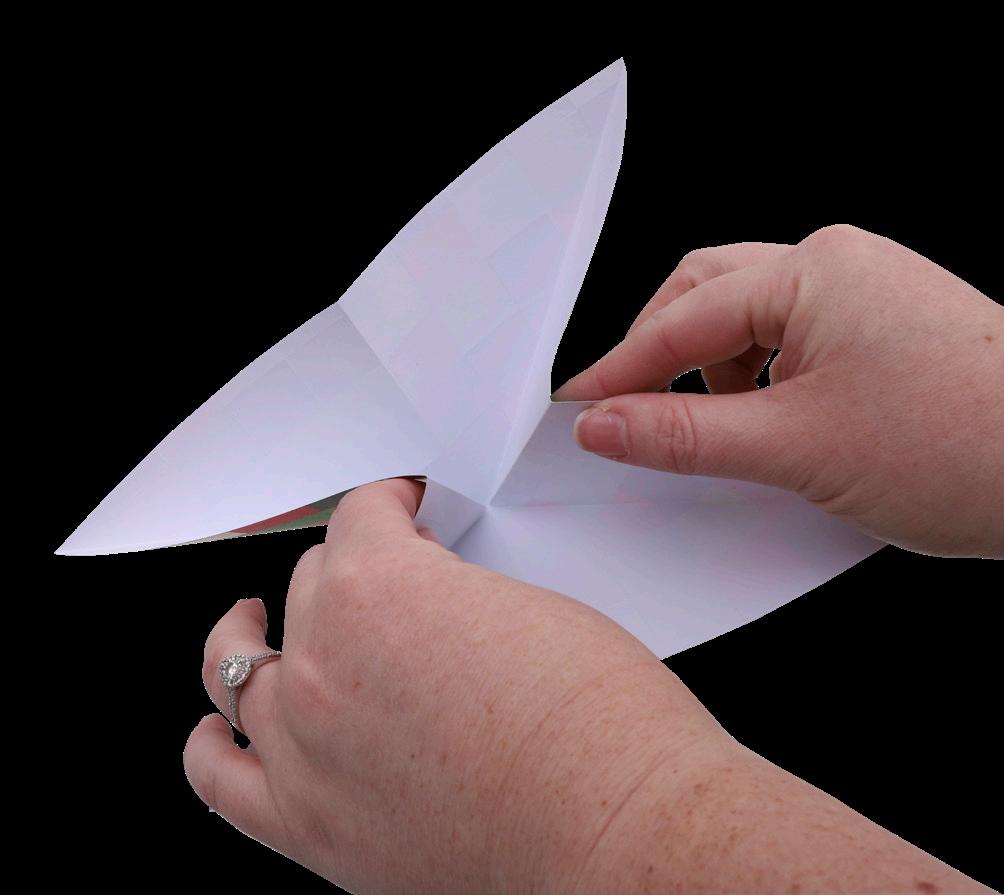
3. Push the left and right side creases up and in towards the centre of the paper. Crease to create a large flat triangle.
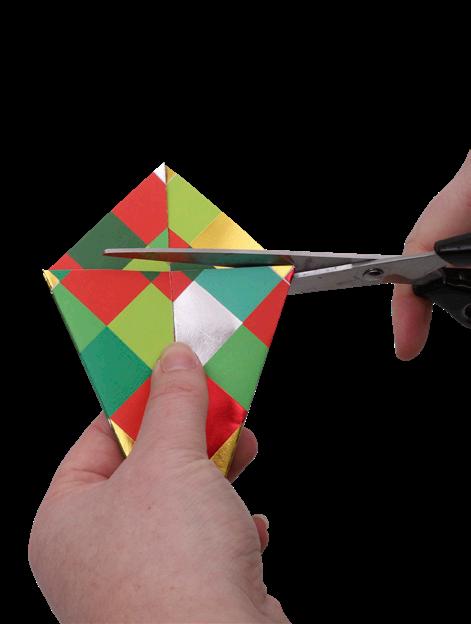
5. Flip the paper over and cut across the top to remove the top two triangles. Repeat steps 4 and 5 for the other side.
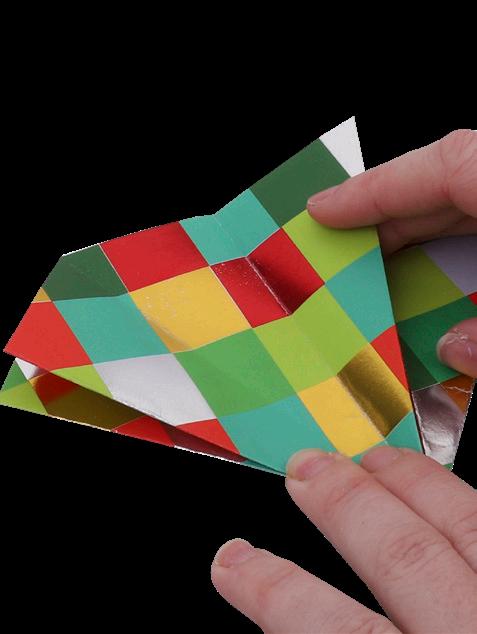
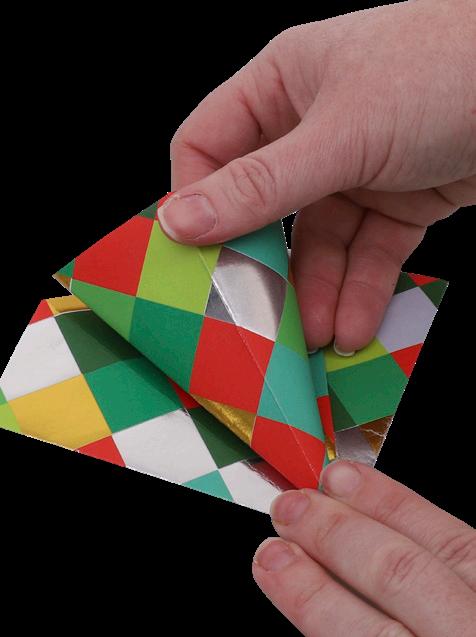
8. Fold the left side of the first squashed flap over. Repeat step 7 for the large flap on the left then fold the right side of the squashed flap over.
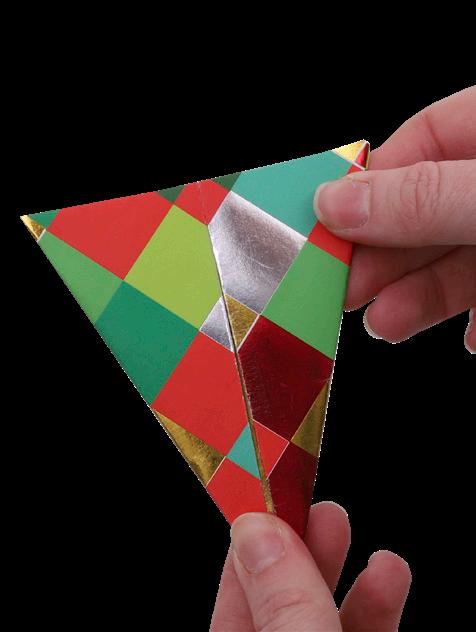
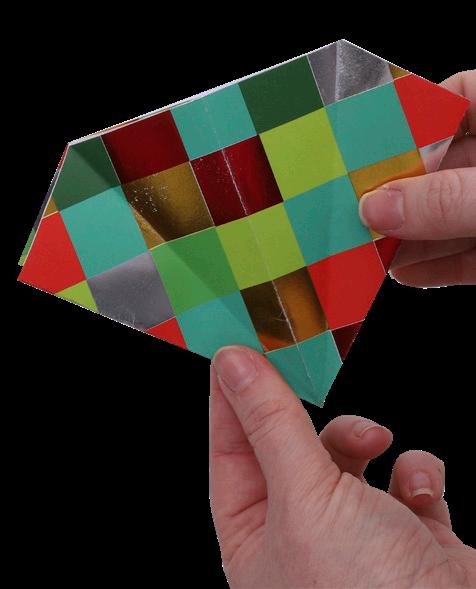
6. You should now have a smaller, narrow triangle. Open the two triangle flaps on each side to create a gem shape. You will now have four flaps – two on each side.
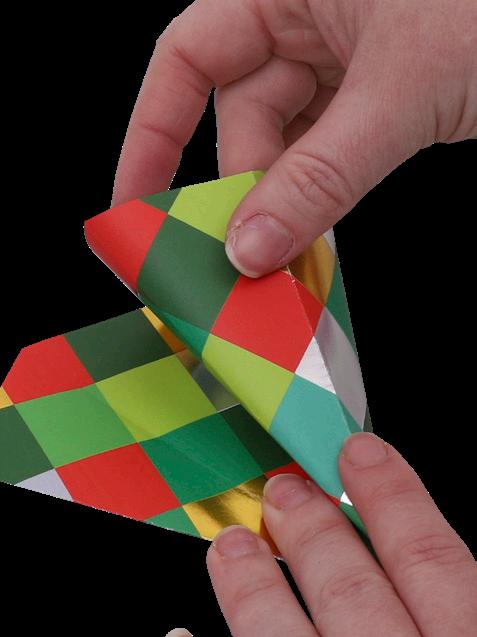
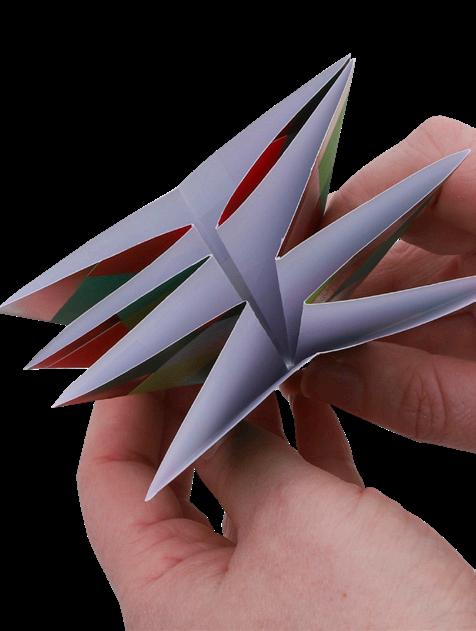
9. Flip the paper over and repeat steps 7 and 8 for the remaining two large flaps. There should now be four flaps on each side of a small, narrow triangle.
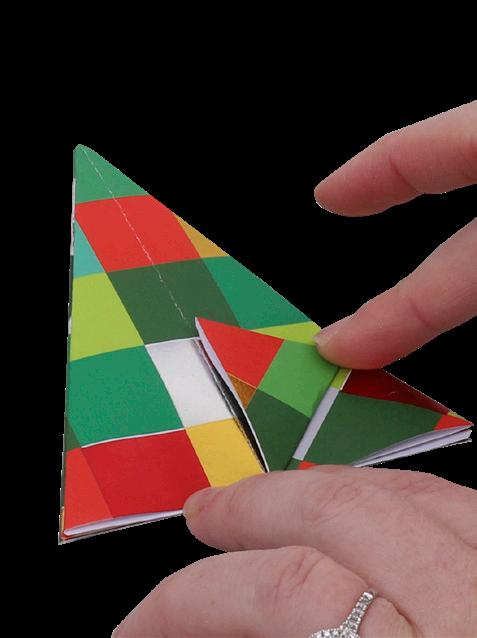
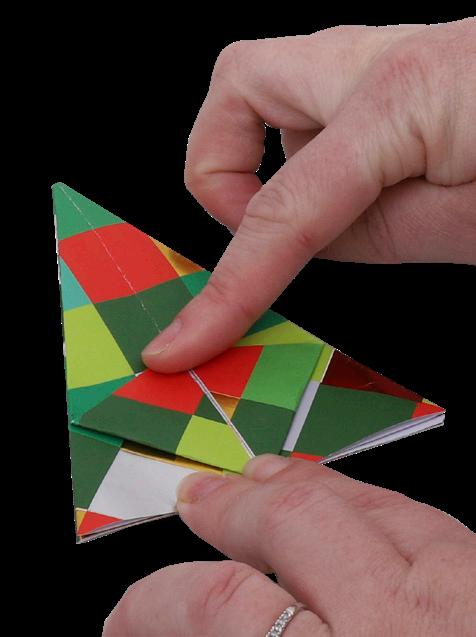
10. Turn the triangle so the pointed end is facing away from you. Take one of the bottom corners and fold it up to align with the centre crease to create a small triangle. Repeat for the other corner.
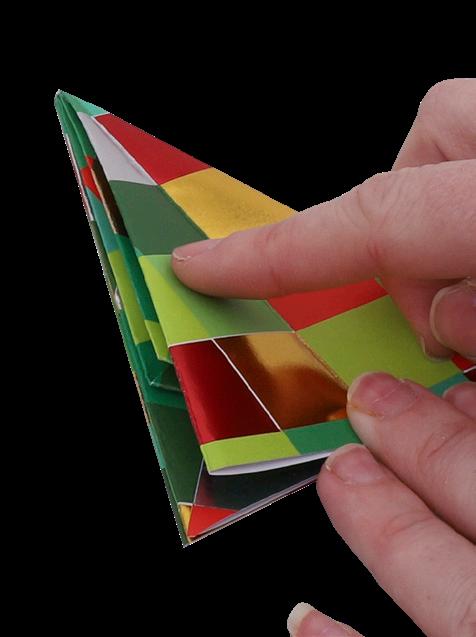
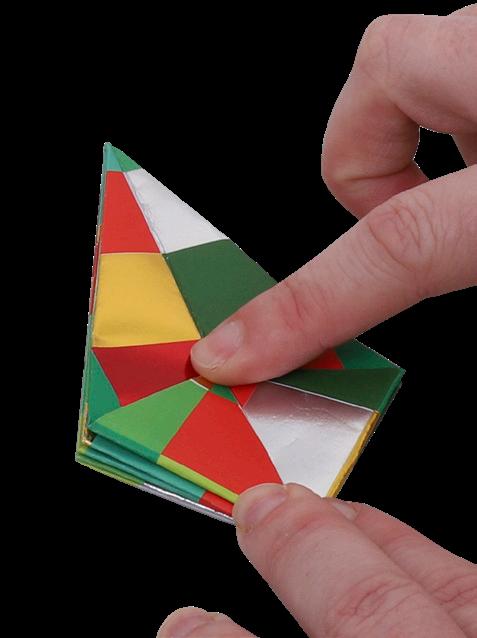
11. Push the small triangle on the right and the next flap over so you can see another two narrow triangles. Repeat steps 10 and 11 to fold the remaining corners, folding over each flap until all corners are folded up.
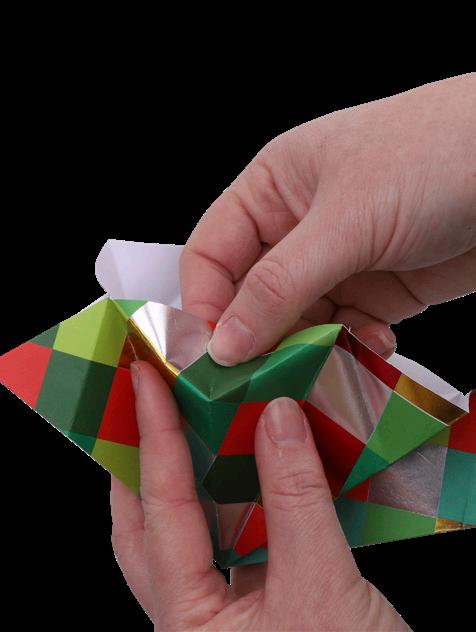
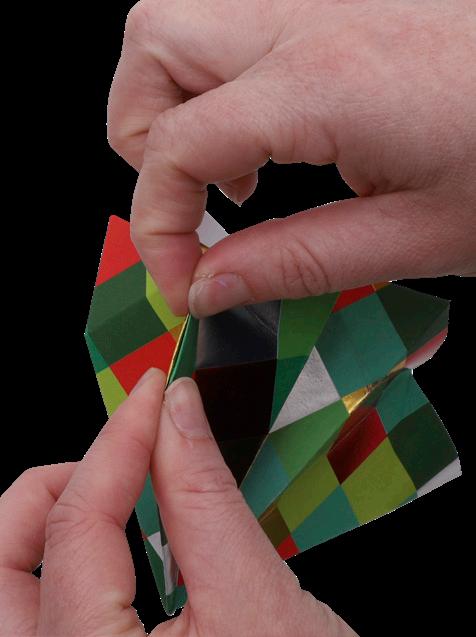
13. There should be two small triangle creases at the end of each point. Push the middle of the triangles towards the inside of the paper. Crease along the two folds of that point.
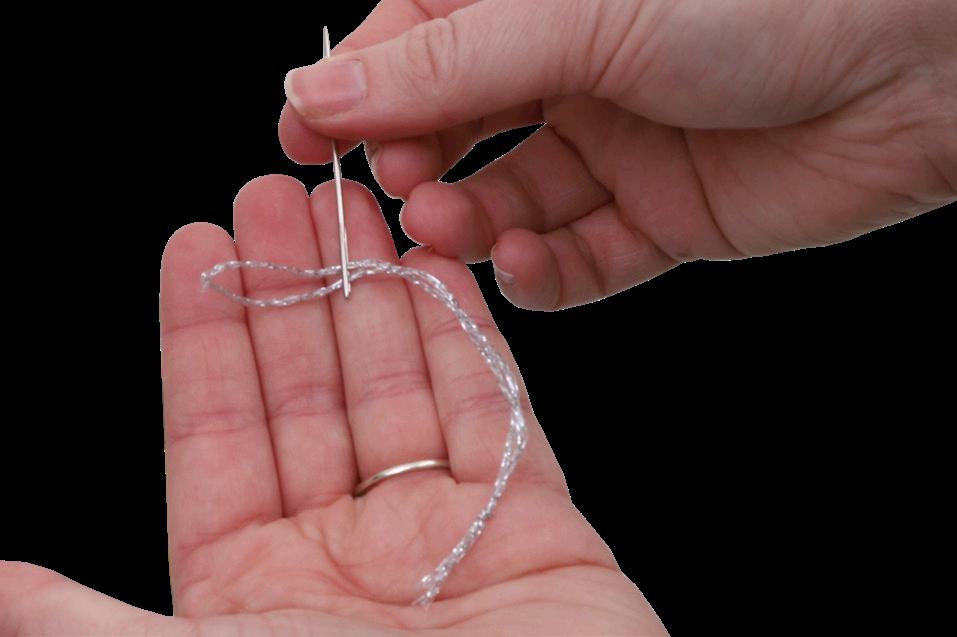
16. Cut a 40cm length of silver yarn. Bring the ends together and tie a double knot. Thread the loop end through a needle.
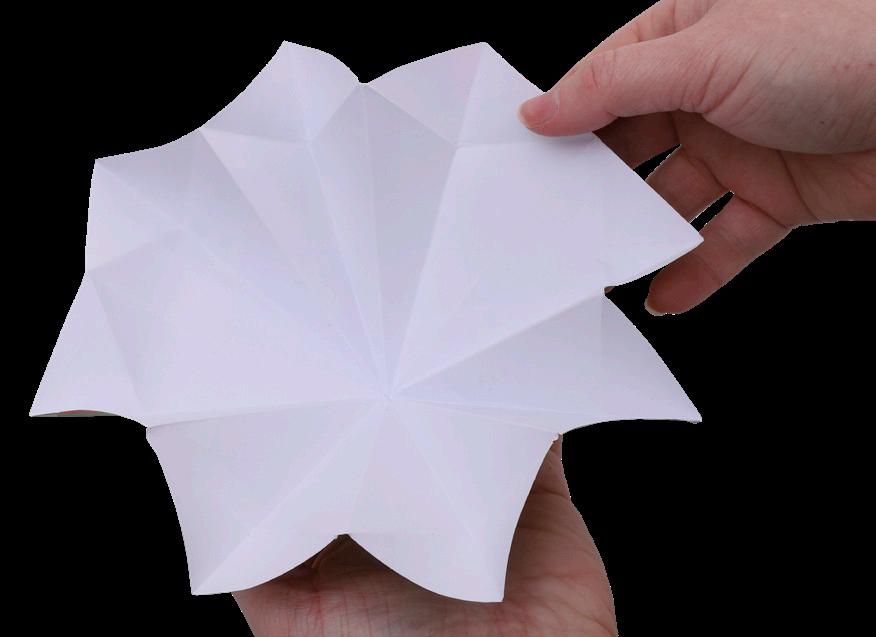
12. Unfold the paper, as shown.
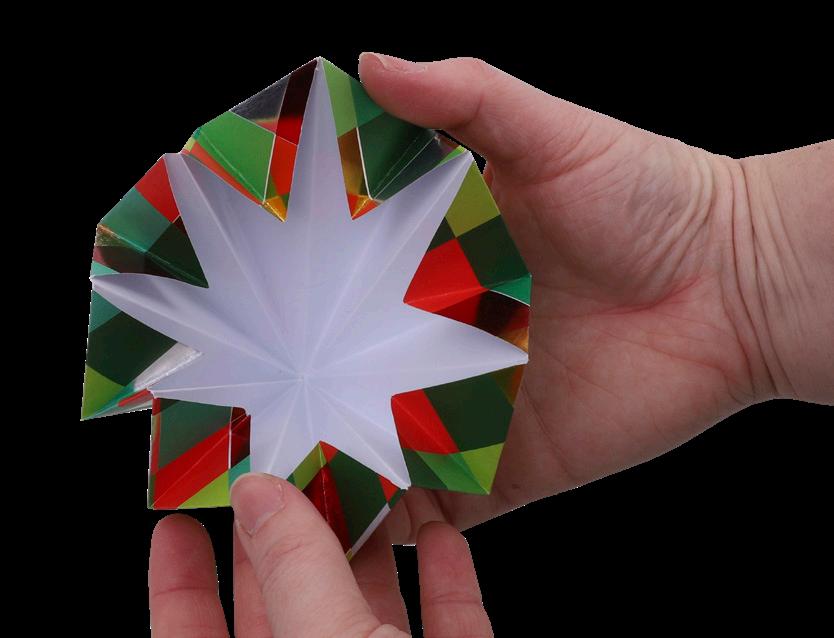
14. Continue pushing each pair of small triangles in and creasing along the folds of each point.
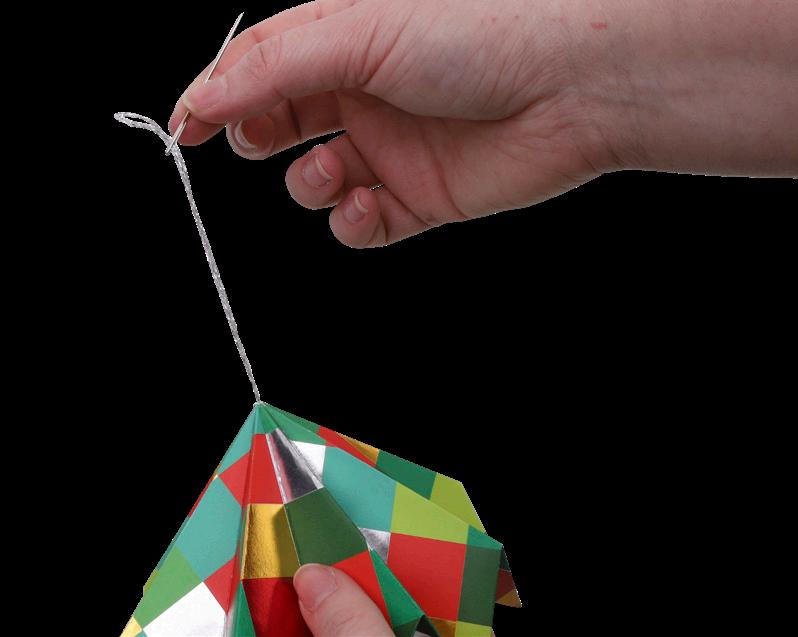
17. Pierce the needle through the centre point of one half of your ornament. Pull the yarn through until the knot catches then remove the needle.
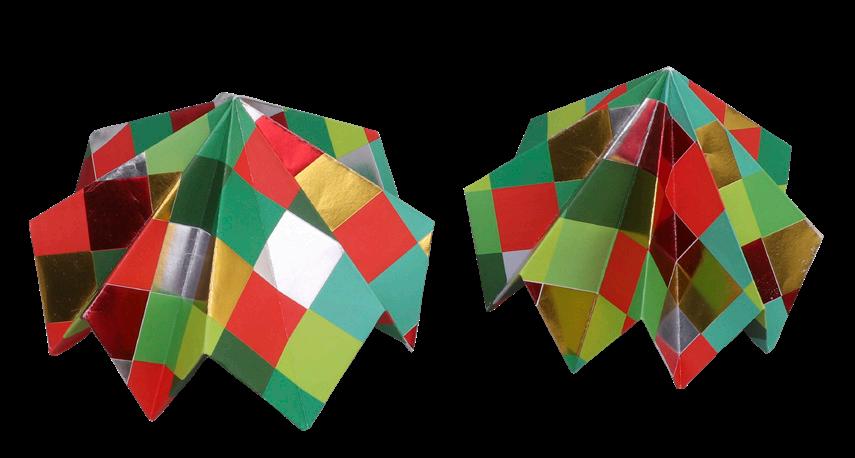
15. Repeat steps 1-14 to create the other half of your ornament.
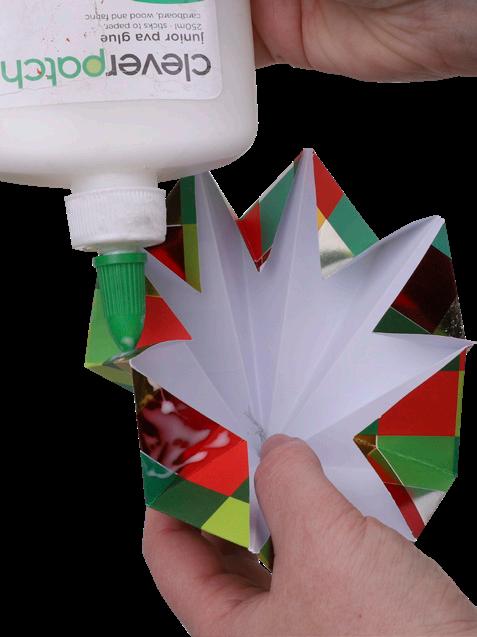
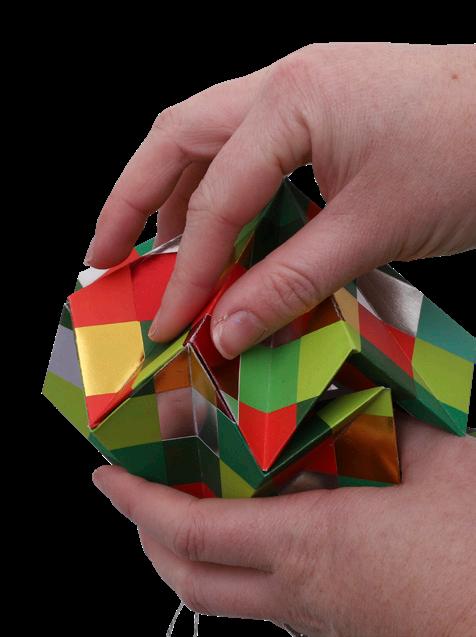
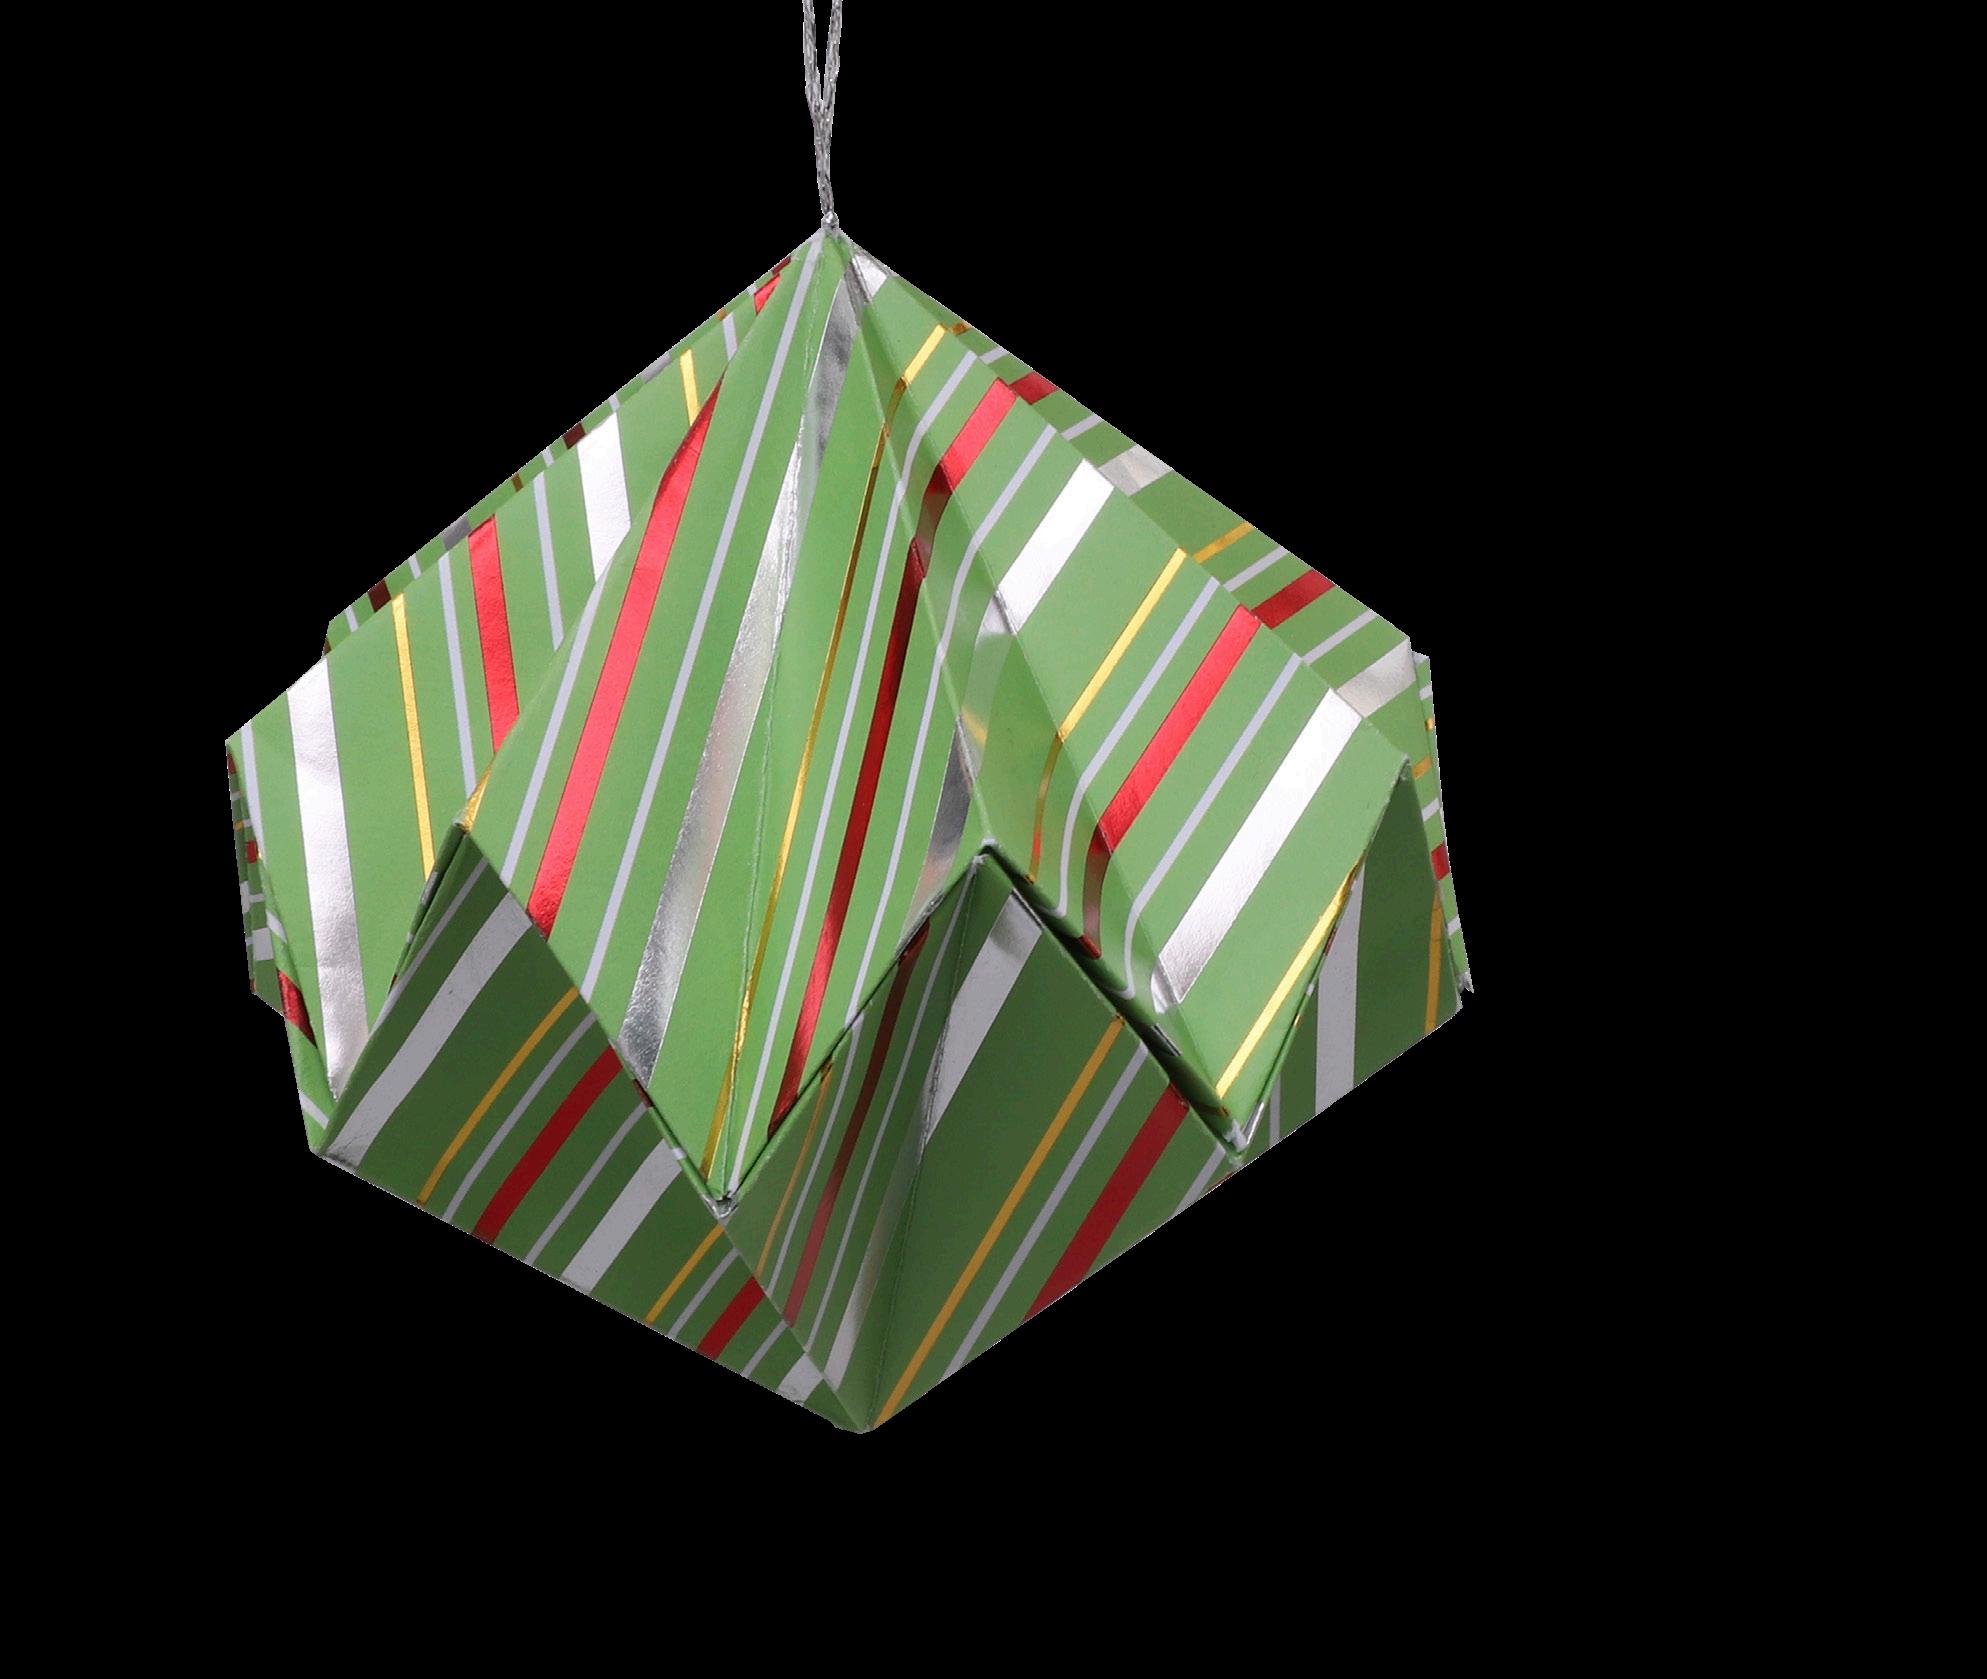
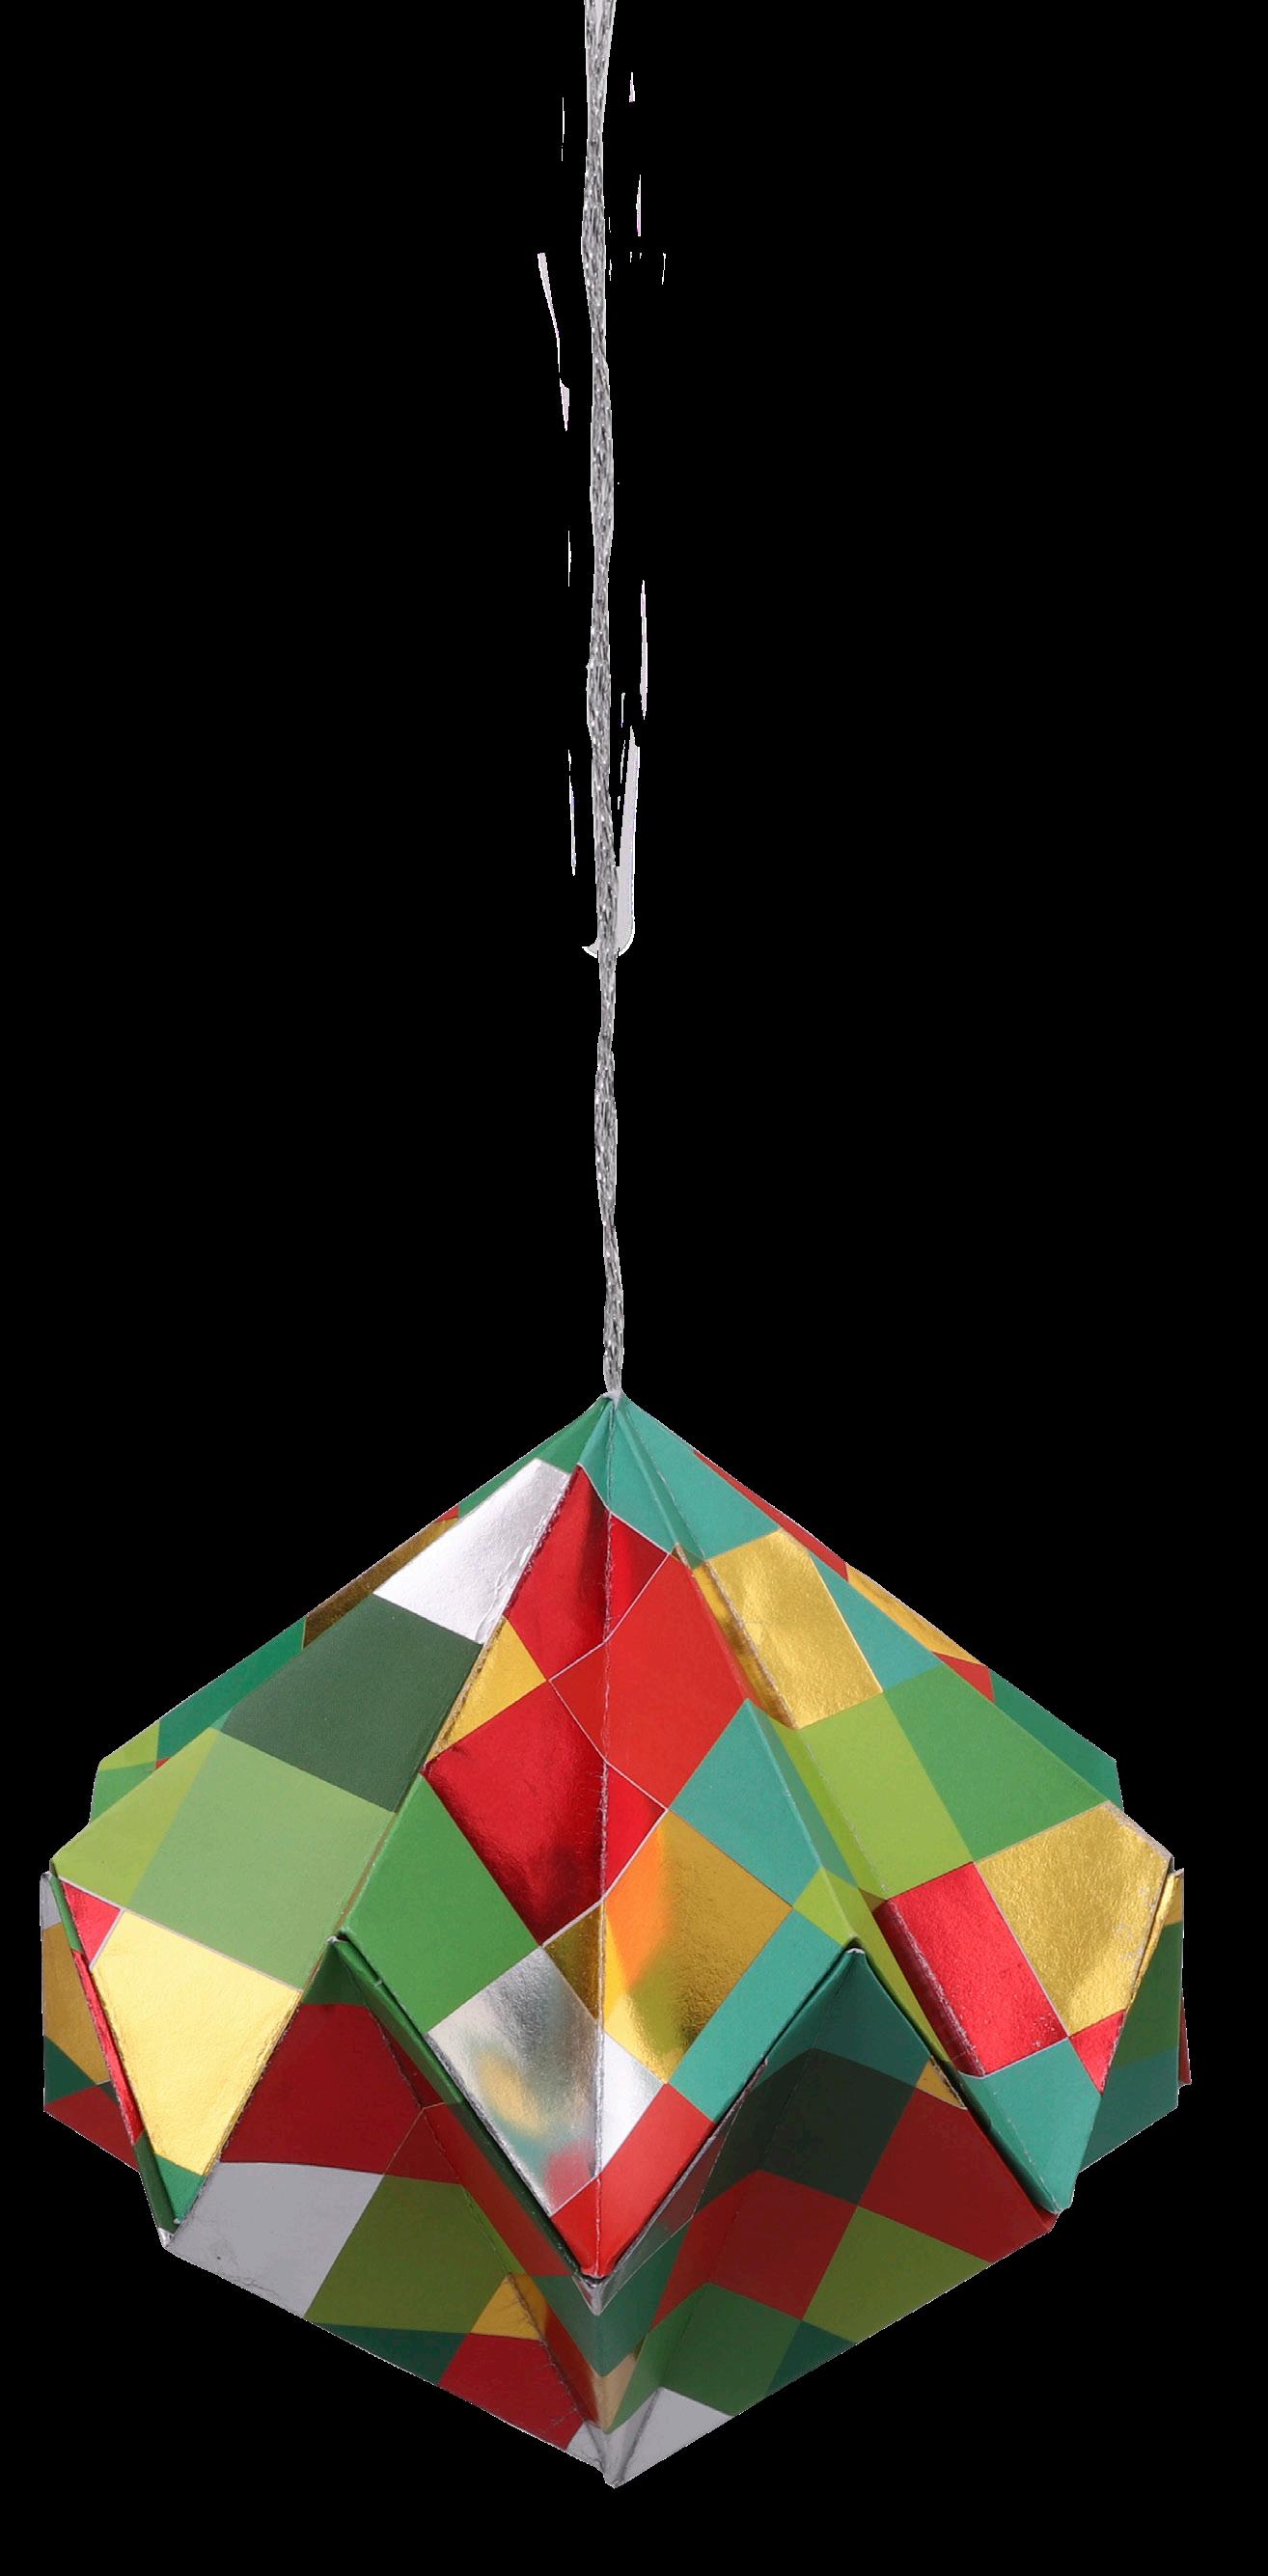
18. Apply glue on each small triangle, along the edge of one ornament half. Join the halves together, aligning the edges. Hold together for a few seconds then allow to dry. Your Origami Ornament is now ready to display!
• Wooden Clock Face – 25cm – 12484
• CleverPatch™ Acrylic Paint Tubes – 75ml Set of 14 Colours – 20811
• CleverPatch™ Cardboard – White – A4 Pack of 100 – 16288

1. Print out the templates on pages 11-13 onto white cardboard. Paint the face, hat and ‘HO HO HO’ templates and allow to dry. Cut out the template pieces. You can use the dotted line for easier cutting on the ‘HO HO HO’ template. Ensure to cut out the centre of the last ‘O’; fold the ‘O’ over and make a slit. Insert scissors and cut around the inside line.
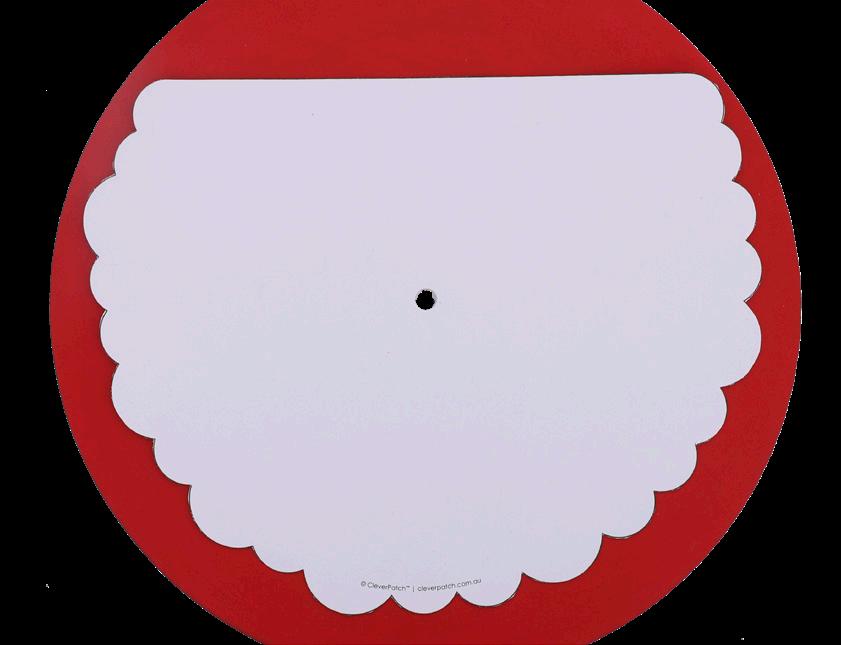
4. Align the hole in the beard template with the hole on the clock face. You may need to push the pencil through the hole to ensure it is the same size as the hole in the clock face. Glue in place and allow to dry.
• Recyclable Paper Straws – Pack of 250 – 17671
• Wooden Skewers – Pack of 100 – 10014
• Jute Twine – Thick – 140 Metres – 14275
• Other materials required: Scissors, paint brushes, pencil, ruler and templates (pages 11-13).
2. Paint a clock face with your choice of colour. Allow to dry.
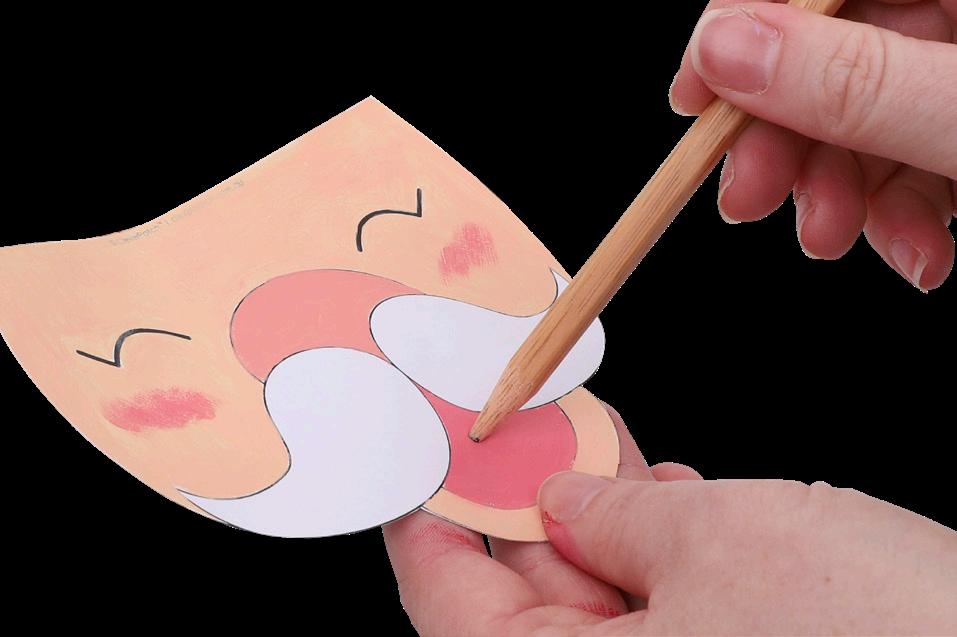
3. Using a sharp pencil, pierce a hole through the face and beard templates as indicated by the dot on each.

5. Align the face template’s hole with the hole in the beard and clock face. Ensure the hole is the same size. Glue in place and allow to dry.
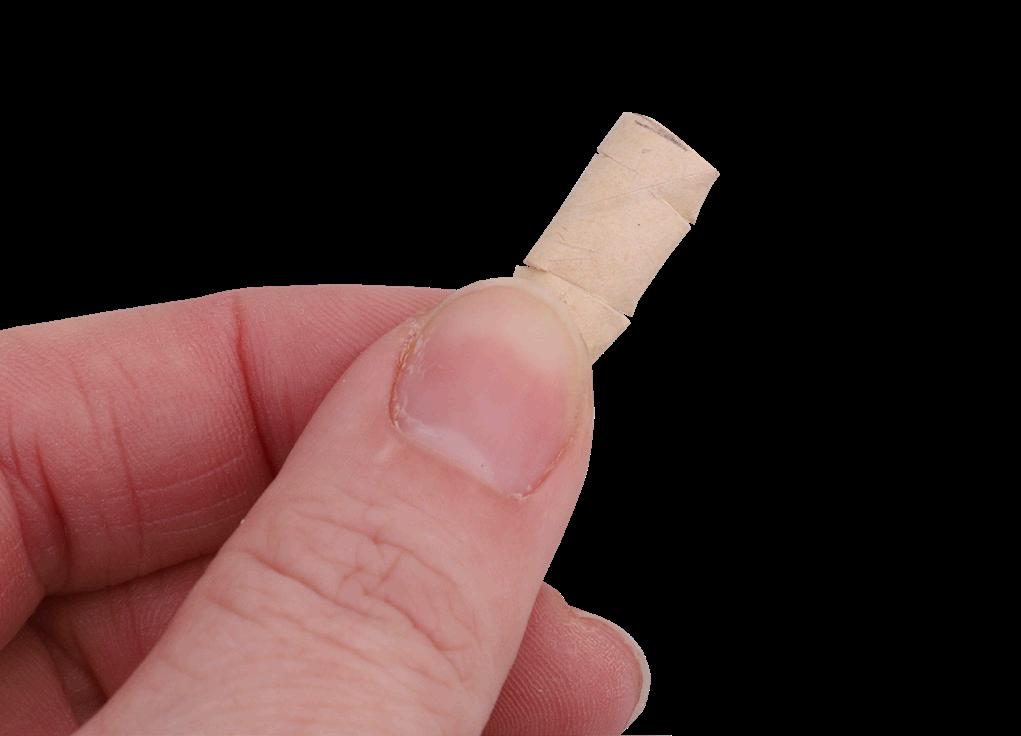
7. Cut a 1.5cm length of paper straw. Make four small slits: two on one side and two directly opposite. Be sure not to cut all the way through!
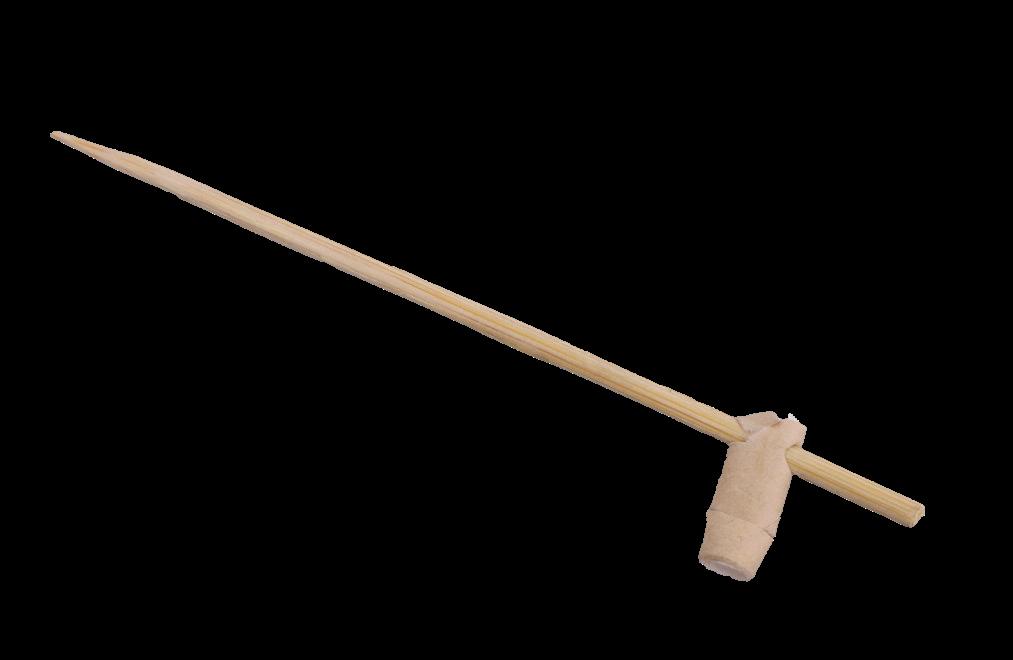
8. Cut a skewer 10cm from the narrow end. Place the other half aside to be used later. Insert the skewer through two slits as shown, so it sits about 1cm in from the cut end.

6. Apply glue to the top section of the clock face. Place the hat template onto the glue and slightly overlapping the top of the face template. Press down to secure and allow to dry.
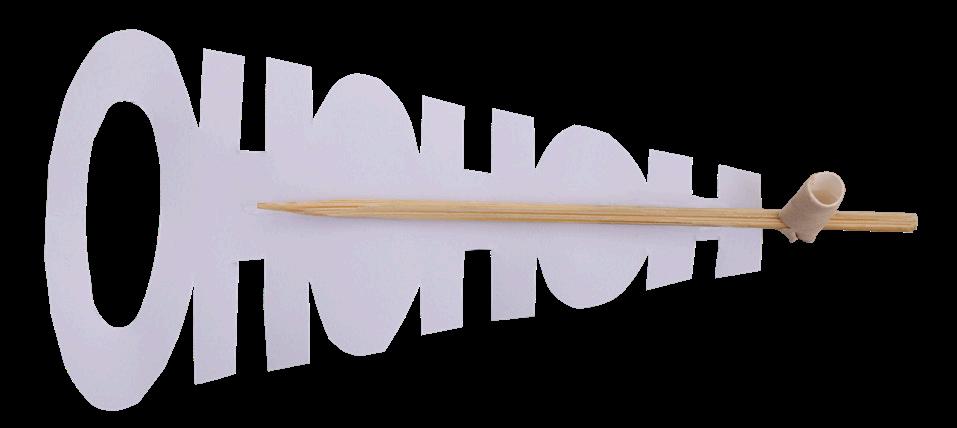
9. Glue the skewer to the back of the ‘HO HO HO’ template so the narrow end is pointing towards the opened ‘O’. Allow to dry.
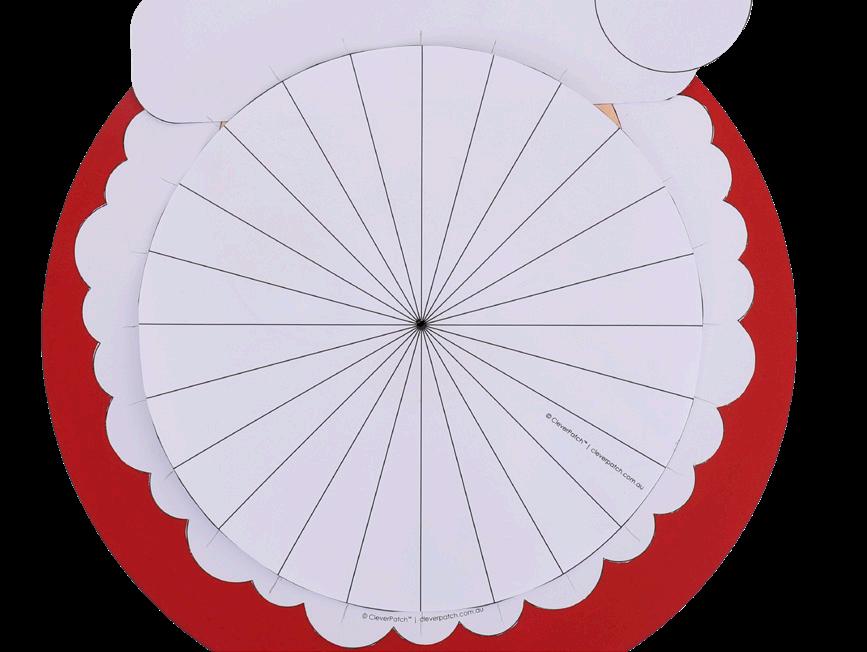
10. Pierce a hole through the centre of the circle template. Align the hole in the template with the hole on the clock face. Use the lines as a guide to make marks with a pencil for your numbers. Remove the template and write the numbers 1-24 near the marks, in an anticlockwise direction.
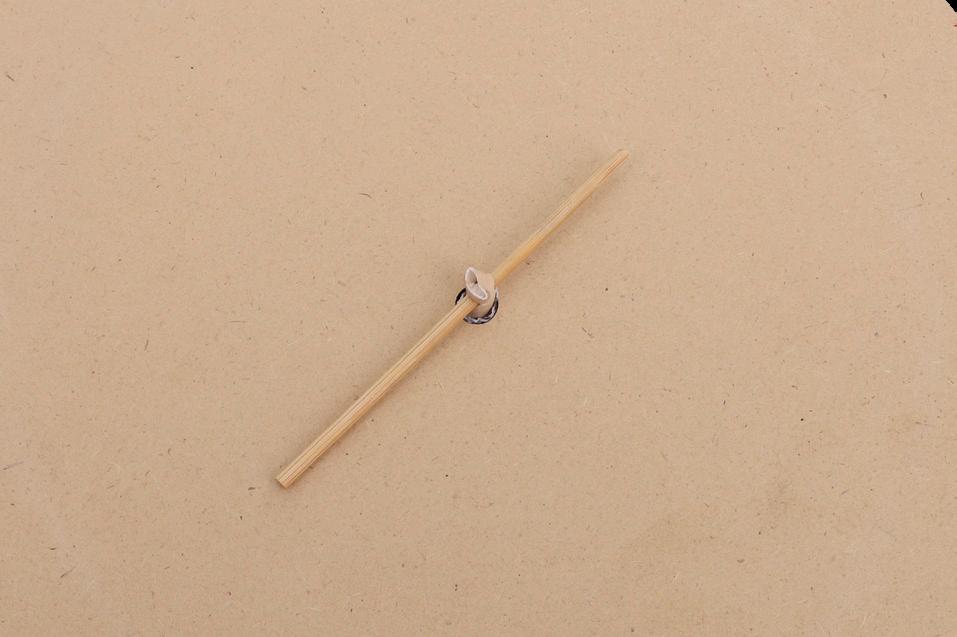
13. Insert the straw back through the centre hole on the clock face. Flip the clock face over and insert the other half of the skewer through the remaining two slits in the straw.
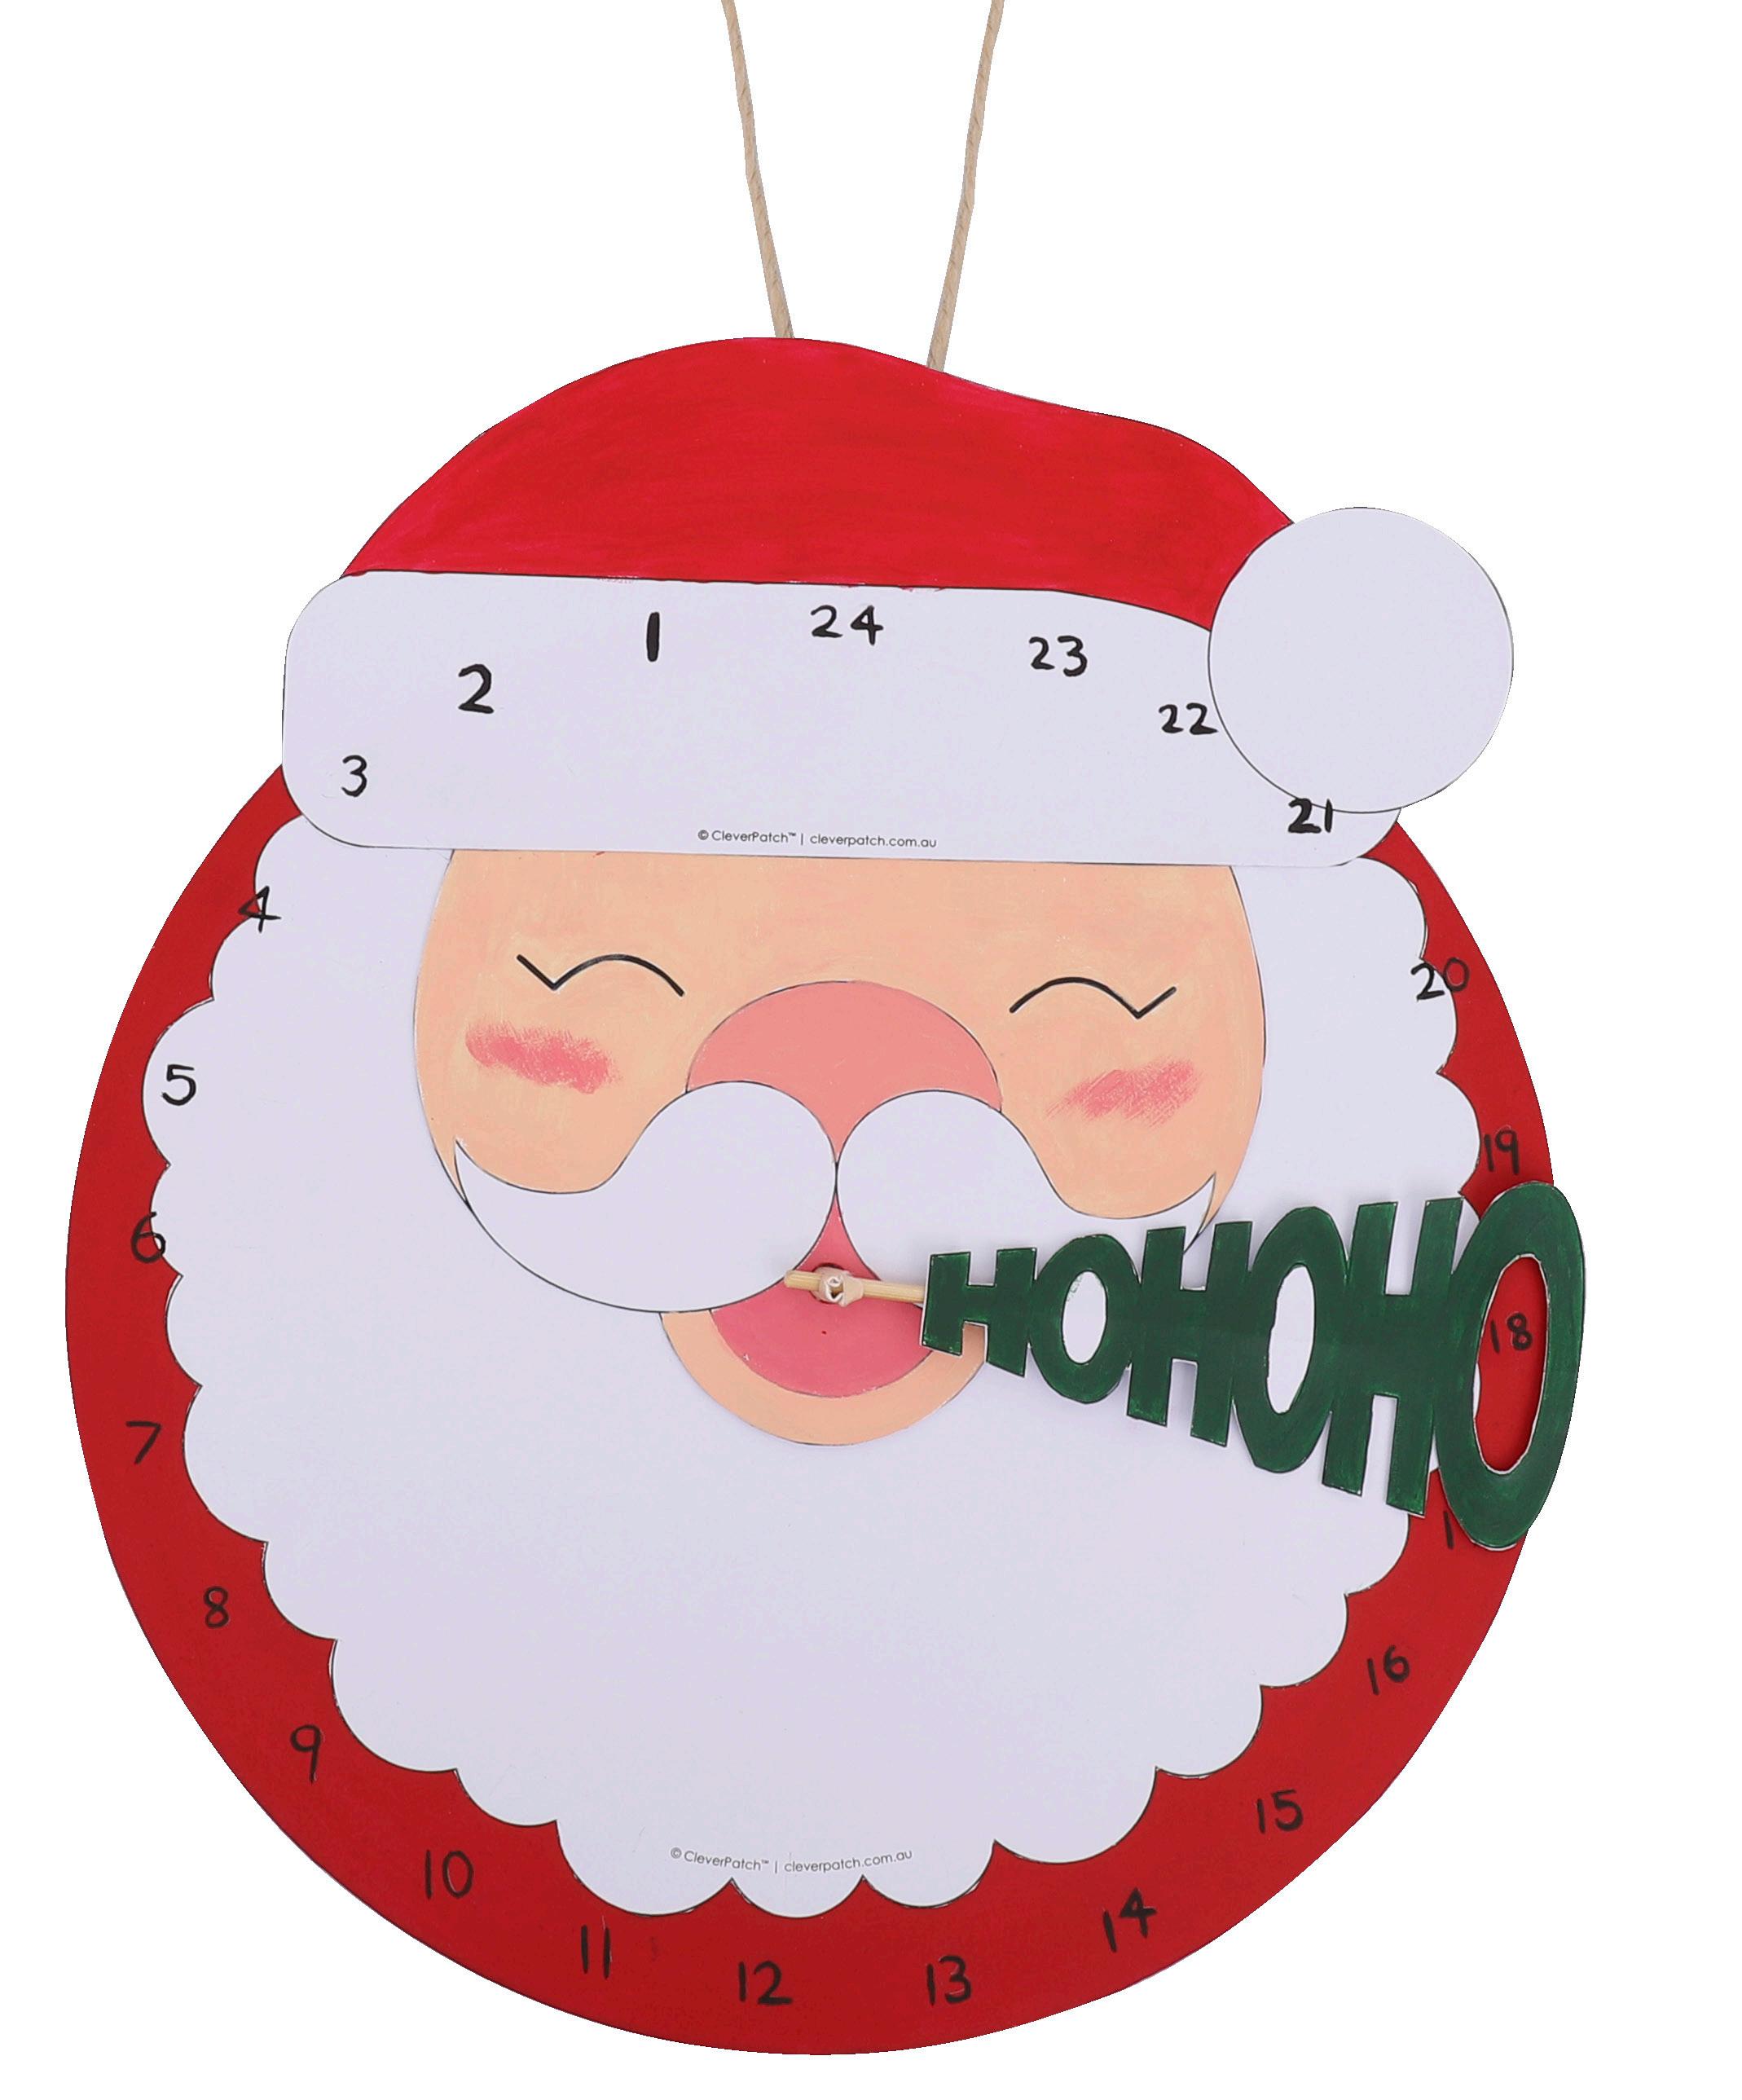
Spin Santa’s jolly laugh as you count down to Christmas!
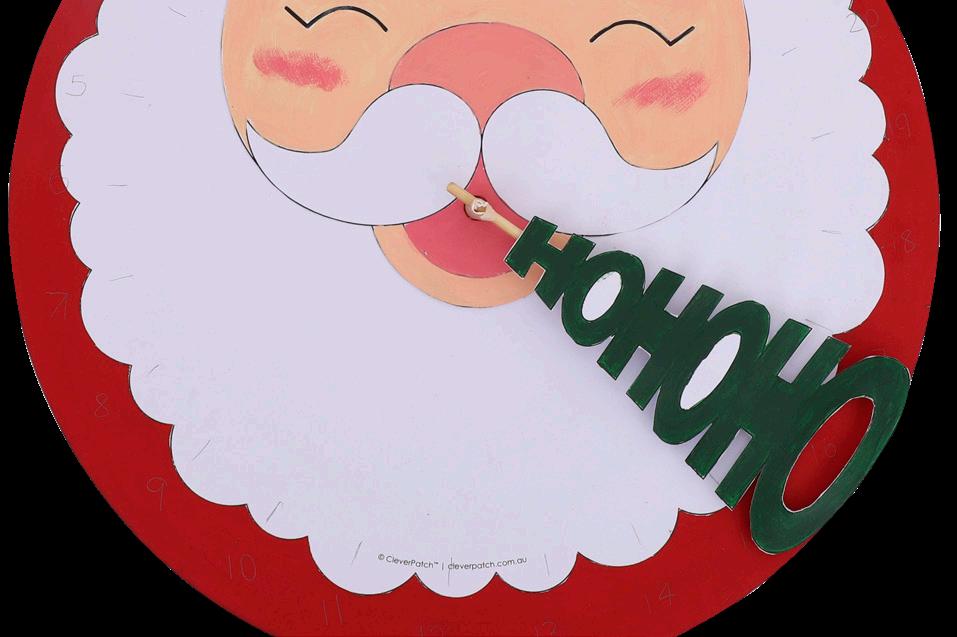
11. Insert the straw attached to the ‘HO HO HO’ template into the centre of the clock face to check the numbers can be seen through the opened ‘O’. You may need to adjust the position of the skewer or rewrite your numbers to align correctly.
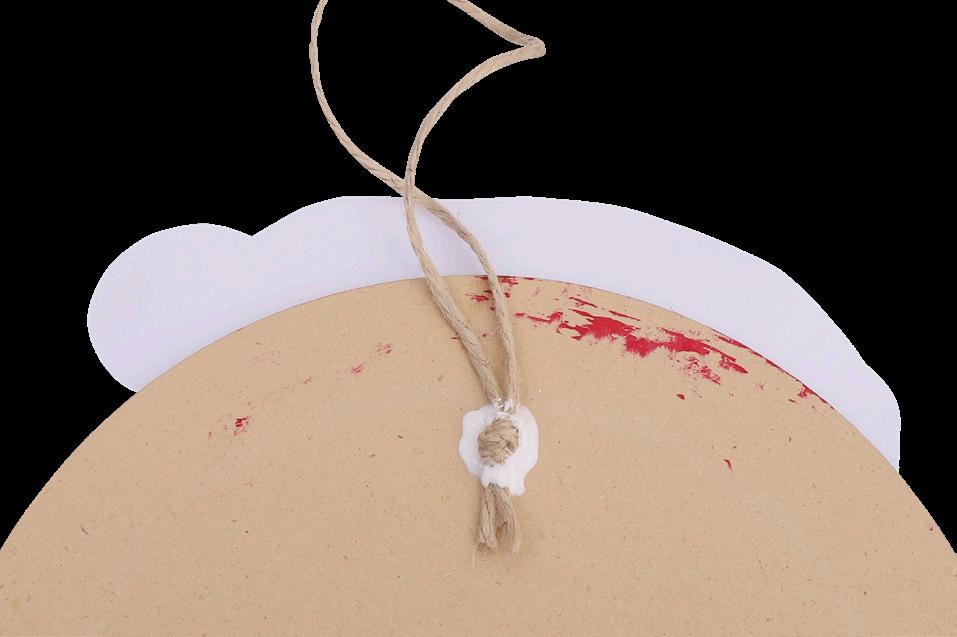
14. Cut a 50cm length of twine and make a knot in the ends. Use a generous amount of glue to attach the knot end to the back of the clock face. This will create a loop for hanging. Allow to dry completely.
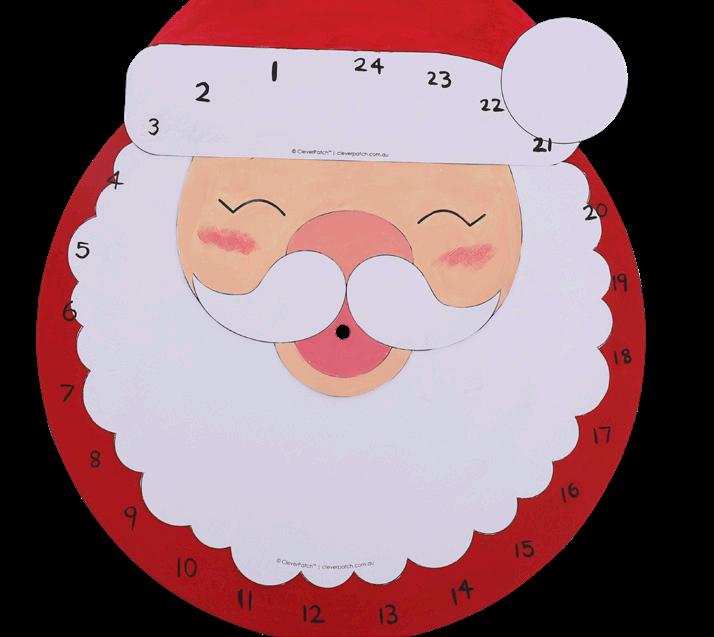
12. Remove the straw and skewer. Once you are happy with the placement of the numbers, trace over them using paint. Allow to dry.
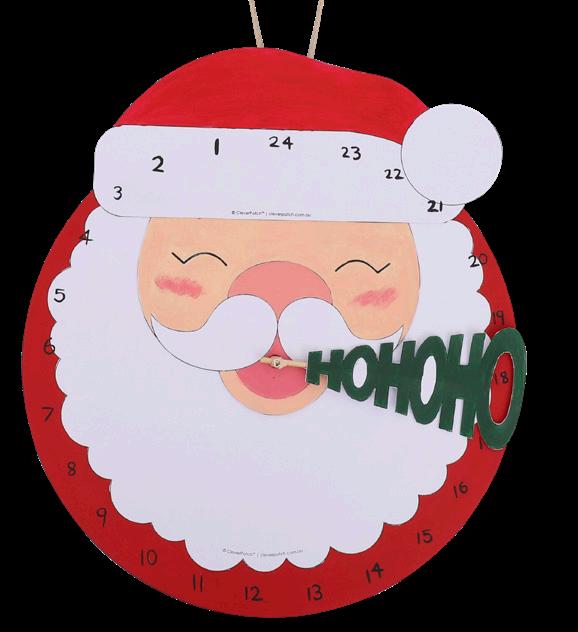
15. Your Santa Countdown Calendar is now ready to count the days to Christmas! Simply spin Santa’s jolly laugh to highlight how many days are left until Christmas.
Use this template to help you complete the activity on page 5.
Christmas Word Search
Use these templates to help you complete the activity on pages 8-9.
Use these templates to help you complete the activity on pages 8-9.
Use these templates to help you complete the activity on pages 8-9.