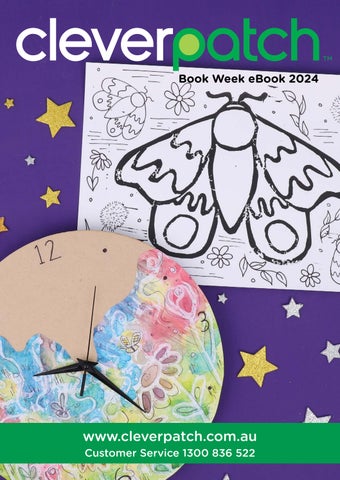
Book Week eBook 2024
www.cleverpatch.com.au Customer Service 1300 836 522
5 magical craft ideas inspired by Book Week! CBCA Book Week 2024 is from the 17th to the 23rd of August. The theme this year is “Reading is Magic”. Click here to visit the CBCA website for more information.
Contents
Self-Portrait.................................................................................................. 3 Bear & Duck Costumes........................................................................4-5 Colourful Clock........................................................................................... 6 Clay & Slime Runny Nose........................................................................ 7 Moth Print..................................................................................................... 8 Templates..................................................................................................9-11 We’ve supplied FREE templates just for you! Print as many times as you like.
KEY: Adult supervision is recommended when using scissors.
Adult supervision is recommended when using an oven.
Adult supervision is recommended when using sewing needles.
Adult supervision is recommended when using carving tools.
Keep an eye out for these icons throughout the eBook and be sure to consult an adult if needed.
CleverPatch Pty Ltd ABN 48 130 866 885
ISBN:
978-1-922894-32-8
Live Chat:
www.cleverpatch.com.au
Submit an Enquiry: www.cleverpatch.com.au/contact
Click here for MORE Book Week ideas! 2
Phone:
1300 836 522
Fax:
1300 244 139
The Patch:
9 Balbu Close, Beresfield, NSW 2322 Australia
Mail:
PO Box 7, Hunter Region Mail Centre, NSW 2310 Australia © CleverPatch ™ 2024 - www.cleverpatch.com.au
Self-Portrait Materials: • Stretched Canvas Frames – Large Rectangle – Pack of 3 – 13444 • CleverPatch™ Acrylic Paint Tubes – 75ml – Set of 14 Colours – 20811 • EverZart Permanent Pens – Black – Pack of 20 – 19810 • Other materials required: Copy or scrap paper, paint brushes, a pencil and template (page 9).
This activity is inspired by ‘Being Jimmy Baxter’ by Fiona Lloyd.
1. Think about the things that make you who you are and sketch them onto some scrap paper. You could include your favourite things, colours or activities! You might like to include notes about the colours you will use for each element.
2. Sketch a self-portrait onto another sheet of plain paper. We have included a template on page 9 to help you get started. Add the designs from step 1 around your self-portrait sketch to complete your portrait composition.
3. Once you have your design planned, recreate it onto your stretched canvas. If your paper with your plan is large enough, you can shade the back and place it design facing up onto your canvas. Trace around the design to easily transfer your sketch to your canvas.
4. Paint your design using acrylic paints. Use a range of painting techniques like blending colours, dabbing for texture or layering to make different tones. Allow to dry between layers if needed. You can experiment with the paint on scrap paper before adding to your canvas. Be as creative as you like! Allow the paint to dry completely.
5. Use a permanent pen to add fine details to your portrait. You can add outlines, interesting patterns, shapes or phrases that help to represent who you are.
6. Paint the edges of your canvas and allow to dry. Your Self-Portrait is now ready to display!
This activity is perfect for exploring identity, a sense of belonging and the social, cultural and emotional influences that make you who you are. Use creativity, imagination and artistic practice to visually communicate you being you! © CleverPatch ™ 2024 - www.cleverpatch.com.au
3
Bear & Duck Costumes Materials: • Self Cover Head Bands – Pack of 12 – 11185
• Cotton Cap – 10792
• Felt Squares – Pack of 100 – 10785
• EC Fabric Paint – Yellow – 500ml – 11246
• Sewing Needles – Blunt Tip – Pack of 25 – 11591
• EC Fabric Paint – Orange – 500ml – 11943
• Embroidery Thread – Brown – 48m – 12376
• CleverPatch™ Tacky Glue – 250ml – 16494
• Embroidery Thread – Black – 48m – 12374
• Other materials required: Brushes, pencil, fold back clips and templates (page 10).
• Embroidery Thread – White – 48m – 13717
This activity is inspired by ‘Bear and Duck are Friends’ by Sue deGennaro.
1. Print the templates on page 10 and cut them out. Place the bear ear template onto brown felt and trace around the design twice to create two ears. Trace the duck feathers template onto yellow felt. Cut out the felt shapes.
2. To create the Bear Ears: Cut five 1cm strips from the remaining brown felt square used in step 1.
3. Use tacky glue to attach the felt strips to the head band, applying glue and wrapping each strip around as you go. You may need to use fold back clips to hold the felt in place while the glue dries. Allow to dry and remove the clips.
4. Fold a bear ear felt piece over the head band so it sits to one side and the edges are aligned. Thread a length of brown embroidery thread through a needle and tie a knot in one end. Thread through the two layers of felt, pulling the length through to the knot end.
5. Blanket stitch over the edges of the felt to join them together. Ensure the stitches are pulled tight. Once you reach the other end of the felt ear, tie a knot to secure. Trim the excess thread.
6. Repeat steps 4-5 on the opposite side to complete the other bear ear. Ensure the ears are spaced apart evenly. Your Bear Costume is now ready to wear!
4
CleverTip: Click here to see how to sew a blanket stitch.
© CleverPatch ™ 2024 - www.cleverpatch.com.au
7. To create the Duck Hat: Paint the top head section of a cotton cap using yellow fabric paint. Allow to dry.
8. Paint the top and bottom of the cap’s brim using orange fabric paint. Allow to dry.
9. Stitch the felt duck feathers piece to the top of the hat using a needle and white embroidery thread. Tie a knot to secure and trim the excess.
10. Sketch two eyes onto the cap just above the brim. Back stitch with black thread to outline the eyes. Fill in the eyes using back stitches side by side, sewing over the outline. Tie a knot at the back and trim the excess.
11. Use white embroidery thread to add highlights to the eyes. Sew using a back stitch technique. Tie a knot and trim the excess.
12. Your Duck Costume is now ready to wear!
CleverTip: Click here to see how to sew a back stitch. © CleverPatch ™ 2024 - www.cleverpatch.com.au
5
Colourful Clock Materials: • CleverPatch™ Cover Paper – A4 – White Pack of 100 – 18170 • Wooden Clock Making Kit – 18320 • CleverPatch™ Liquid Watercolour – 250ml Set of 10 Colours – 16745 • Foam Stencil Stampers – Pack of 9 – 19639 • Basics Large Oil Pastels – White – Pack of 48 – 20135 • EverZart Permanent Pens – Black – Pack of 20 – 19810 • CleverPatch™ Glue Stick – 40g – 13974 • Other materials required: Scissors, a pencil, 1 x AA battery and paint brushes.
This activity is inspired by ‘Timeless’ by Kelly Canby.
1. Place the clock face on a sheet of cover paper and align with the bottom edge. Trace around the wooden clock to give you a guide for your design. Sketch a design into the shape. Slightly erase some of the lines and trace over your design using a white oil pastel.
2. Use foam stampers and paint brushes with liquid watercolour to add colour to your design. Work with one colour at a time and allow to dry between colours. Alternatively, you can choose to let the colours blend together.
3. Continue adding watercolours until you are happy with the design. The oil pastel will resist the watercolour, leaving those sections white. Allow to dry completely. Use a permanent pen to add further details.
4. Cut out your design and position onto your wooden clock face. We have cut our design to fit around the hole in the centre. Alternatively, use a sharp pencil to punch a hole through the paper if you are covering the middle hole. Glue the design in place and allow to dry.
5. Use a permanent pen to add numbers around the outside edge of the clock. You might like to add all the numbers 1-12 or create a decorative look like we have!
6. Follow the included instructions to assemble the clock mechanism. Your Colourful Clock is now ready to use!
6
© CleverPatch ™ 2024 - www.cleverpatch.com.au
Clay & Slime Runny Nose
This activity is inspired by ‘Eww Gross: Foul Facts and • Elmer’s Magical Liquid – 258ml – 18653 Putrid Pictures’ by • CleverPatch™ Clear Gum Glue – 1 Litre – 20792 • CleverPatch™ Liquid Watercolour - Green – 250ml – 16344 Dan Marshall. • CleverPatch™ Polymer Clay – Assorted – Pack of 12 – 18796
Materials:
• Scratch Board Tools – Wooden – Pack of 20 – 15733 • Other materials required: Craft bowl, spoon, scrap paper, pencil, oven, oven tray and baking paper.
1. Decide what type of nose you would like to create. We have chosen to make a human nose. You might choose to make a dog nose, or a monster nose! You might find it easier to sketch a nose design to help you when constructing.
2. Gather the clay colours you need to create your nose. We are blending a row of ochre and a row of coral pink together to create a peach tone. Warm the clay between your fingers until it becomes soft and malleable.
3. Roll the clay into a ball then pinch and mould the clay to start forming your nose shape.
4. Once you are happy with the shape, use a scratch board tool to poke holes through the nostrils so the tool comes out the back of the nose. Make sure the holes are wide enough for the slime to seep through!
5. Place your clay nose on an oven tray lined with baking paper. Bake for 10 minutes at 130°C. You may need to bake for longer depending on the size. Allow to cool completely.
6. Add a small amount of clear gum glue to a craft bowl. The amount needed will depend on the size of your nose design. We have added 50ml of glue. Add 2-3 drops of liquid watercolour and stir to combine. Add more drops for a deeper colour.
7. Add a small amount of Elmer’s Magical Liquid to the glue mixture and stir until combined. Add more Magical Liquid if required, until it starts to form a slime consistency.
8. Pick up the slime mixture and move around in your hands to help blend everything together. It should be slightly tacky and stretchy!
9. Your Clay & Slime Runny Nose is now ready to use. Push the slime into the back of the clay nose and watch it ooze out of the nostrils! Eww gross!
© CleverPatch ™ 2024 - www.cleverpatch.com.au
7
Moth Print Materials: • Lino Tile Velvet Print – Double Sided – 20 x 30cm – 19269 • Lino Roller – 15cm – 12928 • Lino Carving Tools – Pack of 6 – 12933 • Derivan Block Printing Ink – Black – 250ml – 21433 • Acetate Sheets – A4 – Pack of 10 11934 • CleverPatch™ Cover Paper A4 – White – Pack of 100 – 18170 • EverZart Permanent Pens Black – Pack of 20 – 19810 • Masking Tape – 24mm x 50m – 11775 • Other materials required: Pencil and template (page 11). Print out the template on page 11. This activity is inspired by 1.Shade the back of the template using a pencil. Place the template onto a ‘Raised by Moths’ by Charlie lino tile and trace over the template design. This will transfer the design Archbold & Michelle Conn. onto the lino.
2. Remove the template from the lino and go over the lines so they are thicker and easier to see. The blue areas (negative space) remaining will be carved away. If you wish, you can mark these areas with an ‘X’.
3. Start with the ‘V’ tool to create a border near the pencil lines. Be sure to keep your non-dominant hand behind the tool and carve away from yourself in case the tool slips! It is best to use a slow, controlled carving motion, with your hand firmly holding the tool.
4. Use the ‘U’ tool to remove the remaining blue sections. Ensure you carve in the same direction to get a nice finish. If you don’t want any ‘noise’ in the final print, ensure all the sections are evenly carved away. ‘Noise’ refers to the peaks left from carving that are seen when printed.
5. Tape a sheet of acetate onto your work surface. Place a small amount of block printing ink onto the acetate sheet and coat the lino roller in the ink. Roll horizontally and vertically to create a square the same width as the roller to help cover it completely.
6. Roll over the design to cover the areas you need inked. If you notice any unwanted ‘noise’ in the negative space you can carve them out or wipe the sections clean with wet paper towel.
7. Place a sheet of cover paper over the lino tile and press down over the design to print. Use pressure with the heel of your hand, rubbing in a circular motion. Remove the paper to reveal your design. Allow to dry.
8. Add a background design using a permanent pen. Draw patterns, flowers or smaller moths - you can be as creative as you like. Your Moth Print is now ready to display!
8
© CleverPatch ™ 2024 - www.cleverpatch.com.au
Self-Portrait Use this template to help you complete the activity on page 3.
© Cle verPatch™
© CleverPatch ™ 2024. Subject to terms of use at www.cleverpatch.com.au
u m.a h.co | cleverpatc
9
Bear & Duck Costumes Use these templates to help you complete the activity on pages 4 and 5.
Bear Ear Duck Feathers
au
© CleverPatch™ | cleverpatch.com.au
©C
leve
rPatch™ |
. om h.c c t rpa cleve
Book Week 2024 Word Search
C T J W G K X B P R R G D G K S R I B O N V C P O I A I R O S T T M C N I B A X T E R O O U H O I E M I D I F K Z Q S B I Z G R O L V M A C P M Y S R H A N T Y E E F B E T N Y R D M J H X N Z O S C R R O H S F S S X T Z D H O S V O R P S B X M U B L I Q M U D W H O N G E R E K P A W C B R Y Q T Z W E A J L K C U D F U D I Q U J R N O I T A N I G A M I T X A N O Z J K T J P O S R K R V W E D I L L U S T R A T O R F I E R U T C I P I R M H H I W Q
10
Book
Timeless
Illustrator
Imagination
Gross
Author
Bear
Moths
Story
Duck
Reading
Adventure
Magic
Baxter
Picture © CleverPatch ™ 2024. Subject to terms of use at www.cleverpatch.com.au
Moth Print Use this template to help you complete the activity on page 8.
™
h atc verP © Cle
© CleverPatch ™ 2024. Subject to terms of use at www.cleverpatch.com.au
lev |c
erp
o h.c atc
au m.
11