LANDSCAPE WATERING
BY THE NUMBERS
WATERING MADE SIMPLE
If landscape watering has ever left you guessing, you’re in the right place. This guide breaks watering down by the numbers, so you can water confidently—not by guesswork. You’ll learn the key measurements that matter: how deep to water (in feet), how much to apply (in gallons), how many emitters per plant, and how many days to wait between watering.
Because water is limited in our desert environment— and more than half of a household’s annual water use goes outdoors—understanding these basics can save thousands of gallons each year while keeping your landscape healthy and beautiful.
THIS BOOKLET WALKS YOU THROUGH FOUR SIMPLE STEPS:
01 Identify how much water your plants need
02 Measure how much your irrigation system applies
03 Do the math to find your run time
04 Determine seasonal watering frequency—how often to water
Along the way, you’ll find easy tables, worksheets, Pro Tips, Water Wisdoms, and Key Takeaways to help you build a custom watering plan with confidence.
Turn the page and start with the first number that matters: how much water your plants need.
WANT A LITTLE EXTRA HELP? AN ONLINE VERSION OF THIS GUIDE DOES THE MATH FOR YOU, INCLUDES TOOLS, VIDEOS, AND PRINTABLE RESOURCES BEYOND WHAT’S IN THIS BOOKLET. VISIT WATERUSEITWISELY.COM/HOWTOWATER. PRO TIP
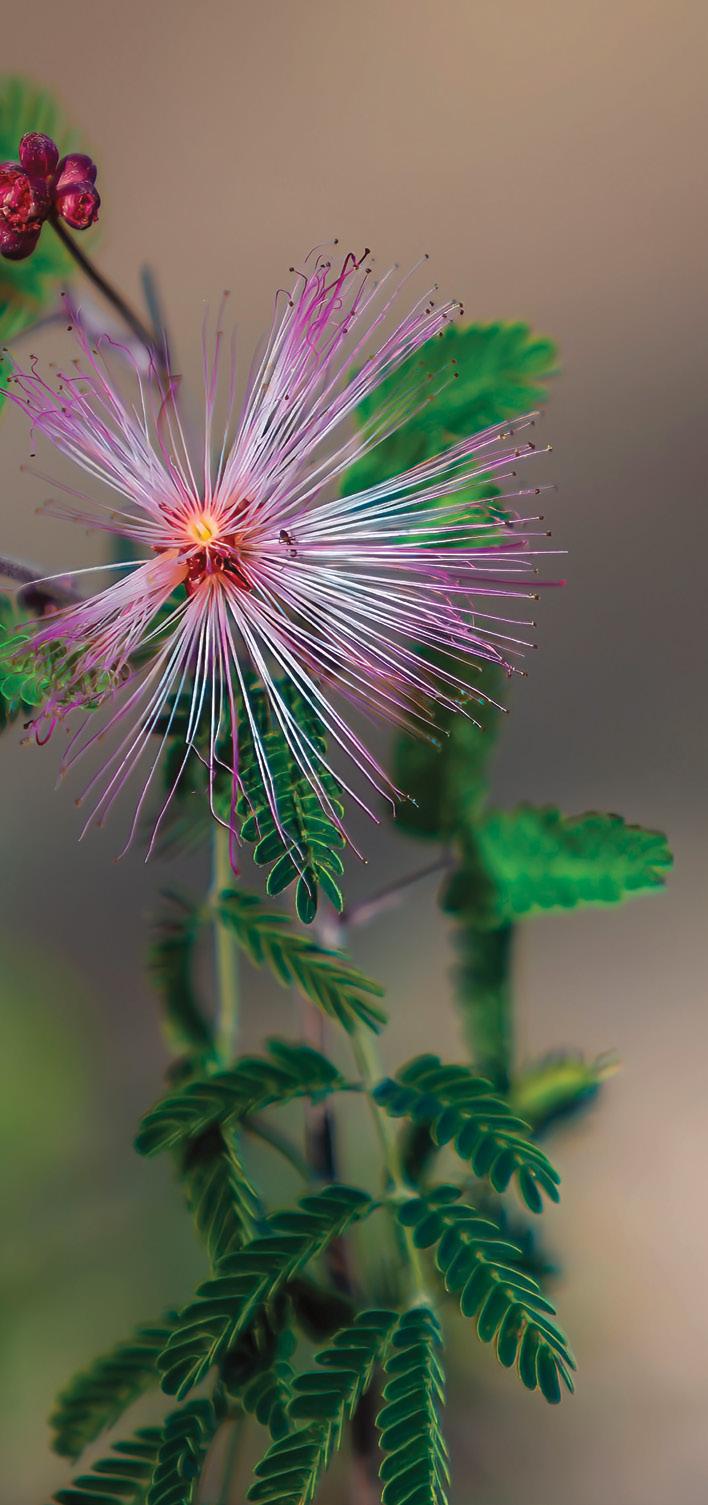
Pink Fairy Duster. Photo by Dave Seibert. Courtesy of AMWUA.
WHY SMART WATERING MATTERS
Arizona’s low rainfall, dry air, intense sun, and temperature extremes make landscape care especially challenging.
With up to 70% of household water used outdoors, how you water can make a big difference in water savings and plant health.
WHAT’S INSIDE
Plant Water Needs Page 3
System Output & Can Test Page 5
Calculating Run Time Page 7
Frequency: How Often to Water Page 12
Controllers & Scheduling Page 15
System Checks Page 16
Troubleshooting Page 17
Quick Watering Guides Page 18
Beyond the Numbers Page 21
Ruler & Scheduling Card Page 22
• Watering too much makes plants grow faster than necessary, leading to more mowing, pruning, and upkeep. Save water—and your weekends!
• Fertilizers can speed up growth—and thirst. Use them sparingly, and remember, desert natives thrive without them.
SOIL PROBE TEST
Check how deep the water soaks in using a soil probe, a long screwdriver, or a sharpened piece of rebar.
3’ Soil Probe
Long Screwdriver
HOW MUCH WATER DO YOUR PLANTS NEED?
The goal is to give your plants just the right amount—not too little and not too much. Too little water can cause wilting or even longterm damage, while too much can drown roots by cutting off their oxygen supply.
Here’s the trick: Think of the root zone (area of roots) like a hidden tank beneath the soil. Each time you water, your goal is to fill that tank completely—don’t just wet the surface. Trees need more water than shrubs or groundcovers because their roots go deeper and wider. By watering to the right depth and width for each plant, you’ll help them stay healthy and thriving!
HOW DEEP SHOULD YOU WATER?
Use this simple root-depth guideline: 6–10 INCHES for grasses.
1 FOOT for small plants like cacti and annuals.
2 FEET for medium plants like shrubs, groundcovers, and vines.
3 FEET for large plants like trees.
To test soil depth, wait about an hour after watering, then push a soil probe, long screwdriver, or piece of rebar into the ground. It should glide through wet soil and stop when it hits dry soil. Water the amount needed until the probe easily reaches your target depth.
HOW WIDE SHOULD YOU WATER?
Once a plant is established (see page 14), most of its waterabsorbing roots are found near the dripline—the outer edge of the plant’s canopy, not by the base of the trunk or stem. To water effectively, place your emitters along the dripline. This way, the water will spread down and out, soaking the soil and reaching the entire root zone. Note that watering at the trunk can even harm the plant.
PRO TIP
WE’VE ESTIMATED THE GALLONS OF WATER NEEDED TO SATURATE YOUR PLANTS’ ROOT ZONE BASED ON SIZE AND TYPE. SEE TABLE C, PAGE 9.
KEY TAKEAWAY
Water the root zones of your established plants every time you irrigate. Larger plants need more water than smaller ones because their roots grow deeper and wider. For new plants, follow a different watering method—see page 14 for details.
WATER ESTABLISHED PLANTS TO THE RIGHT DEPTH AND WIDTH
Suggested Watering Depths for Different Types of Plants
Place Emitters Along a Plant’s Dripline
Tree roots often spread even wider.






For new plants, position emitters at the root ball’s edge. This keeps young roots moist while also soaking the surrounding soil for new root growth.
To soak the root zone, space emitters around the dripline (edge of the canopy):
• Trees may need 3, 5, or even more emitters evenly spaced
• Shrubs do well with 1–3 emitters
• Small plants need just 1 emitter
Even coverage helps water reach all the roots. See Suggested Drip Emitter Quantities (page 9).
HOW MUCH DOES YOUR IRRIGATION SYSTEM APPLY? 02 WATER WISDOM
• Water late at night or early morning (9 PM–5 AM) so less gets evaporated by heat and wind—and more makes it to the roots where your plants need it most.
Now that you know what your plants need, let’s see what your system delivers.
Different watering methods apply water at dramatically different rates—it all comes down to flow rate. Here’s a comparison of how long it takes to deliver 10 gallons:
CAN TEST
Find out how much water your sprinklers really apply!
STEP 1
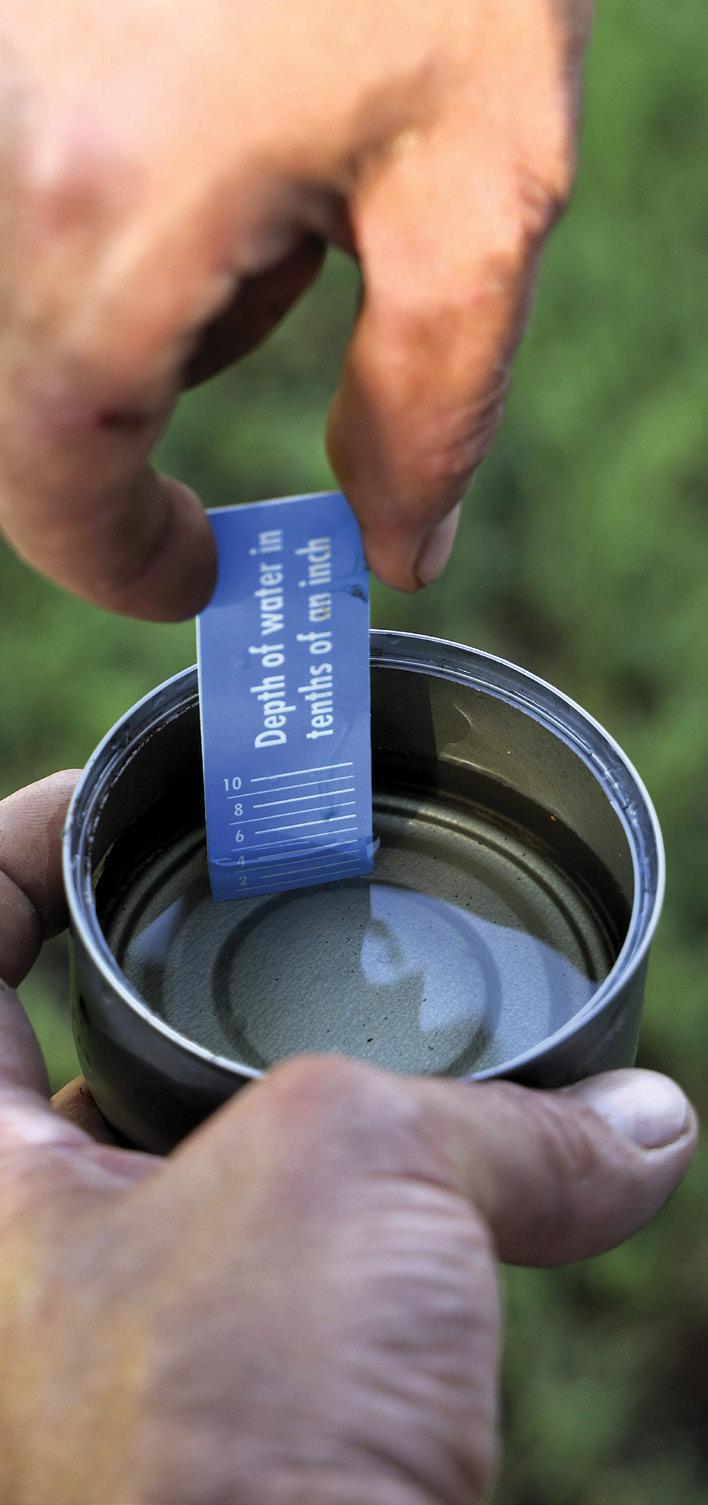
Place several shallow, flat-bottomed cans on your lawn. Turn on the sprinklers for 15 minutes.
See the difference? That’s why drip systems may need multiple emitters and longer run times to reach deep into the root zone. Be sure your watering system’s output matches your plants’ needs!
MEASURING LAWN SPRINKLER OUTPUT
Sprinkler output varies depending on spray heads, water pressure, and system design—so it’s important to measure how much water your system actually applies. Luckily, the Can Test is quick, easy, and even fun for kids to help with!
Here’s how to do it: Gather 6 to 8 shallow, flat-bottomed cans (like tuna or cat food cans) and place them evenly across your lawn, spacing them 4 to 5 feet apart. Run each sprinkler zone for 15 minutes. When the time is up, use the ruler on page 22 to measure the water depth in each can. Then do the math: The example below shows how to add up all the measurements and divide by the number of cans to find the average depth. That’s your sprinkler number—the inches of water your system applies in 15 minutes. You’ll use this number to calculate run times in Step 3 on page 7.
YOUR NUMBERS IN THE SPACE PROVIDED BELOW:
STEP 2
Measure the depth of water in each can.
Some variation between cans is normal, but if you see big differences (greater than 0.2 inches), your system may need adjusting to improve efficiency. Rerun the test after making changes to check for improvement. The goal is to have even distribution. On average, pop-up sprinklers apply about 0.4 inches of water in 15 minutes, while rotating sprinklers apply 0.2 inches or less.
PRO TIP
YOU ONLY NEED TO DO THE CAN TEST ONCE— UNLESS YOU CHANGE YOUR SPRINKLER SYSTEM OR NOTICE A BIG SHIFT IN WATER PRESSURE.
MEASURING DRIP OR BUBBLER OUTPUT
Drip systems and bubblers, used for trees and shrubs, deliver water right where plants need it—at the roots. To water wisely, first figure out how much each plant is getting.
Drip Emitters are rated in gallons (or liters) per hour. Add up the output of all emitters around a plant to find the total applied. Example: 3 emitters x 2 gallons/hour = 6 gallons/hour Bubblers typically apply ½ to 2 gallons per minute, with either a fixed or adjustable flow rate (usually stamped on top). They’re often used for trees or planter beds. Record your totals on the page 10 worksheet like this example.
TIME WORKSHEET FOR PLANTS (Example)
You don’t need to list every plant! For each valve, just group plants by type and size.
KEY TAKEAWAY
Knowing how much water your system applies can be tricky—sprinkler output varies by design, and emitter flow rates aren’t obvious (colors can mislead and info on the emitter is tiny or missing). That’s why doing a Can Test and measuring emitter output is the best way to find out what your system really delivers.
ESTIMATING EMITTER FLOW
Not sure of emitter output? Try this hack: grab a ½-cup (4 oz) measuring cup and time how long it takes to fill to determine gallons per hour (GPH).
Use the flow estimation visual guide below
MATCH YOUR SYSTEM’S OUTPUT TO YOUR PLANTS’ NEEDS 03 WATER WISDOM
• Grass and sprinklers use more water than any other part of the landscape. Getting both run times and frequency right makes the biggest difference on your water bill.
Now it’s time to put the numbers to work. This step is all about run time—how long to water so roots get a deep soak. We’ll cover how often to water next, but first, make sure you’re applying the right amount.
ADDING IT ALL UP FOR GRASS
Run Time: Grass needs about ¾ inch of water each time you irrigate to wet the root zone (soil depth of 6–10 inches). Use your Can Test sprinkler number (page 5) with Table A to find your run time.
Example: A sprinkler number of 0.4 = a run time of 28 minutes.
LAWN WATERING TIPS
SIGNS OF UNDERWATERING
• Bermuda turns bluish-gray
• Grass doesn’t spring back after being stepped on
• Soil is hard—pushing a screwdriver in takes effort
• Turf still feels warm after sunset
SIGNS OF OVERWATERING
• Constant puddles or soggy areas
• Turf smells musty or damp
• Soil feels soft, spongy, or mushy
• Algae or mushrooms are present
PRO TIP
ONCE YOU’VE SET THE CORRECT RUN TIME FOR YOUR SPRINKLERS, IT DOESN’T CHANGE. WHAT CHANGES WITH THE SEASONS IS FREQUENCY—HOW MANY DAYS YOU WAIT BETWEEN WATERING.
Frequency: The Landscape Watering Guidelines chart (page 22) divides the year into just four seasons, so the suggested watering range is intentionally broad. For example, in spring it shows warmseason grasses may need water anywhere from every 4 to 14 days. But your lawn’s needs are more precise than that. Adjusting your watering monthly not just seasonally—will save water and keep grass healthier. Table B makes it easy, with a month-by-month schedule based on historic weather patterns for both warm-season grasses like Bermuda and cool-season grasses like winter rye.
KEY TAKEAWAY
Set Your Sprinklers Right
• Run time: Set it once with Table A and leave it.
• Frequency: Adjust monthly with Table B.
• Result: Deeper roots, healthier grass, less wasted water.
TABLE A: Run Time of Sprinklers to Apply ¾-Inch with Each Irrigation
TABLE B: Monthly Frequency (Days Between Watering) for Bermuda and Rye Grasses
GRASS IS THIRSTY
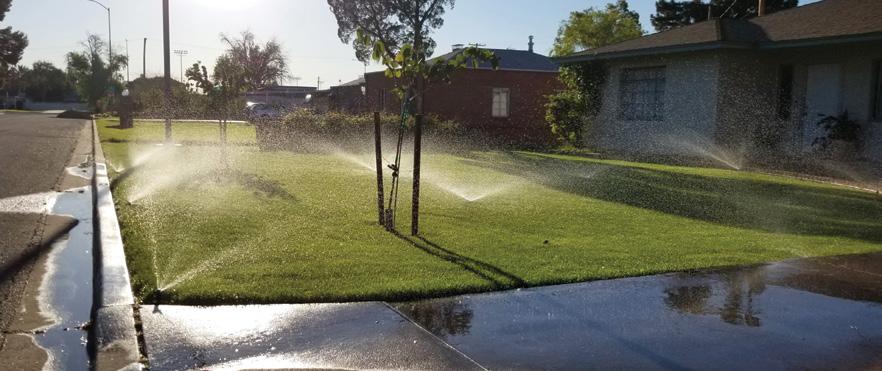
A lush lawn comes at a high price in the Arizona desert. Unlike regions where rain is plentiful and grass grows with little help, here it takes extra soil prep and constant care. The real challenge? Grass is the thirstiest part of your yard, and sprinklers often make the problem worse. Poor design, evaporation, runoff, and leaks can waste gallons every day.
How Much Water Does Your Grass Need?
Just Add Water
That’s an extra 47 inches or 30,000 gallons of water each year for every 1,000 ft2 of lawn.
Grass drinks 7x more water than rain provides.
THREE TIPS TO MAKE YOUR LAWN MORE WATER EFFICIENT
1. Reduce or Rethink the Lawn: Grass can have a place—for play areas, pets, or recreation—but it doesn’t need to dominate your yard. Swap nonfunctional grass for drought-tolerant plants and xeriscape designs. Many cities and water providers even offer rebates to help with removal.
Note: Limit grass to spaces where it serves a functional purpose.
2. Choose the Right Sprinkler Head: On clay or slopes, use the right head and/or cycle-and-soak.
Pop-up spray nozzles apply water quickly and evenly across small areas. On heavy clay soils or slopes, runoff can occur. Typically applies ¾” in 15–30 min
Single-stream rotors deliver larger drops at a slower rate, reducing wind loss and allowing better absorption. Typically applies ¾” in 60–90 min
Note: Don’t mix sprinkler head types on the same irrigation zone.
Multi-stream rotors apply water evenly at the slowest rate, giving every drop time to soak in. Typically applies ¾” in 60–120 min
3. The Great Winter Lawn Debate: That soft, green carpet of winter rye may look great—but it demands a lot of water to keep it that way. To germinate the seed and maintain it takes an extra 8,000–10,000 gallons of water per 1,000 square feet each winter.
Note: Dormant Bermuda, by contrast, uses a fraction of the water—just a monthly watering (or less with winter rain). Come spring, it comes back stronger and healthier.
5 Reasons to Skip Winter Grass
1. Save water: 8,000+ gallons per 1,000 sq. ft.
2. Save money: less seed, fertilizer, mowing, and water.
3. Save time: no scalping, seeding, or weekly mowing.
4. Healthier Bermuda: overseeding stresses summer grass.
5. Cleaner air & quieter yards: fewer mowers, blowers, and dust clouds.
KEY TAKEAWAY
A ‘golden’ Bermuda lawn in winter isn’t a loss—it’s a smart seasonal choice that protects your wallet and our water supply.

Annual Rainfall vs. Grass Water Needs
55”
WATER WISDOM
• As trees and shrubs grow, their roots spread wider and deeper—and so do their water needs. Revisit your run times every few years to be sure they’re still getting enough water. That may mean adding emitters or increasing flow rates.
• Once you’ve determined the right run time, it stays the same. As the seasons change, it’s the frequency—how often you water—not the run time, that gets adjusted.
ADDING IT ALL UP FOR LANDSCAPE PLANTS
For your trees, shrubs, groundcovers, and other plants on drip or bubbler systems, it’s important to match water applied to the size and type of each plant. Use Table C and the Run Time Worksheet on the next page to calculate how long to water. This ensures your plants get the deep soak they need. How it works:
• Table C shows how much water is needed to soak the root zones of different plant sizes and types.
• Combine that information with the emitter/bubbler output numbers you measured in the previous section.
• Then plug the totals into the Run Time Worksheet to estimate how long to run each valve or zone.
SUGGESTED DRIP EMITTER QUANTITIES
*GC=Groundcover
Don’t crowd all the emitters next to the tree trunk! Place them around the dripline— the outer edge of the canopy—so water reaches the roots where they grow.
*GC=Groundcover
NOTE: The amount of water needed will vary depending on soil type and soil conditions. See illustration on page 13.
Fine-tuning may be needed: Try to set up emitters so each plant gets the water it needs in two to six hours. For example, Table C shows that a tree with a 5-foot canopy needs about 22 gallons around its root zone. With just a single 1-gallon-per-hour emitter, that would take 22 hours—far too long! A better setup would be three 2-gallon-per-hour emitters spaced around the tree’s dripline. Together, they put out 6 gallons per hour, giving the tree its healthy drink in about 3.5 hours
KEY TAKEAWAY
Set Your Drip Right
• Run time: Select emitter flow rate/quantity so plants get the Table C water amounts within 2–6 hours.
• Frequency: Water deep but infrequent (pages 12–14).
• Result: Deeper roots, healthier plants, less wasted water.
TABLE C: Gallons of Water Required to Wet Root Zone
PLANT CANOPY DIAMETER IN FEET
RUN TIME WORKSHEET FOR LANDSCAPE PLANTS
Step 1: List your plant types and sizes by valve (columns 1 & 2).
Step 2: For each plant type, record the number of emitters and the emitter output in gallons per hour (columns 3 & 4).
Step 3: Multiply column 3 by column 4 and write the result in column 5 (this is the total output per plant).
Step 4: From Table C, look up the water requirement for each plant type and size. Enter it in column 6.
Step 5: Divide column 6 by column 5 to find the run time in hours. Enter this in column 7.
Metric conversions:
*Are all your different plant types on the same valve? You’re not alone! Many landscapes are set up this way. In this example, when you total the emitter output, you’ll find that different plants need different run times to get the right amount of water. Learn how to balance those run times with a few simple adjustments on page 11
BECAUSE OF DIFFERENT WATERING NEEDS, IT IS BEST TO PLACE TREES AND SHRUBS ON SEPARATE VALVES.
WATER WISDOM
• If you can’t separate trees, shrubs, and succulents onto different valves, adjust emitter numbers and flow rates so their run times align—it’s a simple fix that makes your system more efficient.
• If you water to the driest spot or thirstiest plant, everything else gets too much.
• Got perennials? Follow the same watering recommendations as shrubs, groundcovers, and vines.
ARE YOUR TREES AND SHRUBS ON THE SAME VALVE?
Many irrigation systems are set up with one valve serving plants of different types and sizes. In the Run Time Worksheet (page 10), for example, trees, shrubs, and succulents all share the same valve— even though they have very different watering needs. Ideally, they’d be separated, but you can still improve efficiency with a few small adjustments. In the example, adding two extra emitters to each tree and reducing the succulent emitters from 1 GPH to ½ GPH helps bring the run times into alignment.
Adjustments to Help Align Watering Frequency When Different Plant Types Share a Valve
• Hand-water smaller plants that can’t go as long between irrigations.
• Add extra mulch around smaller plants to help soil hold moisture longer.
• Plug emitters on trees and use soaker hoses when needed.
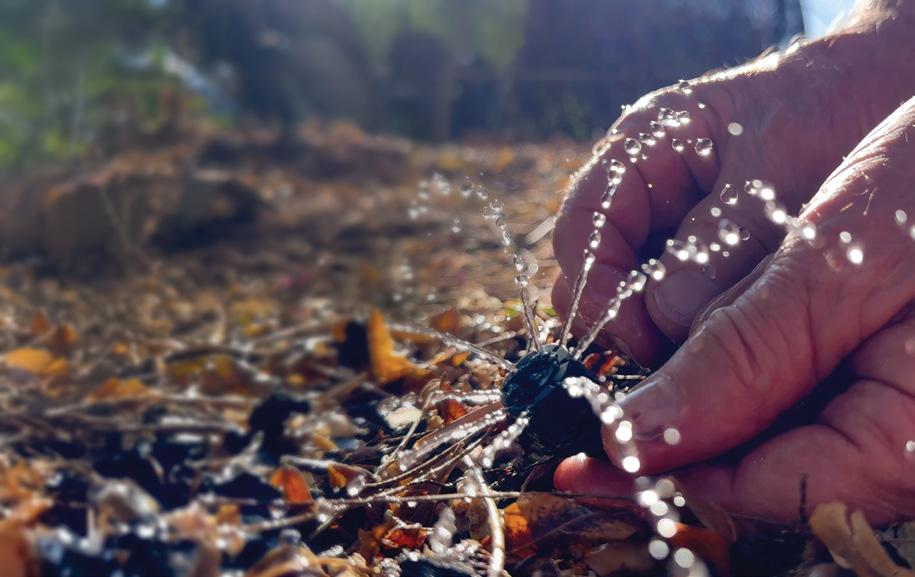
Micro Bubblers: Not for Most Landscapes
While micro bubblers (also called shrubblers) offer flexibility, they’re not recommended for most landscapes. Their uneven output, frequent clogging, and variable flow make efficient watering difficult.
Micro bubblers adjust both flow rate and spray pattern by twisting the top—from a slow drip to a small spray. Typical flow ranges from 0–14 gallons per hour (GPH).
For consistent, efficient watering, choose pressurecompensating fixed-flow emitters. They deliver the same amount of water from each emitter regardless of pressure—so plants get even moisture without waste.
Photo by Dave Seibert
FREQUENCY/ HOW OFTEN TO WATER 04
The Run Time Worksheet (page 10) shows how long to water. Frequency—how often to water—is trickier. The Landscape Watering Guidelines (below) divide frequency into seasons. Adjusting your schedule at least seasonally is essential because plants use 3 to 5 times more water in summer than in winter.
WATER WISDOM
• Adjusting irrigation seasonally can reduce landscape water use by 30–50%
• After 1–3 years, many desert-adapted plants need little more than rainfall—just water during long dry spells.
For example, in spring, the guidelines below suggest watering desert-adapted trees once every 14–30 days. How do you choose? In addition to seasonal weather, watering frequency depends on:
• Plant type
• Plant size
• Soil type
• Plant establishment
These factors are covered in detail on the next pages.
WHEN IN DOUBT, WATER LESS OFTEN BUT DEEPLY. INFREQUENT WATERING BUILDS STRONGER, DROUGHT-TOLERANT ROOTS.
LANDSCAPE WATERING GUIDELINES
• Desert plants are tougher than you think— University of Arizona studies show established shrubs can easily go 60 days, and trees 100+ days, between irrigations in fall and winter.
• Get monthly frequency reminders: Text WHENTOWATER to 1-844-416-1428.
These guidelines are for established plants (1 year for shrubs, 3 years for trees). New plantings and unusually hot or dry weather may require more frequent watering. Water less often during cool or rainy weather. Drip run times are typically 2 hours or more per watering.
How Much & How Often
WATER WISDOM
• Mulch holds moisture where plants need it most. A 2–4 inch layer of wood chips or other organic mulch keeps soil cooler and reduces evaporation. Keep mulch a few inches away from stems. Prefer a uniform look? Top it with granite.
• Potted plants dry out faster than those in the ground. With limited soil that warms quickly, they need more frequent watering.
LANDSCAPE
PLANT WATERING TIPS
SIGNS OF UNDERWATERING
• Older leaves turn yellow or brown and drop
• Leaves look dull, wilted, or drooping
• Leaves curl at the edges
• Stems or branches begin to die back
SIGNS OF OVERWATERING
• Leaves turn pale green or yellow
• Young shoots wilt
• Growth is unusually fast or excessive
• Algae or mushrooms appear around plants
HOW OFTEN TO WATER, CONTINUED
Plant type: Different kinds of plants need watering at different frequencies to stay healthy. The Watering Guidelines distinguish between desert-adapted and high-water-use plants.
High water use:
Citrus
Hibiscus
Rose
Desert adapted:
Palo Verde
Texas Sage
Penstemon
Desert-adapted plants can go much longer between irrigations, while high-water-use plants need more frequent watering. Choosing more desert-adapted species helps save water in your landscape.
Plant size: A tree’s large root zone acts like a big underground storage tank. That means large plants need more water per irrigation, but they can be watered less often. Small plants, with smaller root zones, need less water each time but more frequent irrigations.
Soil type: Soil is like a sponge—it absorbs and holds water differently depending on its texture.

COMPARATIVE WETTING PATTERNS FOR DIFFERENT SOIL TYPES


One inch of water penetrates approximately 12 inches in sandy soil, 7 inches in loam, and 5 inches in clay soil.
How do you adjust watering for soil type?
Here’s an example: A 4-foot shrub needs about 12 gallons to wet the root zone (Table C, page 9).
• In sandy soil, apply slightly less water but irrigate more often—it drains quickly.
• In clay soil, apply more water but irrigate less often—it holds water longer.
PRO TIP
SOIL TYPE ALSO AFFECTS HOW QUICKLY WATER SOAKS IN. WHEN IRRIGATION APPLIES WATER FASTER THAN IT CAN INFILTRATE—ESPECIALLY ON CLAY SOILS—IT RUNS OFF. USE CYCLE-AND-SOAK: SHORT CYCLES WITH SOAK TIME BETWEEN.
Loam
Sandy Soil
Clay Soil
Plant establishment: The Watering Guidelines are intended for mature plants. On average, shrubs become established in about 1 year and trees in about 3 years. New plantings need more frequent irrigation while roots develop.
WATERING SCHEDULE FOR NEWLY PLANTED DESERT ADAPTED PLANTS*
Weeks 1 & 2
Weeks 3 & 4
Weeks 5 & 6
Weeks 7 & 8
After Week 8
Water every 1–2 days in summer, every 3–4 days fall through spring
Water every 3–4 days in summer, every 6–7 days fall through spring
Water every 4–6 days in summer, every 7–10 days fall through spring
Water every 7 days in summer, every 10–14 days fall through spring
Gradually extend the time between irrigations until plants are established
NOTE: After the eighth week, move the drip emitters to the outer edge of the root ball. *High-water-use plants will require more frequent irrigations.
KEY TAKEAWAY
To find the watering frequency that works best in your yard, consider these variables together—plant type, plant size, soil type, and plant establishment. Through observation and a few quick checks for signs of under- or overwatering, you’ll quickly get a feel for your plants’ needs.
WATER WISDOM
• Rainwater is free and great for plants. Capture it with berms or swales to direct runoff into planted basins.
• Place a rain gauge in your yard. If you get at least ½ inch of rain, skip your next irrigation cycle.
• Use the “off” or “rain delay” setting on your controller to pause watering during wet weather—without losing your programs. Or connect a rain sensor to do it for you.
Rainwater Harvesting: Free Water, Naturally!
Why pay for water when it’s free? Rainwater harvesting captures stormwater from your roof, yard, or hard surfaces and puts it to work in your landscape. As little as a half inch of rain on an average roof can collect nearly 500 gallons—enough to give your plants a deep soak.
Rainwater is naturally soft, salt-free, and full of nutrients that make plants thrive. You can start simply by grading the soil to direct runoff toward plants. More advanced systems use gutters, rain barrels, or tanks to store water for later use.
Benefits:
• Reduces runoff and pollution
• Recharges soil and supports deep roots
• Lowers your outdoor water use—and your bill
Learn more: Find how-tos and design tips at WaterUseItWisely.com/Rain
• Lost your controller manual? Search the make and model online for step-by-step instructions.
• Even smart controllers need supervision—check that they’re watering right for the season.
CHOOSING THE RIGHT CONTROLLER
Pick a controller that’s built for desert watering needs.
• Multiple programs: set separate schedules for turf, trees, and shrubs.
• Watering intervals of 30+ days: ideal for desert-adapted plants.
• Run times up to 2+ hours: for deep watering cycles.
• Battery backup: saves settings during power outages.
• Smart controller technology: adjusts watering automatically.
SCHEDULING WITH AN IRRIGATION CONTROLLER OR AUTOMATIC TIMER
A well-programmed controller is one of the best tools for keeping plants healthy and saving water. But efficiency requires regular adjustments—you can’t just “set it and forget it.” As plants become established and seasons change, your schedule should change too.
TRADITIONAL CONTROLLERS/TIMERS
Most standard controllers require you to manually enter:
• Current day and time
• Start times
• Watering days or frequency
• Run time (length watering)
After programming, double-check your settings. Many models have a manual or semi-automatic button for a quick test run to confirm everything’s working properly.
Traditional Controller Program Example
Summer Watering Schedule
Valve/Station Description
Turf sprinklers
Turf sprinklers
Desert shrub drip
Citrus tree bubblers
Desert tree drip Start Time 9 PM –12 AM –4 AM Watering Days Mon & Thur –Every 14 days –Every 21 days
Tips:
• On each program, group valves with similar watering frequencies.
• Stagger start times on different programs to avoid overlap.
• Stick to one start time per ‘Program’—it runs all valves in that program once.
• Add extra start times only when you need multiple short cycles (for grass germination or cycle-and-soak to avoid runoff).
SMART CONTROLLERS/TIMERS
Smart controllers take the guesswork out of scheduling by automatically adjusting watering based on weather, soil, and plant type. They’re a great tool—but only when set up and monitored properly. For desert climates, choose a model that adjusts watering frequency (days between irrigations), not just run time.
These controllers use real-time weather data—such as temperature, rainfall, and humidity—to decide when and how much to water. Many connect through Wi-Fi and some can be programmed with a phone app, giving you remote control and alerts. Older models may rely on historical weather averages instead.
Check your schedule regularly to be sure it’s watering efficiently and compare it to the intervals in this guide. Find setup guides, programming cheat sheets, and a list of EPA WaterSense-labeled
controllers at WaterUseItWisely.com/HowToWater
PERFORM FREQUENT CHECKS ON YOUR SYSTEM
Your irrigation system is your plants’ lifeline, so make it part of your maintenance routine. A full inspection twice a year, plus brief spotchecks, will keep it running smoothly.
General Watering System
Check that the controller program is correct.
Replace backup battery yearly (if your controller uses one).
Run each station to confirm valves open and close properly.
Check for leaks: look for standing water, soggy soil, or erosion.
Open valve boxes while the system is running to check for leaks.
Sprinklers
Replace broken or missing heads. Purchase 4” height heads.
Don’t mix different head types on the same system.
Keep heads flush with the soil surface and upright, not tilted.
Clear grass or obstructions blocking spray.
Adjust heads so they don’t water walls, driveways, or sidewalks.
Drip or Bubbler System
Fix or replace clogged or missing emitters.
Check water placement around plants.
Move emitters out to the dripline as plants grow.
Adjust basins around bubblers as plants mature.
January Flush system and check filter.
February Move emitters to dripline of trees and shrubs as they grow.
March Adjust controller for spring schedule.
April Do a full system check; replace controller battery.
May Adjust controller for summer schedule.
June Inspect emitters and sprinklers.
July Check controller after storms; set rain delay if needed.
August Inspect emitters and sprinklers.
September End-of-summer check: adjust or plug emitters as needed.
October Adjust controller for fall schedule.
November Do a full system check.
December Adjust controller for winter schedule.
Everything Needs Maintenance: An efficient irrigation system doesn’t run on autopilot. Regular checkups are the key to saving water and keeping your landscape healthy.
WATER WISDOM
• Pull weeds frequently so they don’t steal water from your plants.
• The best fertilizer for the garden is the gardener’s shadow. Frequent observation is your most valuable tool for healthy plants.
• Gray water from clothes washers, bathtubs, bathroom sinks, and showers can be reused to water your landscape—saving money and precious water. But you must follow state, county, and city guidelines. For details, contact the AZ Department of Environmental Quality at azdeq.gov/graywater or 1-800-234-5677.
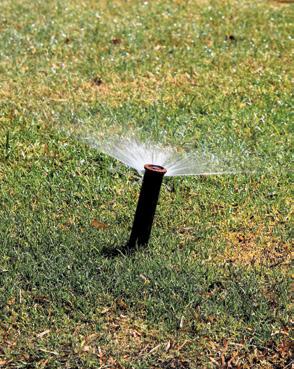
Keep sprinkler heads upright— not tilted.
LANDSCAPE WATERING IN THE REAL WORLD (TROUBLESHOOTING)
Climate variations—adjust for your area
Weather patterns vary across Arizona. Adjust for unusually hot, dry spells or for slightly cooler, wetter regions like Tucson or other higher elevations. These conditions affect how often you water, not how much. Change watering frequency—not run time—to match your local climate.
You’re watering too often—and not long enough
After reading this guide, you’ve learned that plants do better with deeper soakings than frequent watering. Gradually increase run times and stretch the days between irrigations. Use the chart on page 14 to wean plants off frequent watering.
Controller runs irrigation at strange times
Check that the program is entered correctly and confirm the controller hasn’t reverted to factory defaults (often 10 minutes per day). This can happen after power surges or outages. If your controller has a backup battery, make sure it’s fresh and charged.
One valve won’t stop watering
A valve stuck “on” is the usual cause. To confirm, turn off the controller’s power. If the water keeps running, the valve itself is faulty. If it stops, the issue is with the controller or its programming.
Salt accumulation
Frequent watering and evaporation can cause salts to build up in the soil. Symptoms include leaf yellowing or leaf burn. You can leach salts once or twice each summer by watering twice as long as usual. A good soaking rain can also help flush salts away.
Water runoff from your yard
Runoff means water is applied faster than the soil can absorb it. Split the watering cycle in half. Water for half the run time, wait an hour, then water again for the remaining time.
Sprinklers watering sidewalks, driveways, walls, or streets
Sprinkler heads often shift or get knocked out of alignment. This wastes water and can damage surfaces. Check and adjust heads regularly— especially after mowing.
Water squirts from emitters
Water should drip, not squirt. If emitters pop off or shoot water, replace damaged emitters. If the problem repeats, your drip system pressure may be too high—call a professional to inspect and install a pressure regulator if needed.
WHAT’S NEXT? Just ahead you’ll find quick-reference guides, our online resources, and a handy watering schedule.
GUIDE:
WATERING YOUR TREES
Determine your run time with Steps 1–3, then use Step 4 to set your watering frequency!
01. HOW MUCH WATER DO YOUR TREES NEED?
Tips:
• Water trees to a depth of 2.5–3 feet.
• Once established (2–3 years), place water near the canopy edge (dripline).
• Water deeply each time, then allow soil to dry in between irrigations.
02. HOW MUCH DOES YOUR WATERING SYSTEM APPLY?
Tips:
• Drip emitters are rated in gallons per hour (GPH) or liters per hour (LPH).
• Some emitters are stamped with their flow rate—many are not. Find a simple way to measure flow on page 6 of our guide.
03. CALCULATE RUN TIME
Match your system’s output to your tree’s water needs.
GALLONS NEEDED
AMOUNT APPLIED (GPH)
Example: A 6’ tree needs 26 gallons (see chart above) each time you water. The tree has three (3) 2-GPH emitters or 6 GPH total. 26 ÷ 6 = ~4 hour run time
Tips:
• Add all emitter flow rates together. Trees should have at least three emitters spaced around the dripline.
• If you have different tree sizes on one valve, start with the average run time and adjust by adding or removing emitters.
04. HOW OFTEN TO WATER (ADJUST FOR THE SEASON)
Once you know how long to water, use this chart to determine the frequency!
Tips:
• Newly planted trees need ~5 gallons of water every 3–4 days in summer and 6–7 days fall through spring.
• Adding organic mulch over the root zone reduces watering frequency. Keep mulch a few inches away from the trunk.
• Frequency depends on many factors. See page 12 of our guide.
WATERING YOUR SHRUBS, GROUNDCOVERS, & VINES
Determine your run time with Steps 1–3, then use Step 4 to set your watering frequency!
01.
HOW MUCH WATER DO YOUR SHRUBS, GC, AND VINES NEED?
GC, & Vine
Needed to Wet Root Zone Each Watering
Tips:
• Water shrubs, groundcovers, and vines to a depth of 1.5–2 feet.
• Once established (1–2 years), place water near the canopy edge (dripline).
• Water deeply each time, then allow soil to dry in between irrigations.
02. HOW MUCH DOES YOUR WATERING SYSTEM APPLY?
drips
Tips:
• Drip emitters are rated in gallons per hour (GPH) or liters per hour (LPH).
• Some emitters are stamped with their flow rate—many are not. Find a simple way to measure flow on page 6 of our guide.
03.
CALCULATE RUN TIME
Match your system’s output to your plants’ water needs.
Example: A 3’ shrub needs 8 gallons (see chart above) each time you water. It has two (2) 2-GPH emitters or 4 GPH total. 8 ÷ 4 = 2 hour run time
Tips:
• Add all emitter flow rates together. Shrubs/Groundcovers/Vines should have one to three emitters spaced around the dripline.
• If you have different shrub sizes on one valve, start with the average run time and adjust by adding or removing emitters.
04. HOW OFTEN TO WATER (ADJUST FOR THE SEASON)
Once you know how long to water, use this chart to determine the frequency!
Shrub, GC, and Vine Type
Tips:
• Newly planted shrubs need ~3 gallons of water every 2–3 days in summer and 4–6 days fall through spring.
• Adding organic mulch over the root zone reduces watering frequency. Keep mulch a few inches away from the stem.
• Frequency depends on many factors. See page 12 of our guide.
WATERING YOUR GRASS
Determine your run time with Steps 1–3, then use Step 4 to set your watering frequency!
01. HOW MUCH WATER DOES YOUR
GRASS NEED?
Grass needs ¾ inch of water each time you irrigate to wet the root zone (soil depth of 6–10 inches).
Pop-up spray nozzles
Tips:
Single-stream rotors
Multi-stream rotors
• Water 1–3 hours before dawn to reduce evaporation from heat and wind.
• Cycle-and-soak if you get runoff during time needed.
02. HOW MUCH DOES YOUR
Sprinkler output varies depending on spray heads, water pressure, and system design—so it’s important to measure how much water your system actually applies.
WATERING SYSTEM APPLY?
Can Test: Find out how much water your sprinklers really apply!
STEP 1
Place several shallow, flat-bottomed cans on your lawn. Turn on the sprinklers for 15 minutes.
STEP 2
Measure the depth of water in each can.
Tips:
• A can test will tell you how much your sprinklers apply.
• Do the cant test only once, unless you change your sprinkler system or notice big shifts in water pressure.
03. CALCULATE RUN TIME Match your system’s output to your grass water needs.
TABLE A: Run Time of Sprinklers to Apply ¾-Inch with Each Irrigation
Can 1 + Can 2 + Can 3 + Can 4, etc. = Total ÷ number of cans = sprinkler number
Example: .4 + .3 + .4 + .35 + .5 + .4 = 2.35 ÷ 6 = .39 or round up to .4, meaning run time to apply ¾” is ~28 minutes
Tips:
• Use your Can Test sprinkler number with Table A to find your run time.
• Once you find your run time, it doesn’t change. What changes with the seasons is frequency—how many days between watering.
04. HOW OFTEN TO WATER (ADJUST FOR THE SEASON)
Once you know how long to water, use this chart to determine the frequency!
Tips:
• More frequent irrigations will be needed if germinating grass seed.
• Grass never needs to be watered more than once every 3 days, even during the summer.
• Frequency depends on many factors. See page 12 of our guide.
TABLE B: Monthly Frequency (Days Between Watering) for Bermuda and Rye Grasses
REMEMBER THIS
Watering is part science, part art. Use these general guidelines as a starting point, then adjust for your specific plants, soil, and site conditions.
Find 100+ water-saving tips, a calendar of classes, landscape howtos, and resources for youth and teachers at WaterUseItWisely.com.
BEYOND THE NUMBERS
WANT TO KEEP LEARNING?
Dive deeper into smart watering at WaterUseItWisely.com/HowToWater
You’ll find bonus guides, videos, and tools to help you take what you’ve learned here even further— and fine-tune your watering with confidence.
GET MORE FROM YOUR WATERING
Tools & Calculators
• Online worksheets that do the math for you
• Run time and scheduling tools
• An alternative turf watering schedule
Irrigation Setup & Programming
• Program your basic irrigation controller
• Set up and manage smart controllers
• Watering tips for container plants
Smart Watering Techniques
The recommendations in this guide are built on University of Arizona research, including AZMet data, and informed by expert review. The guide was updated in 2026 by a technical advisory group led by Donna DiFrancesco, City of Mesa. Special thanks to Doug Donahue, AZ Irrigation Guy; Jeff Lee and Jeremiah Churchill, Gilbert; Andrew Pirrone, Goodyear; Steve Priebe, Horticulturist; Victoria Caster, Peoria; Aaron Boydston, Phoenix; Dave Pratt, Scottsdale; Sandra Hurlbut, Surprise; Andi Couet and Ryan Wood, Tempe; Cody Wooden, Tucson; Dr. Ursula Schuch, University of Arizona.
• Cycle-and-soak to prevent runoff
• Pressure-compensating emitters and efficient sprinklers
• When and how to move emitters as plants grow
Maintenance & Troubleshooting
• Fixing leaks and common irrigation issues
• Troubleshooting with photos and videos
• When to get help—and who to hire
Water-Saving Strategies
• Rainwater harvesting
• Watering during and after rains
• Graywater basics
TOO MANY NUMBERS?
Keep it simple: water deeply, infrequently, and adjust seasonally.
Cover photo: A hybrid aloe attracts an Anna’s hummingbird—beauty and water-wise landscaping in action. Photo by Dave Seibert. All uncredited photos by Donna DiFrancesco. Booklet design by HAPI.
WATERING TOOLS
• Cut out ruler below and use with the can test on page 5.
• Cut out or copy the chart below and post it near your controller as a reminder to adjust watering each season.
LANDSCAPE WATERING GUIDELINES
These guidelines are for established plants (1 year for shrubs, 3 years for trees). New plantings and unusually hot or dry weather may require more frequent watering. Water less often during cool or rainy weather. Drip run times are typically 2 hours or more per watering. How Much & How Often Water to the outer edge of the plant’s canopy and to the depth indicated. Watering frequency will vary depending on season, plant type, weather, and soil.
Photo by Dave Seibert
Arizona landscapes include many types of plants, each with different watering needs—but all can be watered efficiently with the right approach. This comprehensive how-to guide provides practical irrigation and watering techniques that reduce water use while keeping landscapes healthy and beautiful in our desert climate.
LEARN HOW TO:
WATER DEEPLY WATER INFREQUENTLY ADJUST SEASONALLY
Get this booklet—and other water-saving resources like plant selection and xeriscape landscaping guides—from your local water conservation office or water provider.