To my family: Georgia, Mum (Therese), Dad (Justin), Oliver, Heather and of course Jemima and Esme.
I love you all so much. You have inspired, loved, guided, helped, supported, pushed and put up with me for so long. Thank you. Without all of you, this book would never have happened.
I miss when we aren’t all together around the kitchen and dining table laughing, joking,
drinking and eating. I don’t care how old I get, doing this with you all makes me feel like I’m young again, like all the worries in the world have gone and I feel at home. I am home. This cookbook is for you.
INT_PlantsOnFire.indd 2
16/6/2026 2:06 pm
Simon Toohey PlantsOnFire_CiderMill_Imprint.indd 3
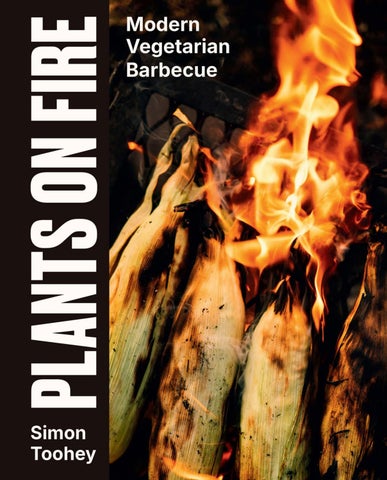
PLANTS ON FIRE
Modern Vegetarian Barbecue
14/7/2026 1:52 pm
INT_PlantsOnFire.indd 4
16/6/2026 2:06 pm
CONTENTS Introduction 7 Who am I and what am I doing here?
8
Choice 10 About this book 11 Oven temperatures 12 Measurements 12
Part One: Techniques 14 Fire-cooking equipment 16 Pots and pans 18 Other essential equipment 20 Lighting the fire 22 The power of the spray 25 A few veggie tips 26 A–Z vegetable seasonality & variety guide
28
Varieties 30 Quick substitution table (vegetables & fruit)
31
Reducing waste 34 Plants on fire 37
Part Two: Recipes 39 Small 41 Medium 91 Large 139 Sweet 195 Bread 215
INT_PlantsOnFire.indd 5
Must-haves
233
Acknowledgements Index
264 266
16/6/2026 2:06 pm
INT_PlantsOnFire.indd 6
16/6/2026 2:06 pm
INTRODUCTION I want to start by quoting one of my favourite food writers, Michael Pollan: ‘Eat food. Not too much.
Mostly plants.’
That’s the foundation of this book, but I’ll take the liberty to reword it to suit my thoughts on food and its role in the book. So here goes: Eat plants. As many as possible. Mostly local. Before you close the book thinking this is another woo-woo plant manifesto – you’re wrong. I’m not here to change centuries of food traditions across the world’s incredible cultures. But there’s no doubt in my mind that the future of food is plants. They’re sustaining, protein-rich, nutrient-dense, quick to grow, they use far less land, release far less carbon and – most importantly – taste delicious. At least, they can taste delicious. Generations have grown up on the meat-and-three-veg diet. There’s nothing wrong with that, but usually the focus is on the meat. The vegetables? Often an afterthought. Think microwaved peas, broccoli boiled until grey, mash that could be eaten through a straw and everything drowned in tomato sauce (ketchup) to make the pile of mush more palatable. I get it – I really do. Time is tight, families are busy and simplicity is key. As I said, I’m not here to change the world’s meat-eating habits. What I can do is help you make your food taste better. I’ve spent the past ten years cooking with vegetables and learning how to extract flavour from them. I’ve worked in some of Australia’s best restaurants. I’ve opened a smokehouse dedicated entirely to smoking and barbecuing plants, and now I host a TV show that’s 100 per cent about cooking with plants. This book is the culmination of that journey. The recipes are designed to ignite flavour, your taste buds and, hopefully, your passion for cooking. At the end of the day, it’s not about meat versus veg; it’s about good food. Really good food. The kind that belongs on any table. Don’t worry if you don’t have a barbecue, pizza oven or fire pit. While I love cooking over a real flame for a beautiful smoky flavour, most of these recipes can be made in your oven, on your stovetop or under a grill with similar results. I’ve tested them both indoors and out, with a lot of help from my amazing mum, who cooked each recipe in her kitchen and gave feedback along the way. You’re in safe hands!
INTRODUCTION
INT_PlantsOnFire.indd 7
7
16/6/2026 2:06 pm
WHO AM I AND WHAT AM I DOING HERE? It was never the grand plan to end up here – cooking,
researching, growing and now writing a whole book about
plants. It just sort of ... happened. What started as
curiosity, something new and different, has turned into a full-blown obsession.
So when did it start for me? Not that long ago really. My mum is an incredible cook, who often presented us with different dishes from different cultures. We had Thai curries and salads, Indian curries and different salads, pastas, bakes, slow cooks and bright Moroccan grains. When people asked how I learned to cook, especially since my appearance on MasterChef, I would say, well, I didn’t have a nonna making fresh pasta for me all my life. But, in fact, I kind of did. Okay, Mum definitely isn’t Italian (even though I’m sure if she was offered only pasta for the rest of her life, she would be very happy), but she cooked for us with so much love and offered so much variety, that it wasn’t until later on I realised it was Mum who had taught me everything. She seemed to have this superpower, opening the fridge or pantry, pulling out whatever was there and somehow turning it into a meal. She’d say it was luck, but when you’ve done it enough times, luck becomes instinct, and instinct becomes knowledge. Mum has never been big on cooking meat so Dad handled that part, which made sense given he worked for the Cattle Council of Australia. Meanwhile, here I am years later, waving the flag for fruit and veg. My brother, Oliver, and I loved all the food. We sat at the table every night with Mum and Dad, eating whatever they ate. No ‘kids’ meals’, no alternatives, just family, food and conversation. It built a bond around the table that’s stuck with me ever since. If I’m honest, that’s not where my love of creating food began. I’ve worked in hospitality for as long as I can remember – apart from a brief, ill-fated stint as a travel agent in my early twenties. That didn’t last long, but it did spark something: an obsession with global cuisine and a fascination for how people around the world eat. I finally found my way behind a bar. My first real gig was at a pub called Filthy McFadden’s, which was, hands down, the best pub in Canberra. I loved it there, and some of my closest mates to this day came from that place. The jump from pub to cocktail bar came naturally. My good friend Raj worked at the Julep Lounge, owned by David Nguyen-Luu, a gorgeous little bar where I learned to respect the craft of mixing drinks. That’s where I first really fell in love with flavour. How ingredients interact, how balance works, how you can turn something as simple as liquid into a sensory experience. After a few years working fast-service bars around Canberra, I knew I wanted more. I bought a one-way ticket to Singapore and made my way across the world until I landed in London – and somehow into one of the best bars in the world, Callooh Callay. Huge thanks to John Gakuru, Andrea Montague and Richard Wynn for taking a chance on a scruffy, long-haired Aussie who looked like every Australian surfer. Four years later, I was the bar manager. Here’s the thing that Australia doesn’t quite get. Hospitality is a profession. In London, Europe, the US – people build careers out of it. When I was working back home, at least once a week someone would ask, ‘So, when are you getting a real job?’ But overseas, it was different. People studied it, invested in it and worked their way up to run venues, manage teams and even open their own places. The beauty of being in Europe is that the whole continent is right there.
8
INT_PlantsOnFire.indd 8
INTRODUCTION
16/6/2026 2:06 pm
The bar world is global – one day you’re pouring gin in Shoreditch, the next you’re learning about sherry in Spain or picking herbs in Italy. I travelled everywhere and every stop taught me something new. Hospitality has this strange pull. Everyone who’s spent their life in it knows: No matter how many times you try to leave, it pulls you back. There’s always another offer, a new job, a bigger paycheque, a bar in another country. After two years in London, I came back to Australia, opened and ran a few venues, but something wasn’t quite right. It wasn’t the work, it was me. I missed that energy, that sense of purpose that hospitality had overseas. So I did what any rational person would do, I booked a flight straight back to London and returned to Callooh Callay. A couple of years later, I stumbled across a master’s program in gastronomy at the University of Edinburgh. It was government-subsidised, which was a bonus, so I applied – and got in. I didn’t end up finishing (there’s a 15,000-word dissertation still out there somewhere, mocking me), but it was one of the most eye-opening experiences of my life. It was food, but not from a chef’s perspective. It was history, culture, agriculture, anthropology – everything that shapes what we eat and why. I knew I wanted to work in food, but I’d also seen enough of the dark side of the kitchen to know I didn’t want to be a chef. The industry has changed a lot since then, but at the time it could be brutal. Edinburgh also gave me something else – Georgia, my wife. She was working at a whisky bar, and I used to sit there writing essays while we talked about food, booze and home. We were just friends back then, but when we both ended up living in Melbourne later, things finally clicked. It was Georgia who finally pushed me to apply for MasterChef. I’d talked about it for years, ever since that pavlova challenge in Season 2. I watched half the contestants destroy theirs and thought, ‘How hard can it be?’ In 2019 Georgia sat me down, opened the laptop, and said, ‘Fill out the form.’ MasterChef changed everything. It gave me a platform, sure, but it was what came after that mattered most. Once the cameras stop rolling, it’s up to you to build something out of it. That’s the hard part, there’s a lot of stress, a lot of unpaid gigs and very little money at first. People assume being on TV means you’re rich, but that’s not even close to true. I could furnish a dozen kitchens with all the ‘contra’ gear I’ve been paid with over the years, but things like that won’t pay the rent. Still, the show gave me something far more valuable: direction. My focus on plants and sustainability became my anchor; it gave me a mission. From there came my plant-based smokehouse, my show Freshly Picked and everything I’ve done since. So here we are. A long way from that bar in Canberra. A few thousand burnt fingers and a million conversations later, but the goal’s the same: to change how people see vegetables. To make cooking plants exciting. To show that eating a little more from the ground and a little less from the paddock isn’t a sacrifice – it’s a win. Because plants aren’t the sideshow, they are the main act.
INTRODUCTION
INT_PlantsOnFire.indd 9
9
16/6/2026 2:06 pm
CHOICE
It would be outrageous for me to try and change how you eat. My job isn’t to tell you what to do, it’s to help you make food that tastes incredible, no matter what you choose to cook with. So when you see ingredients like butter, cheese,
There is something important to note about this book – it is all about your own
choices, with my guidelines.
yoghurt or labneh, it will be followed by ‘or plant-based alternative’. You can use the version that best fits your lifestyle, values or just what’s in your fridge. If a recipe really leans on a particular ingredient, I’ll offer an alternative so you can adapt it to suit you. Before you come at me with ‘I thought you were vegan’ or ‘I can’t believe you’re using animal products’, hear me out – this is about choice. You’re in charge here. I’m just here to make sure whatever you choose tastes bloody great. You’ll notice a lot of recipes in this book where I’ve written ‘optional’ next to certain ingredients. That’s not me being indecisive; it’s me being honest. One of my biggest frustrations when cooking from other people’s books is that there are often ingredients that I don’t have, can’t find or simply can’t be bothered tracking down. Cooking should be flexible. I’m showing you what I think makes the dish sing with the most flavour, but if preserved lemon isn’t a thing where you live, or harissa doesn’t exist in your local shops, it’s not a deal breaker. In most cases, I’ll tell you if you can skip it or swap it – and I promise, most of the time you absolutely can (within reason, of course). I don’t want this book to make you feel like you have to cook by the rules. It’s about giving you confidence to make it your own and to not stress if you’re missing a fancy ingredient. In the end, good food isn’t about perfection – it’s about cooking something you actually want to eat.
10
INT_PlantsOnFire.indd 10
INTRODUCTION
16/6/2026 2:06 pm
ABOUT THIS BOOK There are plenty of barbecue books out there. Most are
about meat, some are about
This is a vegetable-first book, but it’s not a vegetarian book. It’s a flavour book. Every recipe is about unlocking what’s already in the plant – the sweetness, the texture, the bite, the surprise. That’s the beauty of it. You can throw a cabbage straight into the coals, brush off the ash, slice it open, and you’ve got one of the most flavourful things you’ll ever eat. You can take a pumpkin, roast it whole in its own skin, and it becomes something soft, smoky and deeply satisfying. Some dishes in this book lean on technique – roasting, blistering, searing – and others just let the ingredient speak for itself.
technique. A few talk
The recipes are divided into the following chapters:
marinades like they’re sacred
•
about smoke, wood, rubs and
Small: These are snacks, share
•
Sweet: From simple grilled
secrets. This is the only
plates, fireside bites. They’re
seasonal fruit to full-scale
quick, easy, adaptable and
fruit pies, you’ll be amazed at
plants on fire.
perfect for when you’re just
the desserts you can produce
getting started.
with fire.
book you’ll need for cooking
•
Medium: These dishes are the
Bread: Flatbread, cornbread or pizza, bread cooked on fire
that can stand on their own or
is heaven.
play in a group. •
•
heartbeat of the table – the kind
•
Must-haves: Those extras that
Large: These are the feasts.
make everything better. Sauces,
They’re made for when you’ve
preserves, ferments and
got friends, time and stories
dressings that you’ll use again
to share.
and again.
You can scale the recipes up or down depending on the moment. A ‘small’ can feed one or start a feast. A ‘large’ can shrink down for two. Mix and match. There are no rules here, just a rhythm. So how does this book work with fire? Fire is your friend, but sometimes your biggest headache. It’s unpredictable and that’s the point. You can’t tell a fire what to do. You can only guide it, coax it, feed it and learn from it. This book is here to help you understand how to read your fire, how to tell when it’s too hot, when it’s ready and when to let it rest. You’ll find recipes that work on coals, on the grill, in a smoker, in a pizza oven or even on a gas barbecue or a little camping stove. Each recipe has a code about whether it can be cooked outdoors or indoors, and if you don’t have a fire handy, how to cook the recipe otherwise. Y
can be cooked indoors
S
on a stove
G
on a grill
O
in an oven
N
can’t be cooked indoors
INTRODUCTION
INT_PlantsOnFire.indd 11
11
16/6/2026 2:06 pm
OVEN TEMPERATURES From fire to home oven
A lot of these recipes are written for a fire, a barbecue or a pizza oven. With these methods, the heat is a bit more alive, a bit more unpredictable and definitely a bit more fun. But they can all be translated to a standard home oven. When I talk about heat levels in this book, here’s how to think about it if using your home oven on the bake setting: •
•
Low heat, 140–170°C
•
High heat, 190–220°C
(275–325°F): Slow cooking,
(375–425°F): A bit more push.
gentle roasting, letting things
Good for roasting with colour
tick along without rushing.
and getting things moving.
Medium heat, around 180°C
•
Very high heat, 230–260°C
(350°F): This is your standard
(450–500°F): Basically, the
oven temperature. If a recipe
oven should be as hot as it can
says ‘medium heat’, this is
be – it’s your pizza oven zone.
where you want to be.
Fast, hot, and all about colour, blistering and char.
Cooking over fire can vary wildly depending on fuel, flame and airflow, so think of these temperatures as your steady, reliable version of that heat. Trust what you see in front of you and adjust as needed.
MEASUREMENTS
There are different measurements for different countries, the most notable being tablespoons and cups. In Australia, our tablespoons are 20 ml (⅔ fl oz) and our cup size is 250 ml (8½ fl oz). If using standard US cups (240 ml) and tablespoons (15 ml), slight adjustments may be needed. Having said that, while these measurements might affect things like baking – where small differences could change the outcome of a recipe – it won’t make a huge difference in a lot of the recipes in this book. My philosophy is it all comes down to taste, so adjust as you find necessary.
12
INT_PlantsOnFire.indd 12
INTRODUCTION
16/6/2026 2:06 pm
INT_PlantsOnFire.indd 13
16/6/2026 2:06 pm
INT_PlantsOnFire.indd 14
19/6/2026 2:11 pm
PART ONE
TECHNIQUES INT_PlantsOnFire.indd 15
19/6/2026 2:11 pm
FIRE-COOKING EQUIPMENT There are so many different forms of fire-cooking equipment out
there. Let me break them down so you can understand the options.
INT_PlantsOnFire.indd 16
16/6/2026 2:06 pm
The Fire Pit
Pig & Pilgrim Charcoal Barbecue
From someone who has owned or
The Hibachi Grill This is the one that most people
cooked on many barbecues, wood-
When you cook on one, you’ll know
have seen before. If you have ever
fired ovens, smokers, pizza ovens
you’ve made the right decision.
been to a restaurant with an open
or hangers – they’re all great. More
I love mine as I can raise or lower
kitchen, watched MasterChef or
accurately, they all have their place.
the grill using the winch, add a
been to a street market cook-up,
There’s the really expensive, the
rotisserie and keep an eye on the
you would have seen one. They
mid-range, the I-can-get-by and the
temperature. The backing helps
are awesome, as they have thick
makeshift. Here’s the truth: They’ll
protect the coals from the wind too.
walls, which means they hold their
all give you a great result. Some will
If we ever build a proper outdoor
heat, and they are a perfect size to
just make life easier. Others will test
kitchen, this will be the centrepiece.
cook or finish food on. If you want
your patience and timing, but that’s
There are many brands like this that
something good-quality that can be
half the fun of cooking with fire.
you can find; I am just suggesting
moved around and become a bit of
the one I have, which is great.
a workhorse, then this is the one.
The Half-Dome Fire Pit
It is worth the investment.
Weber Go-Anywhere Barbecue
The Home Build
shallow metal bowl, which holds
A small, inexpensive, easy way to
It’s as simple as clearing a flat space
the fire. Over winter, my wife and I
take the fire with you. It doesn’t
and stacking or cementing bricks
light the fire, pour a whisky and sit
hold heat for long and it’s not huge,
together, a couple of layers wide and
beside it chatting away. When the
but it’s all you need for a couple of
deep for sturdiness. When you’re
flames die down, we push a log to
people and a campsite. Think pulling
about three-quarters to your desired
one side, lay a grill over the glowing
up at a river somewhere, lighting
height, lay in a thick piece of sheet
coals about 15 cm (6 inches) above
up the charcoal and cooking away
metal, add a few more bricks, then
the heat and cook a simple dinner.
as the sun goes down. That’s how
top it with another piece of metal or
Heaven. This little thing can cook
I picture these working. Charcoal
a grill. Add a few more layers if you
for up to eight people. If I can make
is your best bet here, as logs won’t
want a bit of wind protection. I’m not
one suggestion: The fire pit you sit
fit. A word of advice: Don’t light a
a builder, but even I’ve managed to
around will be the one you use the
roaring fire in it. The handles will
make these work. They’re cheap,
most, so make sure it’s one you love
melt and you’ll grab them without
strong and last for years. Just be
being near. Ours is tiny, but it’s all
even knowing. Learned that the
sure to check your local regulations
we need.
hard way.
and whether you need a permit or
Believe it or not, this is the one we use the most. It’s simply a large,
are even allowed to build such a pristine piece of engineering work.
TECHNIQUES
INT_PlantsOnFire.indd 17
17
16/6/2026 2:06 pm
POTS AND PANS The good, the bad and the ugly for cooking over a fire.
INT_PlantsOnFire.indd 18
16/6/2026 2:06 pm
It needs to be said, there are indoor domestic-style pans and there are fire pans. ‘Inside pans’ aren’t really built to be used on the fire, whereas all fire pots and pans can be used indoors. Choosing the right pan for fire or barbecue cooking is essential.
The Good
The Bad
Plastic, rubber or soft-grip handles:
Enamel pots and pans: These aren’t
heatproof, these are a no-go. They’ll
terrible as they can handle high heat, but they chip easily when used outdoors. Stick to using them in pizza ovens or for indirect cooking
worth it for the price.
and distribute it evenly and deliver incredible results. Their only downside is (often) small handles that get hot, so invest in proper heatproof gloves or a thick folded
skin. Go for solid metal handles only.
when the smell hits your nose.
and lose their shine forever. Not
some). They’re strong, hold heat
the rubber can literally stick to your
Copper pans: Beautiful, but leave
for in the recipes, though the two
built to last a lifetime (and then
accidentally grab one mid-cook,
Avoid pans with painted or coloured
Cast iron: This is what I am calling
These are the royalty of pans,
melt and give off awful fumes. If you
rather than directly over flames.
them inside. They’ll warp, blacken
types that follow are also good.
Even if the pan claims to be
coatings. You’ll quickly learn why
Griddle or ribbed pans: These don’t make much sense on the fire either. You want your ingredients to either have full contact with the pan or be directly over the heat. A chef once told me, ‘Flavour comes from connection,’ and I couldn’t agree more.
tea towel. Brands like Lodge or IronClad are great. If you find an old beauty in an op shop, grab it. Cast iron only gets better with age. Stainless steel or wrought iron: High-quality versions of these are incredible. I use Solidteknics. They are forged in one piece, so the handles don’t heat up as fast. They’ll last generations, and even if you forget one in the sink overnight and it rusts, a bit of elbow grease brings
The Ugly Polytetrafluoroethylene (PTFE) pans: Start with this golden rule: no pans with non-stick chemical coatings, ever. They’re bad enough indoors, but when heated over 250°C (480°F) – such as over fire or in a pizza oven – they’ll give off fumes and fail fast. Not to mention the chemicals that will end up in
it right back to life.
our food.
Carbon steel: Similar to cast iron but
Aluminium and cheap metal pans:
a bit more high-maintenance. I’ve always wanted a top-quality one, but
If you pick up your pan by the handle and think, ‘Wow, this pan is
the price can sting a little.
light,’ then its base is too thin for
Where to buy? Go local if you can,
over temperature, burning your food
either in store or direct from the maker online. Don’t underestimate
cooking. It will give you no control in seconds.
the treasure trove of op shops, where you can find pans that are cheap, sustainable and full of character. TECHNIQUES
INT_PlantsOnFire.indd 19
19
16/6/2026 2:06 pm
OTHER ESSENTIAL EQUIPMENT
INT_PlantsOnFire.indd 20
16/6/2026 2:06 pm
Visit any barbecue shop and you will be overwhelmed with all the gadgets and utensils you could be tempted to buy. I like to keep it simple, with the basics being a pair of long-handled tongs, a metal spatula to flip food, oven mitts and the following couple of pieces.
Fire Grills and Racks A must-have. You can repurpose your barbecue racks or buy a dedicated fire grill that fits your pit. Try to get one that covers most of the fire (or at least half). For my little half-dome set-up at home, only three of the edges of the cooking
Grill Basket One of the best tools for cooking small ingredients like peas, grains or diced veg. The open mesh lets heat in fast while allowing oils and fats to drip onto the coals, creating those incredible smoky flavours.
rack sit on the edges of the fire pit, leaving one corner floating in the middle, so we just put a log there to prop up the final corner. This will slowly start burning and smoking, adding a smoky flavour, and finally the fire will slowly move to this side of the pit.
I use one from FIREd Cookware. It is solid, heavy-duty and practically indestructible. If you don’t have one, or it is just out of your budget, then a metal sieve can do the trick. They’re cheap and surprisingly effective. Just make sure they’ve got metal handles and aren’t flimsy. They won’t last forever, but when one wears out, head back to the op shop and grab another. I have also called for a metal colander in at least one of the recipes. This keeps the smaller pieces of food contained while allowing easy access to stir as it cooks.
TECHNIQUES
INT_PlantsOnFire.indd 21
21
16/6/2026 2:06 pm
LIGHTING THE FIRE
INT_PlantsOnFire.indd 22
16/6/2026 2:06 pm
Some people might think this bit is obvious – who needs to be told how to light a fire? – but I guarantee there’s someone out there who does need instructions. Honestly, even if you’ve done it before, there’s always a better way to get it going. For me, there are three simple methods: two with wood and one with charcoal.
3. The Charcoal Chimney
If it’s dense, dry and untreated, it’ll
Sometimes you just want reliability,
avid smokers and grillers out there
and this method gives you that. Set the firelighters in the fire pit and pour charcoal into a chimney starter. Place the chimney over the firelighters and light them. Wait for 15–20 minutes for the coals to fully catch and glow evenly. Once most
1. The Teepee This is the classic set-up – quick, simple and reliable. Start by placing firelighters or a bit of scrunched-up newspaper in the centre of the fire pit. Lean two pieces of kindling together to make a small triangle, then add two more
of the charcoal is ashed over and red-hot, pour it out carefully, spread it evenly and add a fresh layer of charcoal on top to keep things rolling. I usually place a small piece of wood on the edge to smoulder away slowly – it’ll add a lovely, gentle smoke and another layer of flavour to whatever you’re cooking.
you’ve made a small teepee. Light the firelighter or paper and let it take. I like to place a small piece of wood beside the kindling as it’s catching. It’ll warm up and be ready to burn properly once the flames strengthen.
Wood Wood is obviously important, but you don’t need to be chasing down
This one’s a little more structured, great for steady, even heat. Place firelighters or paper in the middle of the fire pit. Lay a piece of wood on either side, parallel to each other and about 20 cm (8 inches)
orchard or ordering fancy cherry chunks online. It’s quite simple, really. Find dry wood, that ideally out for at least six months). Wet or green wood is not good, as it smokes too much, burns unevenly and leaves your food tasting like a campfire gone wrong. Dry wood, on the other hand, burns hot and clean, giving you the control you need to cook properly over fire.
apart. Place another two pieces
Different woods do burn differently,
across them, forming a crosshatch,
of course. Some give a more
like a Jenga tower. Keep stacking
intense heat, others a softer, slower
layers, about five or six high, each
burn. Unless you’re doing full-day
time bringing the kindling slightly
briskets or deep smoking, the type
closer together so the flames climb
of wood isn’t going to make or
and feed up through the middle. As
break your food. Ironbark, red gum,
with the teepee, I like to set a log just
boxwood, even old hardwood fence
to the side of the fire while it burns.
posts (clean ones) all do the job
Once it’s hot, it’ll catch beautifully
beautifully.
and help sustain your base heat.
INT_PlantsOnFire.indd 23
enough about the wood, but this book is for ease of use, and getting people started. The thing about wood is that you never really know how good it can be until you get your hands on some that burns clean and hot. The difference is in the way your food tastes. Once you find a wood that works for you, stick with it. Learn how it burns, how fast it turns to coals, how much smoke it gives off. Ask your local firewood supplier for seasoned hardwood. Keep it of charcoal if you need to. The real trick isn’t in the wood itself – it’s in learning to read the fire and adjust as you go.
rare applewood from some secret
has been properly seasoned (dried
2. The Jenga Tower
giving me a mouthful for not caring
dry, keep it simple and mix in a bit
leaning the opposite way. Keep building it up layer by layer until
work. I know there are going to be
Charcoal Most of the best fire cooking isn’t done on the flames, it’s done on the coals. That’s where the control is. Charcoal gives you even, consistent heat that makes fire cooking less about chaos and more about rhythm. I’m a big believer that you don’t need to pick sides in the wood-versuscharcoal debate. Both have their place, both have their flavour and both can make food taste incredible. But for most people, charcoal is the easiest and smartest place to start.
TECHNIQUES
23
16/6/2026 2:06 pm
Think about it, charcoal is wood,
The downside is they don’t hit the
Once you learn to read your
it’s just wood that’s already been
same temperatures, and, depending
coals – that moment they glow
burned down for you. So why would
on the brand, they can carry
white-hot and hum with energy –
you spend an hour trying to turn
additives that mess with the flavour
that’s when cooking over fire stops
wood into charcoal when you can
or smoke. For most quick cooks, I’d
being intimidating and starts being
buy it ready to go? Charcoal is what
stick with lump. For long overnight
instinctive. From there, the fun
happens when wood is heated
smoking or roasts, briquettes can be
really begins.
slowly in a low-oxygen environment,
your friend.
cooking off all the moisture and volatile compounds until you’re left with pure carbon. That carbon burns hot, steady and clean.
You’ll also see binchotan, or white charcoal, especially in Japanese cooking. This is next-level lump charcoal. It’s super dense, burns
Charcoal gives you predictability.
extremely hot, is almost smokeless
You light it, you know how long it
and lasts for hours. It’s expensive
will take to get hot, how long it will
and overkill for most backyard
stay that way, and what it’s going
cooking, but if you ever get your
to do. It’s why it’s the go-to fuel for
hands on it, you’ll understand why
hibachi grills and yakitori set-ups,
chefs love it for yakitori or delicate
as you can control the airflow and
skewered vegetables.
cook with absolute precision. It’s the best way to focus on cooking rather than fire management.
The main thing to remember is that charcoal and wood aren’t opponents, they’re teammates.
Be aware that not all charcoal is the
If I want a quick cook, I start with
same. You’ll usually find two main
charcoal. If I want to add smoke
types: lump charcoal and briquettes.
or depth, I feed in a piece of dry
Lump charcoal is made from pure wood that’s been charred down in a kiln or pit. It’s the real deal. Natural, clean and variable. Some pieces will be small, others large, and they’ll burn at slightly different rates.
wood once the coals are glowing. The wood brings the flavour; the charcoal keeps the consistency. Both have their purpose and one isn’t better than the other, they just speak different languages.
It lights quickly, burns hot and gives
Start where it makes sense for you.
off a beautiful, clean heat that lets
If you’re cooking on a hibachi or
the food shine. Because it’s literally
a small grill, charcoal is your best
just wood with the water and resin
mate. If you’ve got a fire pit or a
cooked out, you’ll also get that
smoker and time on your hands,
gentle wood aroma. It’s my go-to.
play with wood. The only rule is this:
Briquettes are made from compressed charcoal dust mixed with binders (sometimes natural, sometimes not) to form uniform little
Whatever fuel you’re using, keep it clean, dry and natural. No lighter fluid, no chemical starters. Let the fire do the work.
pillows. The upside is they burn longer and more evenly, great for long, slow cooking.
24
INT_PlantsOnFire.indd 24
TECHNIQUES
16/6/2026 2:06 pm
THE POWER OF SPRAY Your secret weapon over fire.
There’s a great trick when playing
Don’t overdo it, a few fine sprays are
with fire and plants. Have on hand a
enough to transform how your food
few spray bottles filled with various
cooks and tastes. Remember, you’re
liquids or blends. This might seem
building complexity. You will find
a little strange, but trust me, this
it really cool at the start, the whole
small act separates the pros from
fire flares up and shoots out a lot
the punters. A good spray bottle
of smoke. It truly looks awesome.
becomes your flavour brush, your
However, if you use too much, the
smoke machine, your flame thrower
smoke flavour will become too
and your finishing flourish.
strong and the dish will just taste
Meat contains fat that renders and melts during cooking, dripping
of wet, acidic, oily smoke. It isn’t too nice.
onto the coals to create smoke and
Once you start experimenting, you’ll
flavour. Vegetables don’t have fat,
never stop. Try these blends at the
so by using a spray bottle with oil in
ratios I suggest, then tweak the
the mixture, we add that element to
flavours to suit your own tastes.
give a similar effect.
•
Oil & citrus juice (3:1) Perfect
Use a good-quality spray bottle.
for asparagus, fennel or
Cheap ones clog up fast and hate
anything that loves brightness.
the density of oil. Go for something sturdy that gives a fine, even mist
•
a umami hit that makes
rather than a dribble. You want
mushrooms or eggplant sing.
to kiss the food with it, not drown it. Make sure to shake it before every use.
•
effect for pumpkins or root vegetables.
spraying oil onto a fire, as it will are well away and don’t let them get their hands on the spray bottles. Make sure your coals are well and truly going. If the heat isn’t high enough, the liquid will just smother the coals and put them out. Give the veg a little spritz before it hits the grill to give the surface an instant layer of flavour, and to help prevent sticking. Midway through cooking, spray the coals below the food to create a burst of smoke. Finally, depending on what your dish
Oil & vinegar & honey (3:1:½) Creates a sweet-and-sour glaze
Always take great care when obviously flare up. Make sure kids
Oil & soy sauce (2:1) Builds
•
Oil & water (3:1) & aromatics Add smashed garlic, herbs or chilli flakes. Let them steep in the liquid, then strain and place into your bottle.
Spray bottles aren’t just for barbecues. You can use them when roasting in the oven, pan-searing on the stove or anywhere you want to add a bit of life and control. A spritz at the right time can bring dull roast vegetables back to life or create a last-minute gloss that makes a dish feel finished.
is, you can give a little spray at the end to boost flavour one last time.
TECHNIQUES
INT_PlantsOnFire.indd 25
25
16/6/2026 2:06 pm
A FEW VEGGIE TIPS
Let’s start with ‘to peel or not to
Broccoli: Peel. Huh? Not the florets,
peel’. It can depend on the particular
obviously, but once you have cut
vegetable, but often we just do
them off, you are left with a thick
it out of habit. Personally, I LOVE
stem. Don’t throw it away. Use
leaving the skin on (most of the
a veggie peeler to remove a thin
time – maybe not for mashed potato).
layer of outer skin. You’ll notice it is
It cuts down on food waste and can
slightly lighter in colour inside. It’s
also help to contain moisture during
delicious, crunchy like an apple and
cooking. Try it and see – instead of
a little sweet. Thinly slice or chop
peeling, give the veggies a good
however you like and cook briefly to
scrub with a natural bristle brush
retain a little crunch. This is delicious
kept for that purpose.
in a stir-fry or fried rice. You could
Sometimes we remove the skin after cooking, after it has served its purpose of keeping in moisture. The list below gives more info on which vegetables I do or don’t peel. Asparagus: Peel (kind of). Most recipes will tell you to trim asparagus by bending the root end until it snaps, theoretically removing the tougher, fibrous part. What I like to do instead is to use a veggie peeler to shave off the outer layer at that end. This will expose the lighter coloured inside, which will be tender. Less waste! Beetroot: Don’t peel. If roasting (in the oven or fire), they are best left whole, as the skin keeps the moisture in, helping to steam and soften them. It does take a long time to roast whole beetroot, but cutting them will just dry them out. Use smaller whole beetroot if you want to cut down on cooking time. After cooking, the skin usually slips off easily, so if you don’t want eat it, take it off then. You can cut beetroot into smaller pieces to cook in a pan with fat and/or water.
26
INT_PlantsOnFire.indd 26
even shave it finely and serve raw in a salad. Broccolini: Don’t peel. I know it is the same family as broccoli, but these stems are grown to be more tender and therefore don’t need peeling. Capsicum (bell pepper): Don’t peel. When cooking whole over coals, the skin protects the flesh. You can let the skin become completely black and blistered, then set aside, covered, to steam and cool slightly for a few minutes. The skin should peel off pretty easily, leaving the sweet, soft flesh behind. This works with any red or green capsicums, bullhorn capsicums or chillies. I am not a fan of raw capsicum, but roasted is a whole different ball game. You can use in dips, salads, sandwiches, burgers – whatever you like. Carrots: Don’t peel. Both at home and in restaurants, we are used to peeled carrots. I think it is mostly a visual thing. As we are going to grill, roast, char and/or glaze them, they end up looking pretty rustic anyway, so just give them a scrub instead.
TECHNIQUES
16/6/2026 2:06 pm
Celeriac: Don’t usually peel. I know
Potatoes: Don’t peel (unless you are
the outer skin is ugly as, but keep it
making mashed potato). The skins
on. The only time I take it off is in my
roast or fry nicely and become crisp
hasselback celeriac recipe, where
and crunchy.
you do need to remove it.
Pumpkin: Don’t peel. Contrary
Eggplant (aubergine): Don’t peel.
to popular belief, pumpkin skin
In most cases, you will just chop
is edible. It will depend on the
or slice the eggplant, then cook
variety, as some have tougher
and eat with the skin on. In other
skins than others, but in Australia,
cases (such as Pulled eggplant on
kent (otherwise known as jap) and
molasses soda bread, page 64),
butternut pumpkins (squash) are the
you may roast the eggplant whole
most commonly used and have skin
then remove the skin and just use
that becomes nice and tender once
the soft flesh.
cooked. The skin also helps to
A couple of things to know about eggplant. Often a recipe will ask you to salt the sliced or chopped flesh
hold the flesh together, particularly when sliced or cut into wedges for cooking.
and let it sit for a while. This draws
Radish: Don’t peel. When roasted,
out excess moisture, which is great
the inside becomes very juicy and
if you are pan-frying, as it helps to
the skin contains it. Interestingly,
cook and colour the eggplant evenly.
they lose the bitter pepperiness
Salting is also supposed to remove
when cooked.
any bitterness, which I am not so sure about. The other thing is that eggplant is super thirsty and will absorb a lot of oil while frying. If you keep frying long enough, it will release the oil, so it is good to be aware of that. Kohlrabi: Peel, unless baking whole.
Root vegetables (swedes, turnips, etc): Don’t peel. Sweet potato (kumara): Don’t peel. Roast sweet potato in the skin to create a lovely jacket for the soft, sweet flesh. You decide if you want to peel if chopping and frying, and I do peel for soup.
This vegetable is amazing both raw and cooked. Mushrooms: Do not peel, please. All they need is a simple wipe to remove any soil, or for pine (matsutake) mushrooms you can use a brush. Onions: Depends. You won’t eat the skin but may leave it on to roast whole onions or make stock.
TECHNIQUES
INT_PlantsOnFire.indd 27
27
16/6/2026 2:06 pm
A–Z VEGETABLE SEASONALITY & VARIETY GUIDE (Season = best time to eat, not when grown.) Vegetable
Best Eating Season
Cold
Mediterranean
Artichoke
Spring–Early Summer
Spring
Spring
Asparagus
Spring
Spring
Spring
Beetroot
Year-round (best Winter–Spring)
Winter–Spring
Winter–Spring
Broccoli
Winter–Spring
Winter–Spring
Winter–Spring
Brussels sprouts
Winter–Spring
Winter–Spring
Winter
Cabbage
Winter–Spring
Winter–Spring
Winter–Spring
Capsicum
Summer–Autumn
Summer–Autumn
Summer–Autumn
Carrot
Year-round (best Winter–Spring)
Winter–Spring
Winter–Spring
Cauliflower
Winter–Spring
Winter–Spring
Winter–Spring
Celery
Year-round (best Autumn–Spring)
Autumn–Spring
Autumn–Spring
Chilli (hot peppers)
Summer–Autumn
Summer–Autumn
Summer–Autumn
Corn (sweetcorn)
Summer–Autumn
Summer
Summer–Autumn
Cucumber
Summer
Summer
Summer
Eggplant
Summer–Autumn
Late Summer
Summer–Autumn
Fennel
Winter–Spring
Winter–Spring
Winter–Spring
Garlic
Late Spring–Summer
Summer
Summer
Kale
Autumn–Spring
Autumn–Spring
Autumn–Spring
Leek
Winter–Spring
Winter–Spring
Winter
Lettuce
Year-round (avoid mid-summer)
Spring–Autumn
Spring–Autumn
Mushroom
Year-round
Year-round
Year-round
Okra
Summer–Autumn
Late Summer
Summer–Autumn
Onion
Late Summer–Autumn
Autumn
Autumn
Parsnip
Winter–Spring
Winter–Spring
Winter
Peas (garden, snow, sugar)
Winter–Spring
Winter–Spring
Winter–Spring
Potato
Year-round (varies by variety)
Year-round
Year-round
Pumpkin
Autumn–Winter
Autumn–Winter
Autumn–Winter
Radish
Spring–Autumn
Spring–Autumn
Spring–Autumn
Silverbeet (chard)
Year-round
Year-round
Year-round
Spinach (English)
Autumn–Spring
Autumn–Spring
Autumn–Spring
Sweet Potato
Autumn–Winter
Autumn
Autumn
Tomato
Summer–Autumn
Summer–Autumn
Summer–Autumn
Turnip
Winter–Spring
Winter–Spring
Winter
Zucchini (courgette)
Summer–Autumn
Summer–Autumn
Summer–Autumn
28
INT_PlantsOnFire.indd 28
TECHNIQUES
16/6/2026 2:06 pm
Subtropical
Tropical
Approx. Varieties
Example Varieties
Spring
Short Spring
10–15
Green Globe, Romanesco
Spring
Short Spring
20
Mary Washington, UC157
Autumn–Winter
Autumn
25
Detroit Dark Red, Chioggia
Autumn–Winter
Short Autumn
40
Calabrese, Marathon
Not ideal
No
15
Oliver, Long Island
Winter
Short Winter
100+
Savoy, Red, Wong Bok
Summer–Autumn
Year-round (peak Summer)
200+
Yolo Wonder, Marconi
Autumn–Winter
Autumn
100+
Nantes, Purple Dragon
Autumn–Winter
No
60
Snowball, Romanesco
Autumn–Winter
Winter
25
Pascal, Tango
Summer–Autumn
Year-round
4000+
Jalapeño, Birdseye
Summer–Autumn
Summer–Autumn
50
Golden Bantam, Honey & Pearl
Summer–Autumn
Year-round
100
Lebanese, Pickling
Summer–Autumn
Year-round
40
Black Beauty, Rosa Bianca
Winter
Short Winter
15
Florence, Orion
Spring–Summer
Early Spring
600+
Australian White, Tasmanian Purple
Winter
Short Winter
15–20
Tuscan, Red Russian
Autumn–Winter
No
20
Musselburgh, Tadorna
Autumn–Winter
Winter
2000+
Cos (Romaine), Iceberg, Oakleaf
Year-round
Year-round
30 (commercial)
Button, Shiitake, Oyster
Summer–Autumn
Year-round
30
Clemson Spineless, Red Burgundy
Autumn
Short Autumn
600
Brown, Red, White, Spring
Short Winter
No
10
Hollow Crown, Gladiator
Autumn–Winter
Short Winter
100+
Greenfeast, Sugar Snap
Year-round
Short Autumn
5000+
Sebago, Desiree (red-skinned), Kipfler (Fingerling)
Autumn
Year-round (peak Autumn)
100+
Kent, Butternut, QLD Blue
Autumn–Winter
Autumn–Winter
60
Cherry Belle, Daikon
Year-round
Year-round
15
Fordhook Giant, Rainbow
Winter
No
25
Bloomsdale, Baby Leaf
Autumn–Winter
Year-round
4000
Beauregard, Okinawan Purple
Summer–Autumn
Year-round
10,000+
Roma, Cherry, Brandywine
Winter
Short Winter
30
Purple Top, Tokyo Cross
Summer–Autumn
Year-round
40
Black Beauty, Gold Rush
TECHNIQUES
INT_PlantsOnFire.indd 29
29
16/6/2026 2:06 pm
VARIETIES
Within the recipes, you’ll see
Why? Because fire isn’t consistent –
me mention specific varieties
and that’s the beauty of it. One
of vegetables, grains, fruits or
day it burns hot and fast, the next
herbs and that’s intentional.
it licks slowly and gently. That
Different varieties have their own
unpredictability is what gives
personalities. Some hold their shape
cooking over flame its magic. You’ll
better under fire, some bring a touch
learn more by burning the edge of a
of sweetness or bitterness that
pumpkin than you ever could from
completely changes the final dish
playing it safe. It’s trial and error,
and others just look damn beautiful
which is how you build instinct.
on the plate. But here’s the thing – if you go to your local market and can’t find that exact variety, don’t stress. This book is about freedom, not perfection. If you can’t find the one I’ve listed, chat with your greengrocer, the market staff or the grower at the stall. They’ll usually know what’s closest in flavour, texture or cooking time. They might even suggest a local gem that’s better than the one I’ve mentioned. Think of this as an invitation to explore. Food markets are full of treasures you might never have cooked with before – purple carrots, white eggplants, yellow beetroots or heritage beans that taste like butter and earth at the same time. So if your recipe calls for cavolo nero and you can only find kale or silverbeet, go for it. Keep an eye on it, adjust the cooking time slightly and trust your senses. If you stumble upon a new variety that you love – swap it in, write it down and make it your own. That’s how cooking evolves. Just remember, even if you did have exactly the same ingredients, your results might still be different.
30
INT_PlantsOnFire.indd 30
TECHNIQUES
16/6/2026 2:06 pm
QUICK SUBSTITUTION TABLE (VEGETABLES & FRUITS) This is a cheat sheet for smart, seasonal swaps. Some of these really depend on application
or use. Obviously zucchini and pumpkin aren’t the same but they can be used in similar ways. This is just a broad guide, and I have based it on cool-climate growing regions.
Ingredient
In-Season
Same-Season Swap
Out-of-Season Substitute
Apple
Autumn–Winter
Pear
Stone fruits (Summer – peach or nectarine)
Apple (green cooking)
Autumn–Winter
Quince
Pear (Spring)
Apricot
Summer
Peach
Dried apricot (Winter)
Artichoke
Spring
Asparagus
Fennel (Autumn)
Asparagus
Spring
Broccolini
Green beans (Winter)
Avocado
Spring–Summer
Pea purée
Mashed pumpkin (Winter)
Banana
Year-round
Mango, sweet plantain
Poached pears (Winter)
Beetroot
Autumn–Winter
Carrot
Radish (Spring)
Berry (mixed)
Spring–Summer
Strawberry
Frozen berries (Winter)
Blackberry
Summer
Raspberry
Frozen blueberries (Winter)
Blueberry
Summer
Blackberry
Frozen blueberries (Winter)
Broad beans (fava)
Spring
Peas
Edamame (Summer)
Broccoli
Winter–Spring
Broccolini
Green beans (Summer)
Broccolini
Winter
Broccoli
Asparagus (Spring)
Brussels sprouts
Winter
Cabbage
Kale hearts (Spring)
Cabbage
Autumn–Winter
Brussels sprouts
Kale (Spring)
Capsicum
Summer–Autumn
Eggplant
Preserved roasted capsicum
Carrot
Year-round
Parsnip
Beetroot (Autumn)
Cauliflower
Autumn–Winter
Romanesco
Broccoli (Spring)
Celeriac
Winter
Fennel
Potato (Spring)
Celery
Autumn–Winter
Fennel stalk
Celeriac (Spring)
Cherry
Summer
Plum
Berry compote (Winter)
Cherry tomato
Summer–Autumn
Tomato
Tinned tomato
Chilli (fresh)
Summer–Autumn
Capsicum (for mildness)
Dried chilli (Winter)
Citrus – Grapefruit
Winter
Orange
Blood orange (Spring)
TECHNIQUES
INT_PlantsOnFire.indd 31
31
16/6/2026 2:06 pm
Ingredient
In-Season
Same-Season Swap
Out-of-Season Substitute
Citrus – Lemon
Winter–Spring
Lime
Vinegar or verjuice (Summer)
Citrus – Lime
Summer–Autumn
Lemon
Finger lime (Spring)
Citrus – Orange
Winter
Blood orange
Mandarins (tangerines) (Spring)
Cucumber
Summer
Zucchini (raw or grilled)
Radish (Winter)
Eggplant
Summer–Autumn
Zucchini
Mushrooms (Winter)
Fig
Summer–Autumn
Plum
Poached pears (Winter)
Garlic
Spring–Summer
Green garlic
Grapes
Summer–Autumn
Figs
Poached apples (Winter)
Green beans
Summer–Autumn
Snow peas
Broccolini (Winter)
Herbs – Basil
Summer
Thai basil
Coriander (Spring)
Herbs – Coriander (cilantro)
Spring–Autumn
Parsley
Mint (Winter)
Herbs – Dill
Spring–Summer
Fennel fronds
Tarragon (Winter)
Herbs – Mint
Spring–Summer
Basil
Parsley (Winter)
Herbs – Oregano
Spring–Autumn
Marjoram
Thyme (Winter)
Herbs – Parsley
Year-round
Coriander
Celery leaves (Autumn)
Herbs – Sage
Autumn–Winter
Thyme
Rosemary (Spring)
Herbs – Thyme
Autumn–Winter
Rosemary
Oregano (Spring)
Jerusalem artichoke
Winter
Potato
Celeriac (Spring)
Kale
Autumn–Winter
Silverbeet
Baby spinach (Spring)
Leek
Winter
Spring onion
Fennel (Spring)
Mandarin
Winter–Spring
Orange
Clementine (Summer)
Mango
Summer
Papaya
Preserved mangoes
Melon (rockmelon/ watermelon)
Summer
Cantaloupe
Poached pears (Winter)
Mushroom
Autumn–Winter
Eggplant
Zucchini (Summer)
Nectarine
Summer
Peach
Plum (Autumn)
Onion
Year-round
Shallots
Leeks (Spring)
Papaya
Summer
Mango
Persimmon (Autumn)
32
INT_PlantsOnFire.indd 32
TECHNIQUES
16/6/2026 2:06 pm
Ingredient
In-Season
Same-Season Swap
Out-of-Season Substitute
Parsnip
Winter
Carrot
Pumpkin (Spring)
Peach
Summer
Nectarine
Mango (Spring)
Pear
Autumn–Winter
Apple
Persimmon (Autumn)
Peas
Winter–Spring
Broad beans
Green beans (Summer into Autumn)
Persimmon
Autumn
Pear
Mango (Summer)
Pineapple
Summer
Mango
Poached apples (Winter)
Plum
Summer–Autumn
Apricot
Poached apple (Winter)
Pomegranate
Autumn–Winter
Cranberries (fresh or dried)
Grapes (Summer)
Potato
Winter–Spring
Jerusalem artichoke
Celeriac (Autumn)
Pumpkin
Autumn–Winter
Sweet potato
Zucchini (Summer)
Quince
Autumn
Apple
Pear (Winter)
Radish
Year-round
Baby turnips
Baby beetroot (Winter)
Raspberry
Summer
Strawberry
Frozen raspberries (Winter)
Rocket (arugula)
Autumn–Spring
Mizuna (mustard greens)
Baby spinach (Summer)
Romanesco
Winter–Spring
Cauliflower
Broccoli (Autumn)
Shallot
Autumn–Winter
Red onion
Spring onion (Spring)
Silverbeet
Autumn–Spring
Kale
Spinach (Summer)
Snow peas
Spring
Green beans
Broccolini (Winter)
Spinach
Spring
Silverbeet
Kale (Winter)
Spring onion (scallion)
Spring
Chives
Leek (Winter)
Strawberry
Spring–Summer
Raspberry
Frozen strawberries (Winter)
Swede (rutabaga)
Winter
Turnip
Carrot (Autumn)
Sweet potato
Autumn–Winter
Pumpkin
Carrot (Summer)
Tomato
Summer
Cherry tomato
Tinned tomato
Turnip
Winter
Swede
Radish (Spring)
Wild mushrooms
Autumn
Swiss brown (cremini)
Oyster or portobello (Winter)
Zucchini
Summer–Autumn
Eggplant
Pumpkin (Winter)
TECHNIQUES
INT_PlantsOnFire.indd 33
33
16/6/2026 2:06 pm
REDUCING WASTE Here are a few ideas for how to use the bits and pieces that are usually trimmed off and thrown away.
INT_PlantsOnFire.indd 34
16/6/2026 2:06 pm
1. Root to Stem Beetroot stems and leaves •
Broccoli and cauliflower
Lettuce and leafy odds
•
•
brush with oil, char well over coals.
Pickled beetroot stems: Thinly slice and quick-pickle with vinegar, mustard seeds and
•
leftover beetroot brine. Use on burgers or salads. •
and vinegar until syrupy. Great
beetroot leaves with toasted seeds, lemon juice and oil for a smoky green drizzle over charred veg. •
Greens: Use beetroot leaves
•
•
•
20 minutes, until crisp.
Charred stem pickle: Grill stems first for smokiness, then pickle with coriander seeds.
•
toppings.
3. Skin-to-Seed Solutions Veg skins for stock •
carrots, onions and garlic (also fennel and celery trimmings
Stock base: Freeze stems in a
and mushroom stems). Roast or
bag marked ‘green gold’. Toss
fire-smoke before simmering for
into every stock.
deep colour and flavour.
Herb stem oil: Blitz with neutral
•
•
and salt, grill until crisp. Serve
making salsa verde, swap the
with dips.
same hit with less waste. •
Stem vinegar: Steep chopped
Seeds •
for a week to create a herby seasoning.
Pumpkin seeds: Dry-roast with chilli and lime salt.
stems in apple cider vinegar •
Capsicum or tomato seeds: Dry on paper towel then put into a labelled envelope until ready to plant for the next season.
oven-bake (as above). Think
Chard stem relish: Finely chop
Potato peel crackers: Toss in oil
Salsa verde stems: When
sprinkle with salt and grill or
•
Carrot peel crisps: Fry or bake with smoked paprika.
Leaf crisps: Rub with oil,
kale chips, but better.
Stock bag: Freeze skins of
leaves for stems – you get the
Rainbow chard and silverbeet •
Pickled greens: Quick-pickle leftover leaves for tangy burger
Stem purée: Boil stems, blend
veggies.
a little oil and pinch of salt. and bake at 180°C (350°F) for
•
oil, strain and drizzle over grilled
onto a baking tray and rub with Place another baking tray on top
smooth ‘waste not’ soup.
Parsley, coriander, mint or dill stems
recipe (page 141) Crispy leaves: Place the leaves
herbs in stock. Blitz into a
funky condiment. Add Korean
2. Leaf, Herb & Green Waste Magic
and stems in the Kaleard greens
•
Wilted green soup: Simmer
leaves just like cabbage for a
silky dip.
baked cheese. Leaf pesto: Blend barbecued
•
with garlic and lemon zest for a
on toast, grilled cheese or
•
or romaine for smoky crunch.
leftover lettuce, spinach and
ginger, shallots, etc. •
Grilled lettuce hearts: Char cos
Leaf kimchi: Ferment broccoli
chilli flakes and paste, garlic,
Beetroot stem jam: Simmer stems with citrus zest, sugar
Stem steaks: Slice lengthways,
•
Watermelon rind: Pickle the rind, or use in kimchi.
stems and simmer down with onion, vinegar and sugar to a tangy relish.
TECHNIQUES
INT_PlantsOnFire.indd 35
35
16/6/2026 2:06 pm
5. Sweet & Unexpected
Citrus •
Zest dust: Dry leftover zest in the oven, then grind to powder.
•
•
•
•
chilli tops after de-seeding; ferment with salt water for spicy brine. •
cocktails or desserts.
•
•
brine from pickles. Add salt and
•
•
Fire-roasted garlic skins: Steep charred garlic skins in dashi or oil for a deep smoky note.
pulp for a subtle nutty broth.
8. Fire-Driven Waste Ideas •
•
Charred waste oil: Fry spent herbs and onion skins in oil, then strain for a smoky drizzle.
•
Coal-baked root skins: Toss peels into hot embers to crisp and char.
Breadcrumb rub: Make crumbs •
Smoked rind rub: Dehydrate
herbs and zest. Lightly toast in a
fruit peels, grind with smoked
pan, then sprinkle on barbecued
salt and pepper.
veg for crunch.
herbs; smoke it lightly to make
Coconut-shell stock: Boil leftover shells or desiccated
Burger bun waste dip: Toast old
from stale bread and mix with
Smoked salt brine: Re-use
‘liquid campfire’.
•
as the base for dips.
Onion-skin salt: Burn clean with salt – earthy and umami.
•
6. Bread & Grain Waste buns and blitz with oil and herbs
onion skins then mix the ash
before simmering.
Carrot skin syrup: Simmer skins with lemon and sugar for
Fire dashi: Smoke onion skins, leek tops and dried mushrooms
grilled dishes.
the better. Fermented chilli stems: Keep
•
Melon rind pickle: Pickle sour crunch to cut through fatty
and beetroot tops – the funkier
•
and garlic skins.
chopped rind to make a sweet-
4. Ferment, Smoke & Preserve Scraps cabbage cores, carrot ends
tomato ends, mushroom stalks
Banana skin chutney: Cook ginger and mustard seeds.
Ultimate waste stock: Simmer roasted veg offcuts, smoked
skins with brown sugar, vinegar,
Preserved citrus rinds: Chop
Veggie waste kimchi: Use
•
water.
into dressings or seasoning
•
Apple core vinegar: Ferment cores and peels with sugar and
Citrus oil: Infuse peel in olive oil for a bright drizzle.
•
•
7. Liquid Gold – Stocks & Broths
•
Burnt leek or onion or garlic
Fermented flatbread: Use sour
oil: Take them too far until the
fruit juice or leftover beer as
stems go black (but not ash-
your liquid.
white) and blend with oil.
Polenta crust: Use leftover cooked polenta to press into new grill cakes.
•
Pizza crust: Use the family’s leftover pizza crusts or bread crusts torn up and roasted to make croutons.
36
INT_PlantsOnFire.indd 36
TECHNIQUES
16/6/2026 2:06 pm
PLANTS ON FIRE
For me, cooking over fire is equal
Let me start you with this little
parts intuition and chaos, and
trick. Sometimes the best thing is
sometimes the difference between
to do absolutely nothing. We have
perfectly charred and burnt beyond
a natural instinct to fuss: to turn,
recognition is just 30 seconds and a
poke, prod, lift or move. To check if
good feeling. However, this intuition
it’s burning. To give it just one more
is something you build over time by
flip because it looks like it might be
trial and error over a live ingredient
ready. But when it comes to cooking
like fire, and my aim with this book is
vegetables over fire, that’s often the
to guide you without the error part.
worst thing you can do.
Plants on Fire is full of small pieces of advice I’ve learned the hard way, through years of burning, tasting, tweaking and finally getting right. You’ll find notes throughout the pages: how to judge the heat of your coals without a thermometer, when to pull a vegetable from the grill just before it’s done so it finishes cooking in its own warmth, why adding salt at the right time matters or how to save a dish that looks like it’s gone too far.
Fire rewards patience. The heat, the smoke and the flames all need time to do their work. When you lay a zucchini, a whole capsicum, a bunch of spring onions or a wedge of cabbage on the grill, you’ve got to let it sit. The natural water content inside those plants is your safety net, as it protects them from burning too quickly, creating steam on the inside while the outside caramelises and blisters beautifully. The moment you start shifting things around too
Think of these as the whispers
much, you break that process. The
from someone who has made every
heat doesn’t get a chance to build
mistake imaginable and come out
up evenly and instead of getting
the other side with a few tricks
that beautiful char, you end up with
up their sleeve. Some are game
steamed, soggy vegetables that
changers. Some are simple safety
taste half-done and half-sad.
reminders. Some might not be for you at all and that’s perfectly fine. Take what resonates and leave the rest.
Fire cooking is never exact. It’s about learning to trust your senses to smell when something’s ready, to listen to the sizzle, to feel the
As you move through the recipes,
heat radiating from the coals and
keep an eye out for those moments.
to know when to step back and just
The little tips, the bold experiments,
let the flames do their thing. One of
the quiet tricks that will help you
the most important lessons when
avoid turning your meal into a
cooking plants over fire is trust. Let
blackened mess or at least help
the fire do its job. Let the vegetables
you turn that mess into something
talk to you. You’ll hear them hiss,
delicious. That’s the point of this
pop and crackle. Once the edges
book: to make cooking easier,
start to char, the skin blisters, or the
smarter and a lot more fun.
surface deepens in colour, then you can move them. Trust the recipe. Trust the plant. Trust the fire.
TECHNIQUES
INT_PlantsOnFire.indd 37
37
16/6/2026 2:06 pm
INT_PlantsOnFire.indd 38
19/6/2026 2:12 pm
PART TWO
RECIPES INT_PlantsOnFire.indd 39
19/6/2026 2:12 pm
INT_PlantsOnFire.indd 40
16/6/2026 2:06 pm
SMALL The small is exactly that. This is something I’d do if it was just me and my wife, or
if I had a few mates coming over. Make one dish for you and a friend, or make a few
and fill a table. They’re simple, quick and absolutely delicious. They don’t take up
too much space on the fire, which makes them easily the kind of dishes you can cook while sitting around the flames, chatting, letting it all come together naturally.
A small few bites, or a bigger version, it’s up to you. Scale it up or keep it
simple, but they are the introduction to this book, the entrée.
41
INT_PlantsOnFire.indd 41
16/6/2026 2:06 pm
INT_PlantsOnFire.indd 42
16/6/2026 2:06 pm
Roasted steel-cut oats with rhubarb and hazelnuts Y
O
S
I know what you are saying … you’re starting this book with porridge? Yes, yes, I am. There is a reason why this dish has lasted many, many lifetimes. Almost
PREP TIME: 10 minutes
every country has its own form of starchy soup, and this is up there with the
COOK TIME: 25 minutes
best. It is filling, it works so well when camping, as nothing really needs to be
SERVES: 6
refrigerated, and it’s great for road trips, too, if you are cooking in a van or
COOKING METHOD: Fire or barbecue
camper. My little twist of toasting the oats just adds that edge to make this the
HEAT LEVEL: Medium-low
nicest porridge you’ll ever make.
EQUIPMENT: Grill plate
1 cup (160 g, 5½ oz) steel cut oats (not instant oats) 3 cups (750 ml, 25 fl oz) milk or plant-based alternative 1 tablespoon peanut butter or any nut butter (optional) 2 teaspoons brown sugar Yoghurt, to serve
Prepare a fire or barbecue to cook on medium-low heat. Start with the rhubarb. Combine the rhubarb, lemon juice, raw sugar and 2½ tablespoons water in a cast iron saucepan. Cover and place over medium-low heat on a grill plate over fire or on a barbecue grill plate. Cook slowly for 25 minutes, or until tender. Check occasionally, and if the water has evaporated, just pour in a little more to stop the pan from going dry.
100 g (3½ oz) roasted hazelnuts,
Meanwhile, place the oats in a cast iron saucepan over medium-low heat, and
crushed
toast for about 10 minutes, or until golden (the darker the colour, the richer the flavour). It is important to keep stirring the oats so they cook evenly. They are
Rhubarb
4 stalks rhubarb, cut into 5 cm (2 inch) pieces Juice of 1 lemon 2 tablespoons raw sugar
high in starch and sugars and will have a bitter flavour if overcooked. Pour in half the milk to quickly bring the temperature down and slow down the cooking of the oats. Add the remaining milk and 1 cup (250 ml, 8 fl oz) water, along with the peanut butter (if using), brown sugar and a pinch of salt. Stir the mixture to combine. You can let it come to the bubble but be sure to keep stirring as it starts to thicken. If you like a wetter style porridge, add more water or milk. If you like it thicker, keep cooking until the liquid has reduced to your liking. Don’t forget that, as the mixture cools, it will thicken a lot more. Spoon the porridge into bowls. Add the rhubarb, including a little of the liquid. Serve with a scoop of yoghurt and finish with the hazelnuts. SUBSTITUTES: Feel free to sub out rhubarb with strawberries or any fruit you
like depending on the season. This recipe would be great with apples, pears,
oranges or peaches. Go nuts with your favourite spices, like cinnamon, nutmeg or allspice.
SMALL
INT_PlantsOnFire.indd 43
43
16/6/2026 2:06 pm
Grilled caperberries with burnt lemon This was a fun find – I loved it. We had a jar of caperberries in the fridge and so
N
I took it out, drained the liquid, threw them in the grill basket and cooked them
PREP TIME: 5 minutes
over the fire. Bloody worked a treat. So here it is for you.
COOK TIME: 3 minutes SERVES: 8 as a snack COOKING METHOD: Fire HEAT LEVEL: High EQUIPMENT: Grill plate, grill
basket
Prepare a fire to cook on high heat.
½ lemon 2 long green chillies 100 g (3½ oz) caperberries 4 wide strips lemon zest, white pith removed 2½ tablespoons extra virgin olive oil
Place the lemon half cut side down on the grill plate above the coals. Cook for about 20 seconds, or until the cut surface has become darkened. Place the chillies into a grill basket and place directly on the coals. Cook for 2 minutes, tossing them occasionally, until blistered. Drain the caperberries. Add to the grill basket and place onto the coals. Let sit to bring the smoke to the caperberries. Add the lemon zest and toss to release the oil. Cook for 1 minute. Transfer to a serving plate. Squeeze over the juice from the lemon half. Drizzle with the oil and serve.
44
INT_PlantsOnFire.indd 44
RECIPES
16/6/2026 2:06 pm
INT_PlantsOnFire.indd 45
16/6/2026 2:06 pm
271
INT_PlantsOnFire.indd 271
16/6/2026 2:10 pm
Plants on Fire Text copyright © Sustainable Earth Network Pty Ltd 2026. Design and compilation copyright © HarperCollinsPublishers Australia Pty Limited 2026. This is an officially licensed book by Cider Mill Press Book Publishers LLC. All rights reserved under the Pan-American and International Copyright Conventions. No part of this book may be reproduced in whole or in part, scanned, photocopied, recorded, distributed in any printed or electronic form, or reproduced in any manner whatsoever, or by any information storage and retrieval system now known or hereafter invented, without express written permission of the publisher, except in the case of brief quotations embodied in critical articles and reviews. The scanning, uploading, and distribution of this book via the internet or via any other means without permission of the publisher is illegal and punishable by law. Please support authors’ rights, and do not participate in or encourage piracy of copyrighted materials. 13-Digit ISBN: 978-1-40035-675-1 10-Digit ISBN: 1-4003-5675-X Books published by Cider Mill Press Book Publishers are available at special discounts for bulk purchases in the United States by corporations, institutions, and other organizations. For more information, please contact the publisher. Cider Mill Press Book Publishers “Where good books are ready for press” 501 Nelson Place Nashville, Tennessee 37214 cidermillpress.com Any internet addresses, phone numbers, or company or product information printed in this book are offered as a resource and are not intended in any way to be or to imply an endorsement by Cider Mill Press, nor does Cider Mill Press vouch for the existence, content, or services of these sites, phone numbers, companies, or products beyond the life of this book. Without limiting the exclusive rights of any author, contributor or the publisher of this publication, any unauthorized use of this publication to train generative artificial intelligence (AI) technologies is expressly prohibited. HarperCollins also exercise their rights under Article 4(3) of the Digital Single Market Directive 2019/790 and expressly reserve this publication from the text and data mining exception. HarperCollinsPublishers Macken House, 39/40 Mayor Street Upper Dublin 1, D01 C9W8, Ireland (https://www.harpercollins.com) Image Credits: Photography by Hayden Dib Printed in Malaysia 26 27 28 29 30 PJM 5 4 3 2 1 First Edition
PlantsOnFire_CiderMill_Imprint.indd 272
14/7/2026 1:52 pm