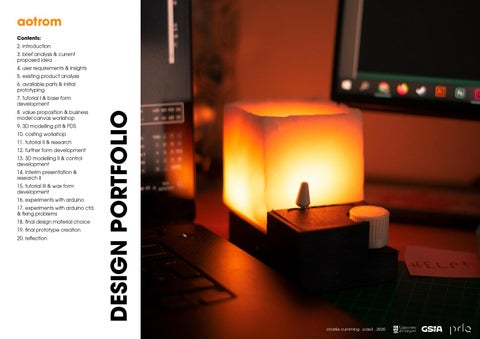
aotrom Contents: 2. introduction 3. brief analysis & current proposed idea 4. user requirements & insights 5. existing product analysis 6. available parts & initial prototyping
8. value proposition & business model canvas workshop 9. 3D modelling ptI & PDS 10. costing workshop 11. tutorial II & research 12. further form development 13. 3D modelling II & control development 14. Interim presentation & research II 15. tutorial III & wax form development 16. experiments with arduino 17. experiments with arduino ctd. & fixing problems 18. final design material choice 19. final prototype creation 20. reflection
DESIGN PORTFOLIO
7. tutorial I & base form development
charlie cumming . pde3 . 2020
aotrom
page 2
charlie cumming . pde3 . 2020
aotrom
page 3
charlie cumming . pde3 . 2020
aotrom
page 4
charlie cumming . pde3 . 2020
*analysis
aotrom
page 5
charlie cumming . pde3 . 2020
aotrom
page 6
charlie cumming . pde3 . 2020
aotrom
page 7
charlie cumming . pde3 . 2020
aotrom
page 8
charlie cumming . pde3 . 2020
aotrom
page 9
charlie cumming . pde3 . 2020
aotrom
page 10
charlie cumming . pde3 . 2020
Further studies on timing of light and effects on mental health and sleep patterns https://science.sciencemag.org/content/317/5844/1488
aotrom
page 11
charlie cumming . pde3 . 2020
aotrom
page 12
charlie cumming . pde3 . 2020
aotrom
page 13
charlie cumming . pde3 . 2020
aotrom
page 14
charlie cumming . pde3 . 2020
aotrom
page 15
charlie cumming . pde3 . 2020
aotrom
page 16
charlie cumming . pde3 . 2020
aotrom
page 17
charlie cumming . pde3 . 2020
final design material choice From initial costing work, it was clear that previously proposed methods of metal manufacture were not suitable: • Blanking and forming - too high set up costs at a production run of 1000 units. • CNC routing - too high per unit costs as process takes a lot of time and has low yield. Due to this, metal casting was to be used as the main metal manufacture process. I wanted to keep a type of metal as it would give the product a premium look and feel, as well as be more durable than alternative polymers such as ABS.
Limit Metal Casting
Recycle
Water (fresh), weak acid, UV radiation, light abrasion
Value Excellent
Reason This would mean the fewest wasted casts, maximising the yield of the process and minimising costs. Yes At the end of the product lifecycle, the casing can be sustainably recycled. Acceptable, Resistance to common substancExcellent es that the product would encounter in daily use.
In order to decide on the metal to be considered, I used CES to compare different materials. Limits were used to filter process usage to casting, recyclability and resistance to common substances. I wanted to optimise price per unit volume, as this was the main concern in manafacture. I created graphs of price against yield resistance, CO2 created in production and recycling, as well as a graph of the overall price per unit volume. This left me with 3 materials with the desired properties: • Stainless Steel • Cast Iron • Aluminium From looking at the data sheets for these materials, I eliminated cast iron due to its rough surface finish, as well as high density, as this would have made the product less aesthetically pleasing, as well as significantly heavier meaning more costs in shipping. From this I was left with aluminium alloys and stainless steel. Both had similar resistance to yield, meaning similar losses from shipping damage and similar general robustness. However, the stainless steels had a lower CO2 output both in creation and recycling compared to aluminuim alloys. However both had significantly less than a polymer alternative. Due to its lower cost and density whilst, compared to polymers, low amounts of CO2 produced in production and recycling I chose to stick with aluminium alloys (specifically 5000 grade datasheet included).
aotrom
page 18
charlie cumming . pde3 . 2020
final prototype creation Due to unforseen circumstances, my final prototype had to be made outside of the GSA workshops and facilities. This meant that I did not have access to the materials and processes that I would have used for the final model. Therefore, I tried to stay as close to the origional design as i could whilst substituting the following items: • Base plate: Instead of cast aluminium, I used FDM 3D printed PLA, and due to this increased the wall thickness to reduce the cracking that had occurred in prior PLA prototypes. The wall still cracked so I used a soldering iron and extra PLA fillament to ‘weld’ it back together, finishing with sandpaper and photoshop. • Rotary Encoder Knob: Again, instead of cast aluminium I used FDM 3D printed PLA, however this time i modified a part that i had printed for an earlier prototype using a soldering iron to melt the plastic and create a different shaped hole. This saved time printing as well as my dwindling fillament supply. • Fader top: Instead of using a customised premade part I used the top of a pickup selector from a guitar, as it had the same mounting. This was due to many failed 3d prints of this part. • Top plate: Line bent aluminium was replaced by a cardboard piece, held together with hot glue. • Wax mould: Instead of a 3D printed mould casting onto the top plate, I used a waxed paper mould, as casting onto the cardboard toplate would have saturated the material and made it lose structure. • Surface finish: As PLA cannot be anodised, I sanded away excess filament and gave the piece three coats of black spray paint. It really needed a top clear coat and primer, however I did not have this to hand. Learning from previous prototypes, I melted the wax slowly using a bain-marie to give a even distrobution of heat then cast a small amount of wax on the bottom of the mould first. This was in order to seal the wires and neopixel in place before pouring the rest of the wax.
aotrom
page 19
charlie cumming . pde3 . 2020
reflection General Reflection Overall, I have enjoyed this project, mainly the freedom and openendedness of the brief. From this I think that I was able to expand my design into more interesting forms and ideas,, conforming them to the specifications and criteria imposed at the beginning in my PDS. As well as this, the project brief encouraged me to consistently prototype, ending up with more protos than I would on other projects. As well as this, I’m very happy with the final prototype outcome. Although it was not made using the final materials or processes, I think that it gives a good representation of the general form and function of the product, and worked well in my video prototype. Reflection on teaching and tutorials I found the regular tutorials very helpful, especially meeting with the same group each time. It was nice to see the development of other peoples ideas, and I often used ideas that they brought to the table. The tutorial buddy system allowed me to focus on my presentation and verbal feedback, without having to take notes. This gave me good paperwork and allowed me to reflect on each tutorial. In future it might be helpful to have the same tutorial buddy at each session, so they would get to know your project in finer detail. Furthermore i greatly enjoyed the external tutorials, such as Ann Davidson’s tutorial on the business model canvas were great. It was a great way to gain first hand knowledge directly from industry experts taught in an engaging manner. Documentation and workflow On this project, I used a notebook to keep track, as well as keep a design journal as I was going along. I really engaged with this way of working as it added a sense of permanency to everything I wrote - meaning what I put down on paper should have been more clear and useful. I think I will continue this into future projects.
allow for more accurate initial prototypes (nothing fit in my first bottom housing print). Sketching and form development • Doing many rounds of form development was successful, as it allowed me time to think, iterating and developing new concepts. On the next project I need to use evaluation matrices in order to choose which forms to continue to work on. • Using lots of hand-drawn imagery looks good, however is not dimensionally accurate. Creating more CAD drawings allows far easier access to dimensions and fits when researching parts. GSA Resources • Towards the end of this project, I really noticed the lack of GSA resources available to me due to the COVID-19 outbreak. Particularly the electronics part of the workshop, the A3 scanners and the knowledge ot the technicians in both the Reid workshop as well as the casting workshop. This showed how much I relied on these resources them being available, and in future I need to plan in advance in case of other unforeseen problems that would limit my access to these facilities. • At the beginning of the project, I didn’t know the casting workshop was available to PDE students. In future projects I need to research and see what resources are available to help within GSA. An example of this could be the media library, which if it was open would have been a huge help in taking product photos and creating video-prototypes. Planning • Even though this was a long project, I still felt myself rushing a little at the end, and having to sacrifice either quality or quantity of work I produced. If I had better planned and set deadlines at the start of the project I might not have been in this mess. I started using monday.com in order to plan my work, however the free trial I had ended. In future I’ll use planning strategies such as GANTT charts to better manage my time and make sure I meet deadlines. Final thoughts
Improvements and thoughts for future projects Prototyping • Creating many small prototypes was very effective, however I need to keep a better track of them (i,e. take more photos!). • Class collaboration was a great way to access quick feedback on my work. The use of a tally survey during my interim presentation gave me an instant answer to my question, and I could then proceed with the human interaction elements of my project. • In future, I should take the model to CAD sooner. This allows for a far easier time figuring out dimetions, and many components (e.g. rotary encoder & ESP32) are available to download highly accurate CAD models of. This would save me time measuring very small details, and
aotrom
page 20
I feel that I have improved greatly throughout this project and PDE3 as a whole. I have become more of a reflective learner, looking at problems in a method or prototype and creating variations and modifications in order to solve them more effectively. As well as this I have learnt to adapt to quickly changing situations and briefs, and still stick to deadlines whilst taking on extra work. This has helped improve my time management skills (well, created time management skills from nothing). Overall I have greatly enjoyed the entirety of PDE3, and it’s a shame that we cannot celebrate the end of the year in the traditional way due to the quarantine.
charlie cumming . pde3 . 2020