1 minute read
YardMachine700SeriesRidersRepairManual


700 Series Lawn Tractor
Steering Gear Replacement
Advertisement
If the steering gear teeth are damaged or missing, the steering gear will need to be replaced. To make the repair easier, consider moving the fuel tank out of the way and removing the fuel tank brace prior to starting the job. Also consider disconnecting the wiring harness at the engine connector and moving it out of the way.
To replace the steering gear:
1. If desired, cut the plastic tie and move the fuel tank out of the way.
2. If desired, remove the four hex screws (two on each side) that fastens the fuel tank support bracket to the lower dash panel. Move the bracket out of the way.
3. Optional: Remove the hex screw that fastens the lower portion of the dash brace to the frame and remove the brace. See Figure 3.15.
NOTE: Some older model riders do not have this brace installed. Note that the upper end of the brace is held in place between the left dash panel and the fuel tank support bracket.
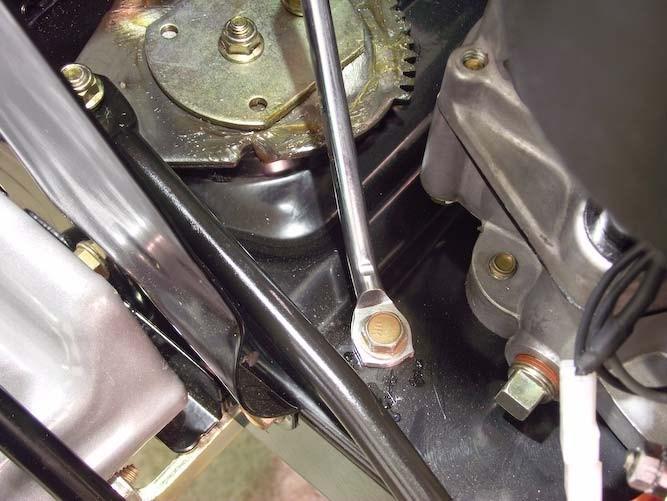
4. Remove the flange lock nut that fastens the steering link rod to the steering gear. Lift the rod up and out of the way. See Figure 3.16.
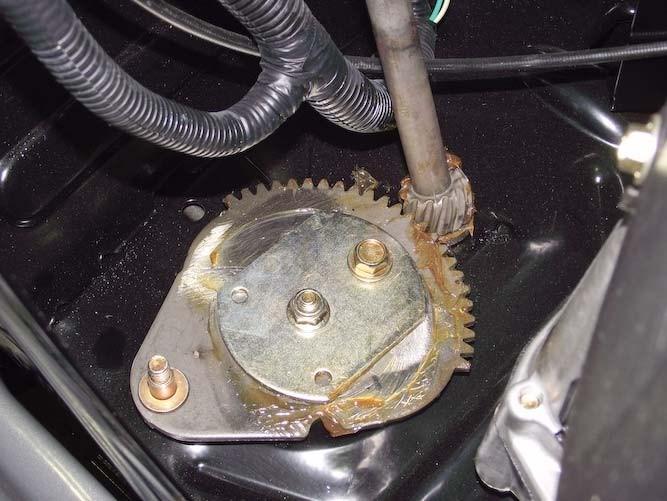
5. To remove the steering gear, loosen and remove both bolts that hold it in place using a pair of 1/2” wrenches.
NOTE: The bolt near the center of the steering gear comes-up from the bottom, with the nut on top. The shoulder bolt that passes through the curved slot near the steering shaft installs from the top with the nut on the bottom.
6. Lift away the steering gear stabilizer plate.
NOTE: The two holes near the corners of the stabilizer plate should be oriented away from the steering shaft.
Shoulder bolt through gear
Steering link rod removed


