3 minute read
Clutch


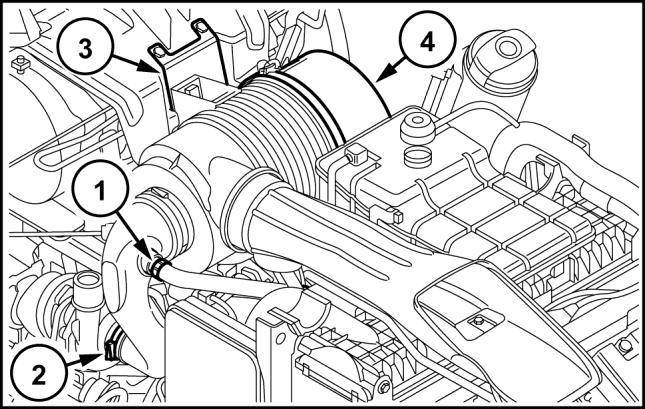
15. Loosen the fixing clamps (1). Extract the tubing from the turbine to the radiator intercooler (2). Perform the same operation for the tubing from the radiator intercooler to the engine (3).
16. Loosen the clamp (2) that fastens the air intake duct to the turbine. Then free the air cleaner (4) together with the support bracket (3) from the screws that secure it. Disconnect the oil vapor duct (1) on the right-hand side of the engine.
Advertisement
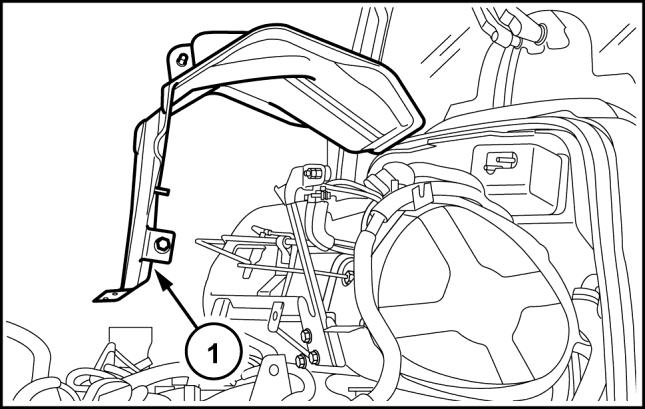
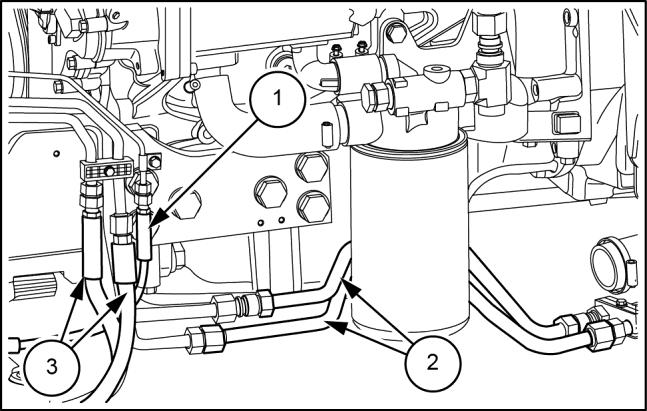
17. Free the air cleaner bracket – hood support (1) from the fixing screws and remove it.
WLAPL4S10C119A 12
WLAPL4S10C120A 13
WLAPL4S10C121A 14
ATTENTION: The filter outlet union DPF (1) at its terminal (2) has a decoupler that responds to temperature variations by changing length. A small misalignment of the axis of the decoupler with respect to the axis of the turbine outlet (3) would produce an adjustment that would no longer be lengthwise, in line with the direction of the tractor, but abnormal transversal adjustment that would impair its durability.
18. Disconnect all of the filter sensors. Loosen the clamp (4). Remove the entire filter together with the sensors, pressure sensing tubes, lambda probe, and heat shrouds by undoing the four screws (5) that secure it on the bottom cradle.

WLAPL4S10C122A 15
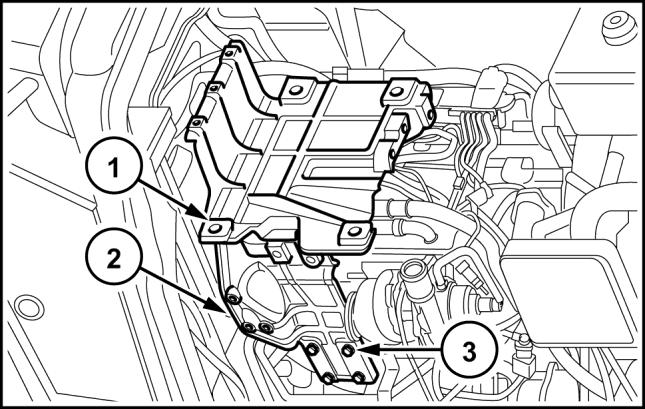
ATTENTION: Only if you have to work on the parts underneath the DPF filter support, it is advisable to remove the support. The upper part (1) and the right-hand part (2) should be removed as a block, when possible, by removing the fixing screws (3) to the right-hand side of the engine. (These screws work on a vertical slot that allows the support (2) to take on various height positions). Before removal, take some references on the position of the unit on the engine so that, during re-assembly, it is possible to restore it to the exact position in which it was originally found.
WLAPL4S10C123A 16
19. To remove the rear shield, loosen the two upper screws that fasten the support (4) to the support (1).
To remove the left-hand support (5), loosen the two upper screws, the respective centring bushings that secure the left-hand bracket to the support (1).
Asregards removing the support (1) and (2), there are no special instructions to follow.

WLAPL4S10C124A 17
20. Detach the steering lines (1) and (2) and the tube supplying oil to the control valve (3).
Remove the fixings of the bracket (4) from the engine.
21. Detach the exhaust pipe of the power steering control valve on the gearbox control valve (2). On the same filter, detach the gearbox control valve supply pipe (1).
Subsequently remove the filter together with the support (3).
22. Detachtheoilfilterinletpipefromthetransmission(2). 23. Detachthesupply pipe (1) fromthe mid-mountremote valves.
24. Detach the pipes (2) of the heat exchanger and, if applicable, of the front braking assembly (1). 25. Free the pipes that were previously detached from the supports,brackets, andclampssecuredtotheengine.
Also do the same thing for the pipes directed to the cylinder (3).

WLAPL4S10C125A 18

WLAPL4S10C126A 19

MOIL13TR01799AA 20
MOIL13TR01800AA 21